SAML single sign-on (SSO) simplifies the login process for you and other users on your Piwik PRO account. It allows you to access the account through an identity provider (IdP) of your choice. With SSO, you can use the same login credentials (username and password) to log in to multiple applications. There’s no need to remember or enter separate login information for each application. You only need to log in once, and then you can access all the connected systems without re-entering your credentials every time.
This has several benefits. It improves security because users have fewer passwords to remember. It also helps in enforcing security policies, monitoring user activity and revoking access when necessary.
In this article, we’ll guide you through the process of setting up SSO on your Piwik PRO account.
Before you start
Here are some important things to keep in mind before you start:
- Your identity provider (IdP) determines which users can access Piwik PRO. When a user successfully logs in for the first time, Piwik PRO will automatically create their user account (unless they have already been invited to your Piwik PRO account).
- Permissions set in SSO aren’t automatically transferred to Piwik PRO. As a result, you have to manually set permissions for users in Piwik PRO.
Set up and turn on SSO
To set up SAML single sign-on (SSO) on your account, follow these steps:
- Log in to Piwik PRO.
- Go to Menu > Administration.
- Navigate to Account.
- On the left, click Account settings.
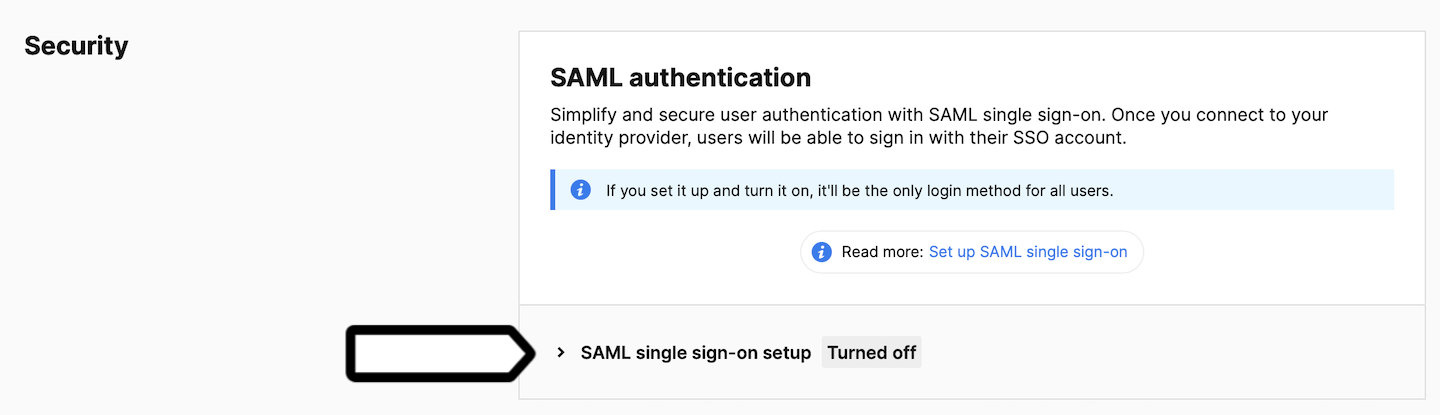
- In SAML authentication, click SAML single sign-on setup.

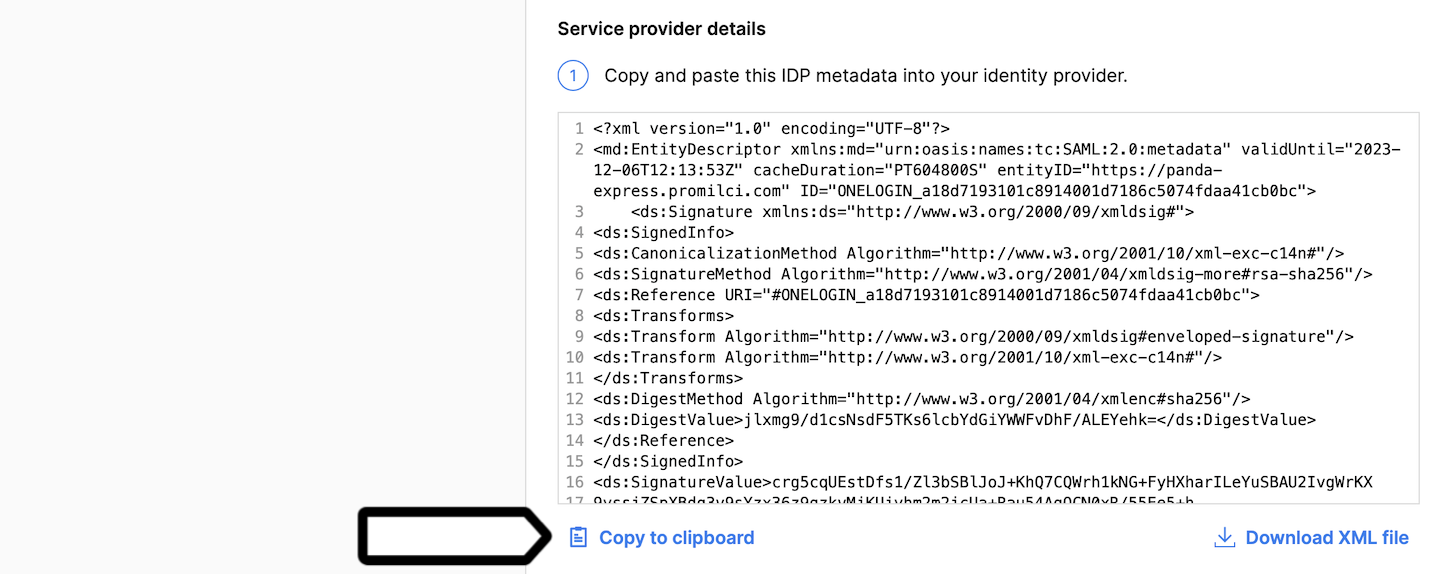
- Copy and paste the metadata URL into your identity provider.
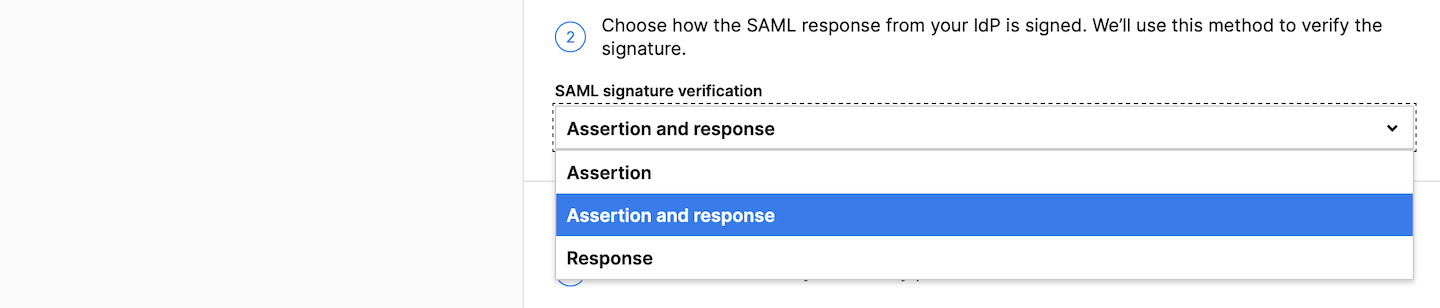
- Choose how the SAML response from your IdP is signed. Options include assertion, assertion and response, or response. We’ll use this method to verify the signature.
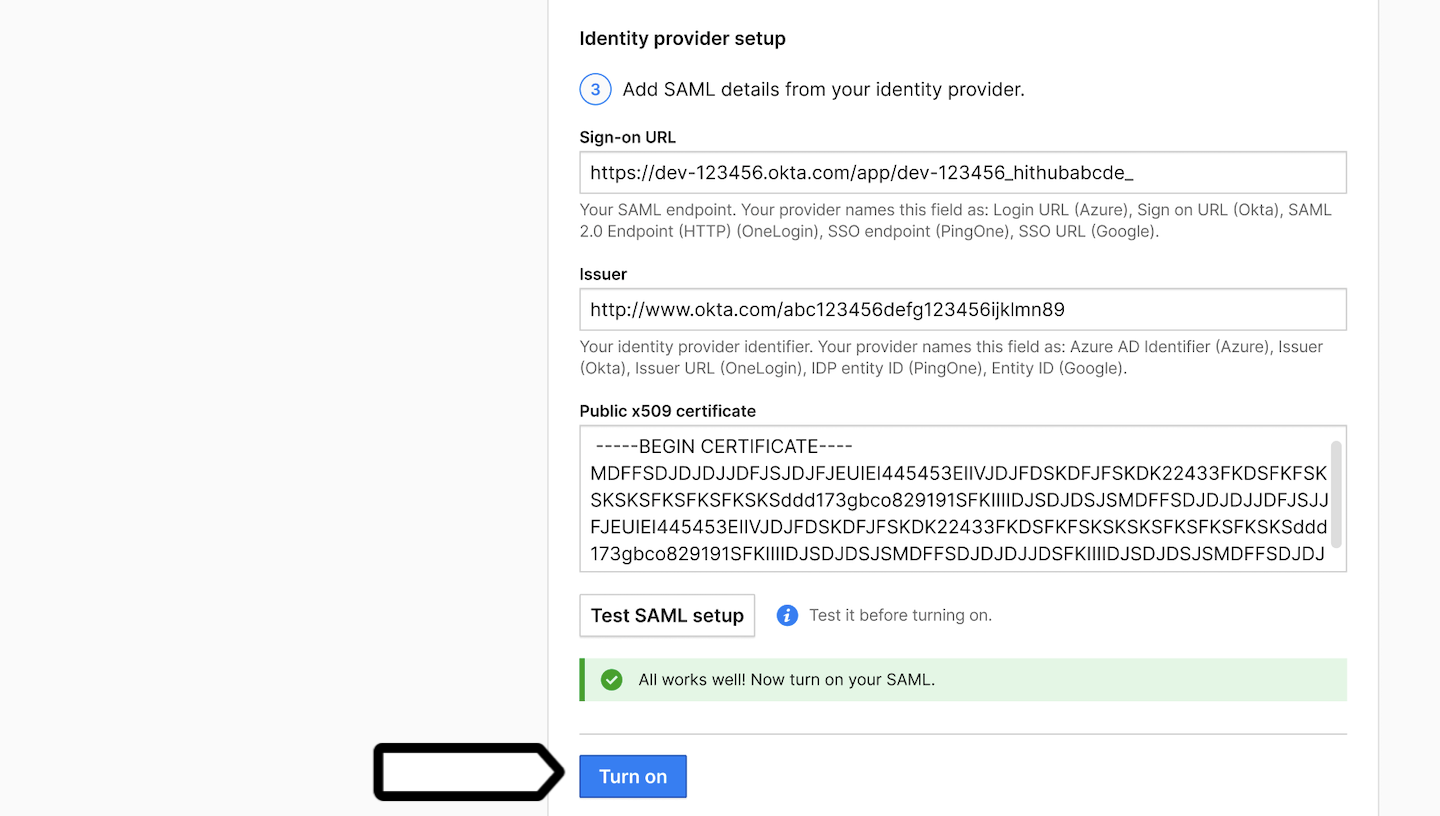
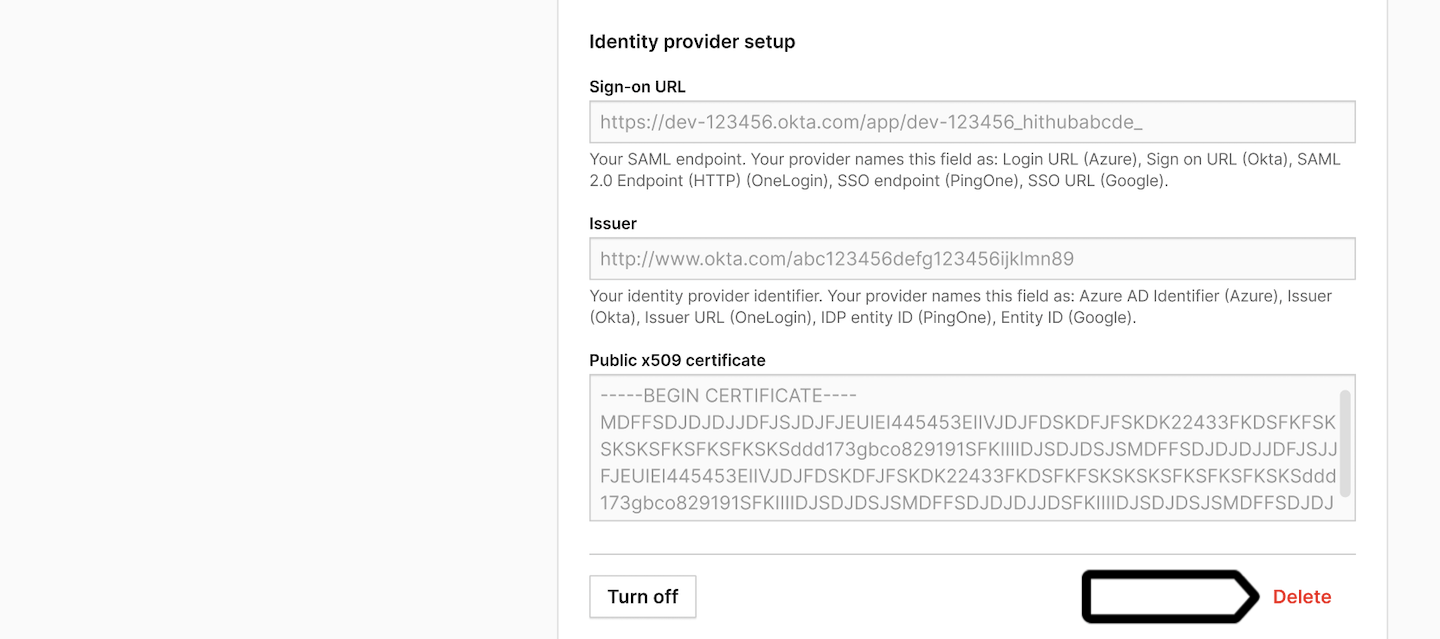
- Add SAML details from your identity provider:
- Sign-on URL: Your SAML endpoint. Your provider names this field as: Login URL (Azure), Sign on URL (Okta), SAML 2.0 Endpoint (HTTP) (OneLogin), SSO endpoint (PingOne), SSO URL (Google).
- Issuer: Your identity provider identifier. Your provider names this field as: Azure AD Identifier (Azure), Issuer (Okta), Issuer URL (OneLogin), Issuer ID (PingOne), Entity ID (Google).
- x509 certificate: A certificate from your SAML that is used to establish secure communication between SAML and Piwik PRO.

- Click Test SAML setup and Piwik PRO will check your setup.
- If the setup is correct, a new window will open and you’ll be asked to log in with your identity provider’s credentials. Once that’s done, the window will close.
- When you’re ready, click Turn on.
- All done! Piwik PRO will now log out all users and ask them to use their IdP account to log back in.
Turn off SSO
If you ever need to turn off SSO on your account, you can do so in the settings. Turning it off won’t remove your SAML SSO setup.
To turn off SAML single sign-on (SSO) on your account, follow these steps:
- Log in to Piwik PRO.
- Go to Menu > Administration.
- Navigate to Account.
- On the left, click Account settings.
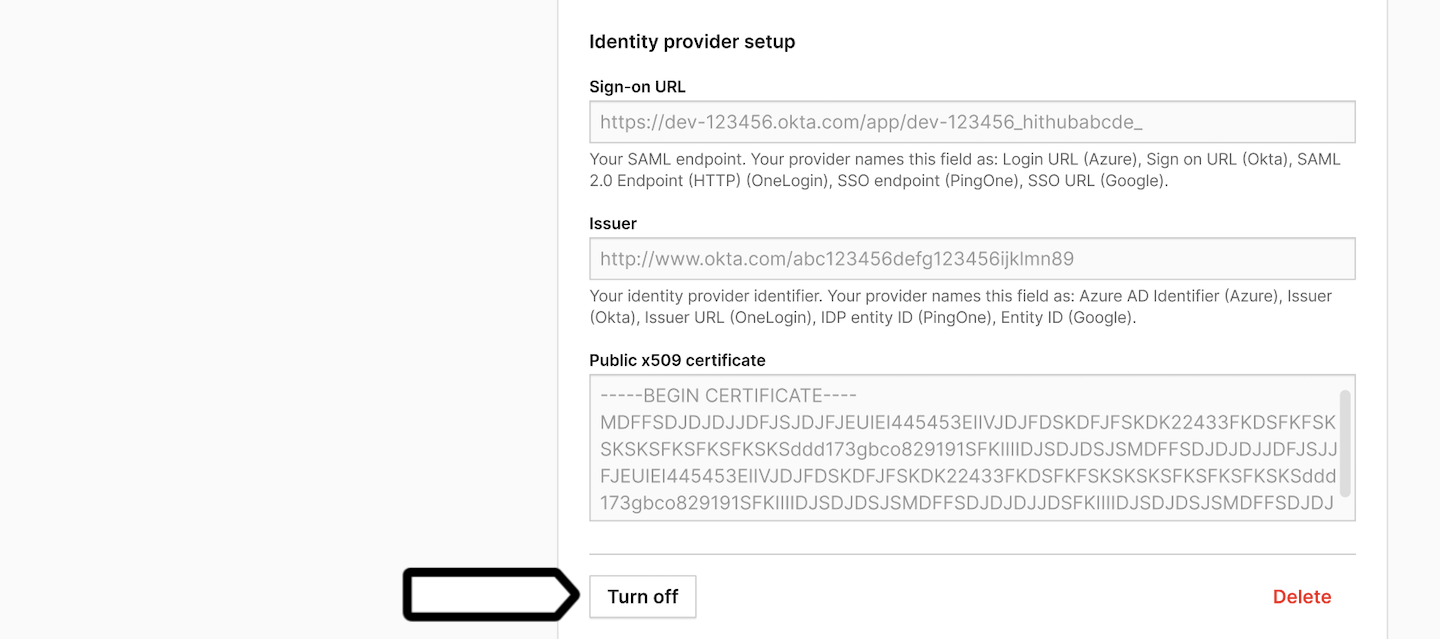
- In SAML authentication, click SAML single sign-on setup to access its settings.
- Click Turn off at the bottom of the settings.
- Done! Piwik PRO will now log out all users and ask them to use Piwik PRO passwords. If they don’t have a password or forgot it, they can reset it on the login page.
Note: Your SAML SSO setup will remain unchanged. You’ll be able to turn SSO back on at any time.
Delete SAML single sign-on (SSO)
In case you ever want to remove SAML single sign-on (SSO) from your account, you can do so in the settings.
To delete SAML single sign-on (SSO), follow these steps:
- Log in to Piwik PRO.
- Go to Menu > Administration.
- Navigate to Account.
- On the left, click Account settings.
- In SAML authentication, click SAML single sign-on setup to access its settings.
- Click Delete at the bottom of the settings.
- All Done! Piwik PRO will now log out all users and ask them to use Piwik PRO passwords. If they don’t have a password or forgot it, they can reset it on the login page.
Note: Your SAML SSO setup will be permanently deleted. If you ever change your mind and decide to re-enable it, you will need to set it up from scratch.
Set up and turn on SAML multitenant mode with Microsoft Entra ID (Azure AD)
You can configure Microsoft Entra ID (Azure AD) integration in two ways:
- Single tenant: Use this option if you use one Microsoft Entra ID (Azure AD) tenant and no external users need access to your Piwik PRO account.
- Multitenant: Use this option if you use more than one Entra ID tenant.
Note: The multitenant SAML integration with Piwik PRO is a solution delivered only to the backend. There are no differences in the application’s frontend between single- and multitenant integrations.
To configure SAML integration in multitenant mode with Microsoft Entra ID (Azure AD) on your account, follow these steps:
- Log in to Piwik PRO.
- Go to Menu > Administration.
- Navigate to Account.
- On the left, click Account settings.
- In SAML authentication, click SAML single sign-on setup.
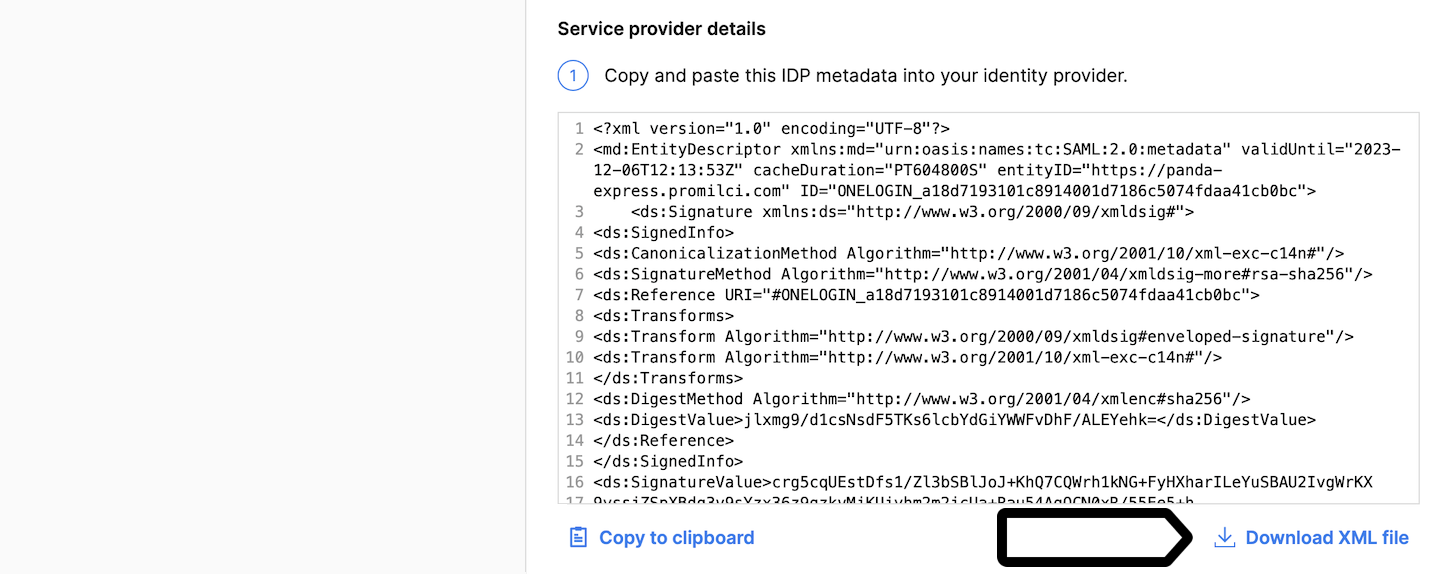
- Download the service provider details. You’ll need to upload it during the multitenant organization configuration on your Microsoft Entra ID (Azure AD) account.
- Log in to your Microsoft Entra ID (Azure AD) account and add an enterprise application to the account.
- Now, enable single sign-on for the created application.
- During the configuration of the multitenant org in Microsoft Entra ID (Azure AD), you’ll need to upload the downloaded XML file. After uploading, check if the data is correct:
- Identifier (Entity ID):
https://<your_account_address> - Reply URL (Assertion Consumer Service URL):
https://<your_account_address>/api/auth/v1/saml/acs - Sign on URL:
https://<your_account_address>/
Note: Microsoft Entra ID (Azure AD) requires verification of the Identifier (Entity ID). This means creating your own domain that links to your Piwik PRO account. For further information, contact our support team using chat on your account.
- Identifier (Entity ID):
- Go back to your Piwik PRO account.
- In step 2 of the SAML single sign-on setup on your Piwik PRO account, choose how the SAML response from your IdP is signed. Options include
assertion,assertion and response, andresponse. We’ll use this method to verify the signature.
- In the Identity provider setup, enter the sign-on URL from your Microsoft Entra ID account:
https://login.microsoftonline.com/common/saml2. - In the Issuer, enter all the required tenant URLs, separated with semicolons
;, like:https://login.microsoftonline.com/<tenant-id-x>/;https://login.microsoftonline.com/<tenant-id-y>/;https://login.microsoftonline.com/<tenant-id-z>/Note: All available tenant IDs must be entered here for multitenancy to work for all users across Microsoft Entra ID instances.
- In Public x509 certificate, upload the certificate from the multitenant application. You can find it in Single sign-on > SAML Certificates section after logging in to your Microsoft Entra ID account.
- Test SAML setup by logging in.
Note: You have to be logged in Piwik PRO with the same email address as the one in Microsoft Entra ID (Azure AD).
- When you’re happy with how the setup works, you can turn on the service for your account.
- Done! Now you can log in to your Piwik PRO account using your Microsoft Entra ID (Azure AD) credentials from multiple tenants.