Note: This feature is in beta, so only selected users can access it for now.
Funnel recovery lets you re-engage users and visitors who leave your funnel, for example, during checkout, in an application form, or while onboarding.
Instead of switching between Analytics, Activation, and Tag Manager, you can use one setup to:
- Spot where users drop off in a funnel.
- Turn users who drop off into an actionable audience.
- Show a personalized message on your site.
- Measure the uplift directly in Analytics.
In this article, we’ll walk you through creating funnel recovery in Analytics.
Before you start
Here are a few helpful things to know before you start:
- Data Activation is turned on for your site or app.
- You have access to Tag Manager.
- Data collection is set up correctly.
- You have a funnel report set up.
- You need the following permissions for bar messages:
- Read to view bar messages.
- Edit to create bar messages.
- Edit to edit or delete bar messages you created.
- Manage to edit or delete bar messages created by others.
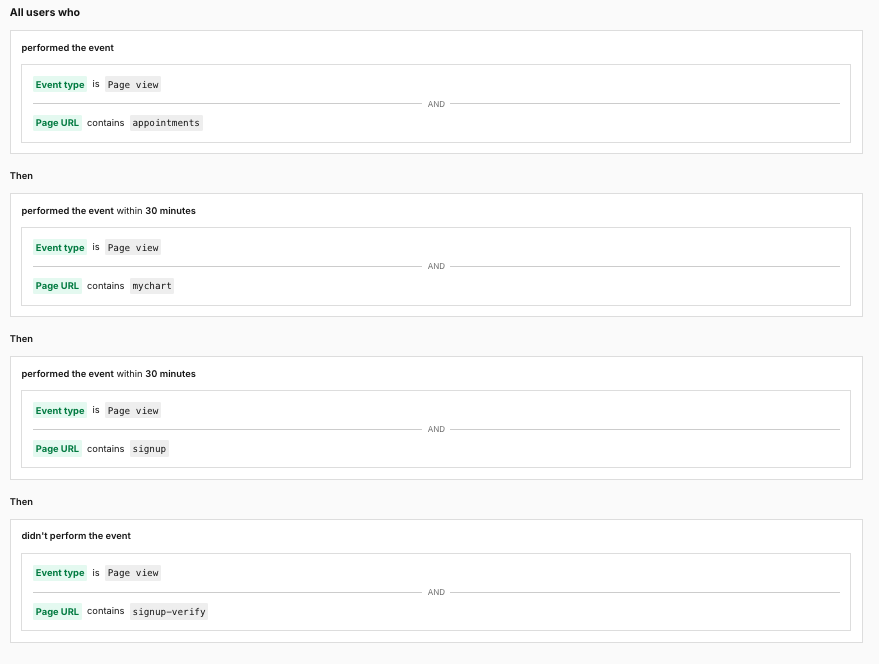
- The audience you are re-engaging in funnel recovery is based on the conditions you defined for that step in the funnel report.
- The funnel recovery only includes users from the moment you create it. It doesn’t include users who dropped off earlier.
Note: After you define the conditions for a step in the funnel report, funnel recovery uses those conditions to create the audience you’ll re-engage.
Create funnel recovery
To create funnel recovery, follow these steps:
1. Go to Menu > Analytics.
2. In Custom reports, find the funnel report you want to work with.
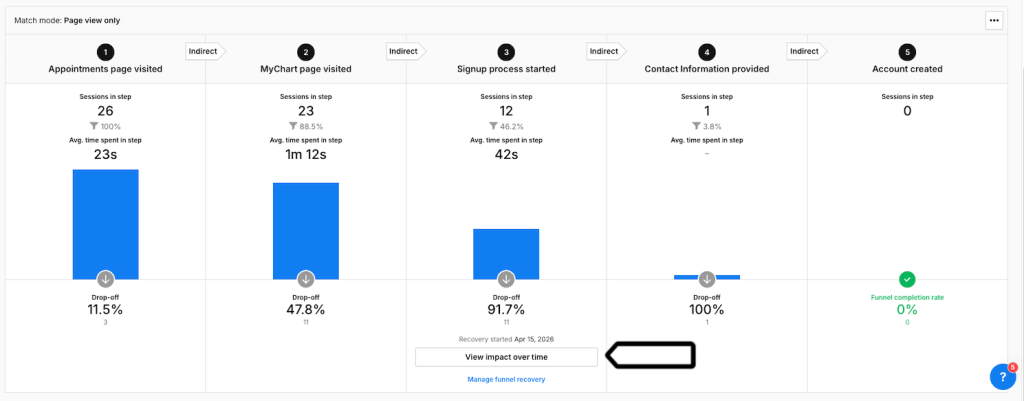
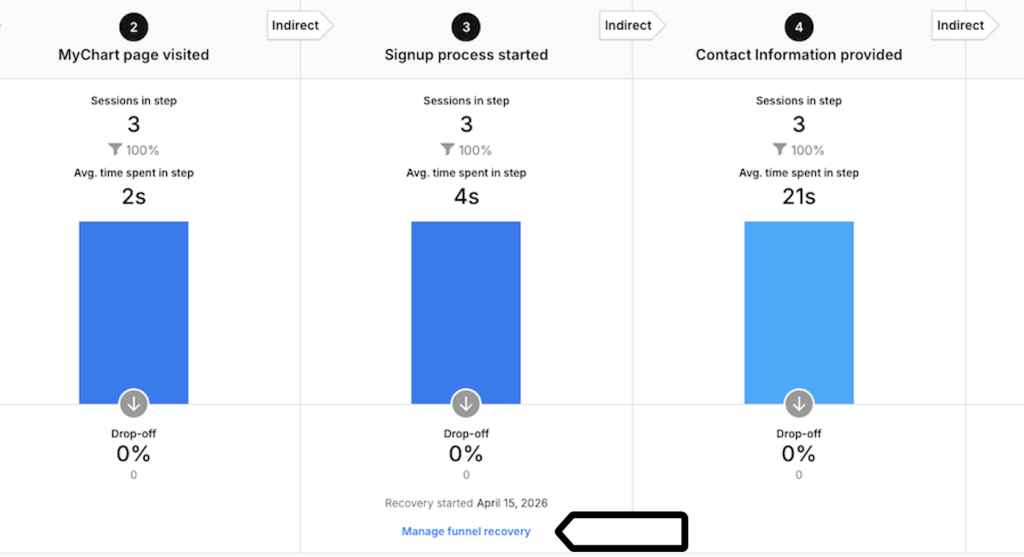
3. In the report, find the drop-off you want to recover, then click Create funnel recovery.
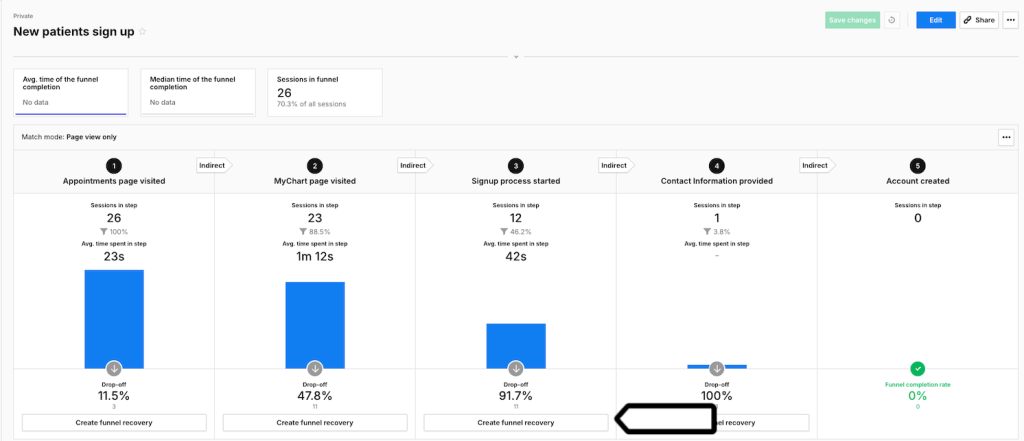
Note: For example, if you create funnel recovery for step 3, we’ll personalize the website for people who reached step 3 but didn’t continue to step 4.
4. Name your audience. You can also add a description.
5. Set Membership duration.
Note: This is how long someone stays in the audience after they join. Time starts when they enter the audience. Their activity won’t reset or extend this duration.
6. Set Audience delay.
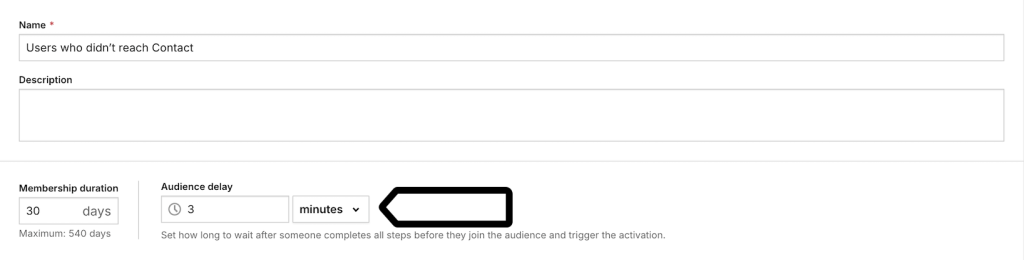
Note: Audience delay is the time users have to complete the next funnel step. If they don’t complete it in time, we’ll add them to the audience and show them the recovery message.
7. Click Next.
Note:
The audience you are re-engaging in funnel recovery is based on the conditions you defined for that step in the funnel report.
- The funnel recovery only includes users from the moment you create it. It doesn’t include users who dropped off earlier.
8. Select Use a top bar.
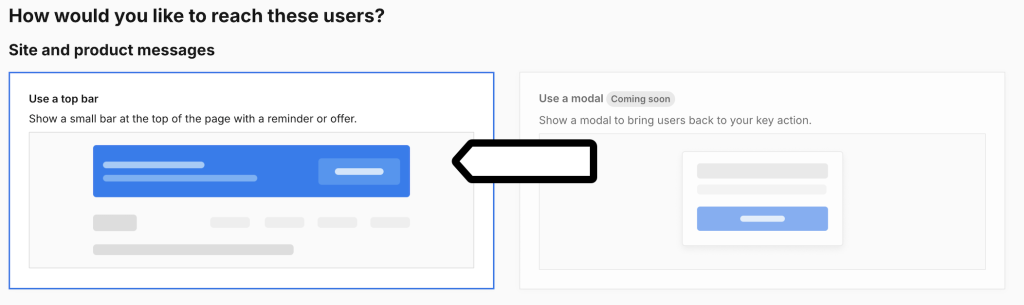
Note: For now, funnel recovery supports only top bar messages. A modal isn’t available yet.
9. Click Next.
10. Enter a bar title. You can also add a message.
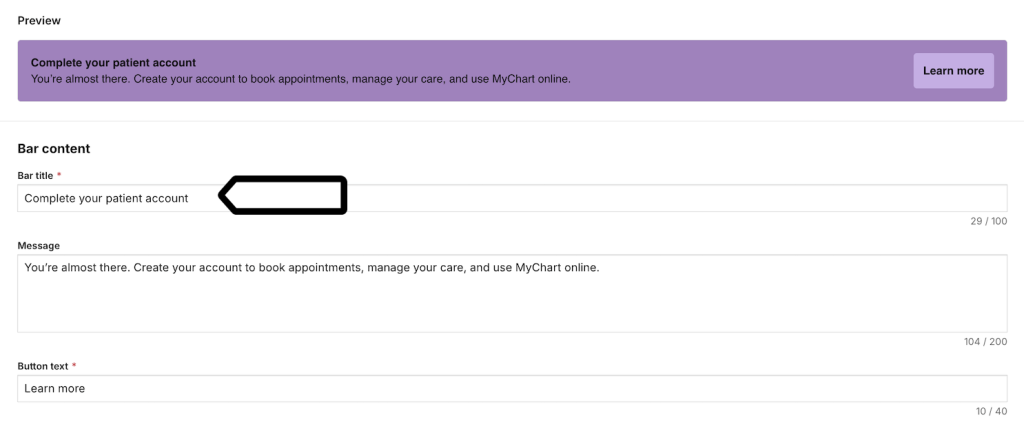
Note: In this view, the preview at the top of the page updates as you edit your message.
11. Enter the button text and URL. The URL is the page users will open when they click the button.
12. Go to Appearance.
13. Under Style, choose the bar style
- Light – Uses a light background with dark text.
- Dark – Uses a dark background with light text.
- Custom – Lets you choose your own colors.
14. Optional. If you chose Custom, set the following options:
- Background color – Enter a HEX color code or use the color picker.
- Button color – Enter a HEX color code or use the color picker.
- Font – Select a font.
- Text color – Select a text color.
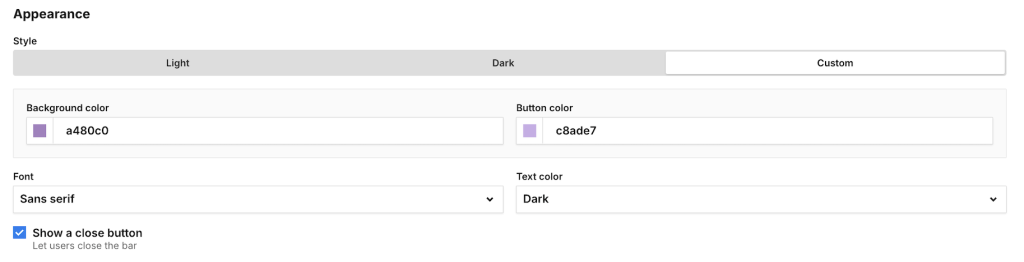
15. To show a close button, select Show a close button.
16. Click Next.
17. Choose the consent visitors need to give before they can see this message. We’ll show the message only to visitors who gave that consent.

Note: We create visitor profiles only for visitors who gave analytics consent. If you choose A/B testing and personalization, we’ll show the message only to visitors who gave both analytics consent and A/B testing and personalization consent.
17. Click Save.
18. Click Save to confirm you want to publish the bar message.
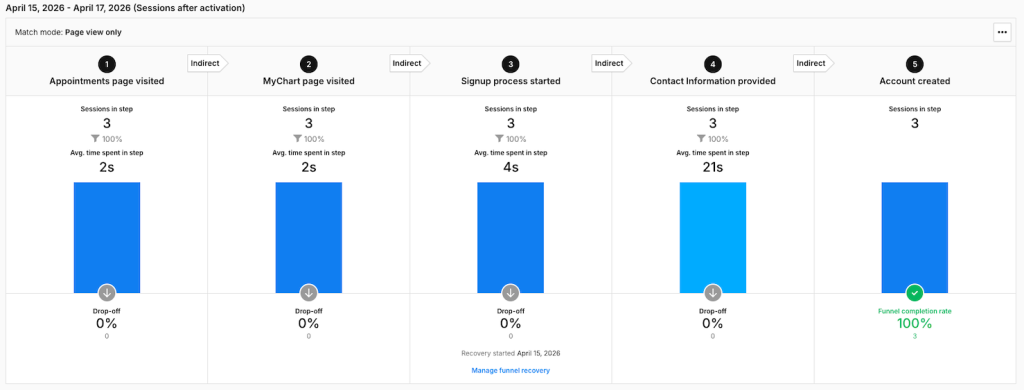
19. Click View impact over time to see personalization results.
Note: We compare the same length of time before and after the funnel recovery was set up. After shows the time since setup. Before shows the same amount of time before setup.
20. Now you can see the results of your personalized messaging.
21. Done.
Manage funnel recovery
To manage funnel recovery, follow these steps:
1. In Piwik PRO, go to Analytics.
2. In Custom reports, open the funnel report where you set up funnel recovery.
3. In the report, click Manage funnel recovery.
4. In Activation details, click Edit.
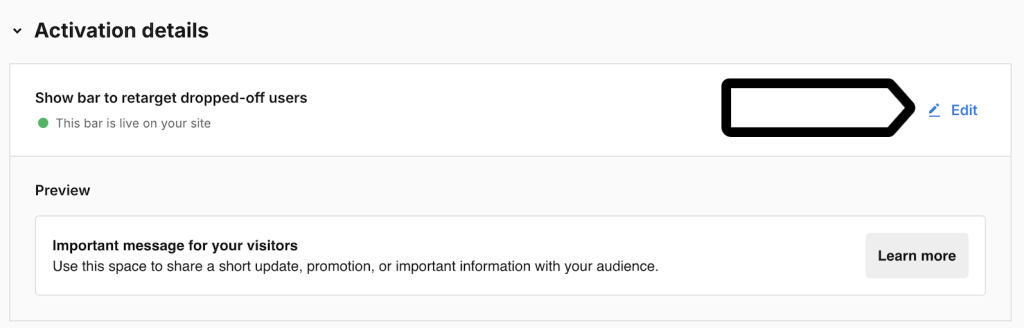
5. In Edit activation, change the bar content, button, URL, or style.
6. Click Next.
7. In Consent for recovery messages, adjust the consent type.
8. Click Save.
9. (Optional) To stop showing the bar, click Turn off the bar.
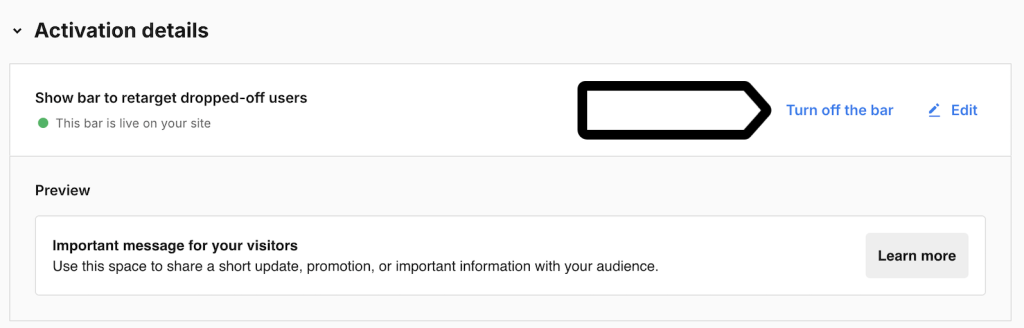
Note: Turning off the bar stops showing the message on your site, but it doesn’t delete the funnel recovery setup.
10. Done.
Funnel recovery dimensions in reports
Funnel recovery adds new dimensions to help you analyze how visitors interact with recovery messages. You can use them in reports to see which messages were shown, clicked, or dismissed during a session.
| Dimension name | Description | Scope |
|---|---|---|
| Personalization shown | A list of personalizations shown to a visitor during a session, such as banners or other personalized messages. It can only be used in filters. | Session |
| Personalization clicked | A list of personalizations clicked by a visitor during a session, such as banners or other personalized messages. It can only be used in filters. | Session |
| Personalization dismissed | A list of personalizations dismissed by a visitor during a session, such as banners or other personalized messages. It can only be used in filters. | Session |
| Personalization name | The name of the personalization related to a content impression or content interaction event, such as a banner or other personalized message. | Event |