Smartlook allows you to record visitor sessions on your website and app. When you integrate it with Piwik PRO, you can access session recordings in Piwik PRO and view heatmaps in Smartlook.
To integrate with Smartlook, follow these steps:
1. Log in to Smartlook.
2. Navigate to Account.
3. If you don’t have a project yet, create one.
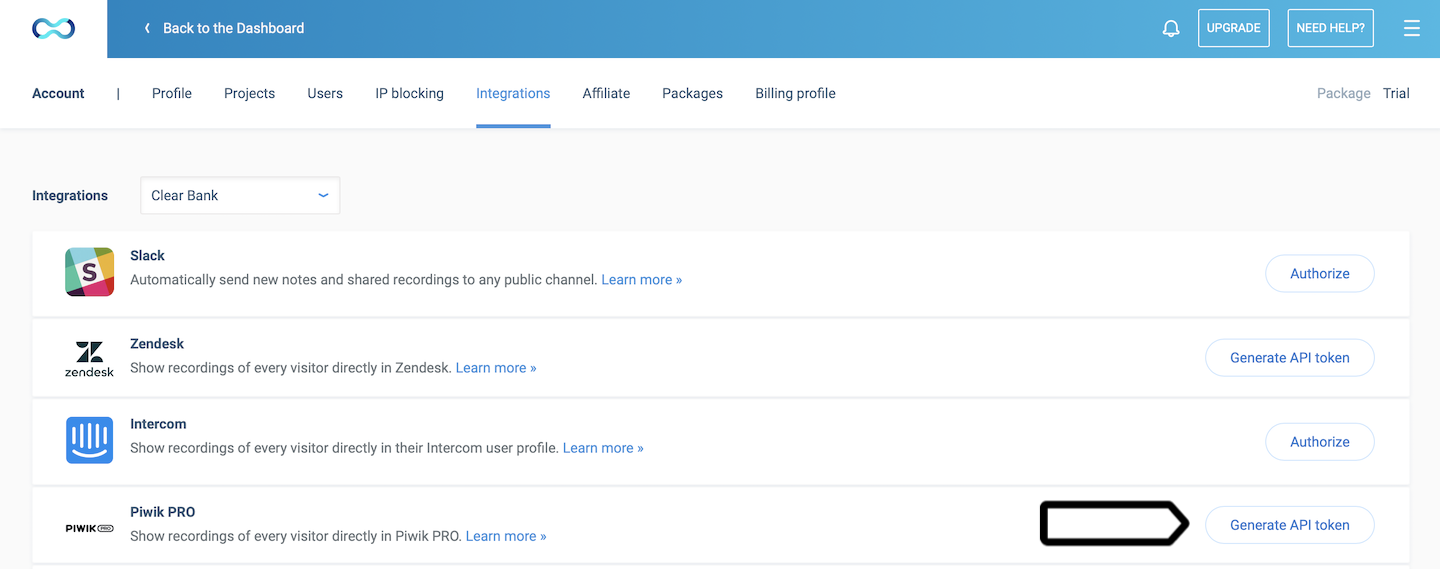
4. Navigate to Integrations.
5. Select the project you want to work with.
6. Find Piwik PRO Integration on the list and click Generate API token.
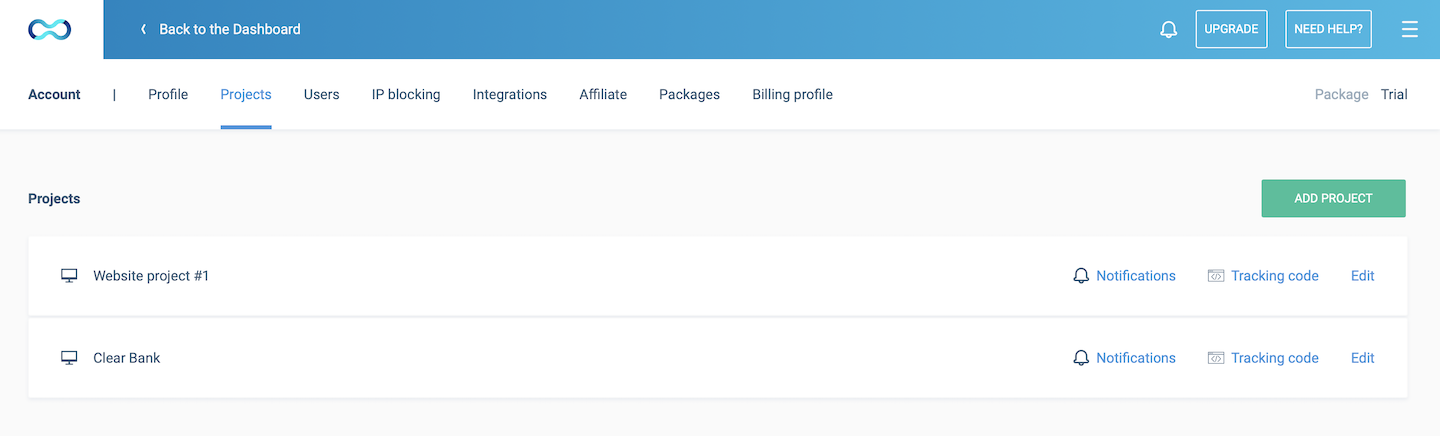
7. Navigate to Projects.
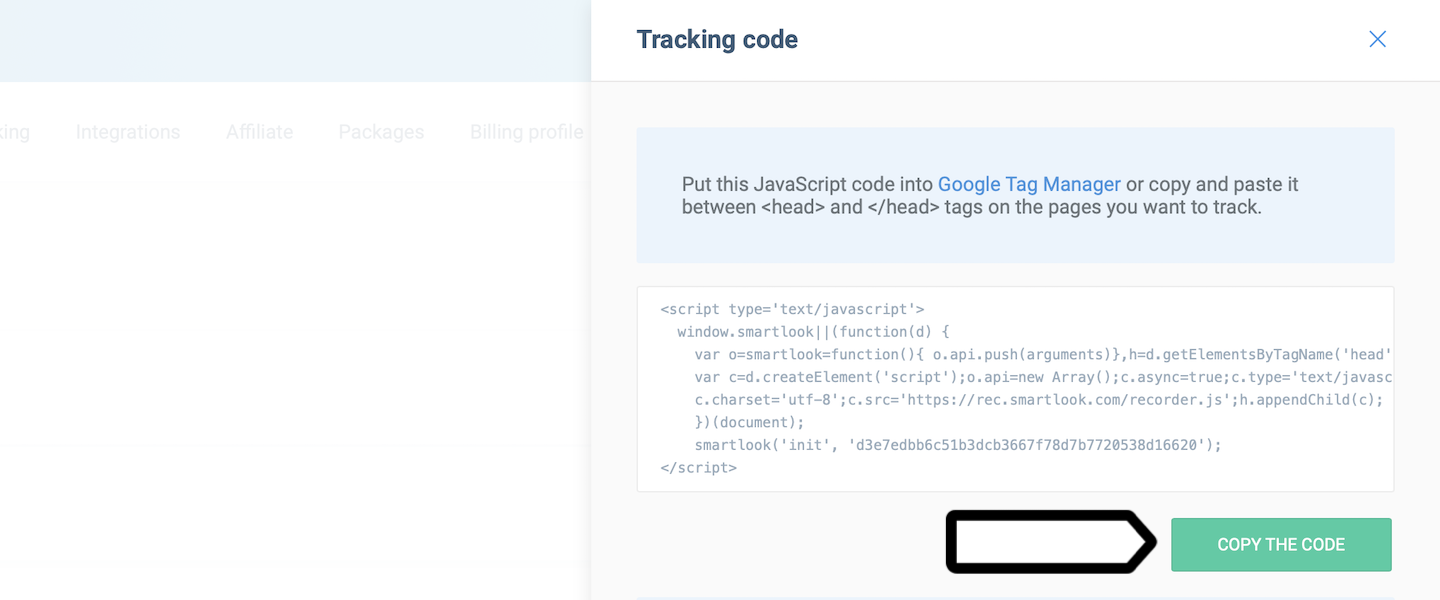
8. Click Tracking code.
9. Copy the code. You’ll need it in the next steps.
10. Log in to Piwik PRO.
11. Go to Menu > Tag Manager.
12. Navigate to Tags.
13. Click Add a tag.
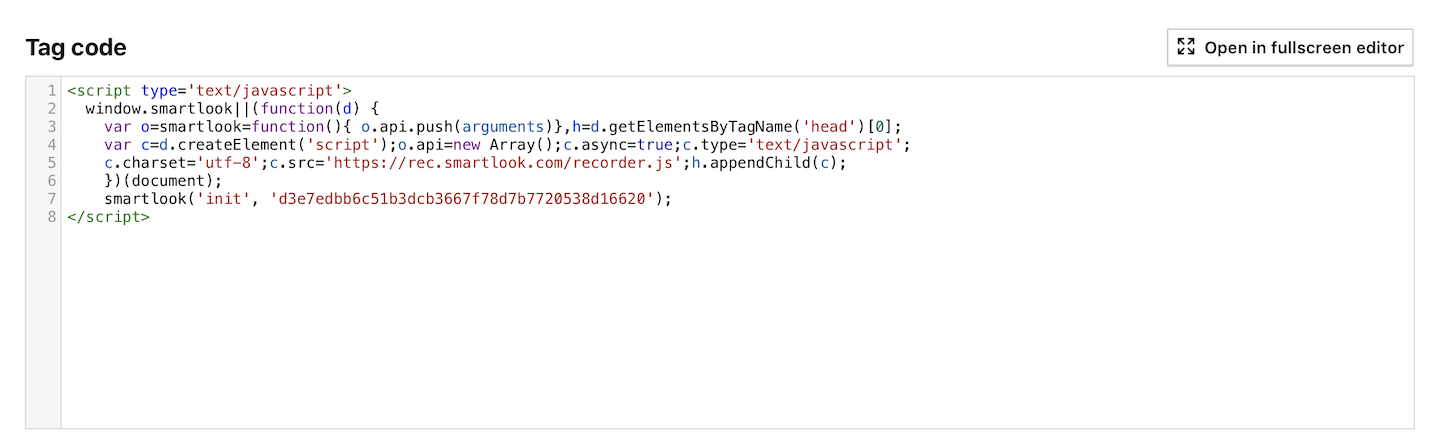
14. Name your tag and select the following type: Custom code.
15. In Tag code, paste the code you copied from Smartlook.
16. In Tag triggers, click Choose existing trigger.
17. Select All page views.
18. Click Save.
19. Test your tag in debug mode.
20. When you’re happy with how the tag works, click Publish.
21. Done! Your Smartlook integration is all set. If everything is working properly, you’ll see playURLs of session recordings in Piwik PRO in Menu > Analytics > Reports > Session log.
Note: To view heatmaps in Smartlook, go to Smartlook > Dashboard > Heatmaps >Add heatmap. Our integration uses Smartlook’s tracking code, so you don’t need to set up additional tracking to see heatmaps.