You can use folders to keep your dashboards, real-time dashboards, custom reports, and goals neat and easy to find. Whether you work solo or in a team, folders help you stay organized and collaborate more efficiently.
Note: Folders are only available for dashboards, real-time dashboards, custom reports and goals. They’re not currently supported for segments, tags, triggers and variables.
In this article, we’ll show you how to create folders, move items into them, and understand the difference between private and shared locations.
Before you start:
- You can use folders to:
- Keep personal work separate from shared team content.
- Group items by topic, campaign, or client.
- You can create folders for dashboards, real-time dashboards, and custom reports in two places:
- Private: Visible only to you, perfect for work-in-progress items or personal setups.
- Shared: Visible to everyone in your Piwik PRO account, ideal for teamwork and collaboration.
- You can create your own folder structure in both private and shared locations, but you can only move items into folders you have access to. For example, if a folder is in a shared location, make sure you have permission to edit or manage shared content.
- You must be the author of the item to move it to your private location. If you move an item created by another user from shared to private, the original author will see it in their private location, and you’ll lose access to it.
- You can also group goals into folders, but they work a bit differently from dashboards and reports, because they don’t have visibility options.
- Each folder can contain multiple dashboards, real-time dashboards, custom reports, or goals.
- If you delete a folder, everything inside it will be deleted as well. You can’t undo this, so be careful.
Create a folder to group dashboards, real-time dashboards, and custom reports
To create a folder, follow these steps:
1. Go to Menu > Analytics.
2. Navigate to Dashboards, Real-time dashboards, or Custom reports.
3. Click + Add a folder.

4. Choose whether you want to create it in a private or shared location.
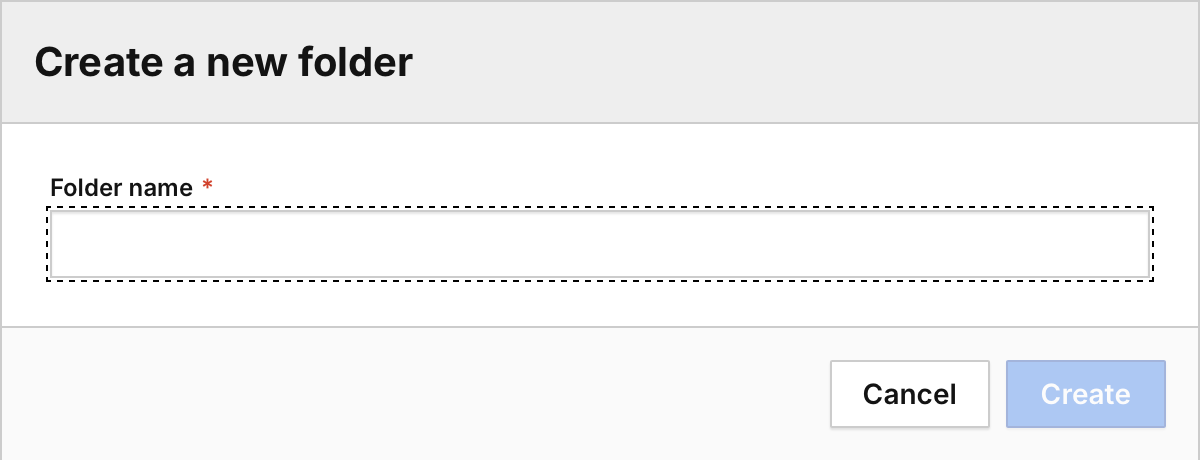
5. Name your folder and click Create.

6. That’s it! You’ve created a folder.
Move a dashboard, real-time dashboard, or custom report into a folder
To move a dashboard, real-time dashboard, or custom report into a folder, follow these steps:
1. Find the item you want to move. In our example, it’s a dashboard.
2. Click the ⋯ three-dot icon next to its name.
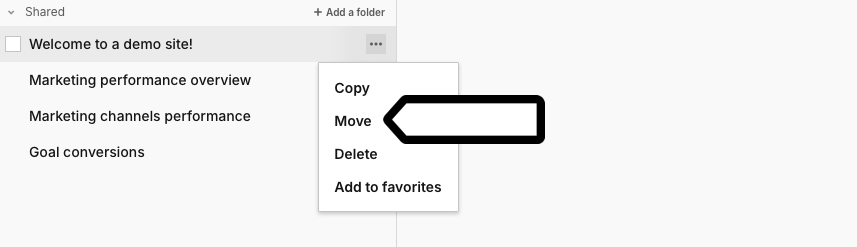
3. Select Move.
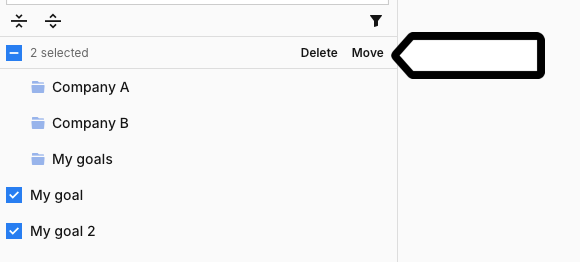
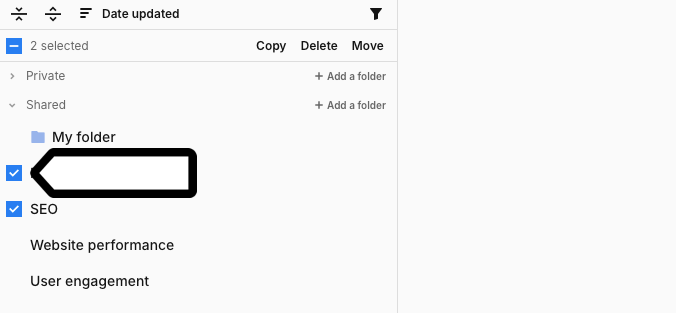
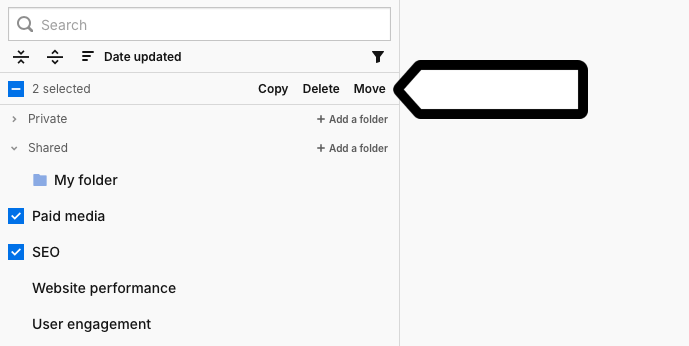
Note: You can perform bulk actions and copy, delete, or move multiple items to a folder at once. Here’s how to do it:
1. Select the items from the list.
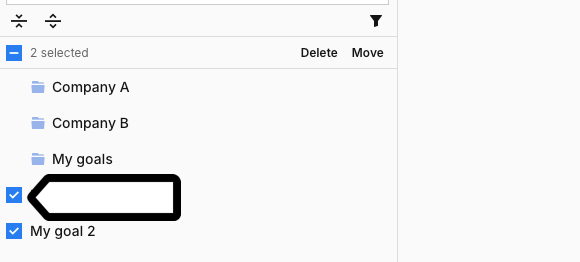
2. Click Copy, Delete, or Move in the top navigation bar.
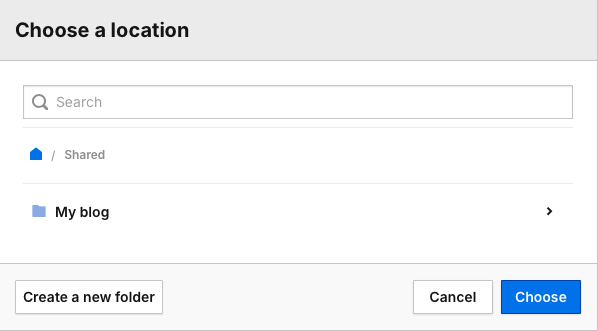
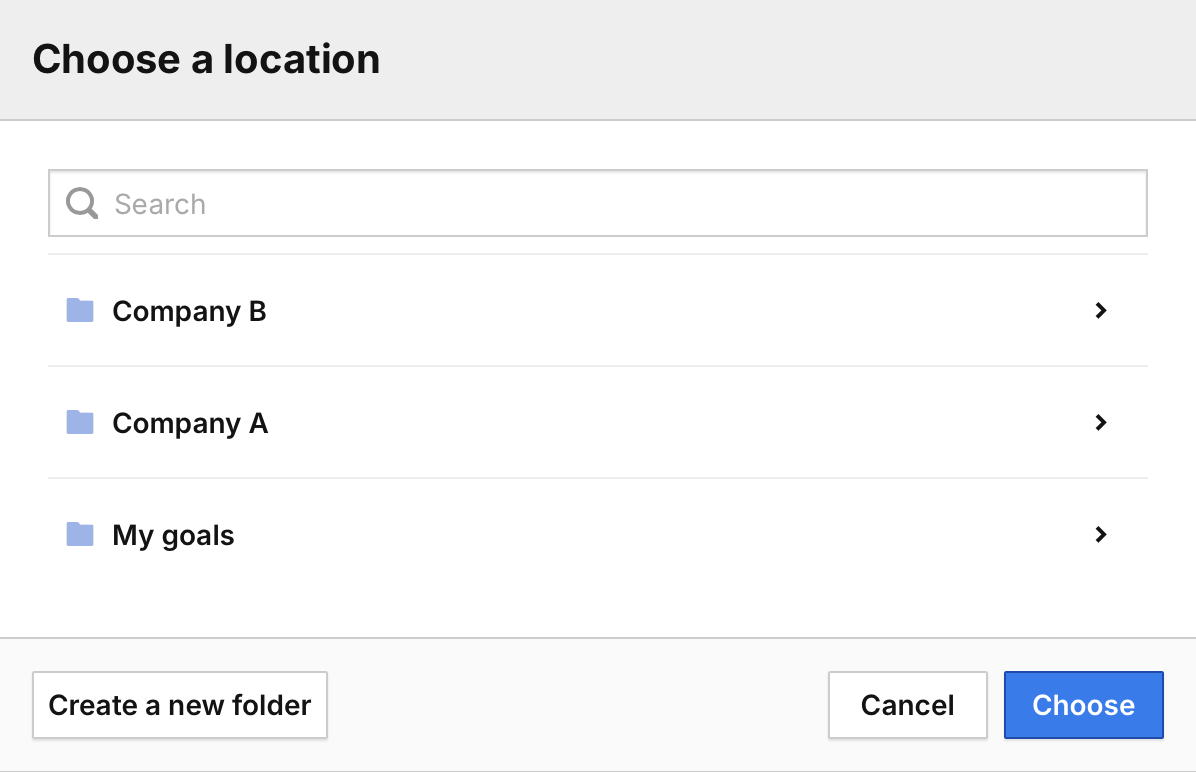
4. Choose the destination folder in private or shared locations. You can also create a new folder in the chosen location.
Note: You must be the author of the item to move it to your private location. If you move an item created by another user from shared to private, the original author will see it in their private location, and you’ll lose access to it.
5. Click Choose.
6. Done! You’ve successfully moved an item into a selected folder.
Create a folder to group your goals
To create a folder for your goals, follow these steps:
1. Go to Menu > Analytics.
2. Navigate to Goals.
3. Click + Add a folder.

4. Name your folder.
5. Done! You’ve created a folder for your goals.
Move a goal into a folder
To move a goal into a folder, follow these steps:
1. Find the goal you want to move.
2. Click the ⋯ three-dot icon next to its name.
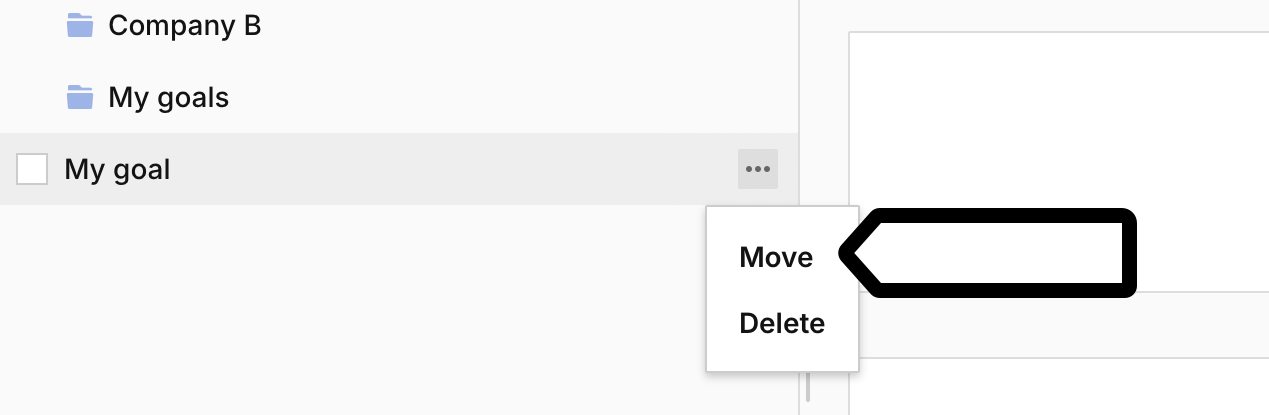
3. Click Move.
Note: You can perform bulk actions and copy, delete, or move multiple goals to a folder at once. Here’s how to do it:
1. Select goals from the list.
2. Click Copy, Delete, or Move in the top navigation bar.
4. Choose the destination folder. You can also create a new folder in the chosen location.
5. Click Choose.
6. Done! You’ve successfully moved a goal to a selected folder.
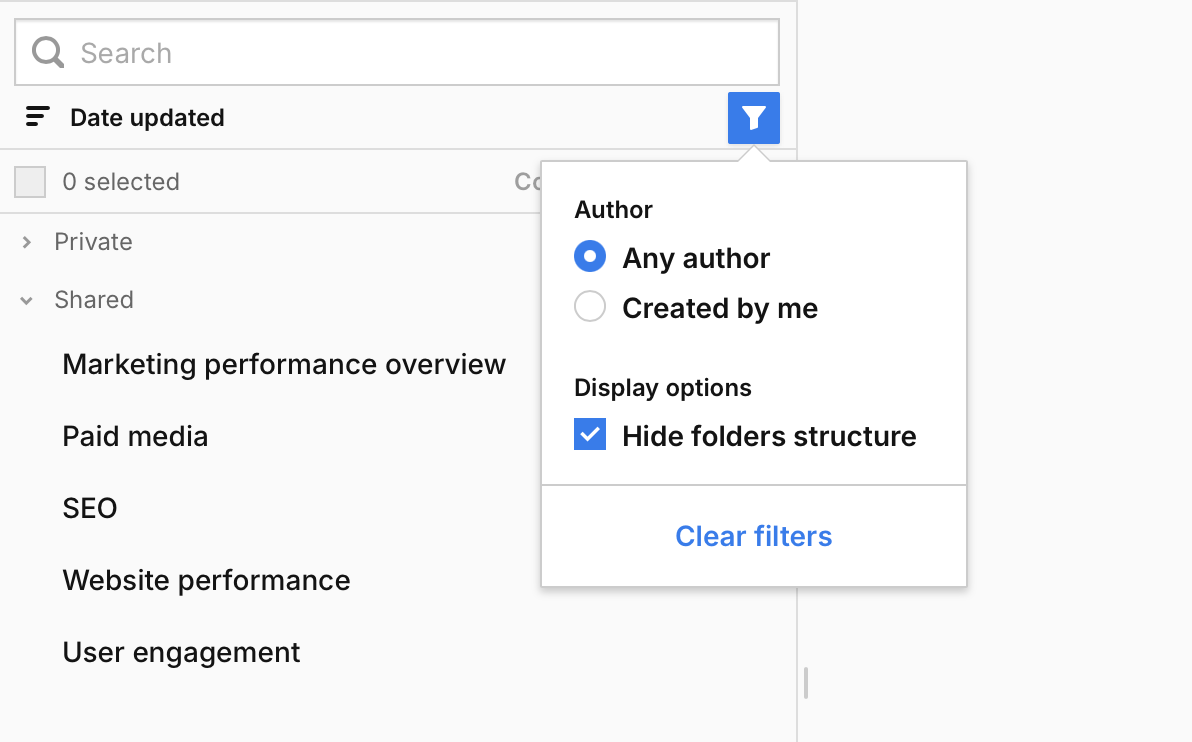
Hide folder structure
If you don’t need folders and prefer a simpler view, you can hide the folder structure. Here’s how to do it:
1. Go to Menu > Analytics.
2. Navigate to Dashboards, Real-time dashboards, Custom reports, or Goals.
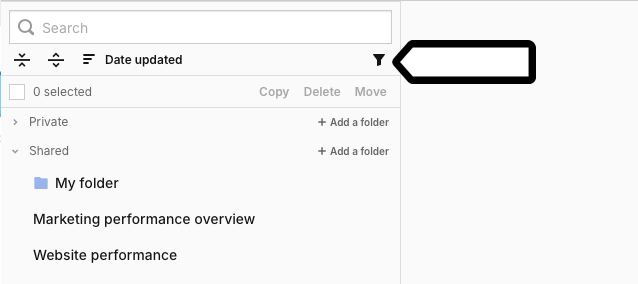
3. Click the filter icon.
4. Choose Hide folder structure.
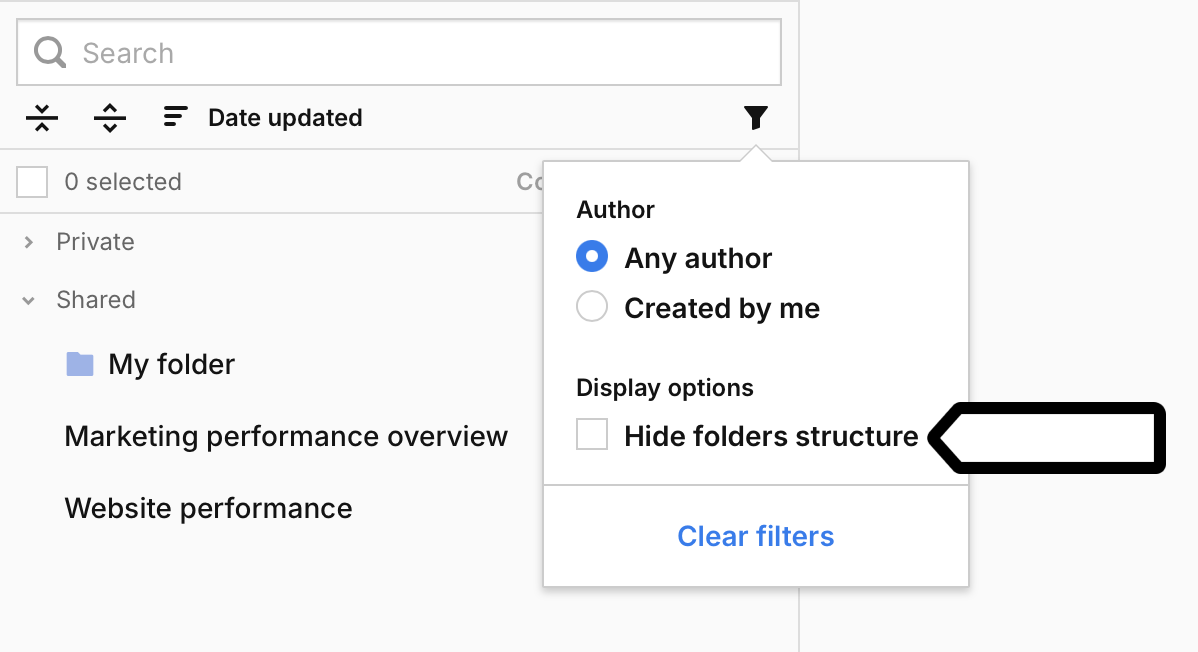
5. That’s it! All your items will now be displayed in a flat list without folders.