JavaScript error tracking helps you to find all kinds of JavaScript errors on your website, even if everything looks correct at first glance. This can help you identify and handle any errors more quickly and easily.
You can set up JavaScript error tracking in two ways: (1) turn on automatic tracking or (2) set up manual tracking. You can use both methods at the same time because the manual method gives you additional information about errors.
Turn on automatic JavaScript error tracking
Note: This option is turned on by default. Collected data is saved as custom events and counted as actions in your plan. So if you use this option, you’ll likely increase the number of actions tracked in a month.
Remember that each JavaScript error detected is counted once per page view, even if the user repeatedly clicks on the broken element.
To turn on automatic JavaScript tracking, follow these steps:
1. Go to Menu > Tag Manager.
2. Navigate to Tags.
3. On the left, click Piwik PRO (tracking code).
4. Scroll down to UX issues.
5. Turn on Detect JavaScript errors.

6. Click Save.
7. Click Publish.
8. Done! Once data is collected, it’ll appear in Analytics > Reports > Custom events.
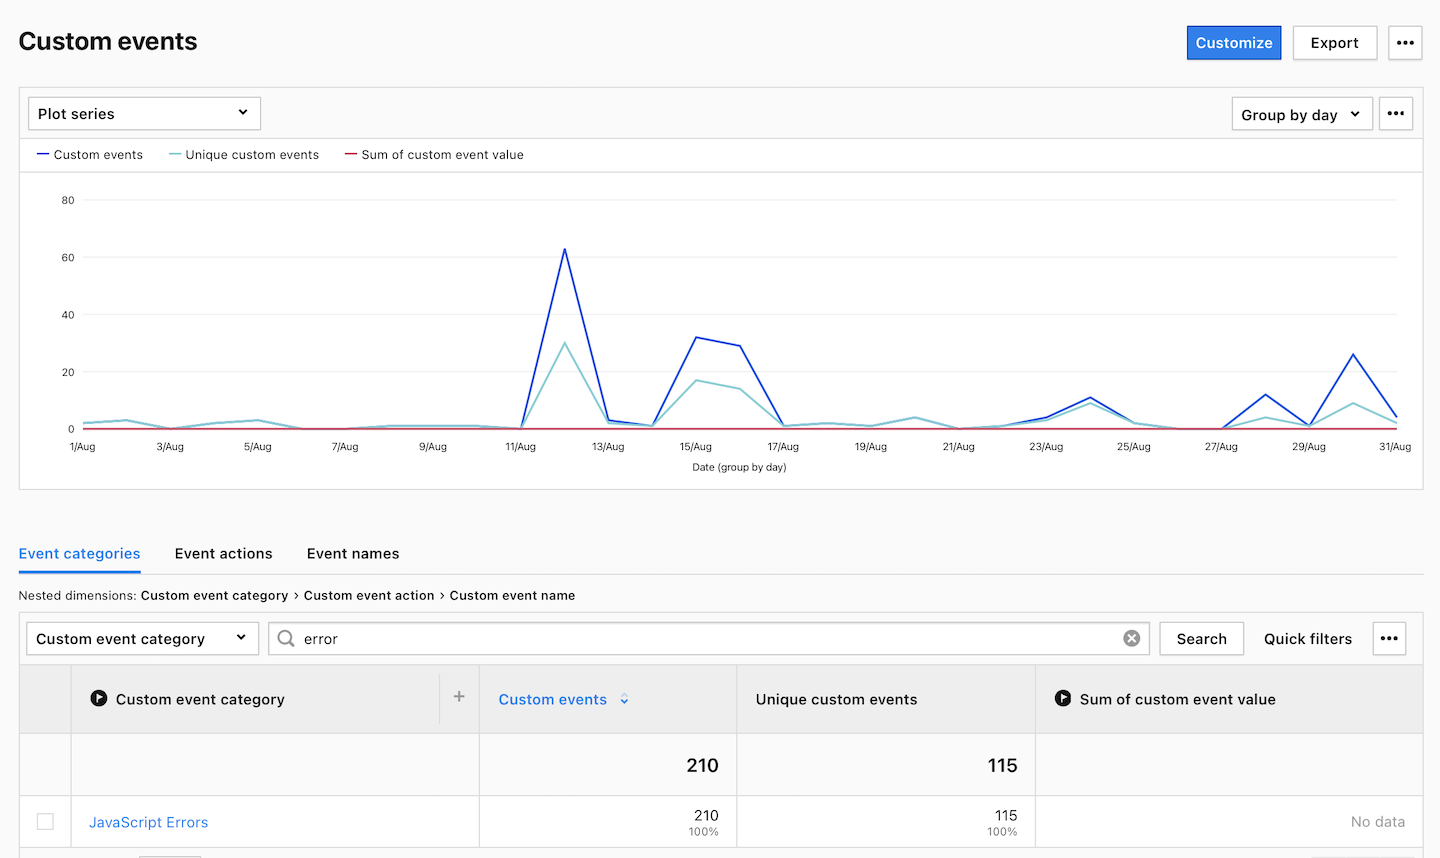
Note: JavaScript errors are recorded in the following way:
- Event category: JavaScript Errors
- Event action: The URL of the failed script
- Event name: Error details
Tip: To find out which element caused the error, use manual tracking for error clicks. Using both methods gives you all the details you need.
Set up manual JavaScript error tracking
To set up manual JavaScript error tracking, follow these steps:
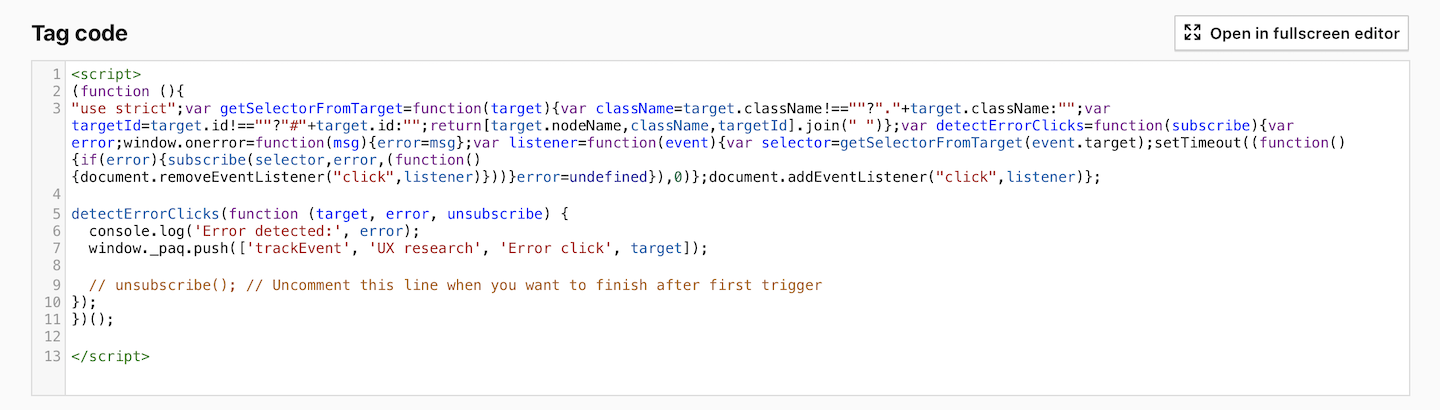
1. Here’s the code that you’ll use:
<script>
  (function() {
    "use strict";
    var getSelectorFromTarget = function(target) {var className = target.className !== "" ? "." + target.className : "";var targetId = target.id !== "" ? "#" + target.id : "";return [target.nodeName, className, targetId].join(" ")};
    var detectErrorClicks = function(subscribe) {var error;window.onerror = function(msg) {error = msg};var listener = function(event) {var selector = getSelectorFromTarget(event.target);setTimeout((function() {if (error) {subscribe(selector, error, (function() {document.removeEventListener("click", listener)}))}error = undefined}), 0)};document.addEventListener("click", listener)};

    detectErrorClicks(function(target, error, unsubscribe) {
      console.log('Error detected:', error);
      window._paq.push(['trackEvent', 'UX research', 'Error click', target]);
      // unsubscribe(); // Uncomment this line when you want to finish after first trigger
    });
  })();
</script>
Parameters
console.log(‘Error detected:’, error);
window._paq.push([‘trackEvent’, ‘UX research’, ‘Error click’, target]);
Custom event details.
2. Go to Menu > Tag Manager.
3. Navigate to Tags.
4. Click Add a tag.
5. Select the following tag template: Custom code.
6. Click Next.
7. Name the tag. Example: Error clicks.
8. In Tag code, paste the code prepared in step 1.
9. In Advanced tag settings > Consent type, select the following type: Analytics.
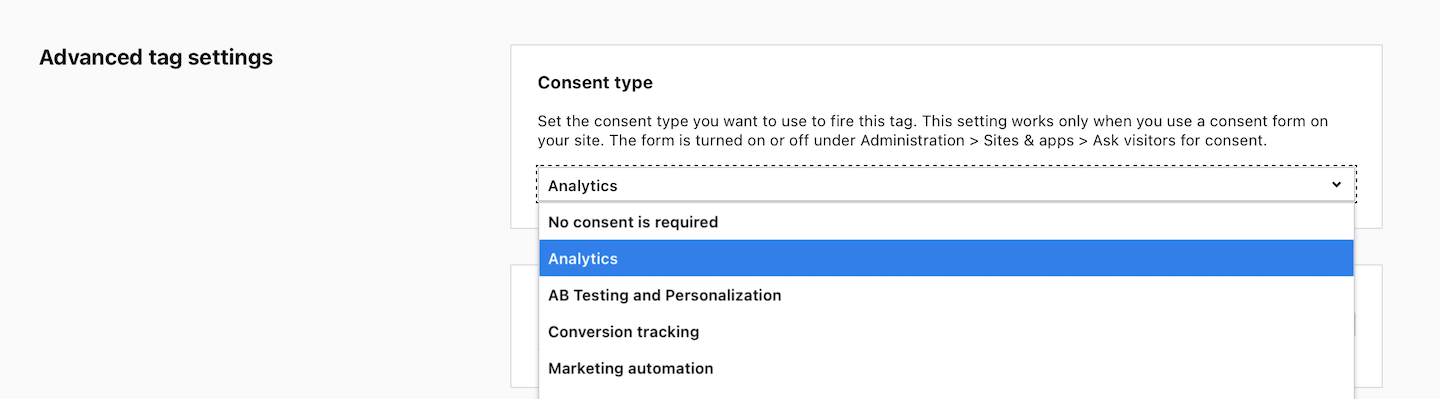
Note: Set it up if you use a consent form on your site. This tag will only fire for visitors who accept the selected consent type.
10. In Tag triggers, click Choose existing trigger.
11. Select All page views and click OK.
12. Click Add to save the tag.
13. Test your tag in debug mode.
14. When you’re happy with how the tag works, click Publish.
15. In the next steps, you’ll need to set up reporting for error clicks.
16. Go to Menu > Analytics.
17. Navigate to Custom reports.
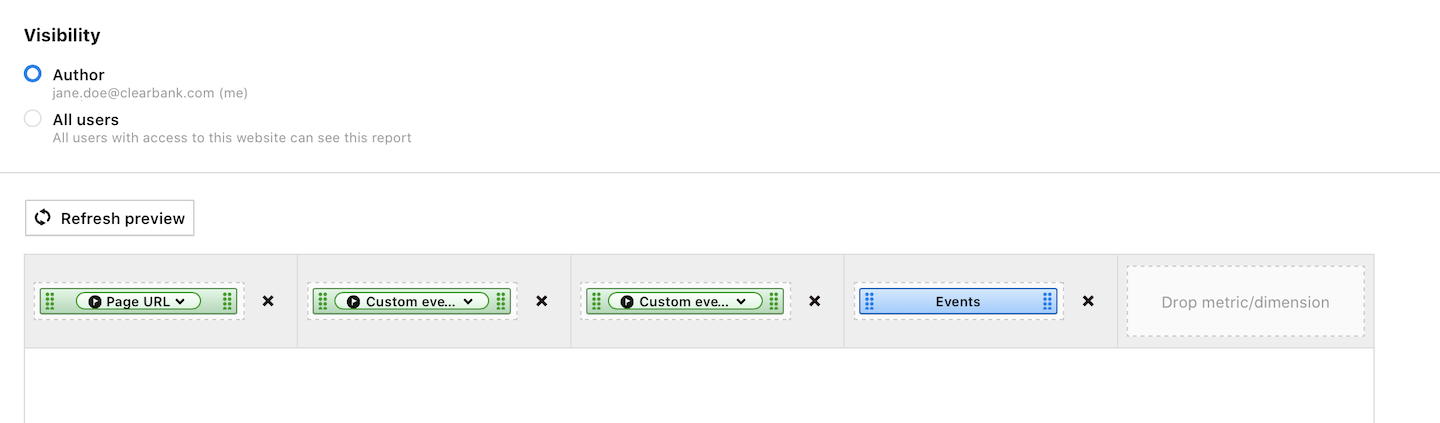
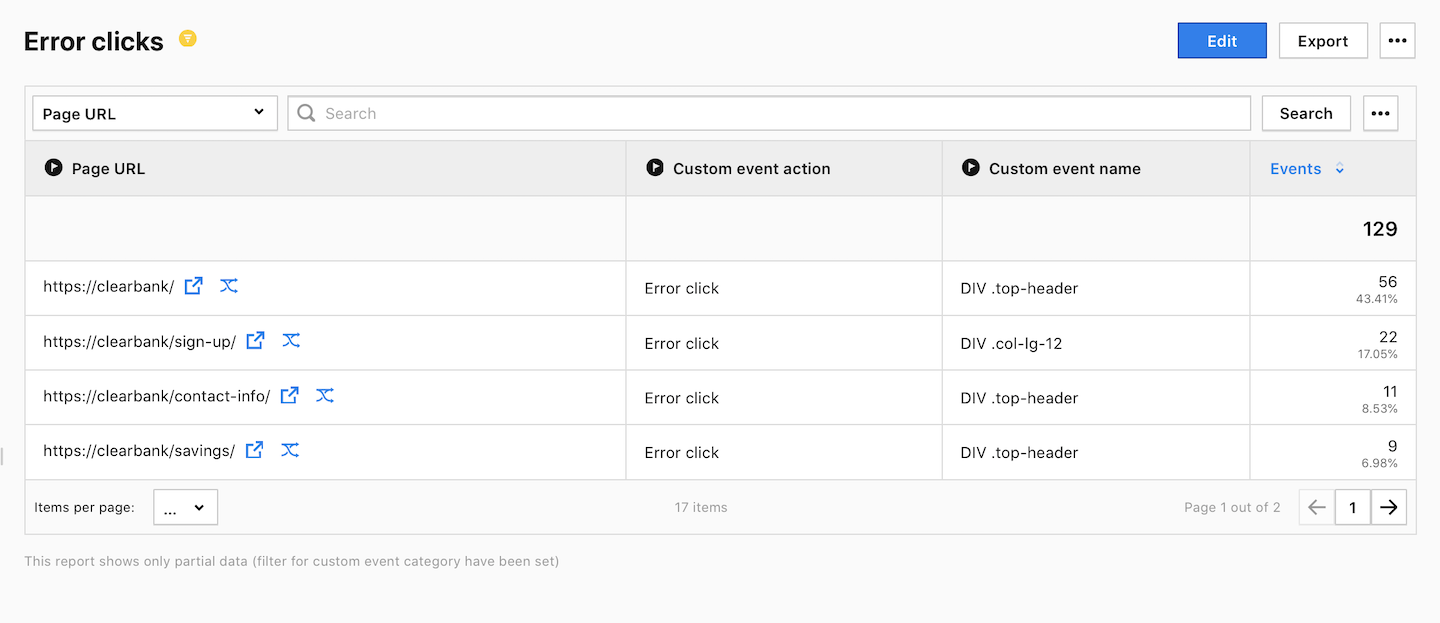
18. Create a custom report with the following setup:
- Report type: Table
- Dimensions: Page URL, Custom event action, Custom event name
- Metrics: Events
- Filter: Custom event category is UX research
19. Click Save.
20. All done!
Note: This setup works both for mobile and desktop devices.