The audit log lets you track how your teammates are using Piwik PRO. It helps you see who’s logged into the platform and made any changes to the settings. We made sure it follows HIPAA guidelines to enhance the security of your account.
In this article, we’ll show you how to use the audit log.
Before you start
Here are some things to know before you start:
- Audit log data is stored for a set time. You can adjust the retention period in Administration > Account > Subscription.
- You can export the audit log using API.
- Currently, the audit log only shows changes made to settings in Menu > Administration. In the future, we plan to include changes made in other modules as well.
Open the audit log
To access the audit log, follow these steps:
1. Go to Menu > Administration.
2. Navigate to Account.
3. On the left, click Audit log.
4. Browse the log.
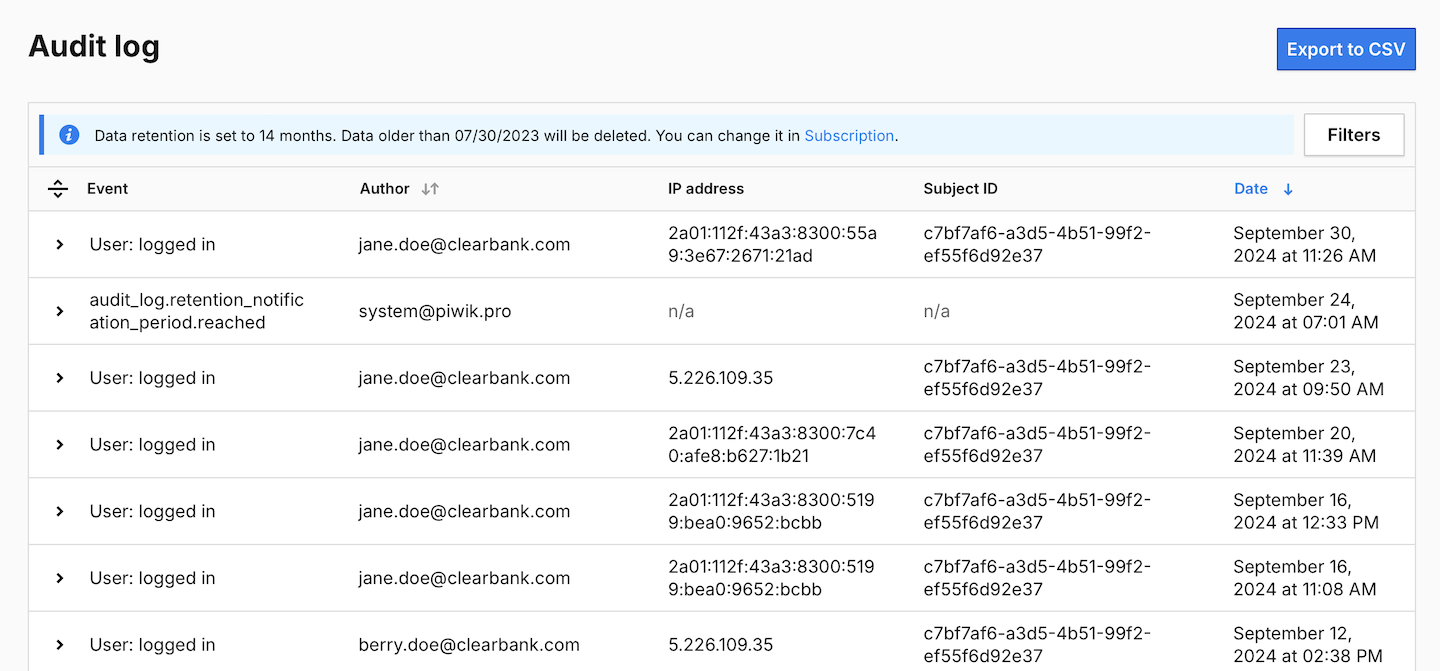
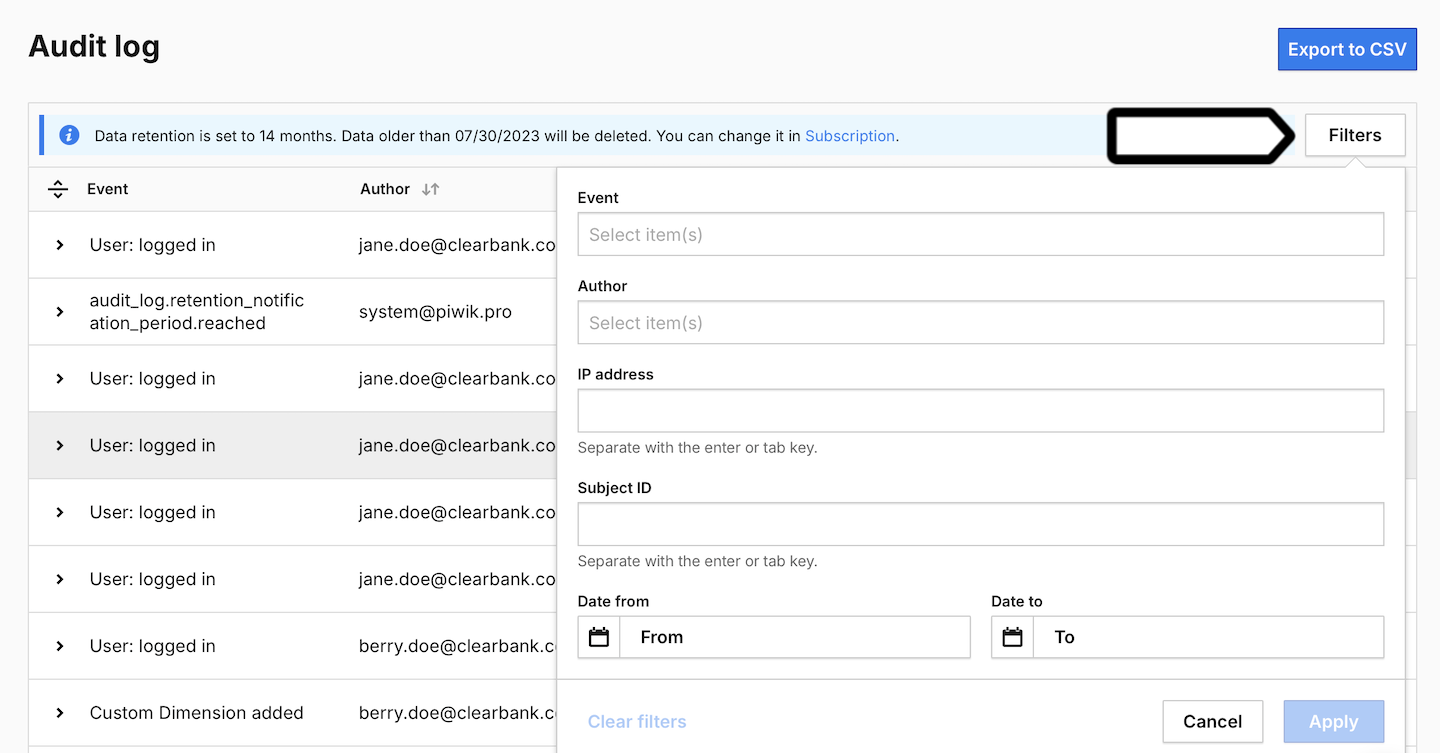
5. (Optional) Click Filters to use filters.
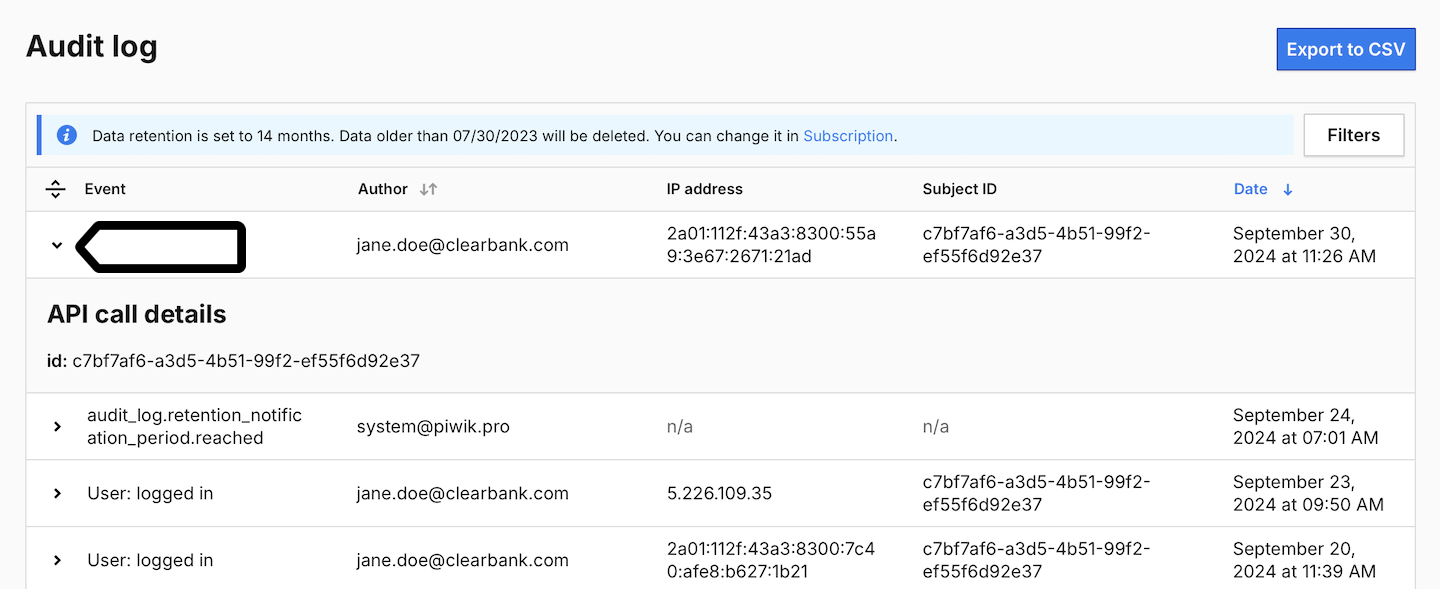
6. (Optional) Click the expanded view to see the details of each change.
7. (Optional) Click Export as CSV to export the log.
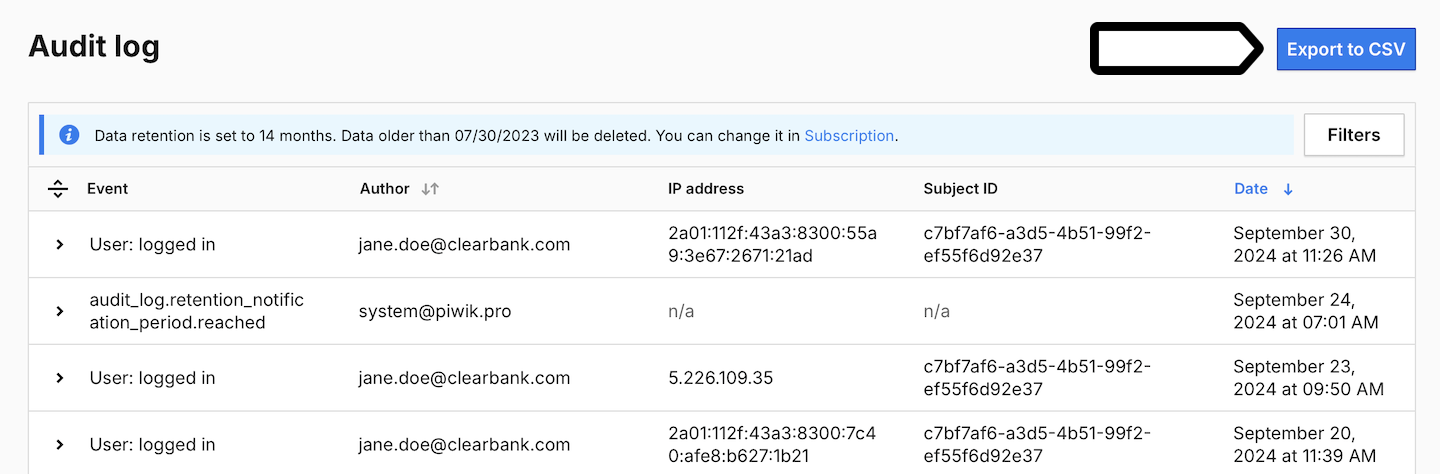
Note: This option will export only the logs that you currently see on the screen, not all of them.
See changes made to a specific site
In the audit log, you can view the changes made to all websites in your account. But if you want to focus on specific websites, you can use the site/app ID to filter the log and see what happened on those particular sites.
To see changes made to a specific site, follow these steps:
1. Go to Menu > Administration.
2. Navigate to Sites & apps.
3. On the left, select the site for which you want to find an ID.
4. The ID is under the name of your site.
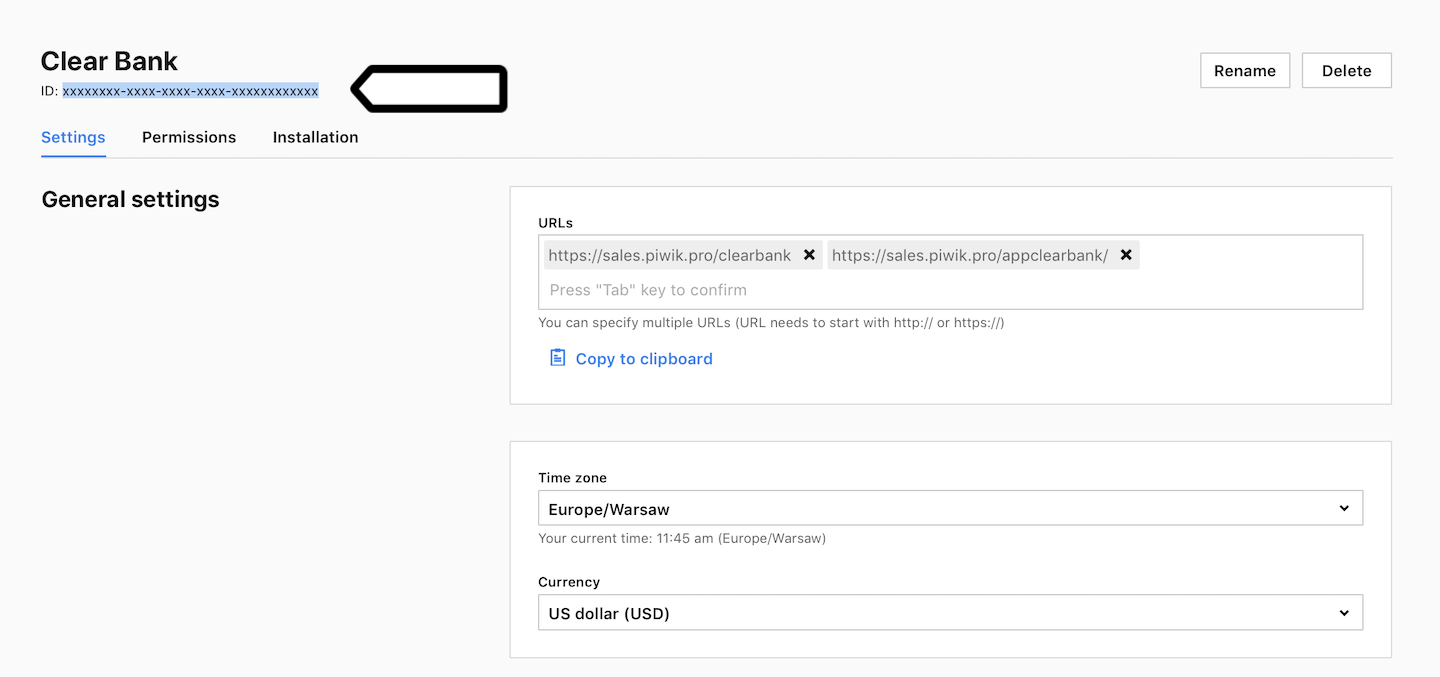
5. Copy the ID.
6. Navigate to Account.
7. On the left, click Audit log.
8. Click Show filters.
9. In Subject ID, paste the site ID.
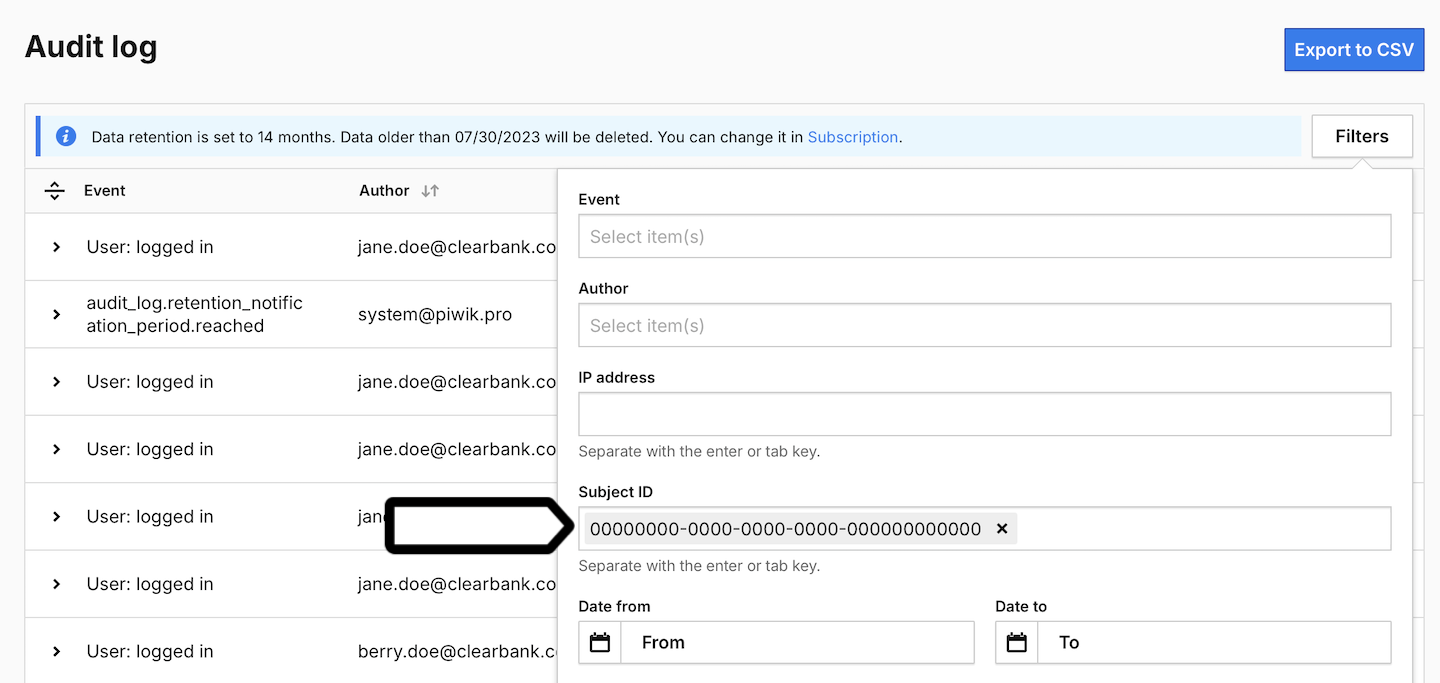
Note: You can filter out multiple sites by pasting the IDs of all sites.
10. Click Apply.
11. All done! You can now view the filtered audit log.
Change the retention period for audit log data
Audit log data is stored for a set period. If you need to change it, you can easily do so in the subscription menu.
To change the retention period for audit log data, follow these steps:
1. Go to Menu > Administration.
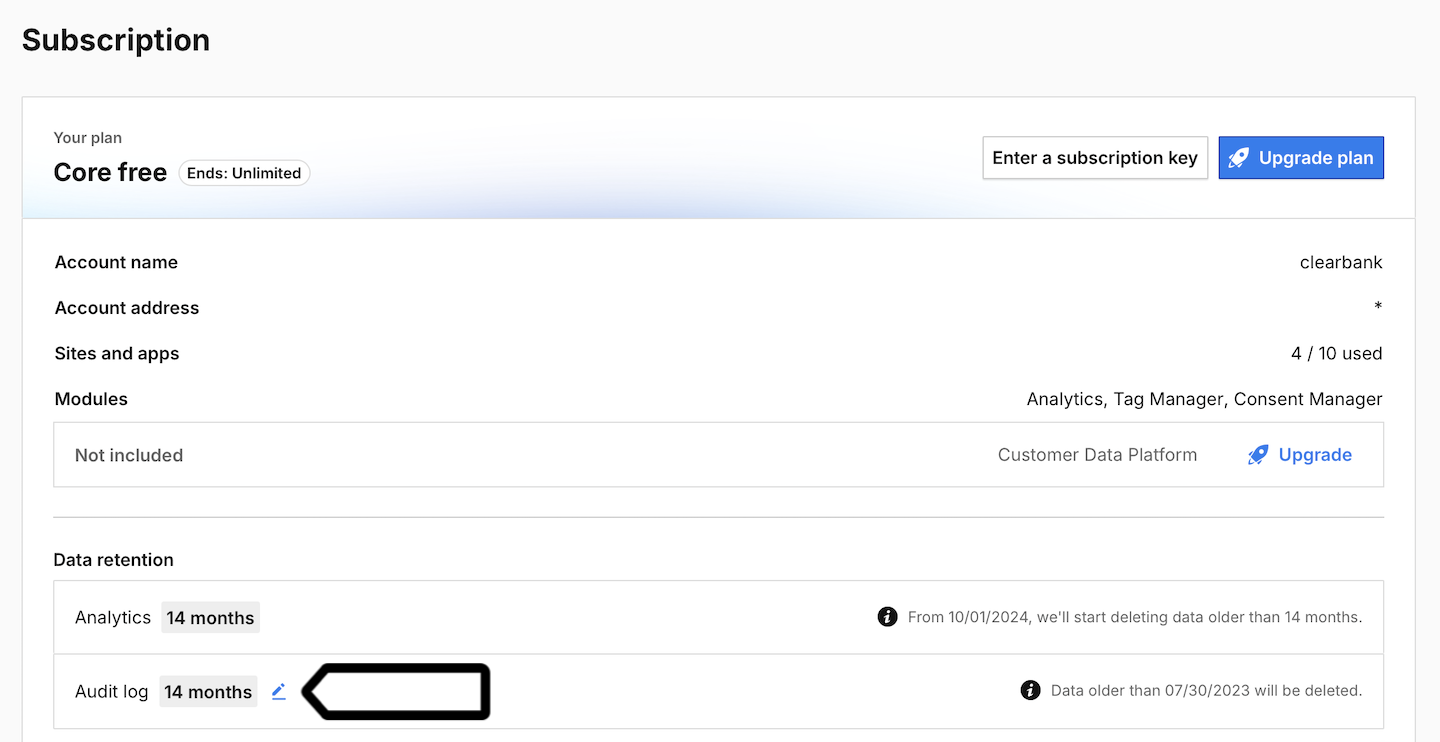
2. Navigate to Account.
3. On the left, click Subscription.
4. In Data retention, click on the pencil next to Audit log.
5. Change the retention period.

Note: If you choose a shorter data retention period, data older than the updated period will be deleted and can’t be restored.
6. Type your account address to confirm.
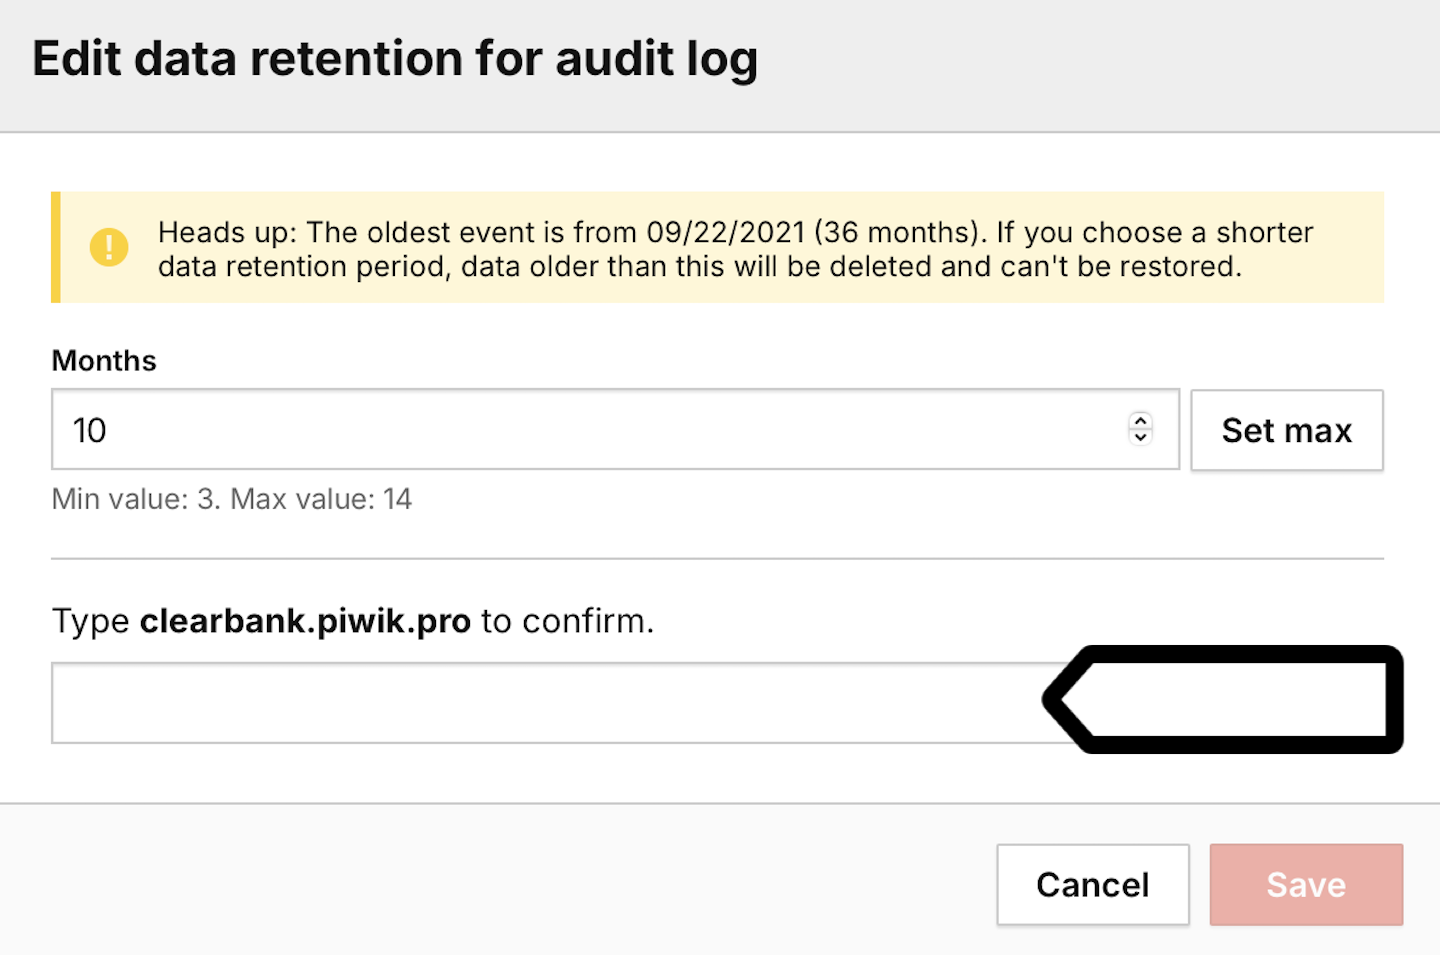
7. Click Save.
8. All done! Your audit log data will now be retained for the updated period.