Needed permissions: owner
Note: If you’re interested in using this feature, contact your account manager.
If your organization is a public service in any EU country, you need to share information about the people who visit your website with the Single Digital Gateway (SDG). The information that needs to be reported includes the number of visitors, which services they used and feedback on obstacles they encountered. This data will be used to improve the services offered through the gateway and ensure they meet the needs of people across the EU.
If you connect Piwik PRO with SDG, Piwik PRO will send a monthly report to SDG.
The report will contain the number of page views for each page URL broken down by visitor’s country and device. SDG will combine your data with others and analyze the online traffic from different countries.
In this article, we’ll explain how to set up the integration between Piwik PRO and the Single Digital Gateway.
Before you start
Here are some things to know before you start:
- Needed permissions in Piwik PRO: owner.
- You need to have a registered SDG account.
- The SDG report is always sent for the last month.
Integrate with SDG
To integrate with SDG, follow these steps:
1. Log in to Piwik PRO.
2. Go to Menu > Administration.
3. Navigate to Sites & apps.
4. On the left, choose the site or app you want to work with.
5. Navigate to SGD Integration.
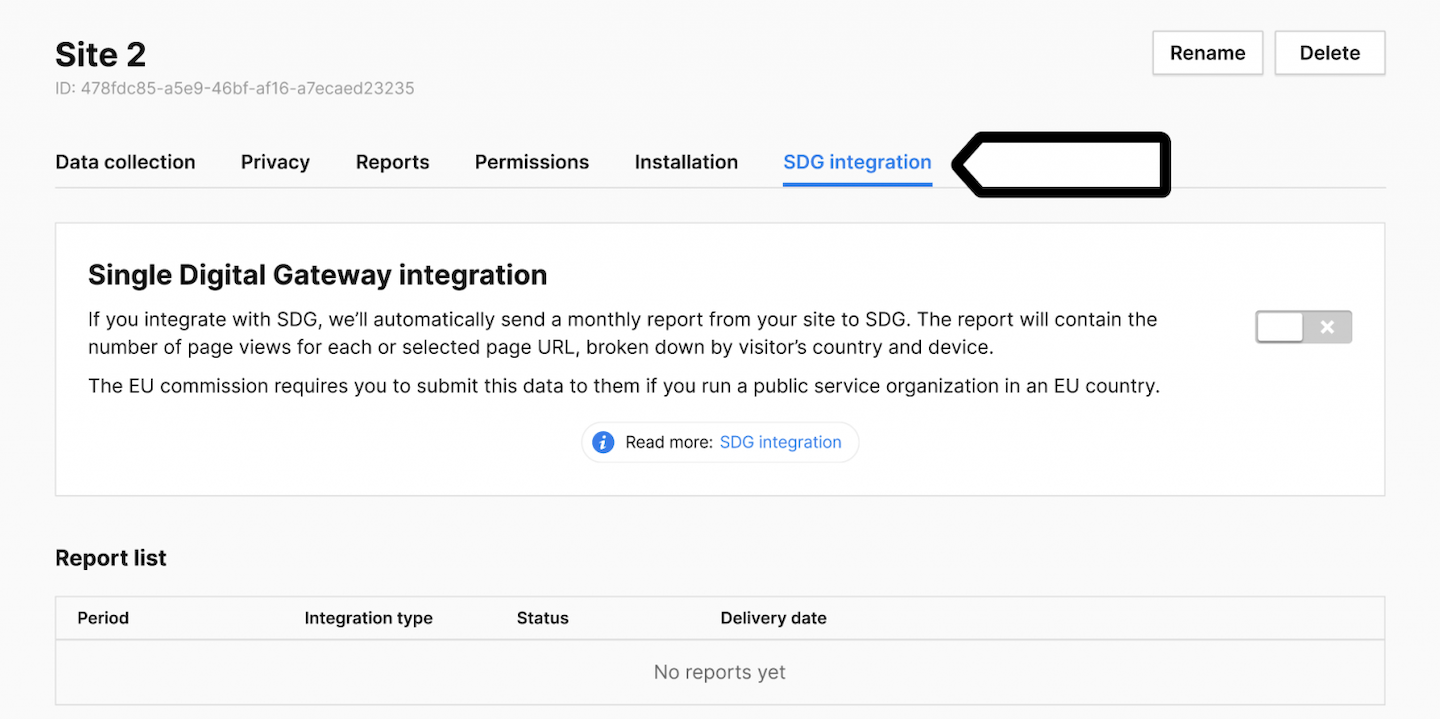
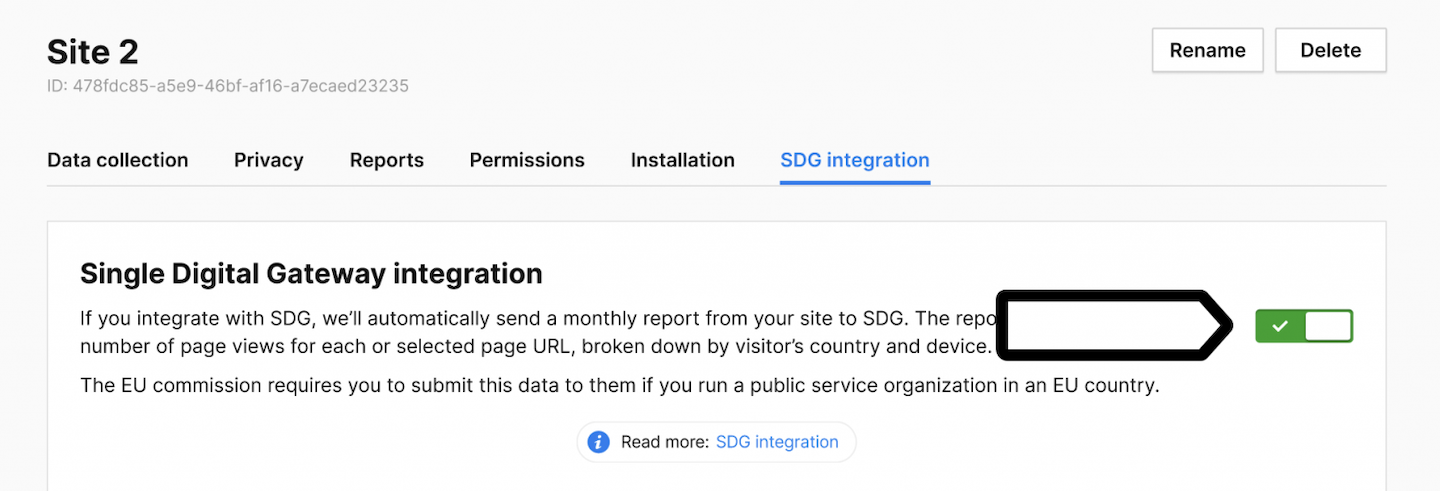
6. Turn on Single Digital Gateway integration.
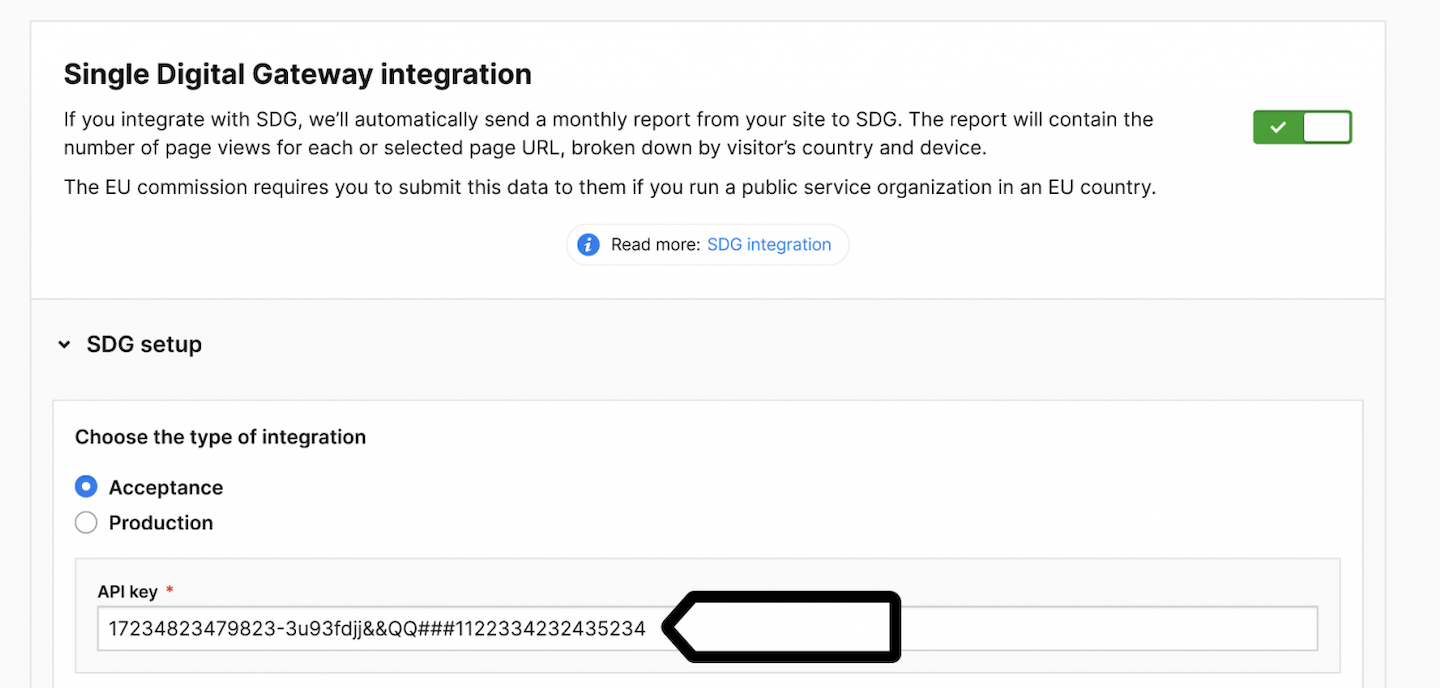
7. In SDG setup, pick one of the following instances: Acceptance or Production.
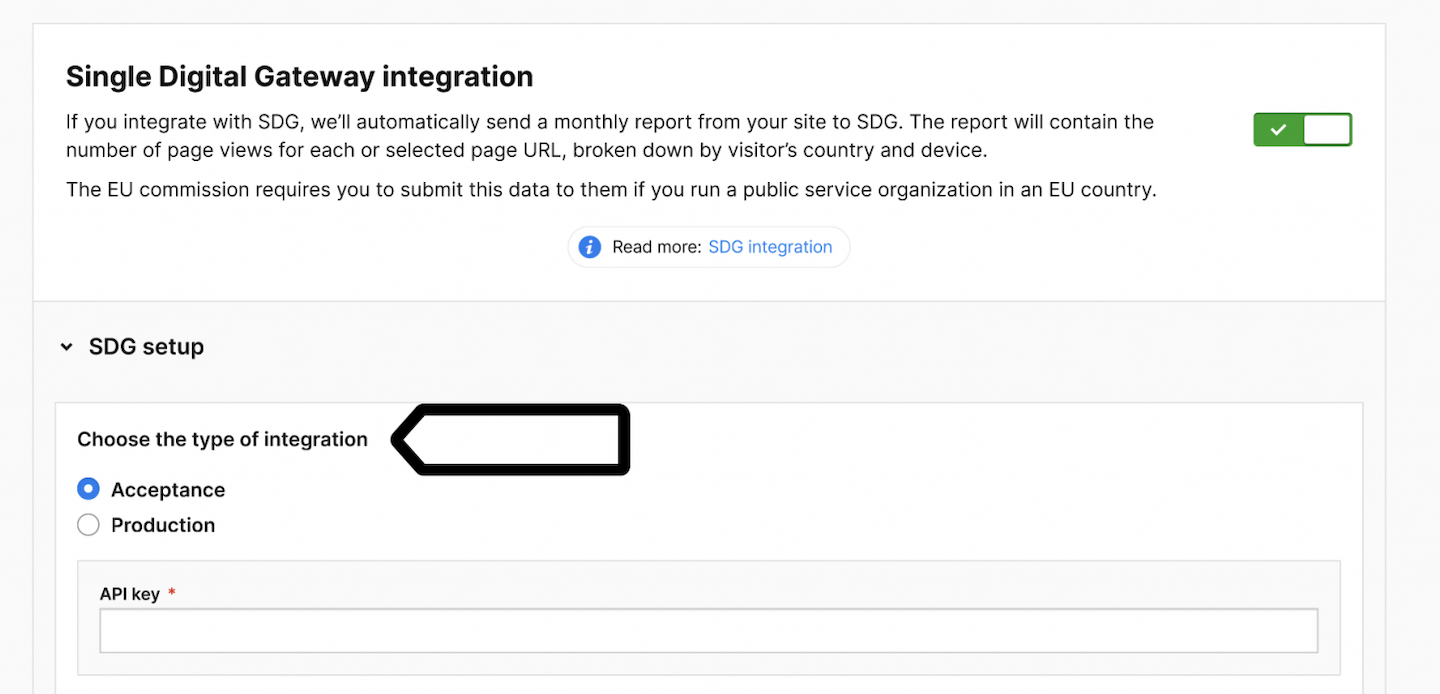
8. Enter the API key received from the Single Digital Gateway provider.
9. In Applicable URLs, specify whether to report all URLs or only specific URLs.
10. Click Save.
11. All done! The integration is ready and Piwik PRO will send data for the last month to SDG.
Note: You can’t schedule the report for a specific date. It’s always scheduled for the 3rd day of the month. However, you can always send a report for the last month manually.
Send the SDG report manually
If you don’t want to wait until the scheduled date, you can run the report one-off.
To send your report manually, follow these steps:
1. Go to Menu > Administration.
2. Navigate to Sites & apps.
3. On the left, choose the site or app you want to work with.
4. Navigate to SGD integration.
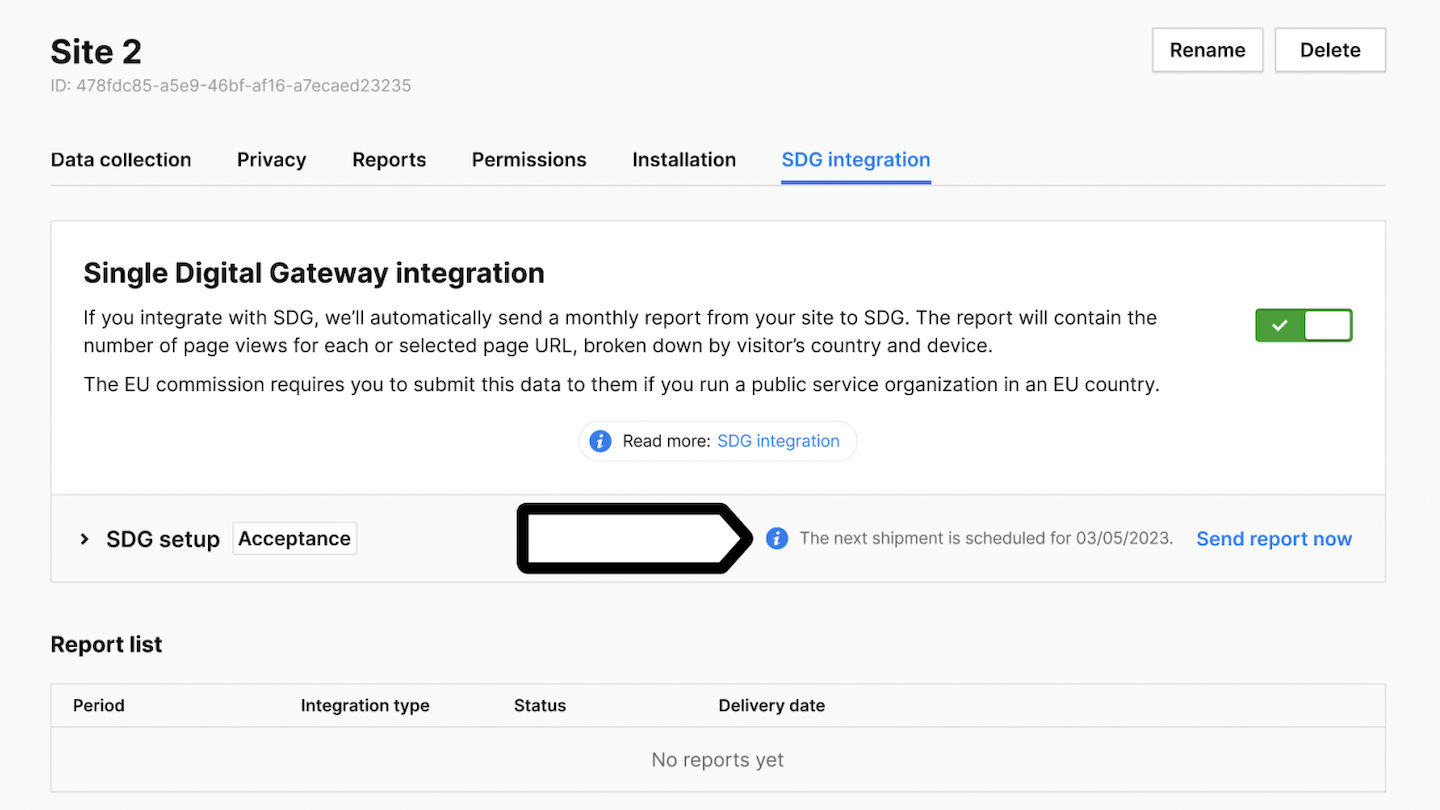
5. Next to SDG setup, click Send report now.
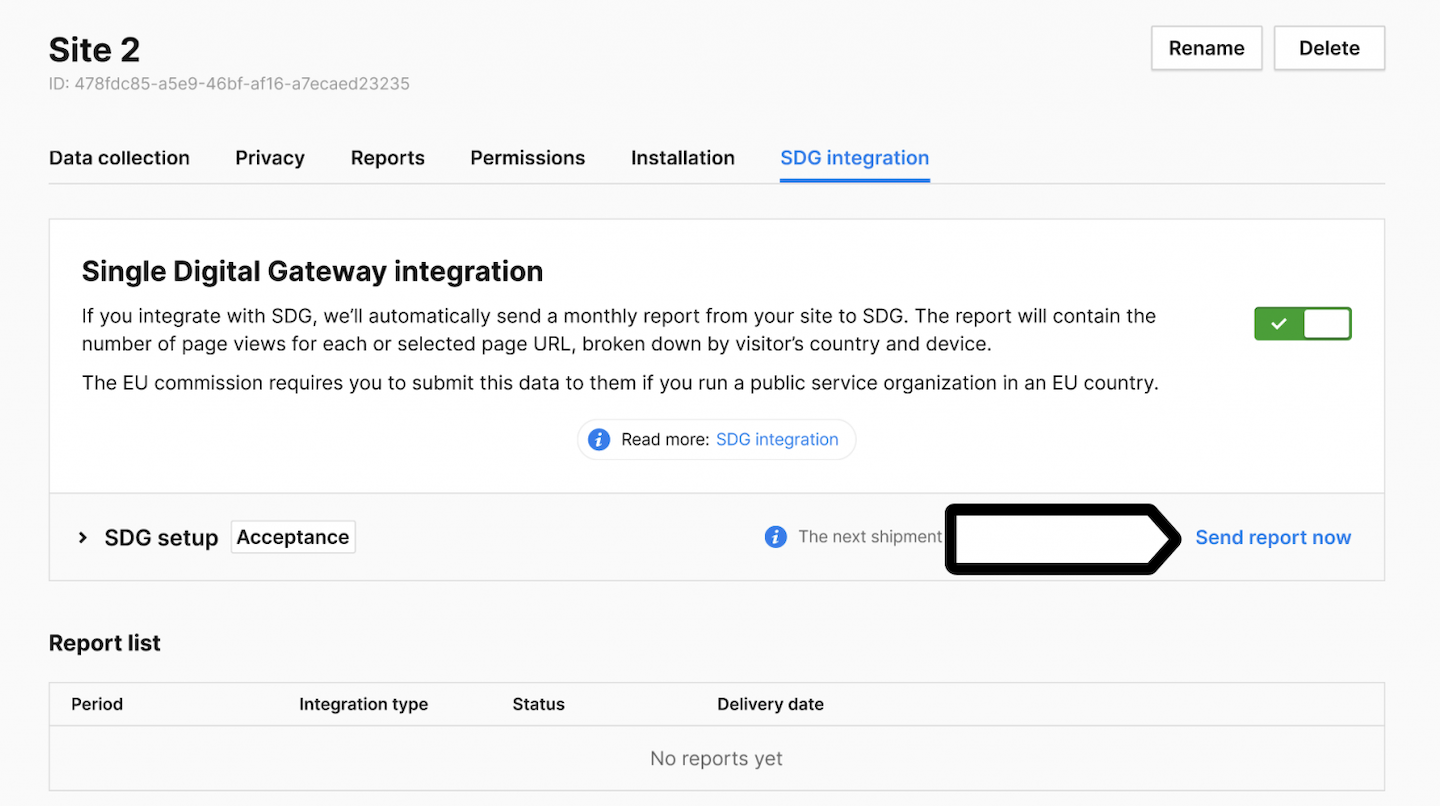
6. Click Send on the confirmation screen.
7. Done! Your report has been sent to SDG. Now you can also find it in Report list.

8. (Optional) If you want to see the report summary, click View.
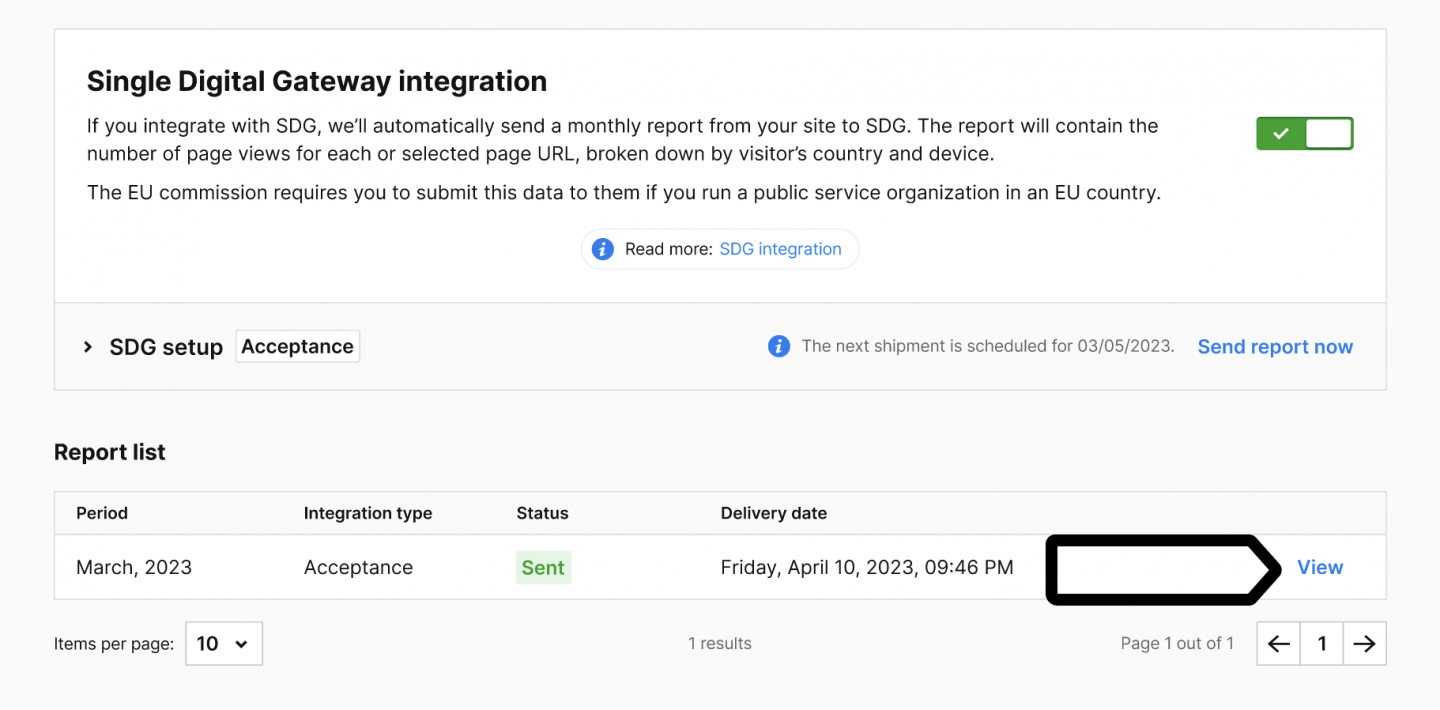
Note: In the report summary, you can download report files in .txt format for both requests and responses.
Resend the SDG report
You may need to send the report to SDG again for various reasons. For example, if you’ve included new URLs in the Applicable URLs section of the settings or if the report failed to send for some reason.
To resend the report, follow these steps:
1. Go to Menu > Administration.
2. Navigate to Sites & apps.
3. On the left, choose the site or app you want to work with.
4. Navigate to SGD Integration.
5. (Optional) In Applicable URLs, change the URLs.
6. Identify the report you want to resend and click View.
7. Click Resend.

Note: If you can see the Resend button, but it’s not active, check if:
- The current integration is the same as the one used with the original report.
- The SDG integration is turned on.
If the Status of your report is Pending, you won’t see the Resend button.
8. Click Resend on the confirmation screen.
Note: You can only create one report per integration type per month, so you won’t find a new report entry in the Report list after resending. However, if you view the detailed view of a report, you will notice changes in the Request log. This log will display every report upload, including any failed attempts.
9. Done!