Webtrends Optimize is a tool that helps businesses improve their site’s conversion rates through testing. It allows you to create and compare different versions of your site, including elements like button text, placement, size and color scheme.
By integrating Piwik PRO with Webtrends Optimize, you can conveniently access your Webtrends Optimize stats in Piwik PRO. This integration combines the strengths of both platforms, enabling you to make data-driven decisions based on thorough analysis of the data.
In this article, we’ll walk you through the integration process with Webtrends Optimize.
Before you start
Here are some things to know before you begin this process:
- This integration is based on a data layer, custom dimensions and custom events. For each Webtrends Optimize campaign, you need to create a separate custom dimension and custom event, including separate triggers.
Integrate Piwik PRO with Webtrends Optimize
The integration with Webtrends Optimize works by creating a data layer to store Webtrends Optimize data. This data layer lets you access Webtrends Optimize stats using tags in Piwik PRO. These tags then transfer the data to custom dimensions and custom events, so you can easily see it in your Piwik PRO reports.
To integrate Piwik PRO with Webtrends Optimize, follow these steps:
1. Log in to Piwik PRO.
2. Go to Menu > Tag Manager.
3. Create a tag of the following type: Custom code (async).
4. Name the tag: Webtrends Optimize data layer push or use another name.
5. Add the following code in tag settings:
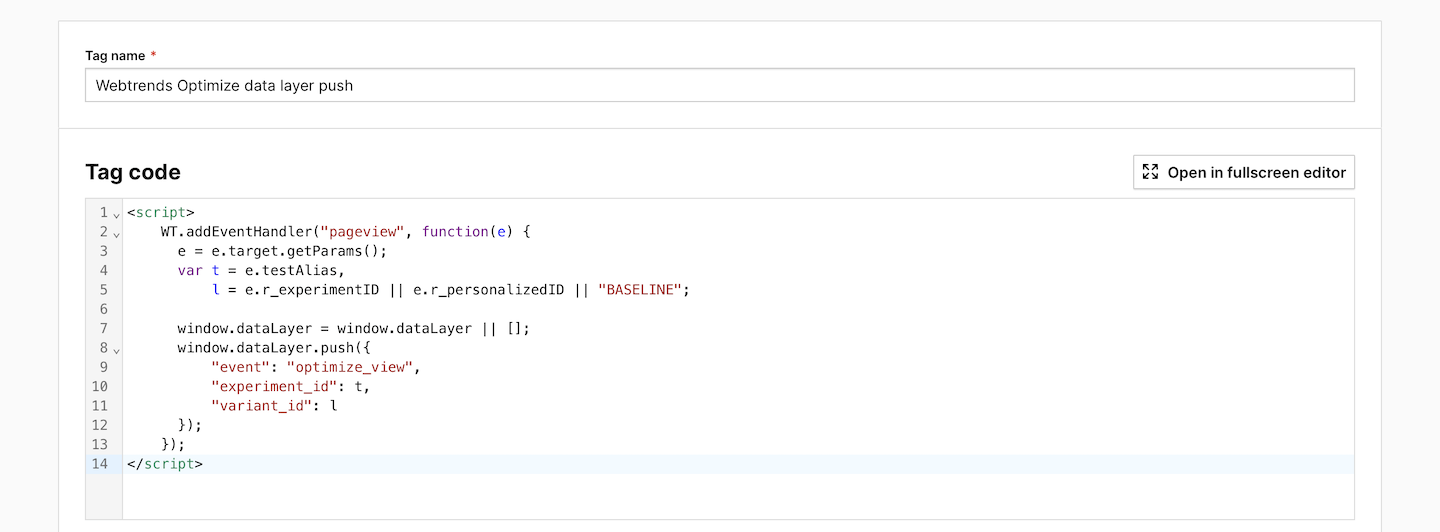
6. Add the following trigger: All page views.
7. Save and publish the tag.
8. Go to Menu > Analytics > Settings.
9. On the left, click Custom dimensions.
10. Create a new session dimension. Name it the same way as your campaign in Webtrends Optimize. Example: Webtrends Optimize campaign: add-to-cart button color.
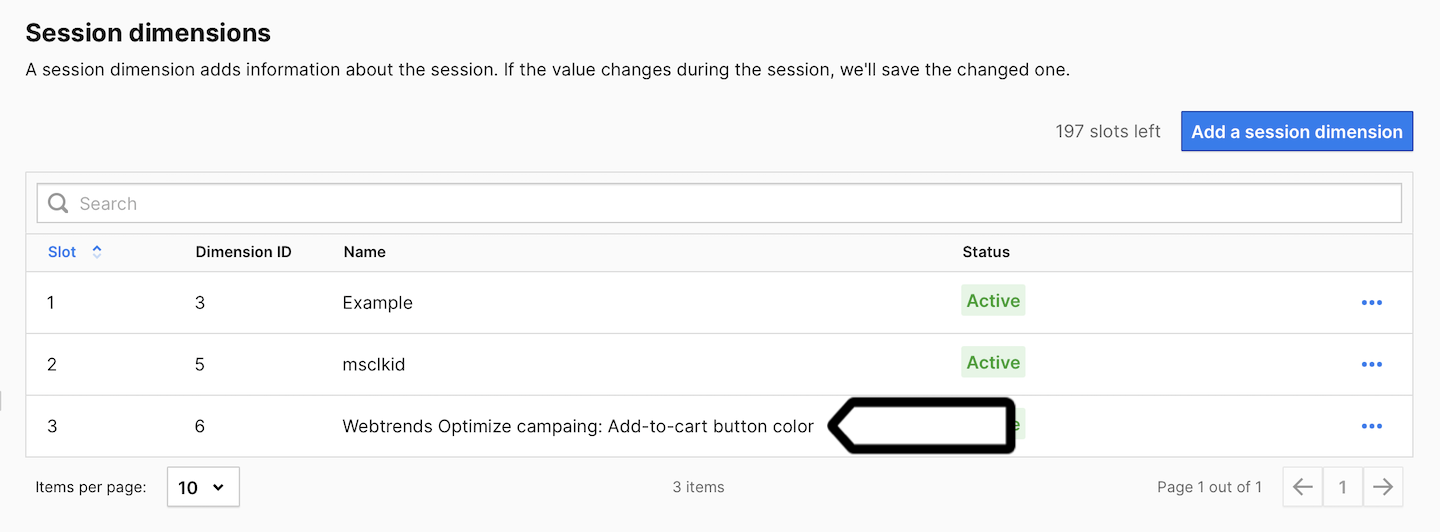
Note: Create a custom session dimension for each Webtrends Optimize campaign you want to see in Piwik PRO.
11. Go back to Menu > Tag Manager.
12. Create a variable of the following type: Data layer variable.
13. Name it Variant name or use another name.
14. Set the following value for this variable: variant_id.
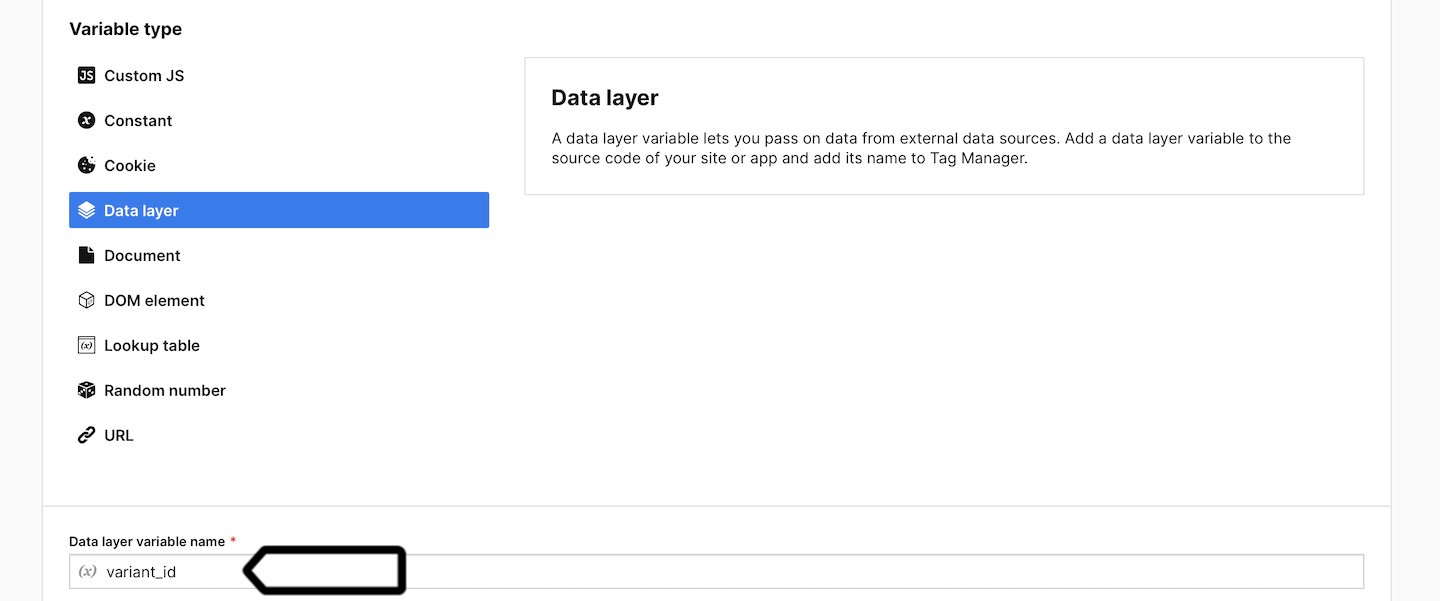
15. Save the variable.
16. Create another variable of the same type: Data layer variable.
17. Name it Experiment ID or use another name.
18. Set the following value for this variable: experiment_id.
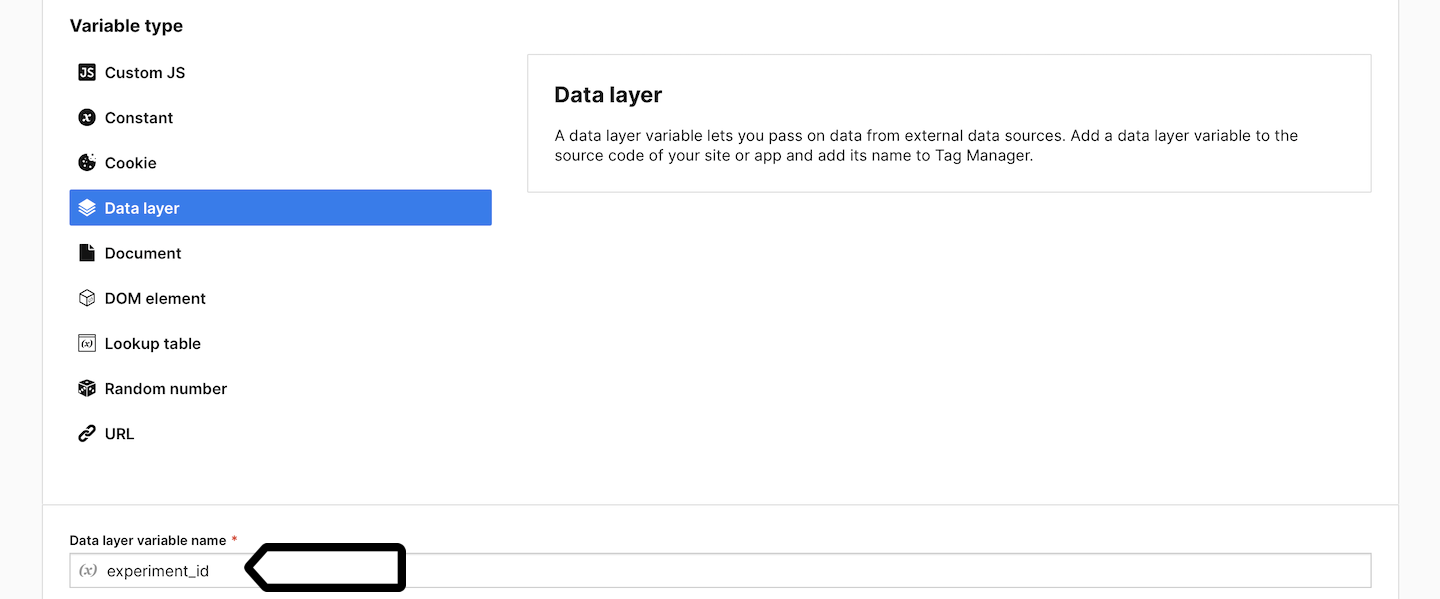
19. Save the variable.
20. Create a new tag of the following type: Custom event.
21. Name it the same way as your campaign in Webtrends Optimize. Example: Webtrends Optimize campaign: add-to-cart button color.
22. Set the following parameters:
- Category:
Webtrends Optimize - Action:
{{ Experiment ID }} - Name:
{{ Variant name }}

23. Add the custom dimension you created in step 10 to this event and assign the following value to it: {{ Variant name }}.

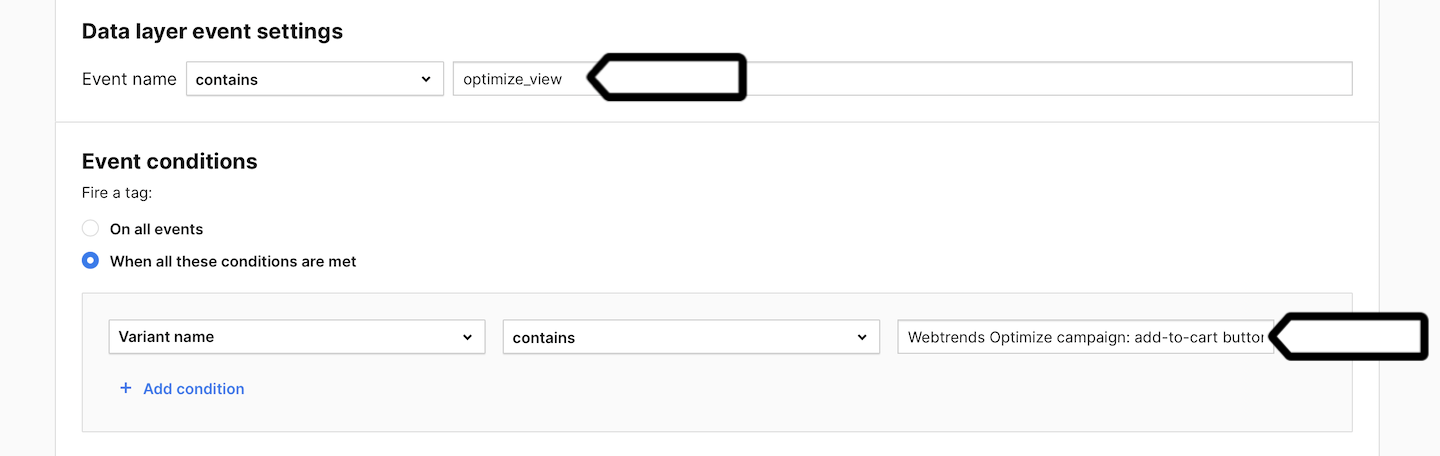
24. Add a new trigger to this tag. Choose the following trigger type: Data layer event.
25. Set the following conditions:
Event name contains optimize_view- When all conditions are met:
{{ Experiment ID }} contains <campaign name used in Webtrends Optimize for which you are creating an event>
Note: Create a custom event tag for each Webtrends Optimize campaign you want to see in Piwik PRO. Each active A/B test should have its own custom event tag, configured with the correct trigger to match the experiment name. Additionally, custom dimensions should be set in the appropriate slots to prevent data from being overwritten between tests.
26. Save and publish your tag.
27. Voila! Now your Webtrends Optimize stats will be visible in Piwik PRO reports.
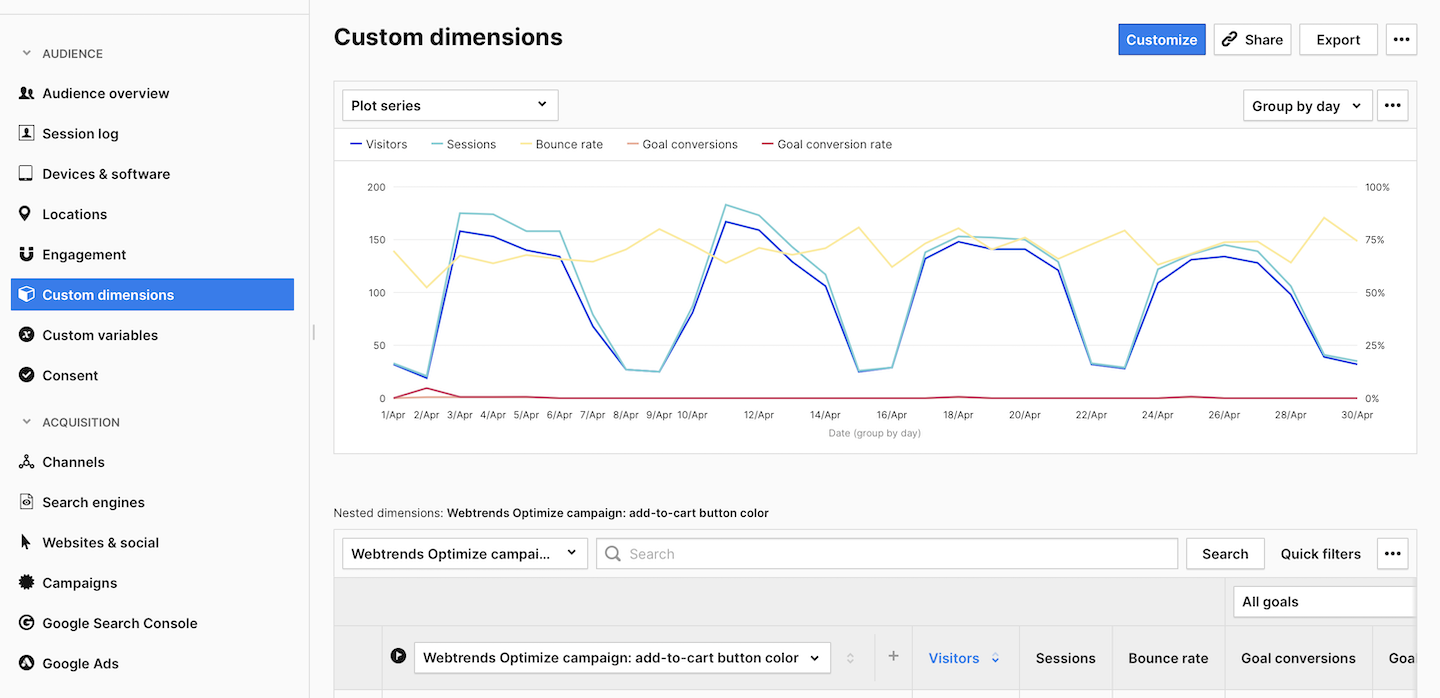
Webtrends Optimize stats in Piwik PRO reports
Now, we’ll show you how to access your A/B test data from Webtrends Optimize in Piwik PRO reports.
To view reports, follow these steps:
1. Go to Menu > Analytics.
2. Navigate to Reports.
3. On the left, pick the following report: Custom dimensions or Custom events. Your Webtrends Optimize data will be visible in both of these reports.
4. (Optional) You can also create two kinds of segments to help you analyze data. One for sessions including the selected campaign. Condition: <campaign name> is not.

5. (Optional) And you can create another segment for sessions that include the selected A/B variant. Condition: <campaign name> contains <experiment ID>.
