XPath (XML Path Language) is a path expression that can point you to any web page element. You can use it to set conditions for a click trigger.
In this article, we’ll show you how to find XPath for any element on your web page and how to set the click trigger.
Find XPath for a page element
1. Open your page.
2. Right-click on any element and click Inspect or Inspect element, depending on the browser you’re using.
3. Right-click on the element’s source code and choose Copy > Copy XPath or Copy > XPath, depending on the browser you’re using.
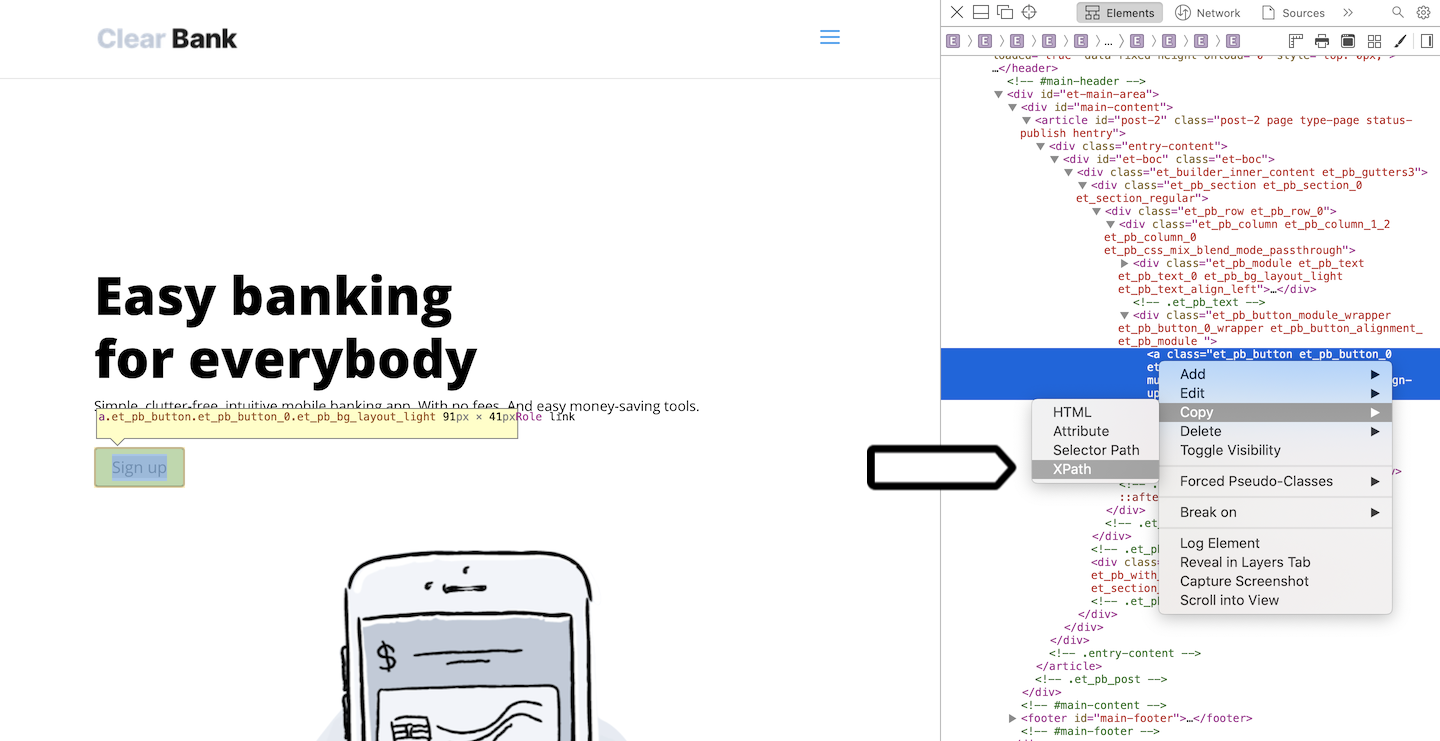
4. Keep the copied code. You’ll need it to set the click trigger. In our example the XPath is //*[@id="et-boc"]/div/div[1]/div/div[1]/div[2]/a.
Set up a click trigger
1. Go to Menu > Tag Manager.
2. Navigate to Triggers.
3. Click Add a trigger.
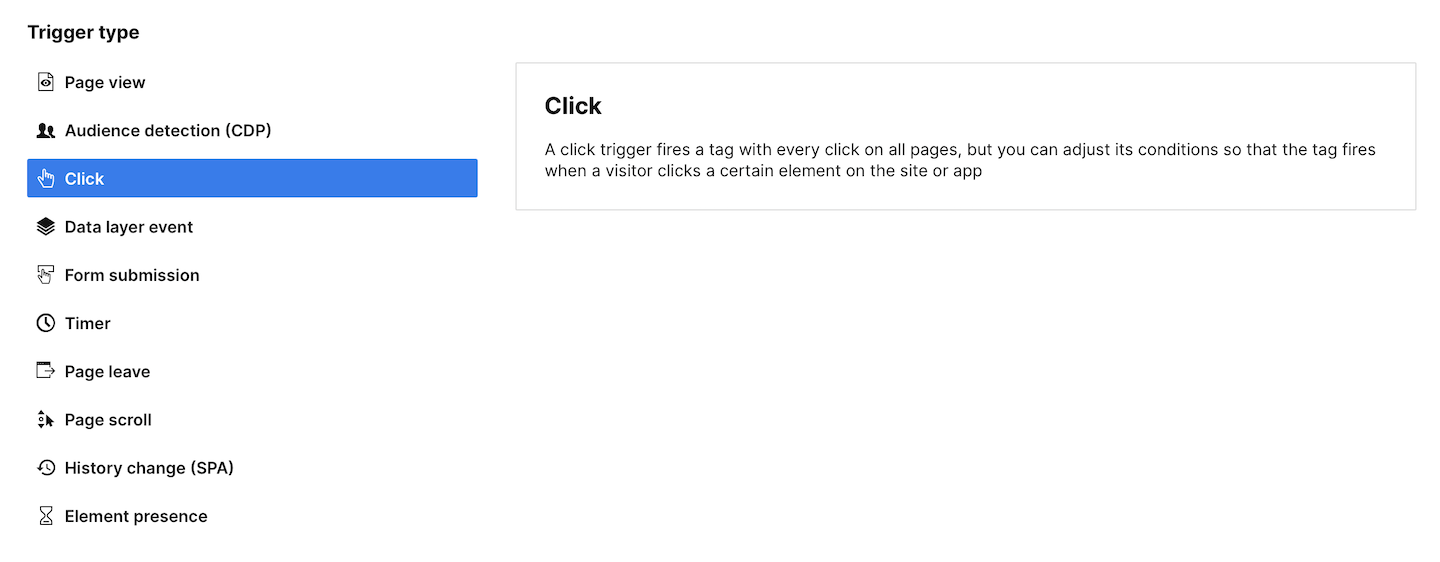
4. Name the trigger and choose the following type: Click.
5. Click Next.
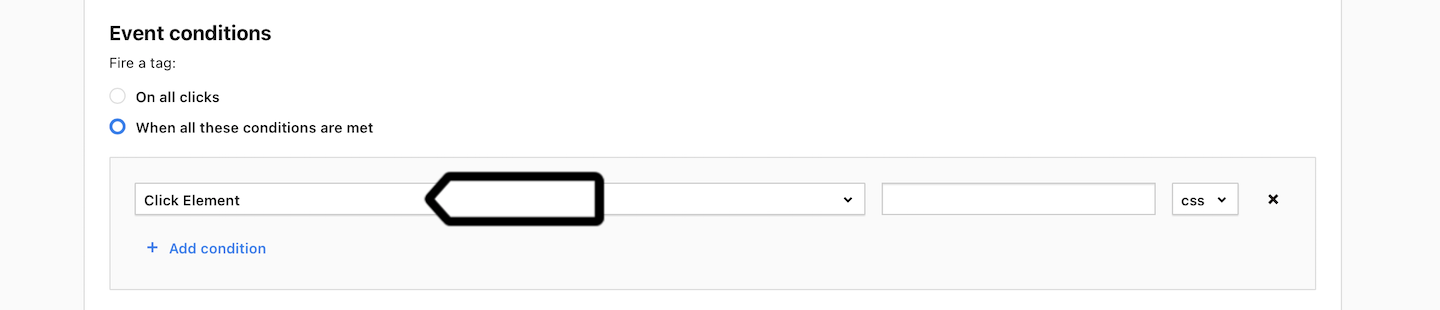
6. In Event conditions, choose Fire when conditions are met.
7. Choose Click element.
8. Paste your XPath.
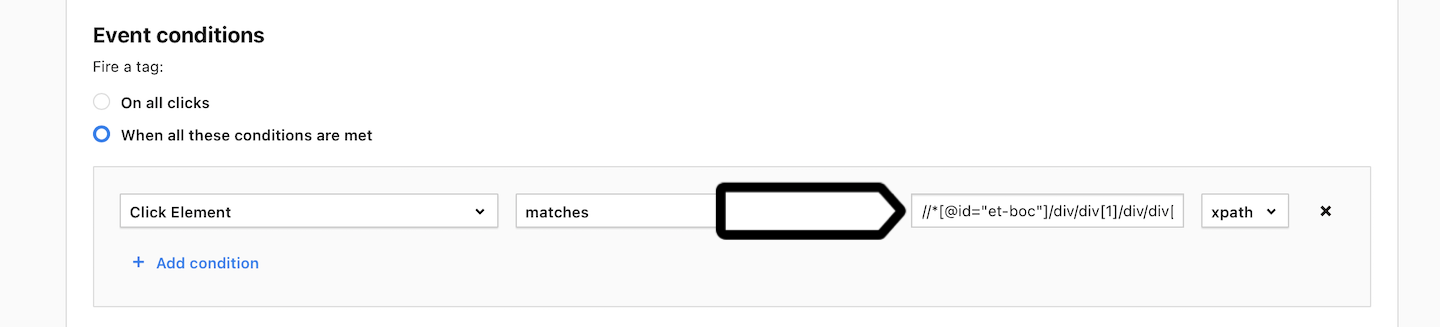
9. Change css to xpath in the last box.
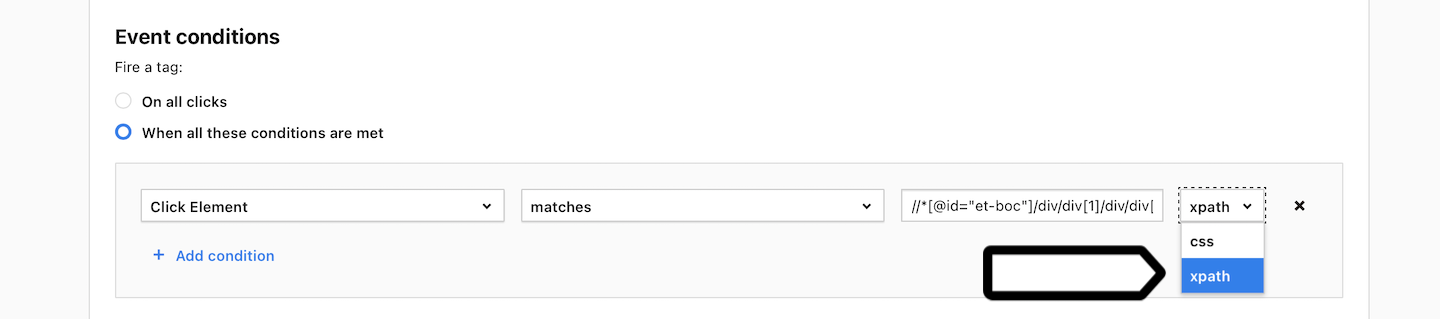
10. Add more conditions if you want.
11. When you’re done, click Add.
12. Use this trigger for your tag and see how it works in debug mode.
13. Click Publish to make changes on your site.
14. All done!