A variable is a tool for storing data. Tags, triggers, or other variables can access this data.
Let’s take the page URL variable as an example; it holds and shares the URL of the current page.
Tag Manager offers built-in variables as well as custom variables that you can define yourself.
In this article, we’ll show you how to add a custom variable.
Before you start
Here are some things to know before you start:
- A variable is written as a text wrapped in double curly braces
{{ variable }}. - Variables are commonly used to store API keys or share extra information from your website.
- You can use variables in tags, triggers and other variables. However, when you put a variable inside another one, you can’t make a loop where A depends on B, B depends on C, and C depends on A.
- You can add a custom variable through a dataLayer push in JavaScript. But it can only be used for the custom code tag.
Create a variable
To create a variable, follow these steps:
1. Go to Menu > Tag Manager.
2. Navigate to Variables.
3. Click Add a variable.
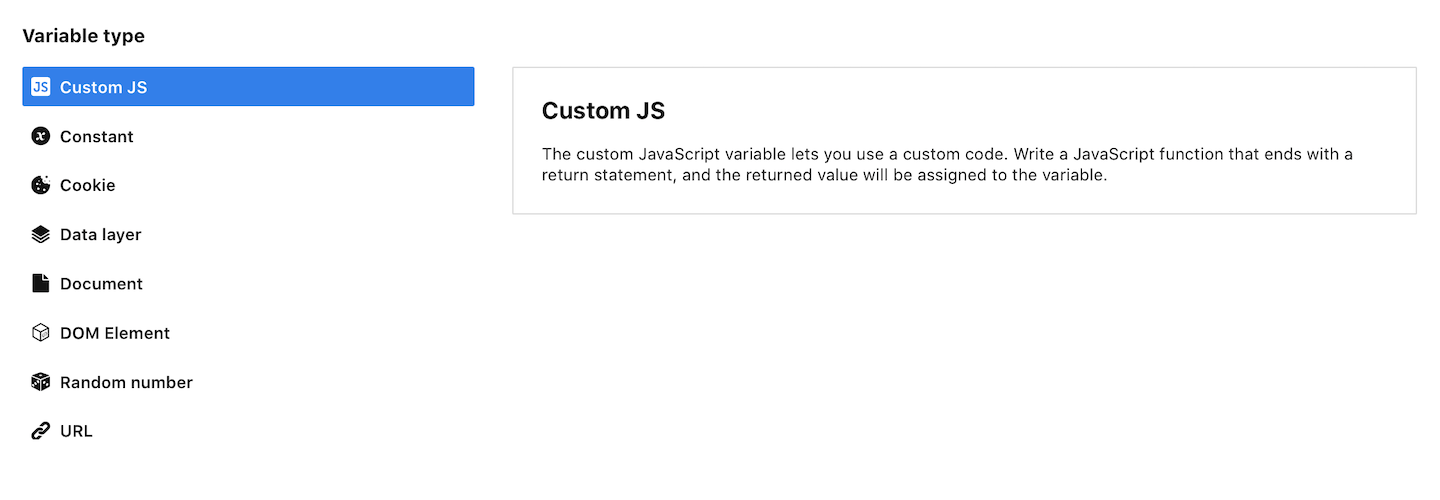
4. Select a variable type.
5. Name your variable.
6. Set up your variable. Each variable type collects data differently. Choose the one that best fits your use case:
- Custom JS variable: Write a JavaScript function that ends with a return statement. Read more
- Constant variable: Type in a constant value. Read more
- Cookie variable: Type in a cookie name. Read more
- Data layer variable: Type in a data layer variable name. Read more
- Document variable: Type in a document name. Read more
- DOM element variable: Type in an element ID, CSS selector, or XPath. Read more
Available from 16.33.0Lookup table variable: Choose the input variable and map inputs to outputs. Read more- Random number: You don’t need to set anything here. This variable gives a random value between 0 and 1 (inclusive of 0, but not 1). Read more
- URL variable: Choose Get parameter, Query or Protocol. Read more
Tip: For more about variable types, read this article.
Note: Available from 16.30.0. You can use a variable inside another variable. Just keep in mind that a variable can’t contain a circular dependency. Don’t create a closed loop. Example: A depends on B, B depends on C, and C depends on A.
7. When you’re done, click Save.
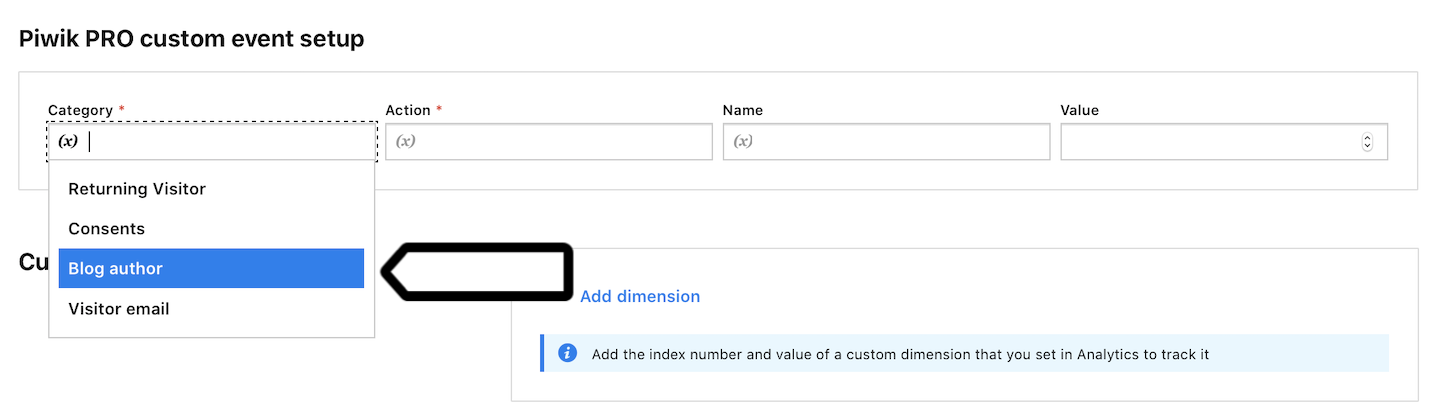
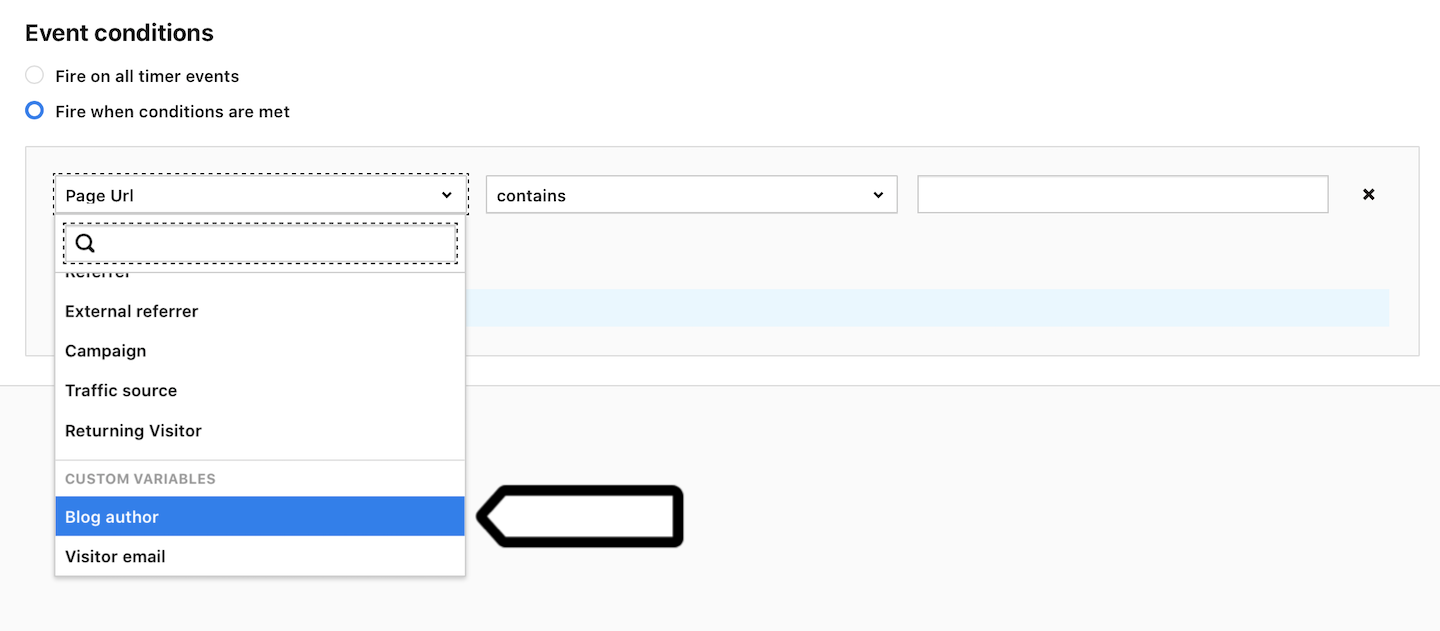
8. Once you’ve crafted a variable, you can easily choose it from the list when working with tags, triggers or other variables.
Variable in a tag
Variable in a trigger
Variable in a code editor
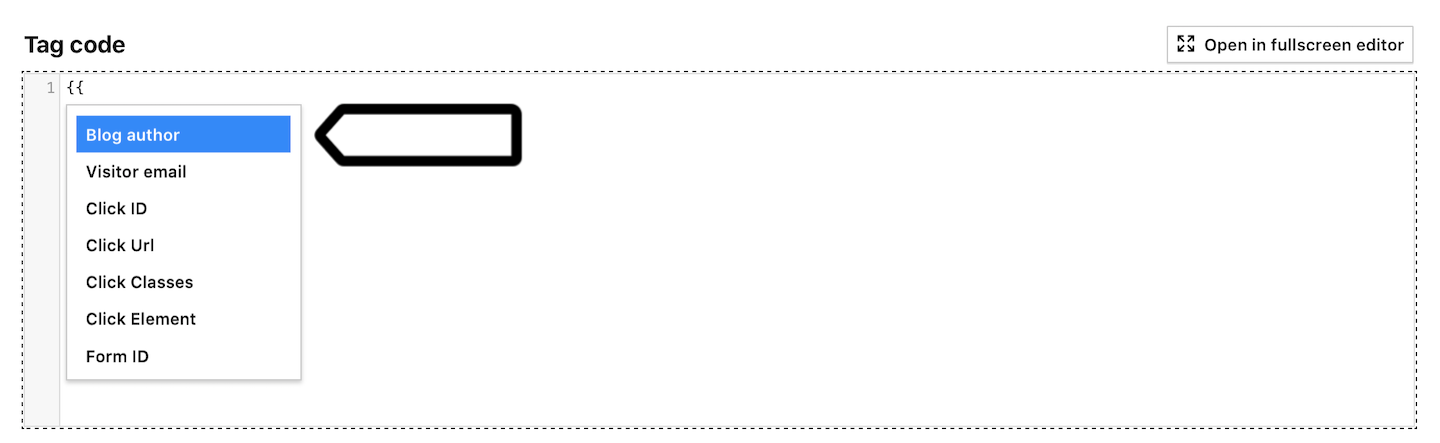
Note: In a code editor, start typing {{ to see the available variables.
9. All set!
See where a variable is used
Tag Manager links variables to the tags, triggers, and variables that use them, and links tags and triggers back to their dependent variables.
When you view an existing variable, you’ll see a summary of where it’s used in your setup. For example:
- Used in X tags – Shows how many tags use this variable
- Used in X triggers – Shows how many triggers use this variable
- Used in X variables – Shows how many other variables use this variable
- Uses X variables – Shows how many variables this one depends on
Note:
- If you see a warning icon next to Uses X variables, this variable relies on one or more unrecognized variables.
- You can’t delete a variable that is used in other configurations.
- You can’t view built-in variables.

To see where a variable is used, follow these steps:
1. Go to Tag Manager > Variables.
2. Select the variable you want to review, for example, Support page.
3. Next to Used in 1 tag, click the number.

4. In Tags that use Support page, you see the tags using this variable.

5. Click View.
6. You’ll see the details of the tag that is using the Support page variable.

7. Repeat steps 3–6 for Used in triggers and Used in variables to see all other places that use the Support page variable.
8. (Optional) If you see an orange warning icon next to Uses X variables (for example, Uses 2 variables), click the number to see which variables the tag depends on.
9. In the window that opens, check which variables are marked as unrecognized. Click Create next to each one, then follow the steps in the Create a variable section above.

Note: If Variable type isn’t available, it means the variable is unrecognized. It means this variable hasn’t been created yet, isn’t defined, or was copied from a different container, site, or app.
10. Done.
Variables and a context in the custom code tag
When you use a variable in the custom code tag, you need to be aware of the context. By context, we mean a place where the variable is used. As long as the contexts are not mixed up, everything will work properly.
Now we’ll show you some examples of correct context and an example of incorrect context.
Correct context
Example: Custom tag, HTML and variable in URL.
<img src="//ab-testing/images/banner_{{abVersion}}.png">Example: Custom tag, HTML and variable not in the URL.
<div class="layout-{{abVersion}}">... some content here ...</div>Example: Custom tag, JavaScript and variable in the string.
<script type="text/javascript"><br />
    (function (d) {<br />
        setTimeout(function () {<br />
            var f = d.getElementsByTagName('script')[0], s = d.createElement('script'); s.type = 'text/javascript';<br />
            s.async = true; s.src = '//example.com/{{ customerID }}/{{ siteToken }}.js'; f.parentNode.insertBefore(s, f);<br />
        }, 1);<br />
    })(document);<br />
</script>
Note: You might be wondering why a variable in this example isn’t considered a mixed context. This is because we’re always in a JavaScript context here. We create a script tag using JavaScript exclusively; we don’t output a complete HTML.
Example: Custom tag, JavaScript and variable not in the string.
<script type="text/javascript"><br />
    var _paq = _paq || [];<br />
    _paq.push(['setCustomUrl', {{ url }}]);<br />
    _paq.push(['setDocumentTitle', {{ title }}]);<br />
    _paq.push(['trackPageView']);<br />
</script>
Incorrect context
Example: A mixed context occurs when, within one script, another script is dynamically generated with a src attribute and inserted using document.write.
<script type="text/javascript"><br />
    document.write(decodeURI('%3Cscript%20src="' +<br />
        (document.location.protocol === 'https:' ?<br />
            'https://example.com/{{ partition }}/path/{{ guid }}.js' :<br />
            'http://example.com/{{ partition }}/path/{{ guid }}.js') + '"%20type="text/javascript"%3E%3C/script%3E'));<br />
</script>
In this case, both variables, “partition” and “guid,” are used in JavaScript. However, they are essentially components of the HTML script tag’s URL. Also, everything is supposed to be URI encoded. If we were to fix this code, it would look like this:
<script type="text/javascript"><br />
    var partition = encodeURI(encodeURI('{{ partition }}'));<br />
    var guid = encodeURI(encodeURI('{{ guid }}'));</p>
<p>    document.write(decodeURI('%3Cscript%20src="' +<br />
        (document.location.protocol === 'https:' ?<br />
            'https://example.com/' + partition + '/path/' + guid + '.js' :<br />
            'http://example.com/' + partition + '/path/' + guid + '.js') + '"%20type="text/javascript"%3E%3C/script%3E'));<br />
</script>
What we’ve done is double-encoded the variables. This is necessary because the entire script is passed through the decodeURI function. However, we need a URI-encoded string to safely pass it to the script’s URL.