When you want to track the performance of blog authors and categories on your website, you can set up advanced tracking in Piwik PRO. In this article, we’ll guide you through the process.
Find CSS attributes for author and category
First, note down the CSS attributes for both authors and categories on your blog. This will help you identify authors and categories during tracking.
To find CSS attributes, follow these steps:
1. Open your blog.
2. Right-click on the blog author and click Inspect or Inspect element, depending on the browser you’re using.
3. Look for the author’s ID or class among the lines of code. The code might look something like this: <span class="author">Jane Doe</span>
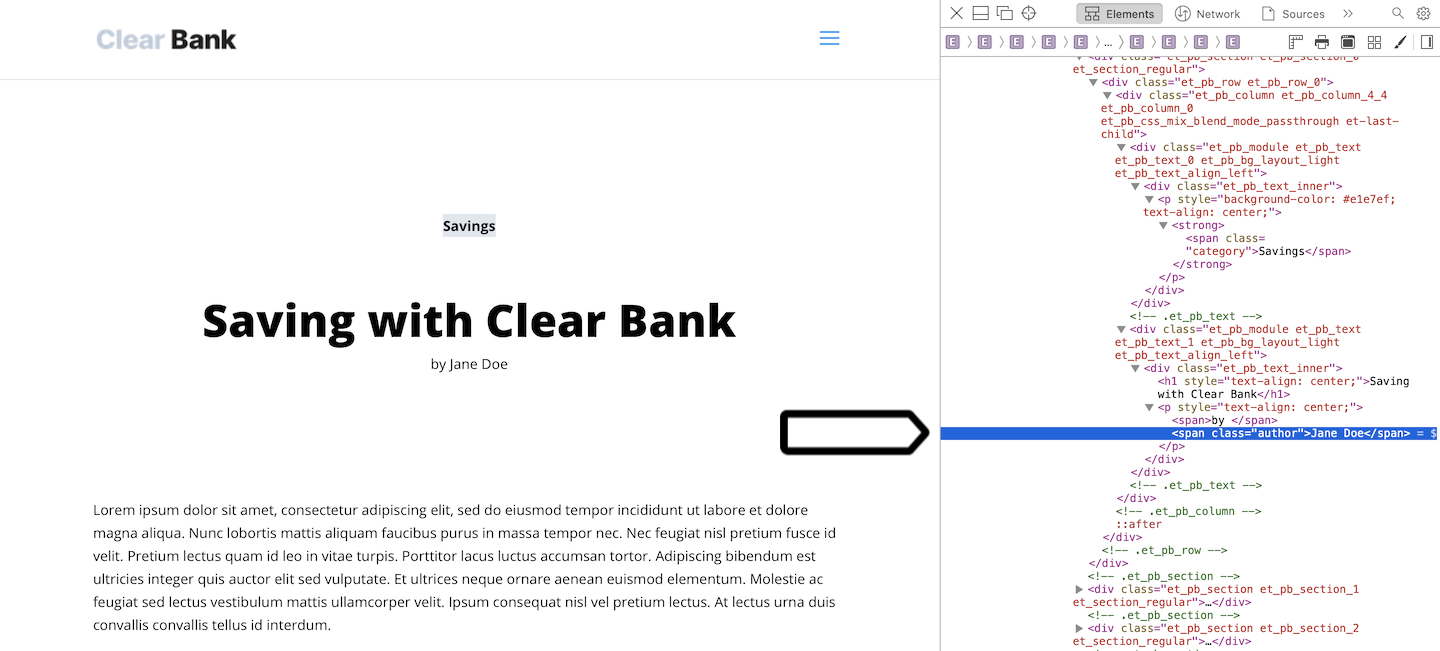
4. Follow steps 1–3 to find the blog category ID or class. The code might look something like this: <span class="category">Savings</span>
Add a variable in Tag Manager
In the next step, you’ll need to create a variable to get author or category data from CSS elements.
To add a variable, follow these steps:
1. Go to Menu > Tag Manager.
2. Navigate to Variables.
3. Click Add a variable.
4. Name the variable.
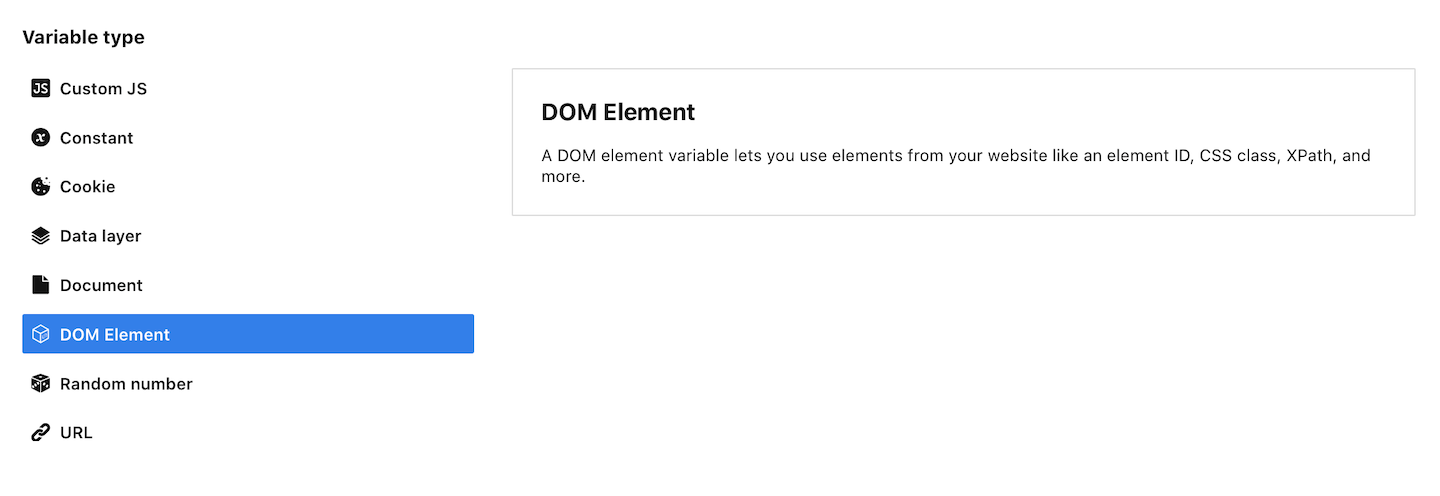
5. Select the following variable type: DOM element.
6. In Variable settings, set Element ID or CSS selector. In our example, we’ll use CSS selector.
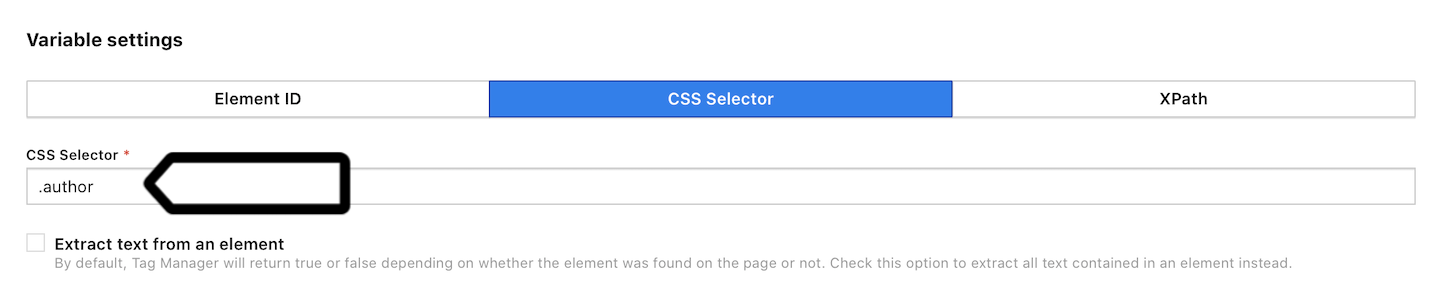
7. Check Extract text from an element. This option will get the author name or category name.
8. Click Save.
9. Repeat steps 1–8 to set a variable for a category.
Add a custom dimension in Analytics
In the following step, you’ll need to add two custom dimensions. They will store information about a blog author and category.
To create a custom dimension, follow these steps:
1. Go to Menu > Analytics.
2. Navigate to Settings.
3. On the left, click Custom dimensions.
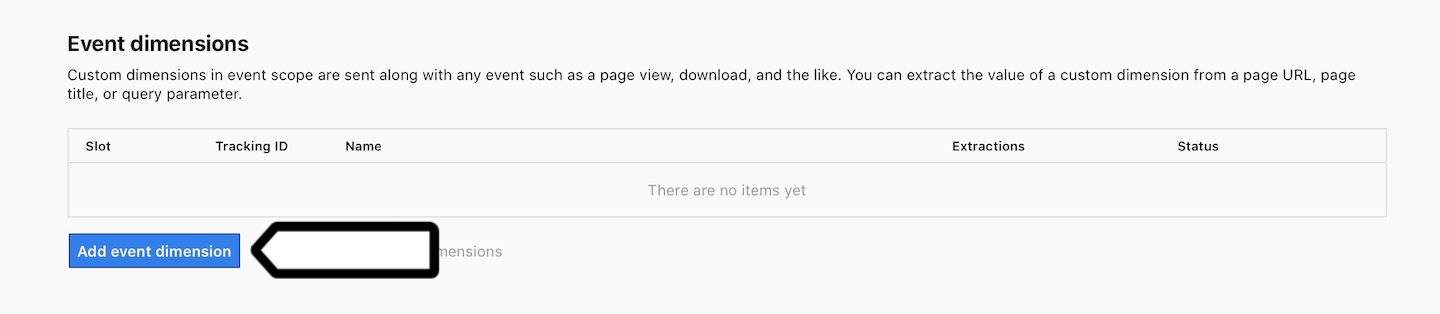
4. In Event dimensions, click Add an event dimension.
5. Name the dimension.
6. Click Save.
7. After creating the custom dimension, note its name or ID.
8. Repeat steps 1–7 to set a custom dimension for your blog category.
Modify the tracking code in Tag Manager
As the last step, you’ll need to modify the tracking code so that it tracks your new custom dimensions.
To modify the tracking code, follow these steps:
1. Go to Menu > Tag Manager.
2. Navigate to Tags.
3. On the left, click Piwik PRO. This is the tag with the tracking code.
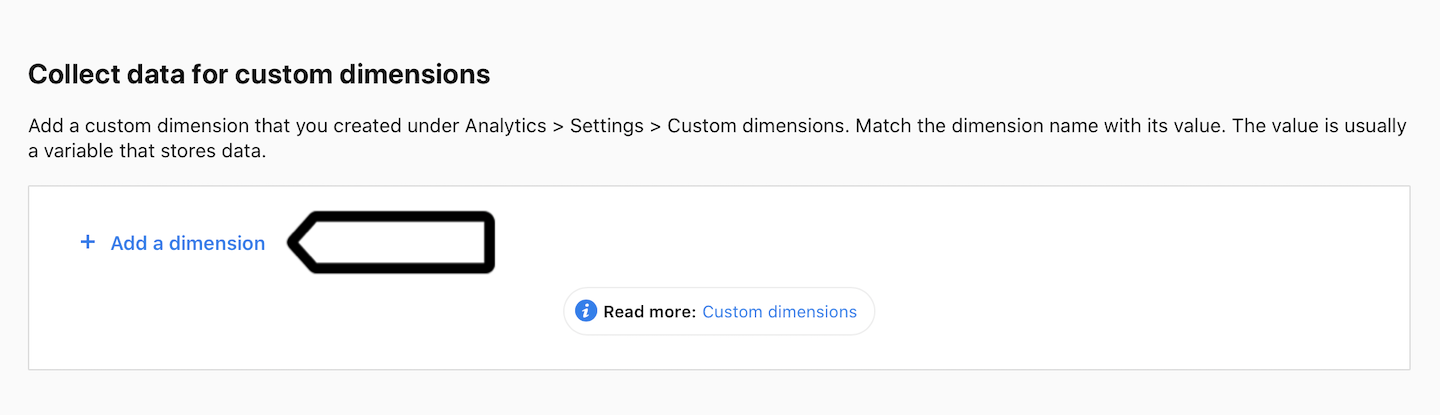
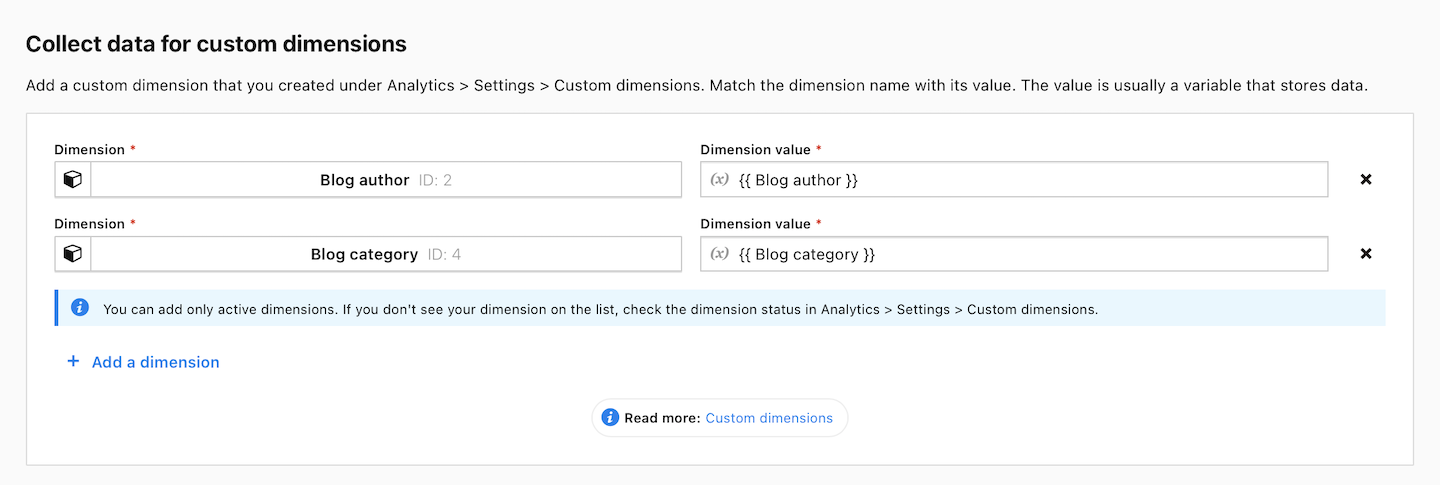
4. In Collect data for custom dimensions, click + Add a dimension.
5. In Dimension, choose your dimension. In Dimension value, type the value.
6. Scroll down to the bottom and click Save.
7. Click Publish.
Note: You can also use a custom dimension tag to set up more custom tracking for your dimension.
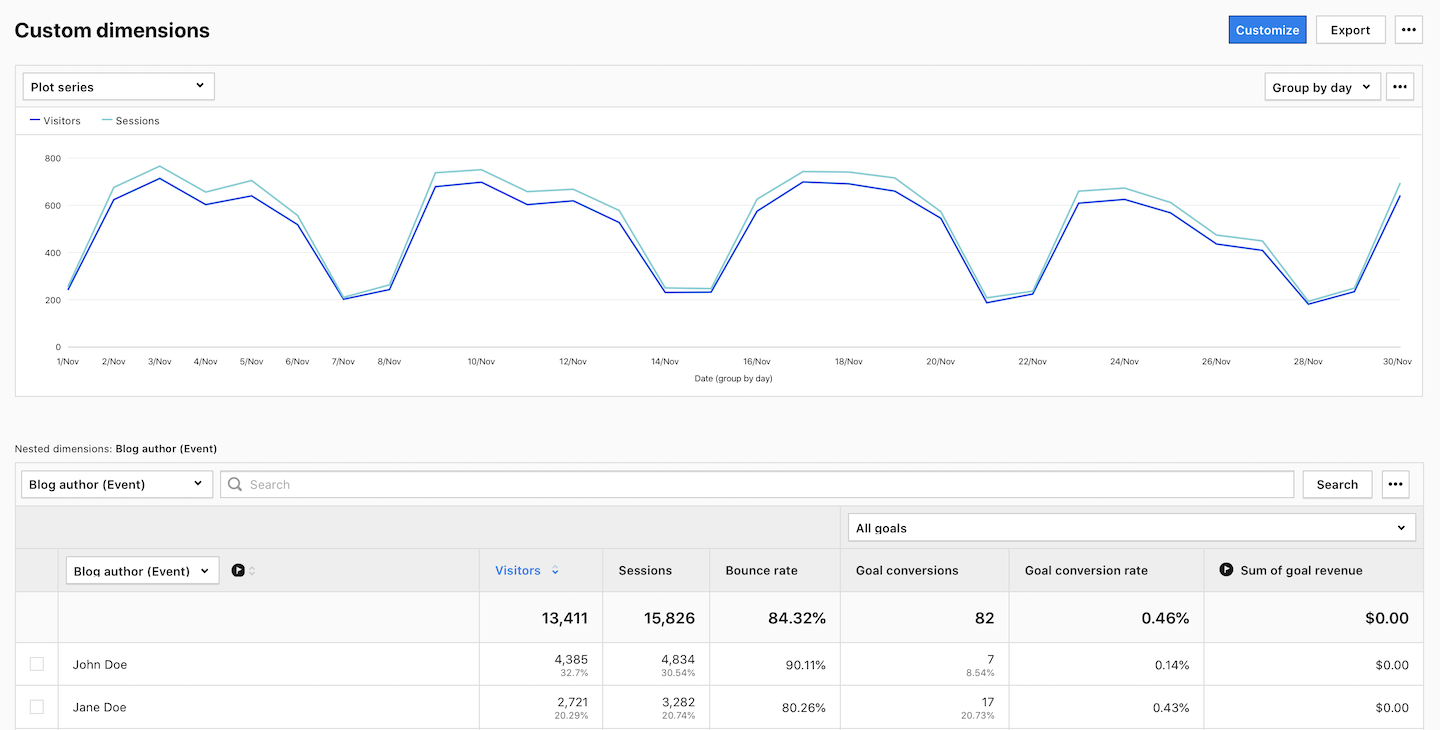
8. All done! After a while, collected data will appear in Menu > Analytics > Reports > Custom dimensions.