A custom dimension tag allows you to collect custom dimension values. It’s used for session and event custom dimensions. Before setting it up, remember to create a custom dimension in Analytics > Settings > Custom dimensions and set up a variable to capture the desired value for the custom dimension.
To set up the custom dimension tag, follow these steps:
1. Go to Menu > Tag Manager.
2. Navigate to Tags.
3. Click Add a tag.
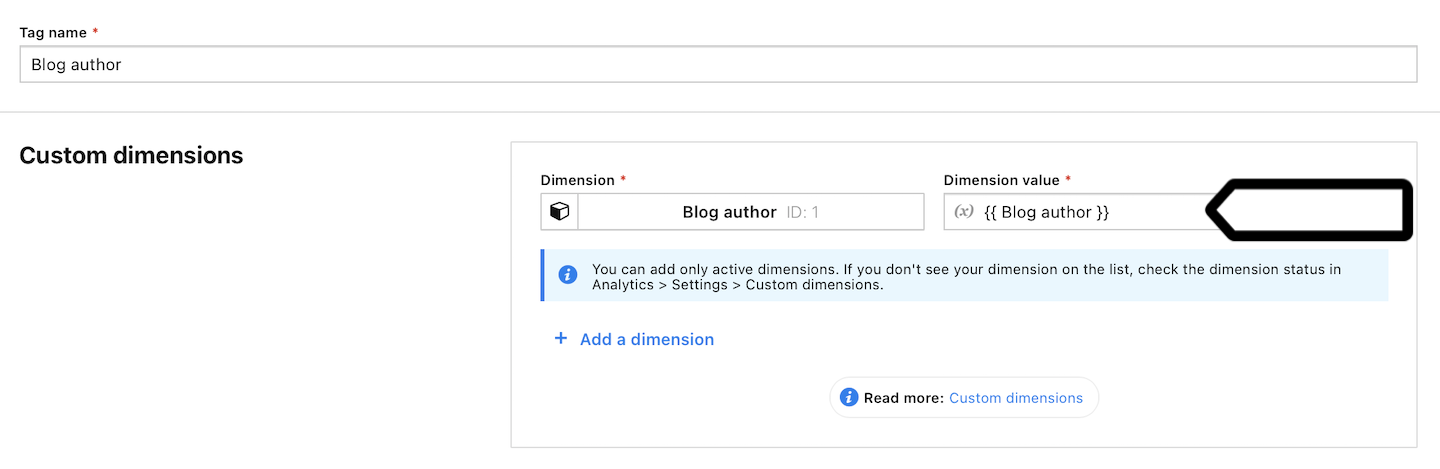
4. Name your tag and select the following type: Custom dimension.
5. Click Next.
6. Add the custom dimension set in Analytics> Settings> Custom dimensions and assign a value to it.
7. In Advanced tag settings, choose Consent type. Set it up if you use a consent form on your site. This tag will only fire for visitors who accept the selected consent type.
8. Respect opt-out and DNT is turned off by default. Turn it on, if you want to respect visitors who’ve turned on the Do-Not-Track feature in their browsers or who’ve opted out of tracking using our opt-out form.
9. In Flight dates, set the date and time when the tag will fire.
10. In Tag triggers, click Add a trigger or Choose existing trigger to set up a trigger for your tag.
11. Click Save.
Note: If you decide to track event dimensions with this tag, you need to run it before the tracking code (Piwik PRO tag). This is because this tag needs to send data before a page view is tracked. Read how to set tag priority.
12. Test your tag in debug mode.
13. When you’re happy with how the tag works, click Publish.
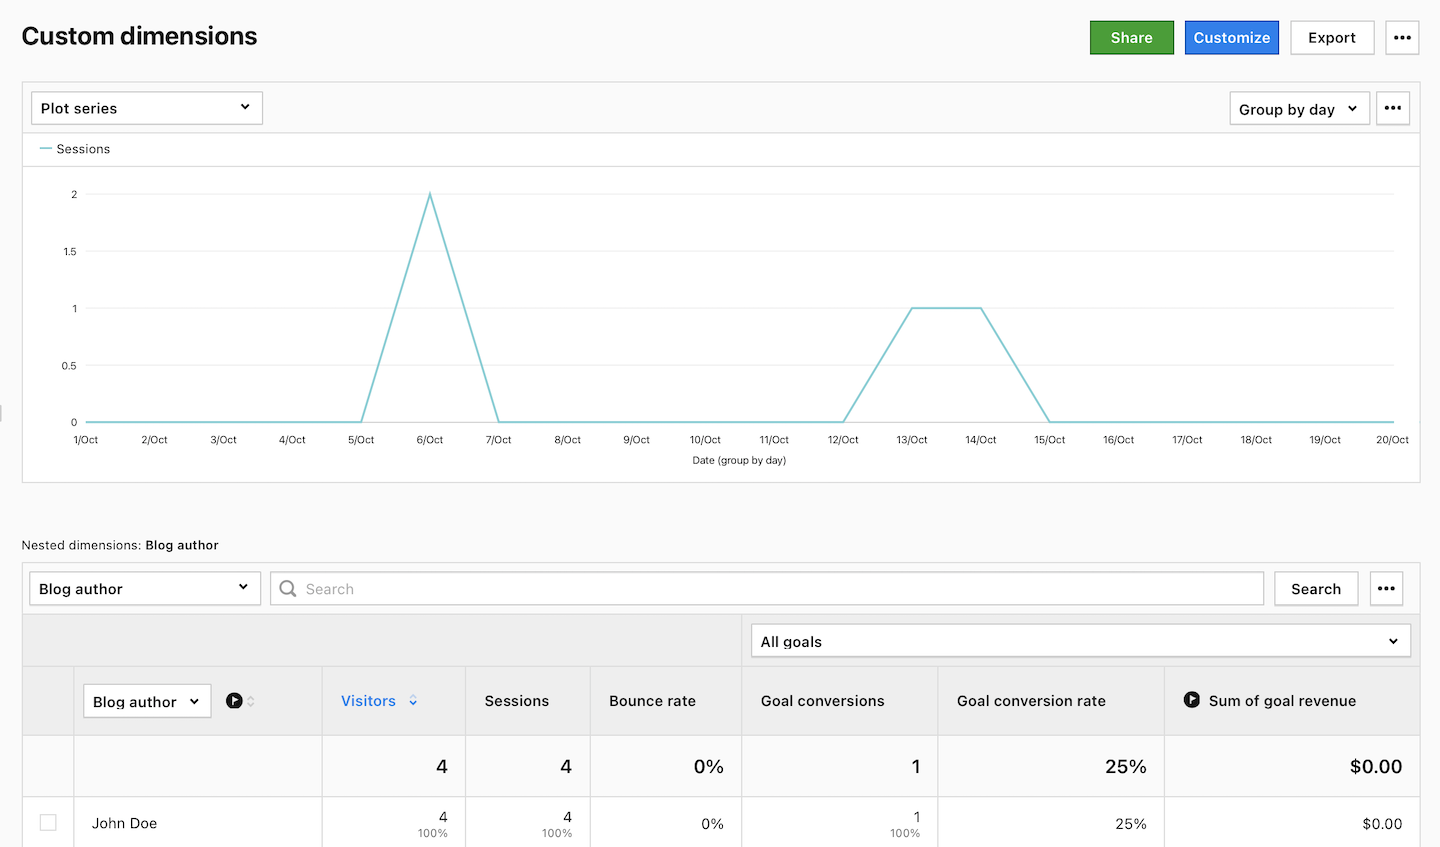
14. Done! After a while, data will be collected and you’ll see it in Menu > Analytics > Reports > Custom dimensions.