A custom dimension is an extra dimension that you can make to collect and analyze data. It can be used for various purposes, such as capturing information about visitors, like their job or age; details about your website, like the blog category or author of a post; or specifics about products in your online store, like color or size.
Custom dimensions can store text, whole numbers, or decimal numbers. Numeric values can be displayed as regular numbers, time values, or percentages. For percentages, send the value as a decimal, for example, send 0.2 for 20%. In reports, Piwik PRO will display it as 20%.
If a custom dimension stores a whole number or a decimal number, you can also use it as a metric. This lets reports calculate values such as the minimum, maximum, median, average, or total.
Custom dimensions can belong to three different scopes:
- Session scope: This scope is related to the entire visit and it retains the captured custom dimension for the entire session. If the value of a custom dimension changes during a session, Piwik PRO will record the last updated value. For example, consider a scenario where a custom dimension for the visitor’s age is created in the session scope. Since the age doesn’t change during the session, this is an appropriate setup. However, if the visitor mistakenly inputs the age as 23 and later during the session corrects it to 32, Piwik PRO will capture the last value, which in this case is the number 32.
- Event scope: This scope is used to track different events like page views or file downloads. It keeps track of specific details for each event. For example, if you want to count how many times a blog author’s page has been viewed, you would use the event scope. If you used the session scope instead, Piwik PRO would replace the previous view count with each new page view, so only the last recorded count would be kept at the end of the visit.
Available from 17.7.0Product scope: This scope is related to products tracked by ecommerce events such as “add to cart,” “order” and the like in your online store. If your store uses a data layer for tracking, you can easily use tracking IDs from the data layer as dimension IDs for these custom dimensions.
Note: Product dimensions are only available if you turn on ecommerce in Administration > Sites & apps > Reports.
In this article, we’ll show you how to create a custom dimension.
Before you start
Here are some things to know before you begin this process:
- You need owner or manage permissions to create a custom dimension.
- The custom dimension value can be up to 1024 characters long.
- Available number of slots:
- Session dimension: 200 slots
- Event dimension: 200 slots
- Product dimension: 20 slots
Note: In versions below 16.0.0, there are only 25 slots available for each scope. Additionally, product dimensions are not available in these earlier versions.
- In meta sites/apps, you can map custom dimensions and see combined data in Analytics > Reports > Custom dimensions.
Note: Piwik PRO also supports custom variable key and value for both event and session scope. Unlike custom dimensions, you don’t need to define them in the UI, you just send the key and value directly with an event. For example, to track gender, you can set a session custom variable with key: gender and value female.
Custom variables offer more flexibility in tracking but are harder to analyze, as the UI shows generic names like event custom variable key 1 instead of your key and value. You can use up to 5 custom variables per scope (session and event) in a single event.
For implementation details, see our developer guides.
Create a session custom dimension
To create a session custom dimension, follow these steps:
1. Go to Menu > Analytics.
2. Navigate to Settings.
3. On the left, click Custom dimensions.
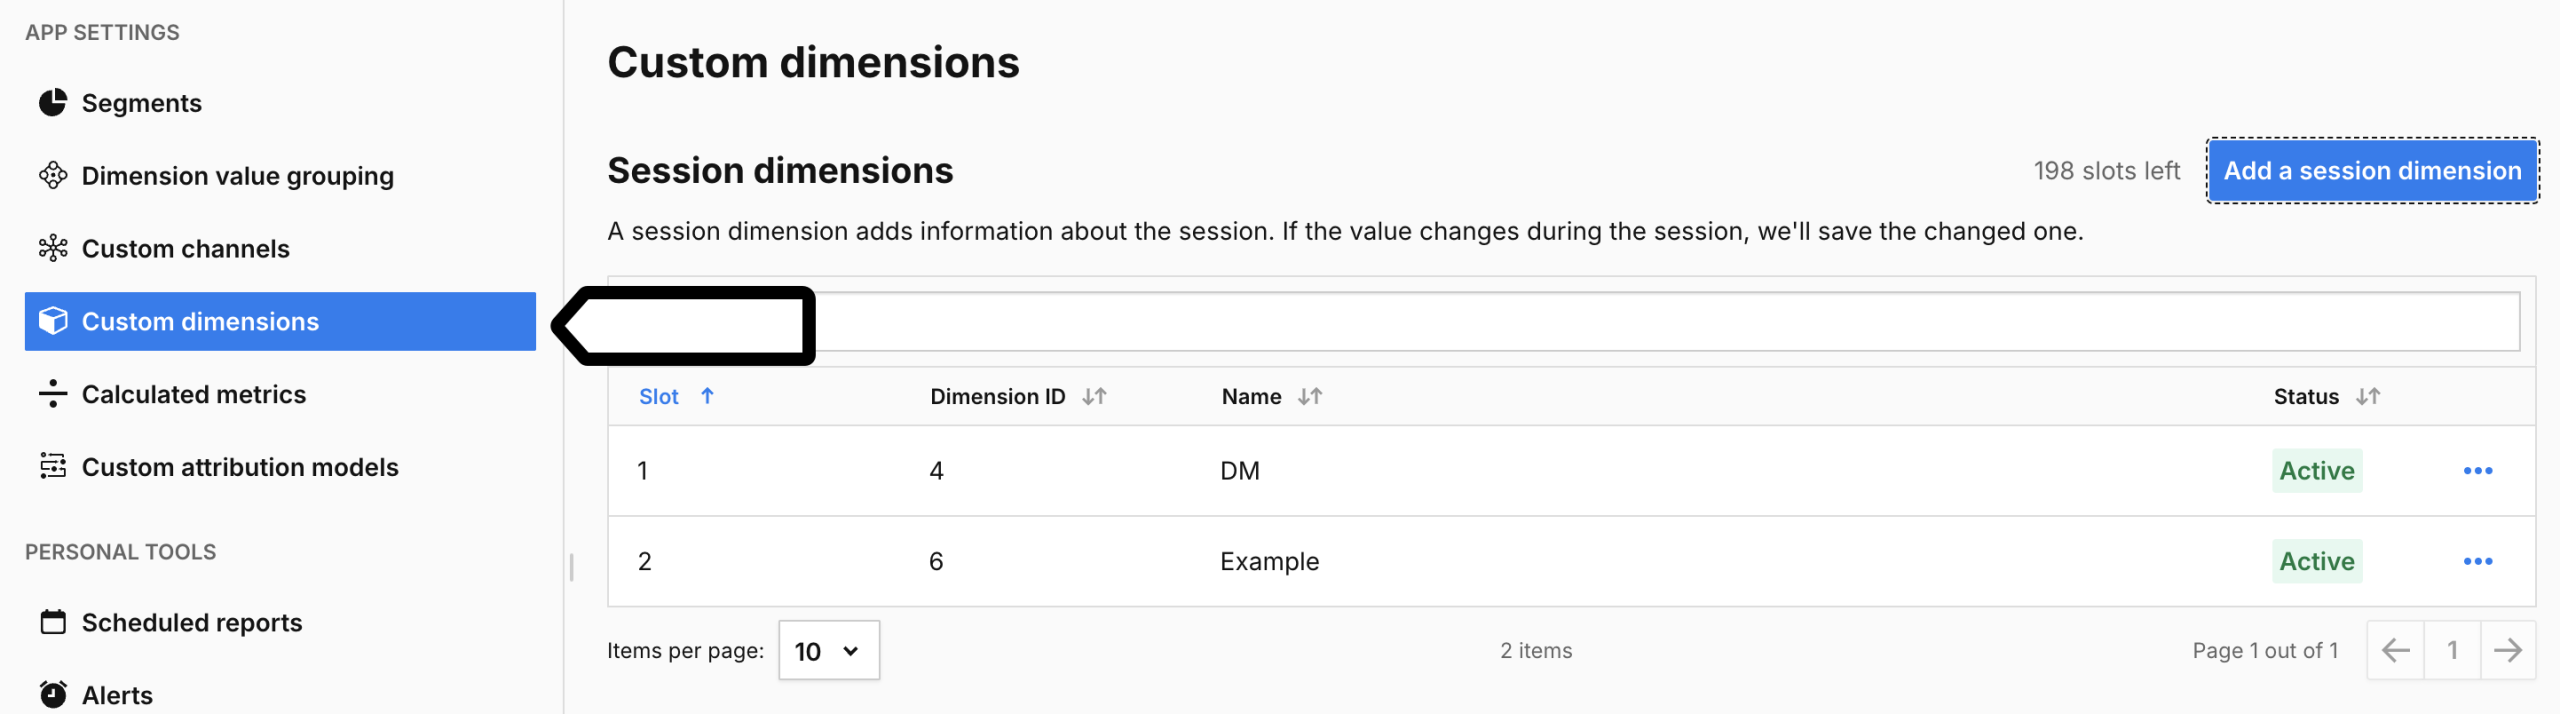
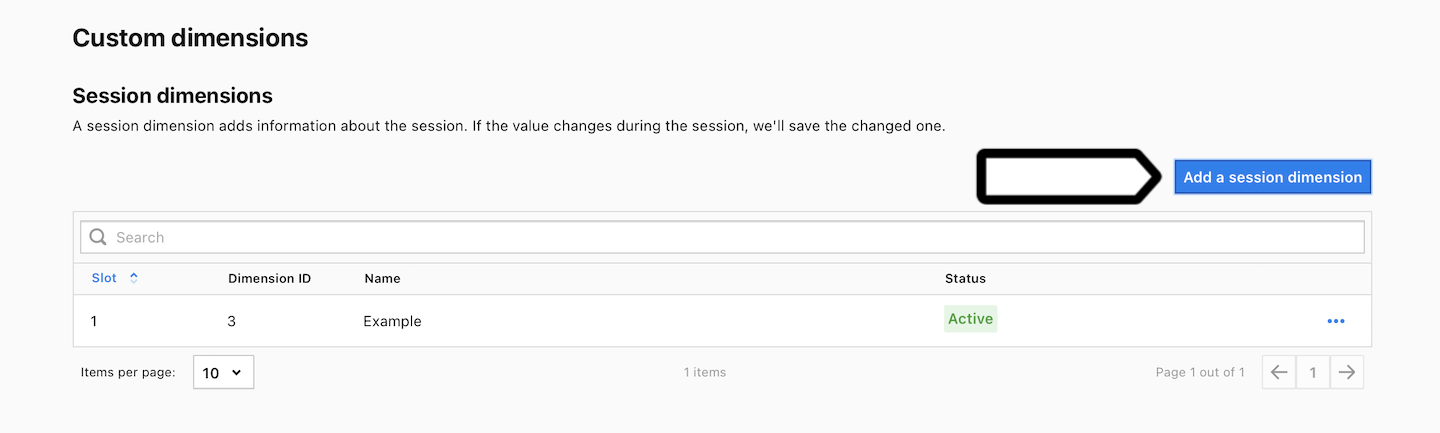
4. Click Add a session dimension.
5. Name the dimension and choose the dimension type.
6. Click Save.
7. Now it’s time to set up dimension values and data collection:
- Tag Manager: Set up a variable and custom dimension tag. Read the next steps.
- For developers: You can manually set values and data collection using the JavaScript tracker API or HTTP tracker API.
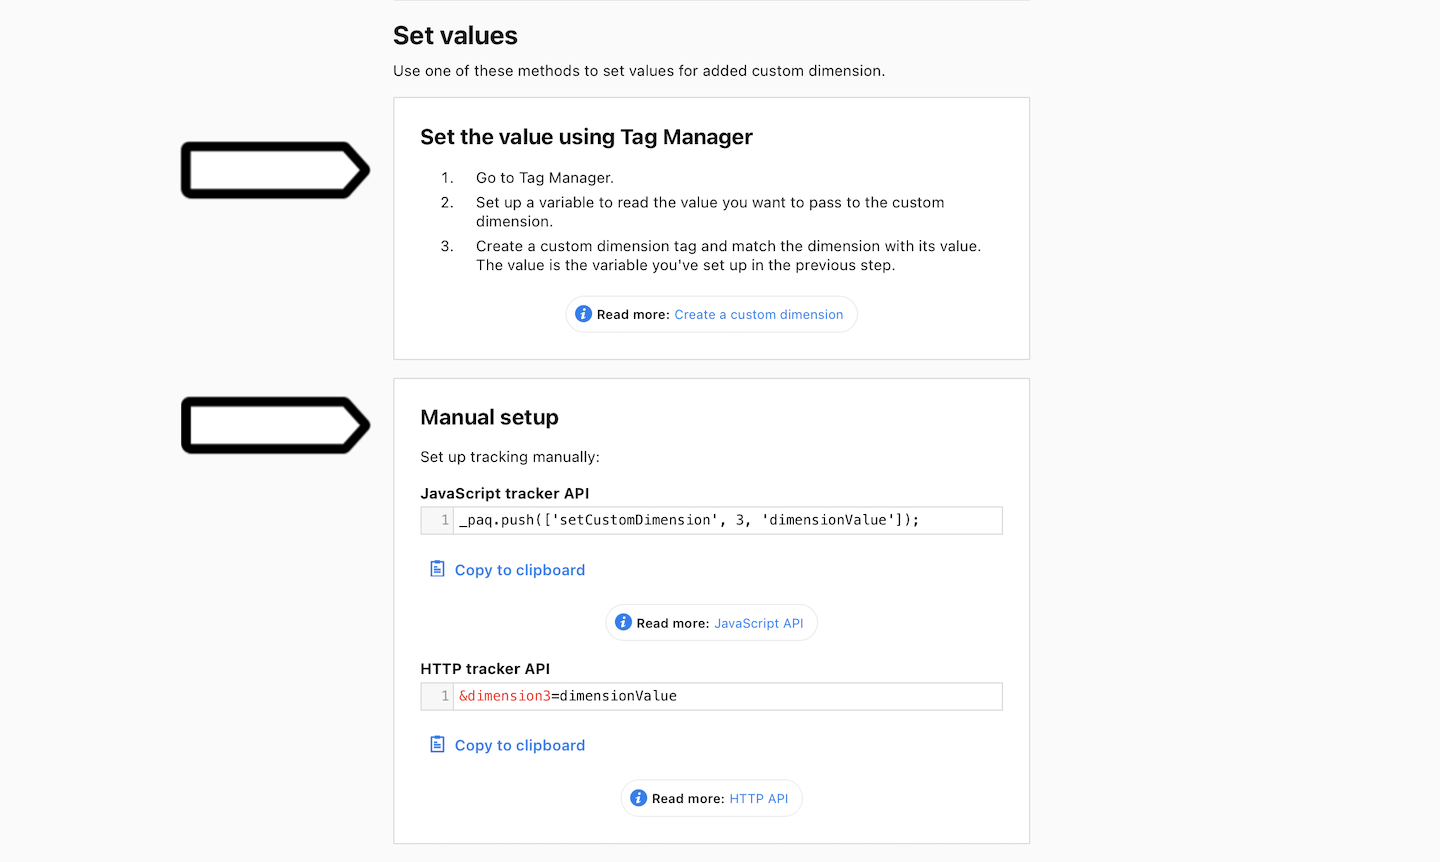
Note: String values can be up to 1024 characters long. Integer and float values should be within the Int32 and Float32 ranges.
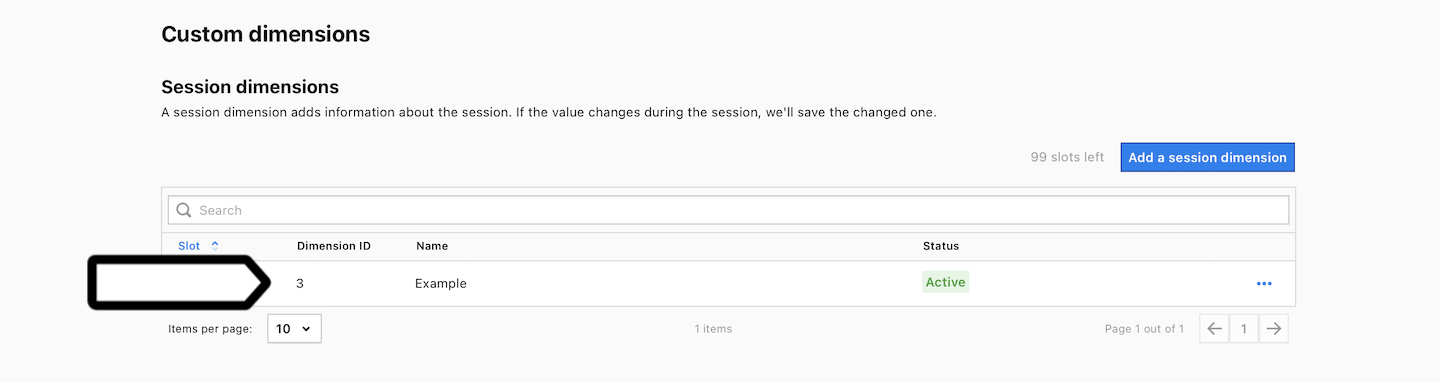
8. Note Dimension name or ID. You’ll need it in the next steps.
9. Go to Menu > Tag Manager.
10. Navigate to Variables.
11. On the left, click Create a variable.
Note: Each site or app has a different construction, so each variable setup will be unique.
12. Name the variable and click Save.
13. Select a variable type.
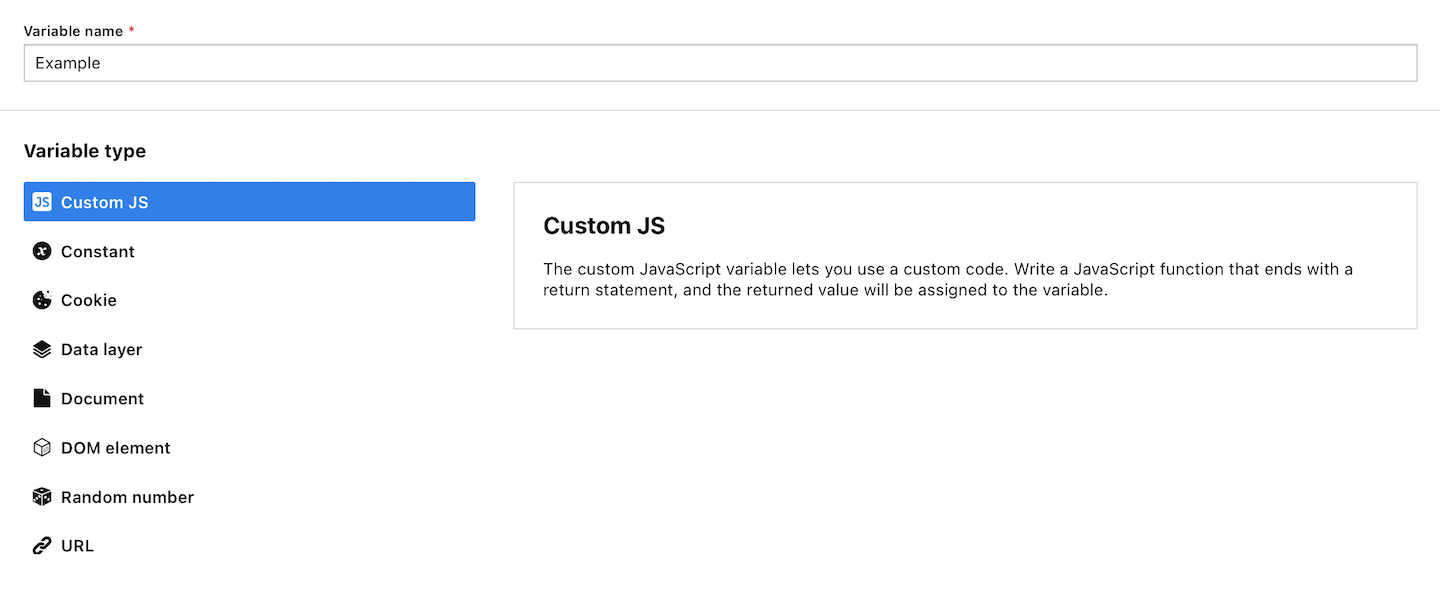
14. Set up the variable.
15. When you’re done, click Save.
16. Navigate to Tags.
17. Click Add a tag.
18. Choose the following type: Custom dimension and click Next.
19. Name your tag.
20. In Dimension, choose your dimension. You created it in step 6.
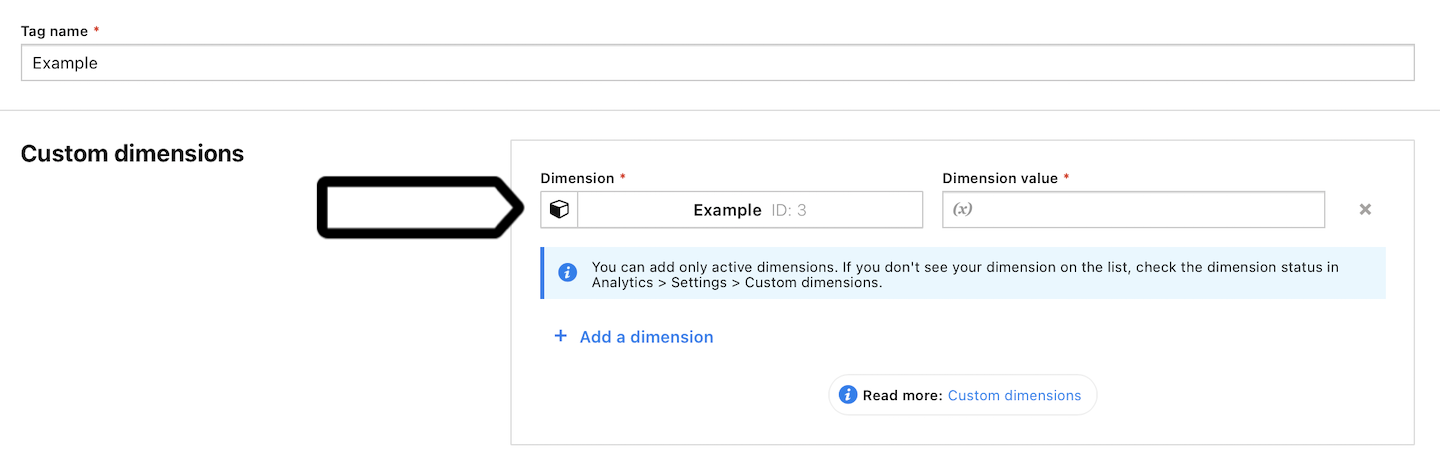
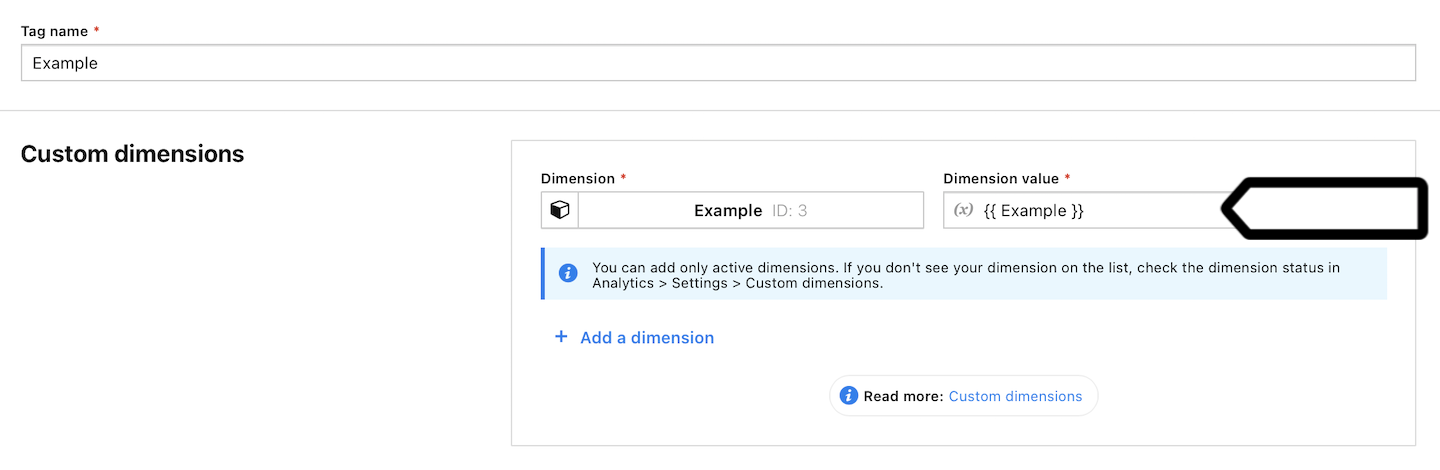
21. In Dimension value, type the value. This is the variable you created in steps 9–15.
22. In Advanced tag settings, choose Consent type. Set it up if you use a consent form on your site. This tag will only fire for visitors who accept the selected consent type.
23. Respect opt-out and DNT is turned off by default. Turn it on, if you want to respect visitors who set Do-Not-Track in their browsers, or visitors who opt out of tracking using our opt-out form.
24. Adjust trigger conditions.
25. When you’re done, click Save to save the trigger.
26. Click Save to save the tag.
27. Test your tag in debug mode.
28. When you’re happy with how the tag works, click Publish.
29. All done! Your data will now be collected and visible under Menu > Analytics > Reports > Custom dimensions.
Create an event custom dimension
To create an event custom dimension, follow these steps:
1. Go to Menu > Analytics.
2. Navigate to Settings.
3. On the left, click Custom dimensions.
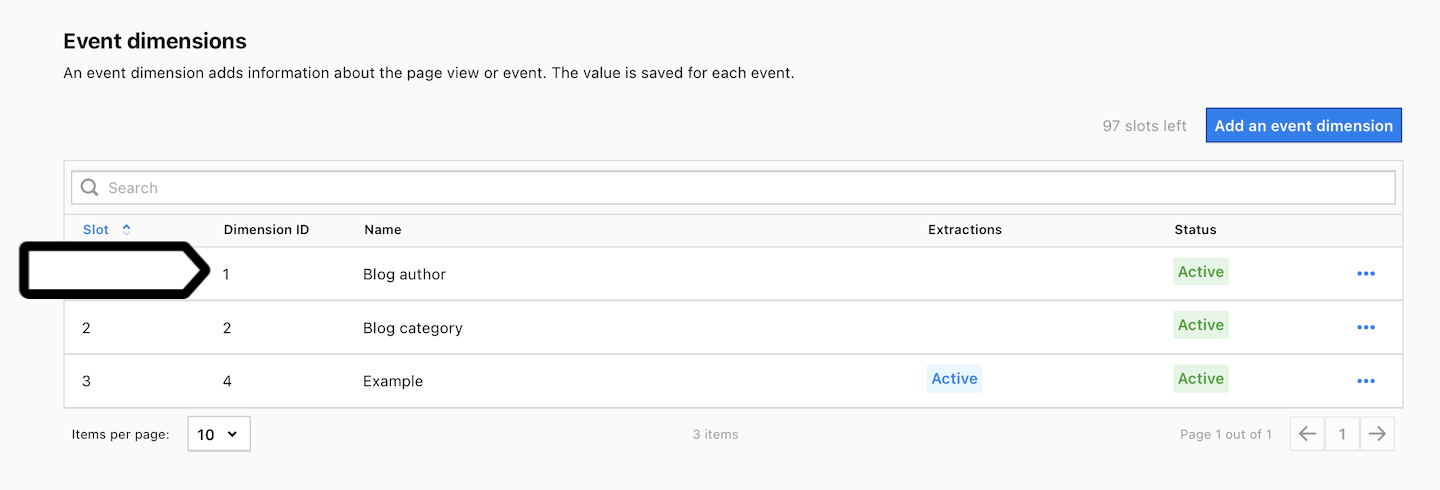
4. Click Add an event dimension.

5. Name the dimension and choose the dimension type.
6. Click Save.
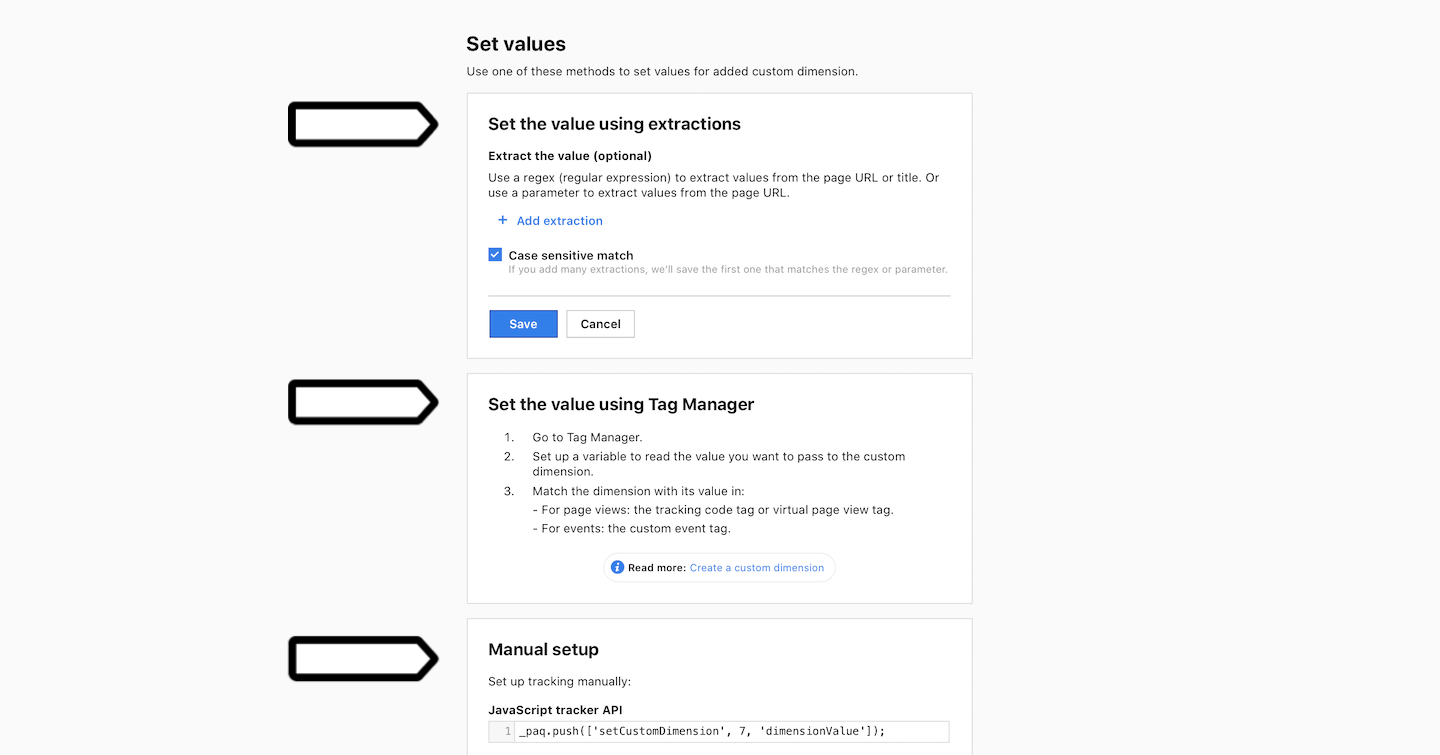
7. Now it’s time to set up dimension values and data collection:
- Extractions: Use a regex (regular expression) to extract values from the page URL or title. Or use a parameter to extract values from the page URL.
- Tag Manager: Set up a variable and custom dimension tag. Read the next steps if you use this method.
- For developers: You can manually set values and data collection using the JavaScript tracker API or HTTP tracker API.
Note: String values can be up to 1024 characters long. Integer and float values must be within the Int32 and Float32 ranges.
8. Note Dimension name or ID. You’ll need it in the next steps.
9. Go to Menu > Tag Manager.
10. Navigate to Variables.
11. On the left, click Create a variable.
Note: Each site or app has a different construction, so each variable setup will be unique.
12. Name the variable and click Save.
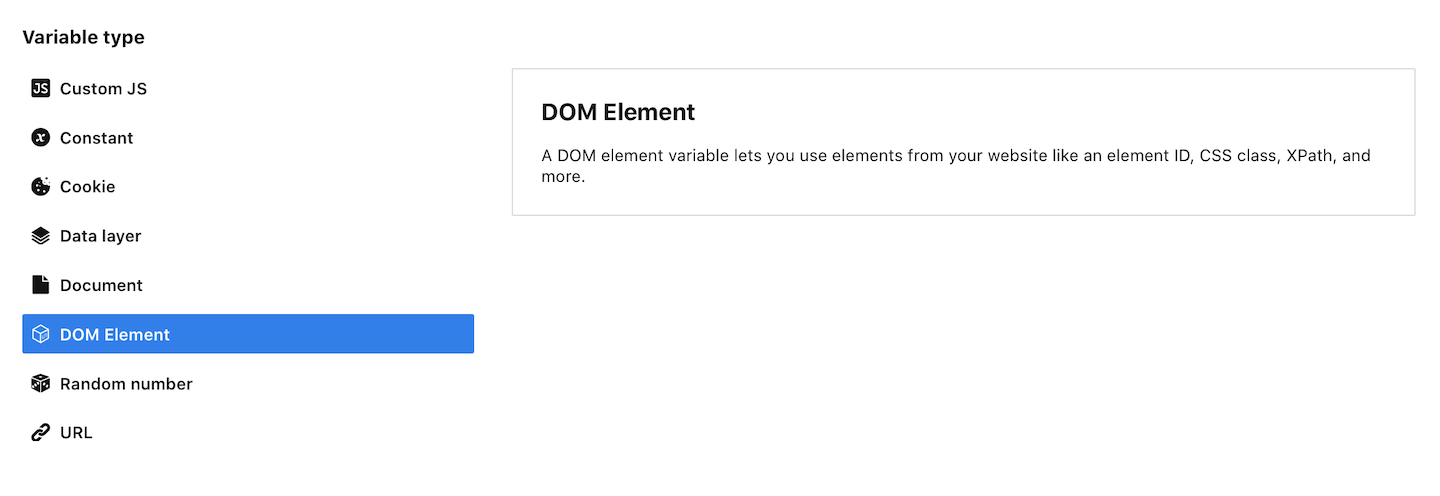
13. Select a variable type. We’ll use DOM element in our example.
14. Set up the variable. In our example, we’ll use the CSS selector and add .author. The .author element relates to the HTML element with the .author class used for the blog author on our website.
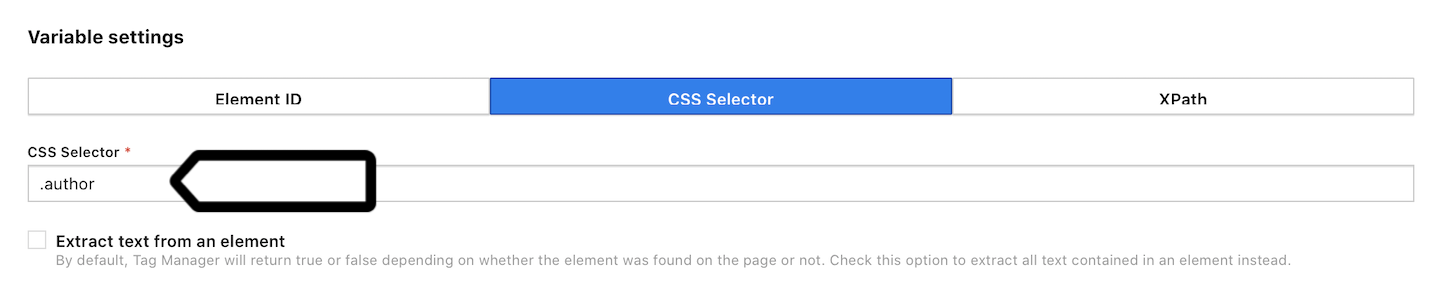
15. When you’re done, click Save.
16. Now we need to match the dimension with its value. You can use the following methods:
- For page views: a tracking code tag (Menu > Tag Manager > Tags > Piwik PRO > Collect data for custom dimensions) or a virtual page view tag (Menu > Tag Manager > Tags > Add a tag > Virtual page view).
- For events: a custom event tag (Menu > Tag Manager > Tags > Add a tag > Custom event).
Note: If you are using an event dimension and tracking it with a custom dimension tag, make sure you run the custom tag before the tracking code (Piwik PRO tag). This is because the custom tag needs to send data before a page view is tracked. Read more
17. When you’re done, test your tag in debug mode.
18. When you’re happy with how the tag works, click Publish.
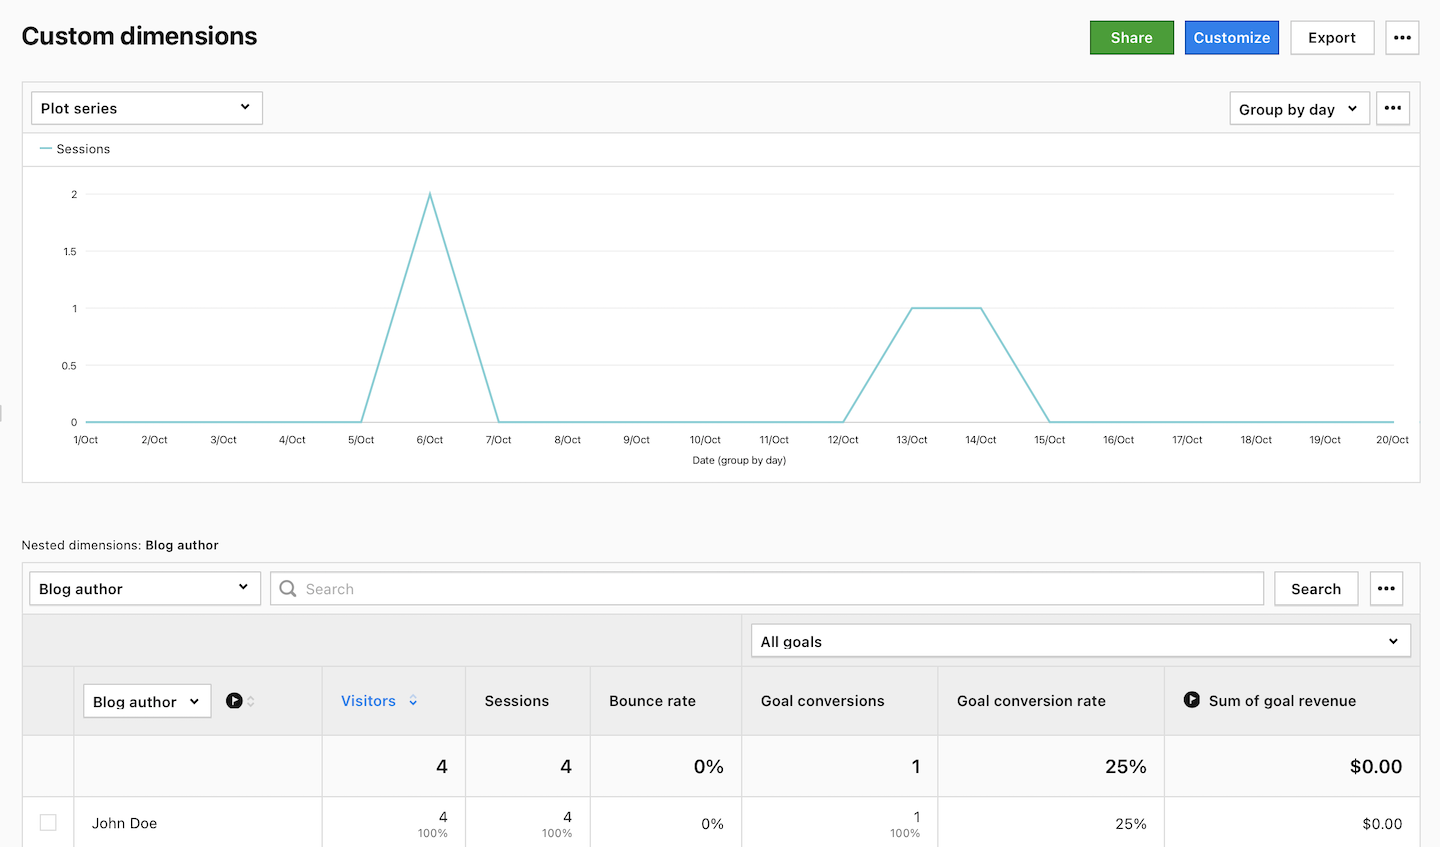
19. Well done! Your data will now be collected and you’ll see it under Menu > Analytics > Reports > Custom dimensions.
Create a product custom dimension
To create a product custom dimension, follow these steps:
1. Go to Menu > Analytics.
2. Navigate to Settings.
3. On the left, click Custom dimensions.
4. Click Add a product dimension.

5. Name the dimension and choose the dimension type.
6. If you want, you can modify Slot/Dimension ID in the 1-20 range.
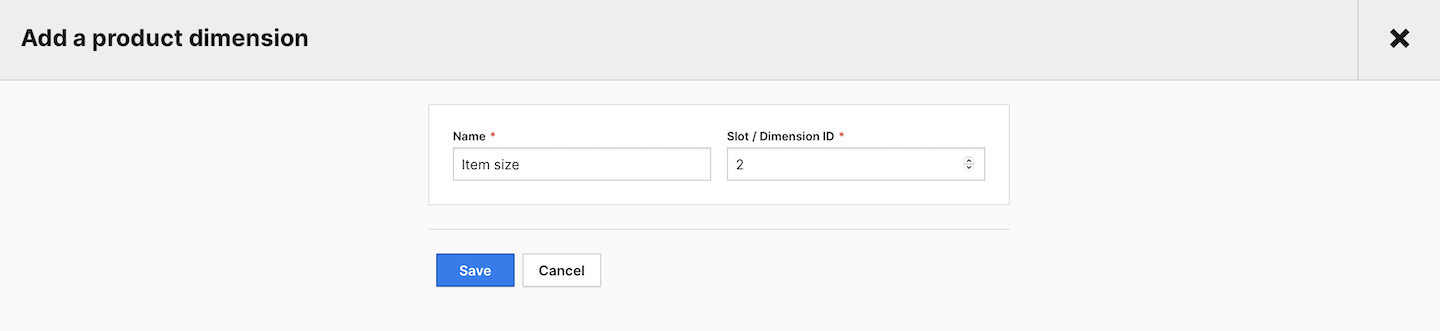
7. Click Save.
8. Note Dimension name or ID. You’ll need it in the next steps.
9. Go to Menu > Tag Manager.
10. Navigate to Tags.
11. Select an existing ecommerce tag or Add a tag using one of the ecommerce tag templates.
12. Click + Add product dimension.

13. In Dimension, choose your dimension from the list. You created it in step 7.

14. In Dimension value, type the value of the dimension key in your data layer.

Example: Suppose you have a dataset structured as follows:
{
“event”: “add_to_cart”,
},
“items”: [
{
“item_id”: “11111”,
“item_name”: “Product name”,
“price”: “30.00”,
“quantity”: 1,
“item_brand”: “Product name brand”,
“item_category”: “Men”,
“item_category2”: “Shoes”,
“item_category3”: “Boots & Trainers”,
“item_category4”: “Boots”,
“item_category5”: “Cowboy boots”,
“item_color”: “red”,
“item_size”: “small”
}
]
}
Let’s say you want to keep track of the size of the item. In this case, you should choose item_size as the dimension value.
Inspector tool: how to check your custom dimension
To see if custom dimension values are being collected, follow these steps
1. Open your website.
2. Open the inspector tool in your browser and go to network requests.
3. Simulate an action that triggers capturing the custom dimension. In our example, that will be visiting a blog post.
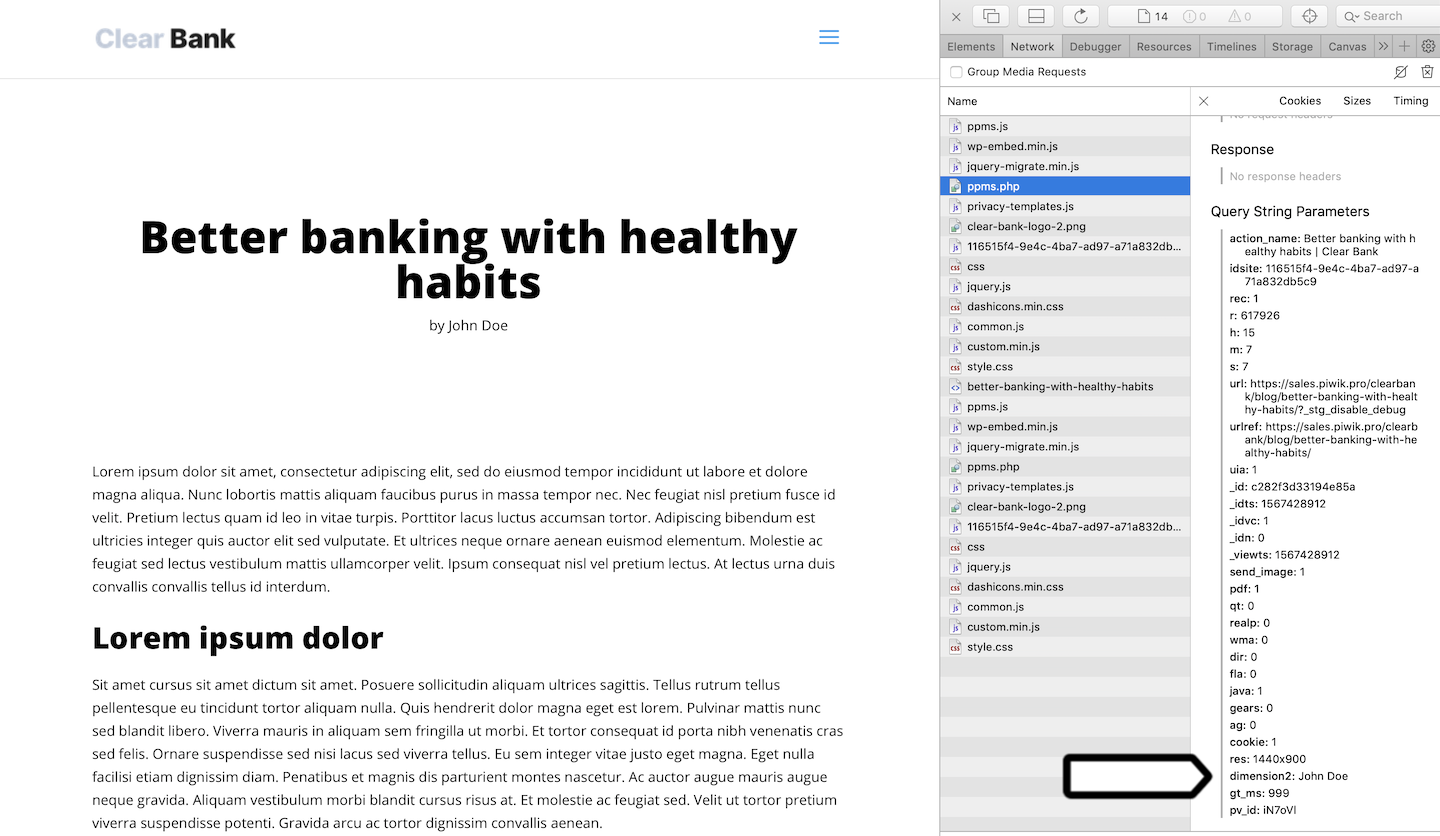
4. Click ppms.php in the list of network requests.
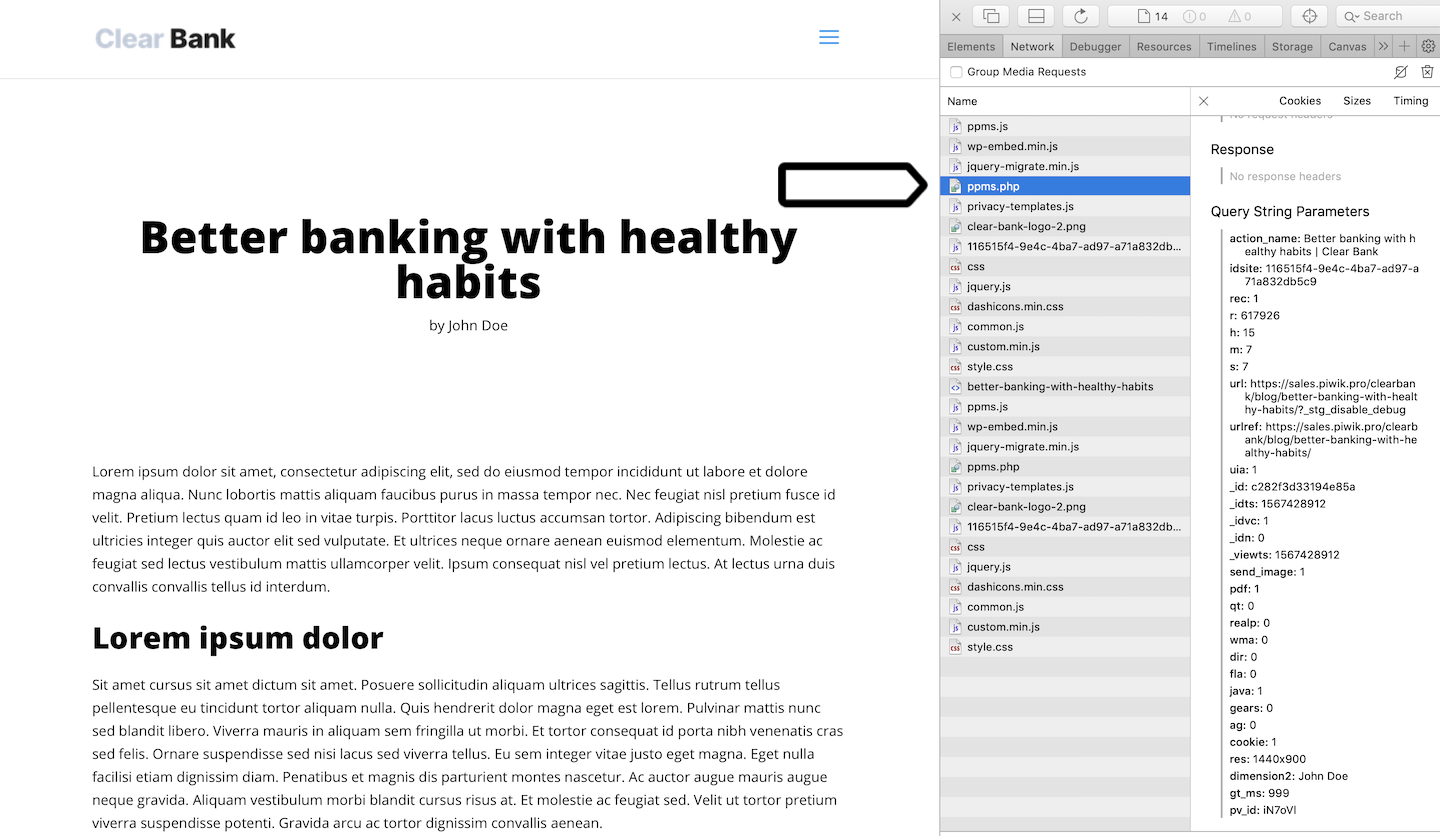
5. In the list of query string parameters, look for the custom dimension. In our case, it is dimension2: John Doe.
Custom reports: how to use custom dimensions
To use custom dimensions in custom reports, follow these steps:
1. Go to Menu > Analytics.
2. Navigate to Custom reports.
3. Click Add a report.
4. Select a report type.
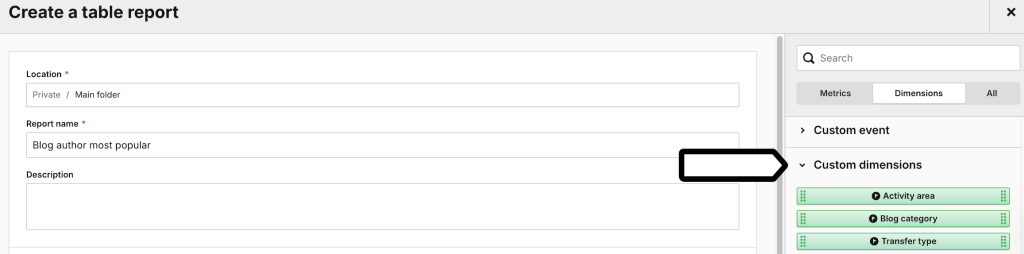
5. Name the report.
6. On the right, click Dimensions.
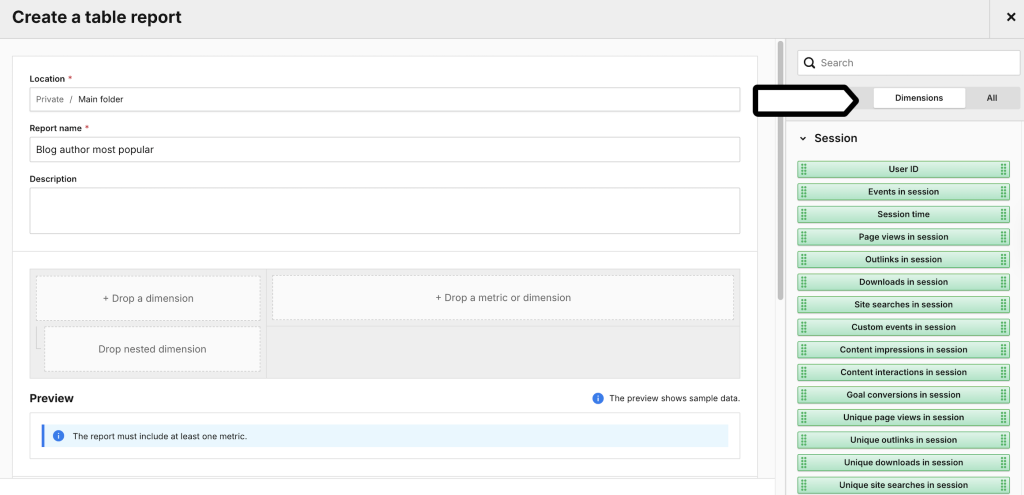
7. Scroll down until you see Custom dimensions.
8. Pick the custom dimension you want to use in your custom report.
9. Set up all conditions and click Create.
10. Done!