In Piwik PRO, you can use and compare the following attribution models: last click, position based, first click, last non-direct click, time decay and linear. However, if they don’t give you the results you’re looking for, you can add a custom model.
In this article, we’ll show you how to add and use such a custom model.
Before you start
Before you start, we’ll walk you through baseline models that serve as the foundation for creating custom models. Here’s a list of these models:
| Baseline model | Description | Settings |
|---|---|---|
| Last click | 100% credit goes to the last touchpoint | You can set touchpoint filters |
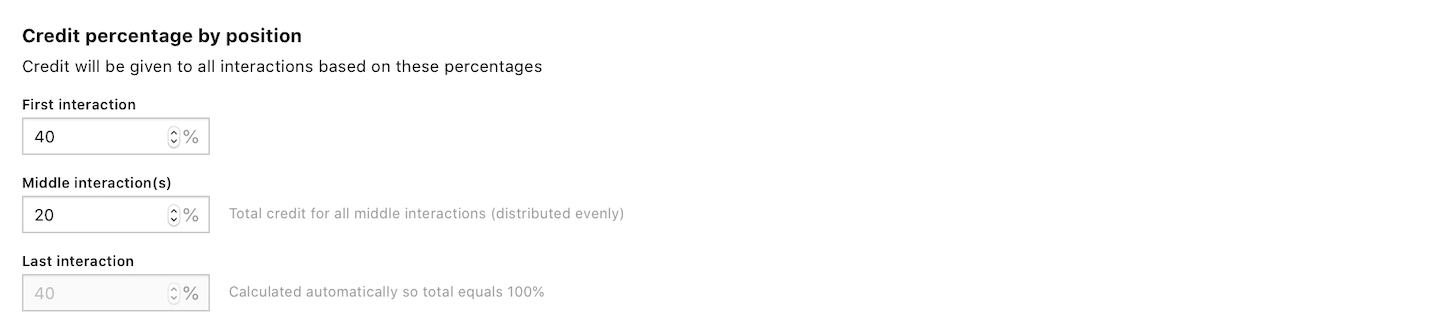
| Position based | The first and last touchpoints get 40% credit each, and the remaining 20% is distributed evenly across the middle touchpoints | You can change credit distribution, link credit to user engagement and set touchpoint filters |
| First click | 100% credit goes to the first touchpoint | You can set touchpoint filters |
| Time decay | The touchpoint closest in time to a sale or conversion receives most of the credit | You can set a half-life period, link credit to user engagement and set touchpoint filters |
| Linear | Each touchpoint in a conversion path receives an equal credit share of the sale or conversion | You can link credit to user engagement and set touchpoint filters |
Add a custom model
To add a custom model, follow these steps:
1. Go to Menu > Analytics.
2. Navigate to Settings.
3. On the left, click Custom attribution models.
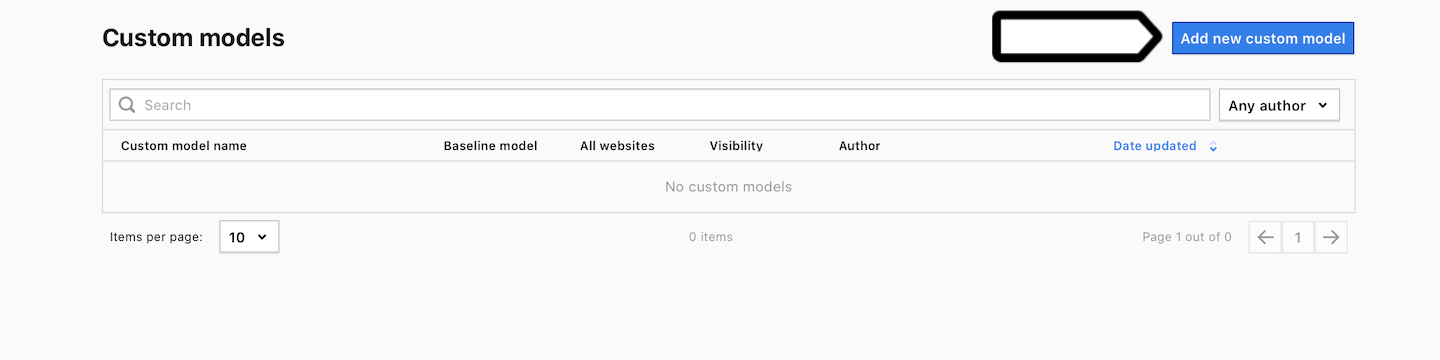
4. Click Add a custom model.
5. Name the model and select a baseline model. Example: Position based.
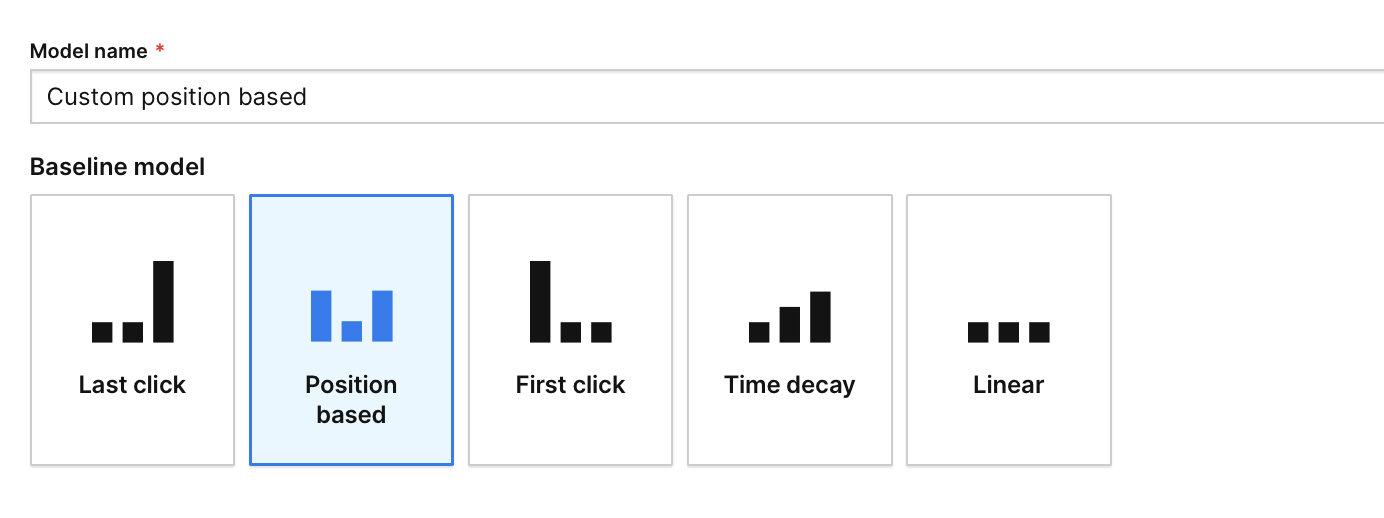
Note: A baseline model is the foundation for creating your own model. Each baseline type gives you different options to customize the model.
6. In Visibility, choose: Author or All users. All users lets you share this dashboard with your teammates.
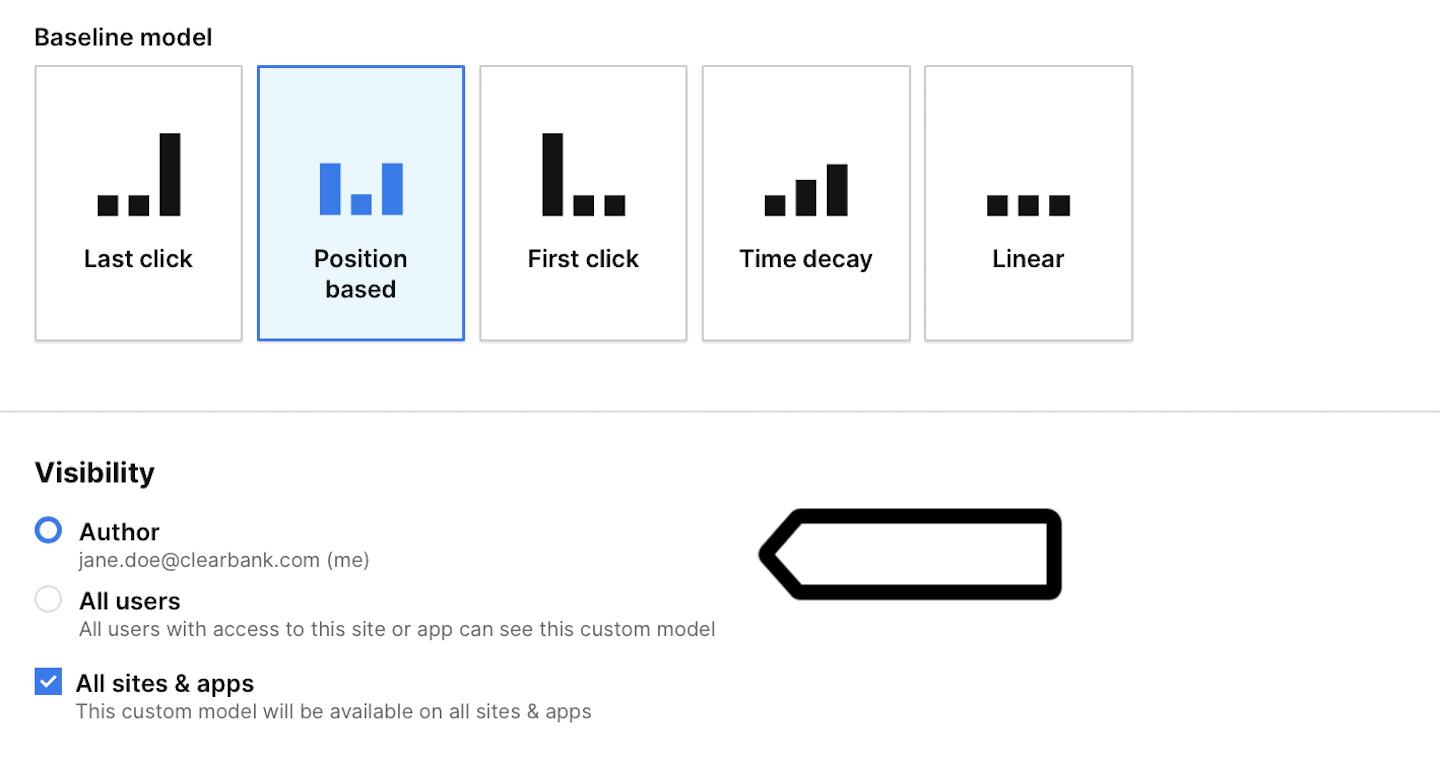
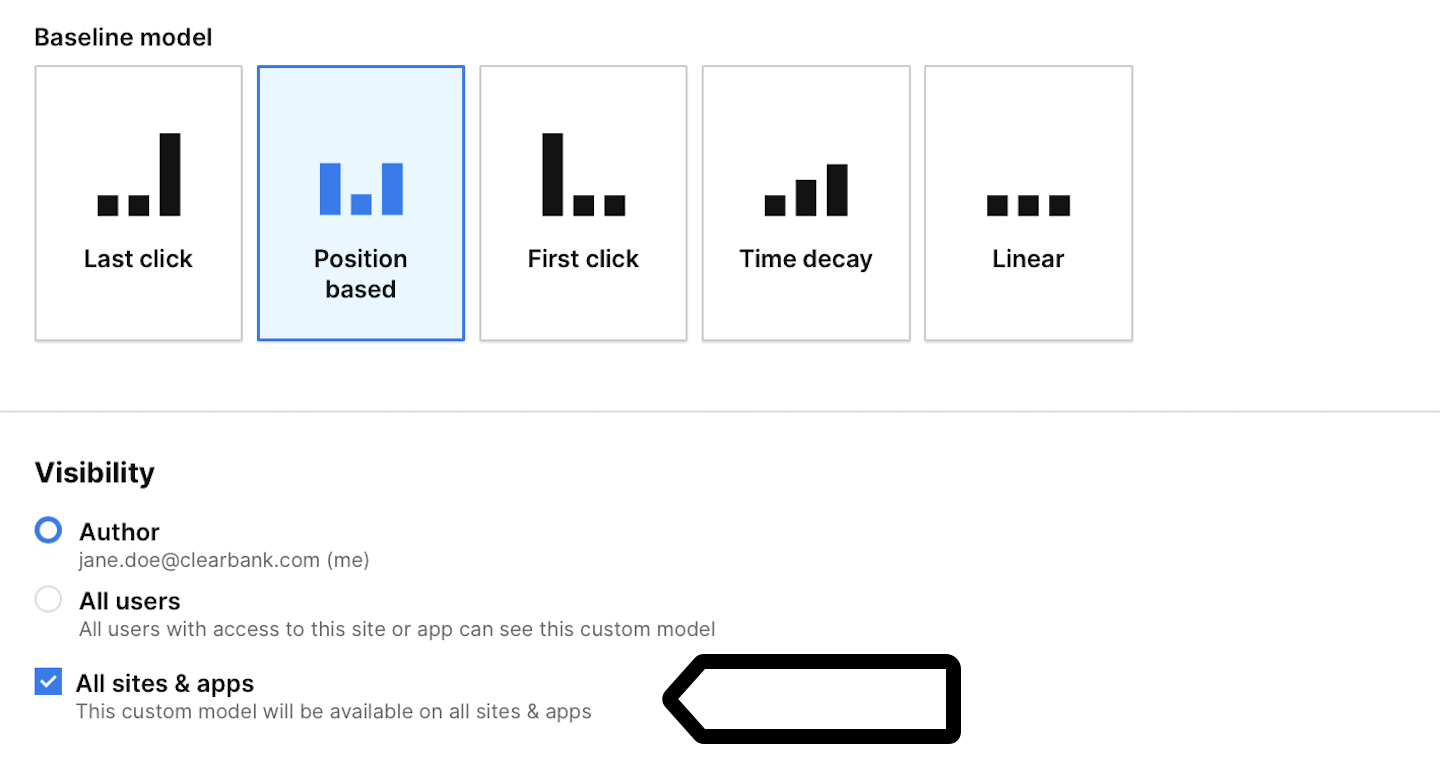
7. (Optional) Check All sites & apps to make this model visible across all sites and apps.
8. Set up your model. For example, in a position-based model, distribute 100% of the credit between interactions to weight them based on their importance.
9. (Optional) In Link credit to user engagement, you can correlate credit distribution with user engagement. The engagement can be based on:
- Session time
- Page views in session.

Note: This option is available in the following models: position based, time decay and linear.
10. (Optional) In Use additional credit rules, set additional conditions.
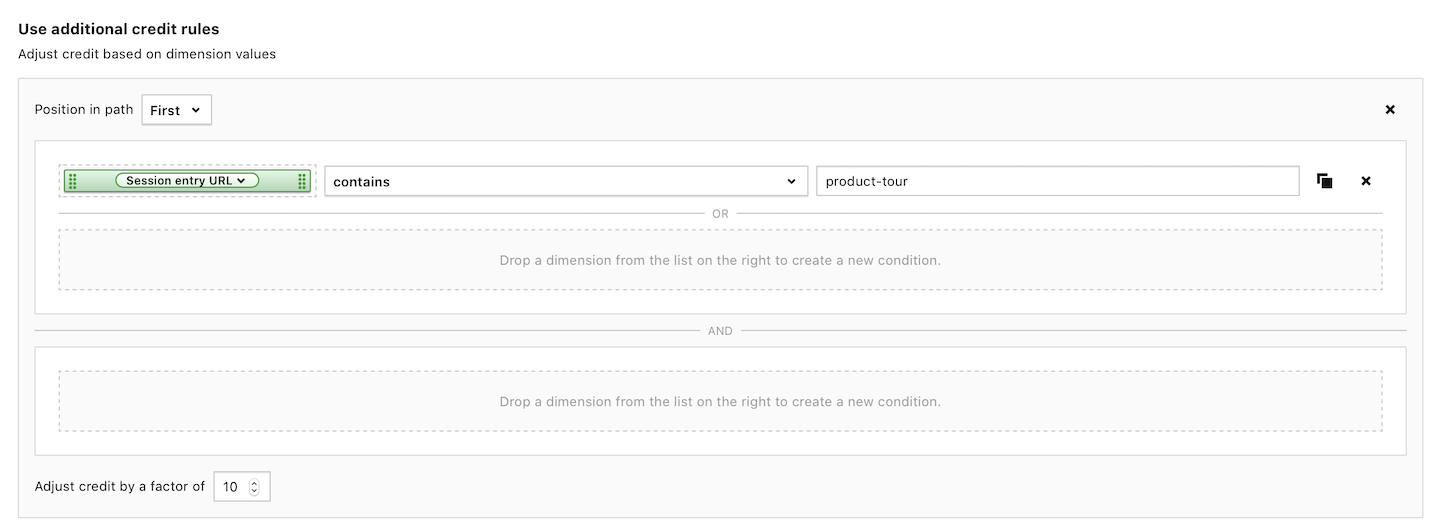
Note: The credit will increase by a selected factor. For example, if you set the factor to 10, the credit will be multiplied by 10.
11. When you’re done, click Save.
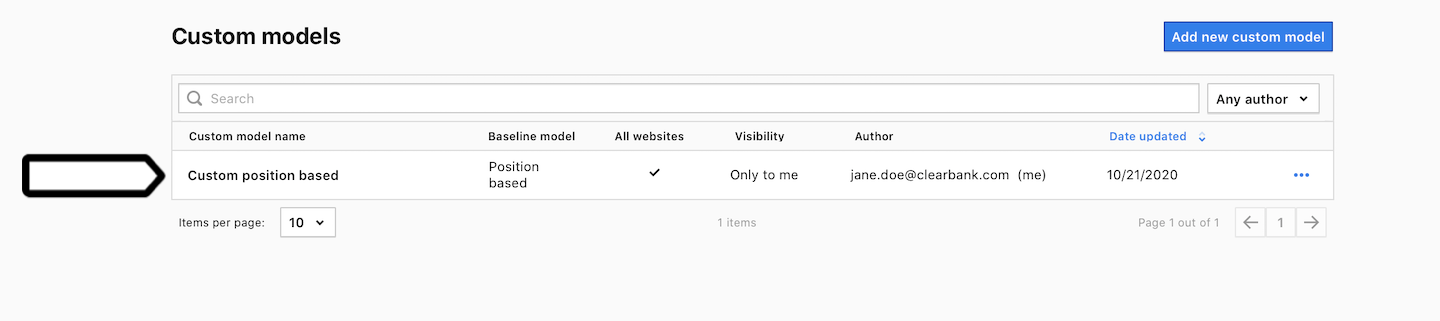
12. Well done! Your new model is now on the list of custom models and can be used in the attribution report and custom attribution report. Keep reading to learn where to find these reports.
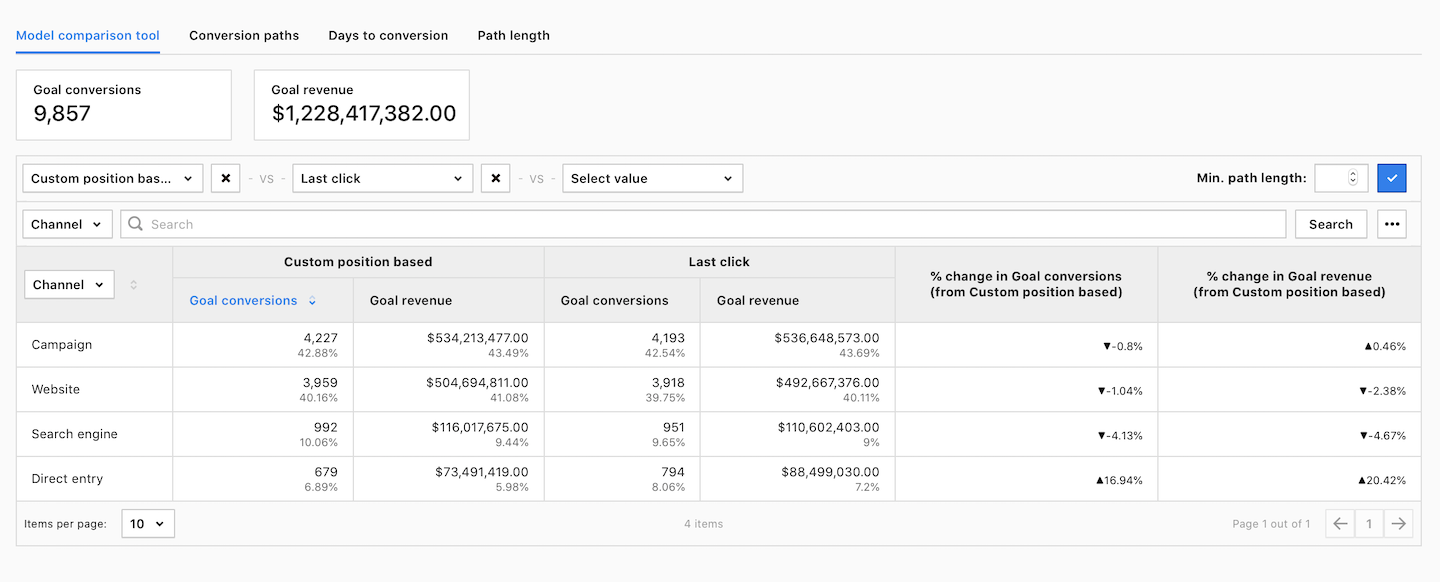
Use a custom model in the attribution report
To use a custom model in the attribution report, follow these steps:
1. Go to Menu > Analytics.
2. Navigate to Reports.
3. On the left, click Attribution.
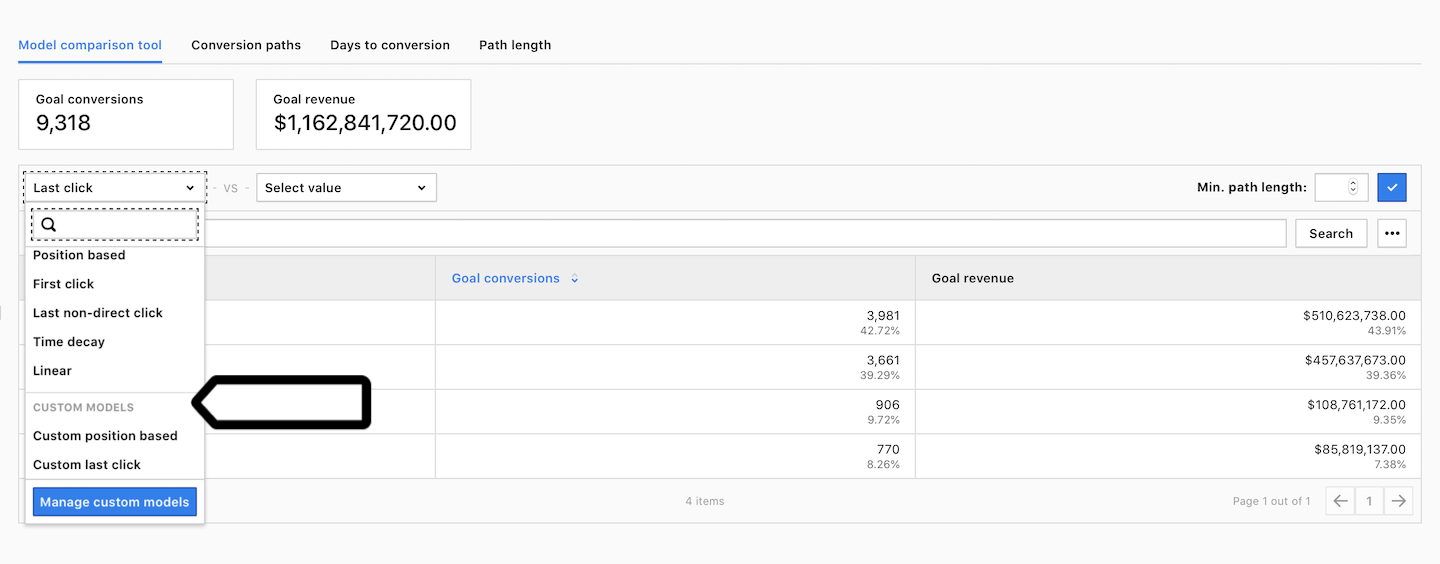
4. Navigate to Model comparison tool.
5. Click on the model picker and choose your custom model from the list.
Note: Custom attribution models are also avaliable in custom reports in Analytics > Custom reports > Attribution.
6. Done! You can now compare your custom model with other models.
Edit, copy and delete a custom model
To edit, copy or delete a custom model, follow these steps:
1. Go to Menu > Analytics.
2. Navigate to Settings.
3. On the left, click Custom attribution models.
4. Pick the model you want to work with.
5. On the right, click the ⋯ three-dot icon.
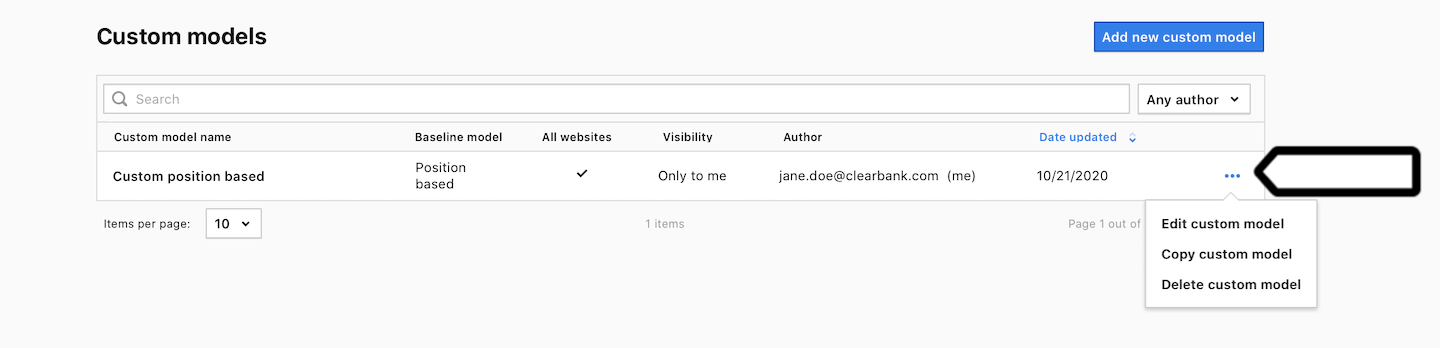
6. Click Edit, Copy or Delete.
7. Follow the steps on the screen.
8. All set!