When collecting data from a mobile device, you can set up visitor recognition across both an app and a website. This allows you to recognize the same visitor when they move from a webview within the app to the website in their mobile browser.
You can also track how users navigate from a website to an app using deep links.
Sessions that would typically be treated separately for an app and website can now be combined into a single session.
Note: Data anonymization rules will be applied according to your settings.
To turn on cross-platform visitor recognition, follow these steps:
1. Go to Menu > Administration.
2. Navigate to Sites & apps.
3. Click Add a site or app.
4. Name a site and an app.
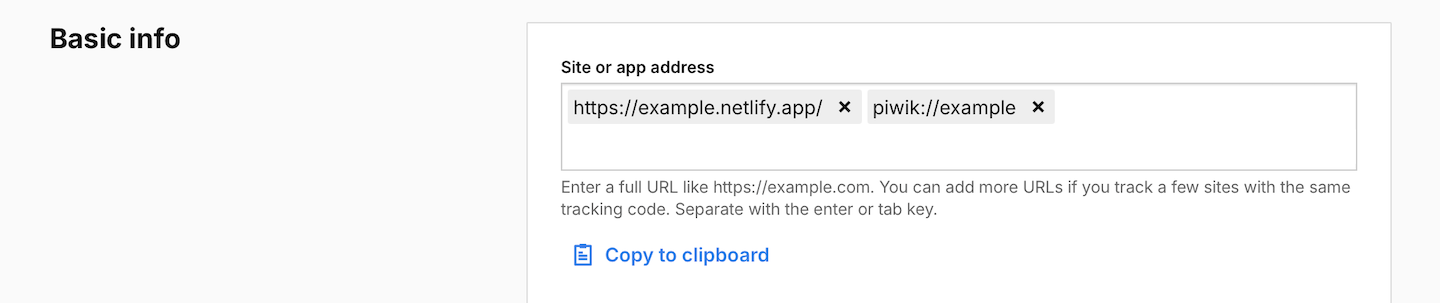
5. In Site or app address, type address of your website which is involved in the transition from/to the mobile application and deep link scheme. Example: https://example.netlify.app/ and piwik://example.
6. Install the container with the tracking code on your website by following this guide. Then install Piwik PRO SDK in your mobile app by following one of the following guides:
7. Go to Menu > Tag Manager.
8. On the left, click Piwik PRO. This is the tag with the tracking code.
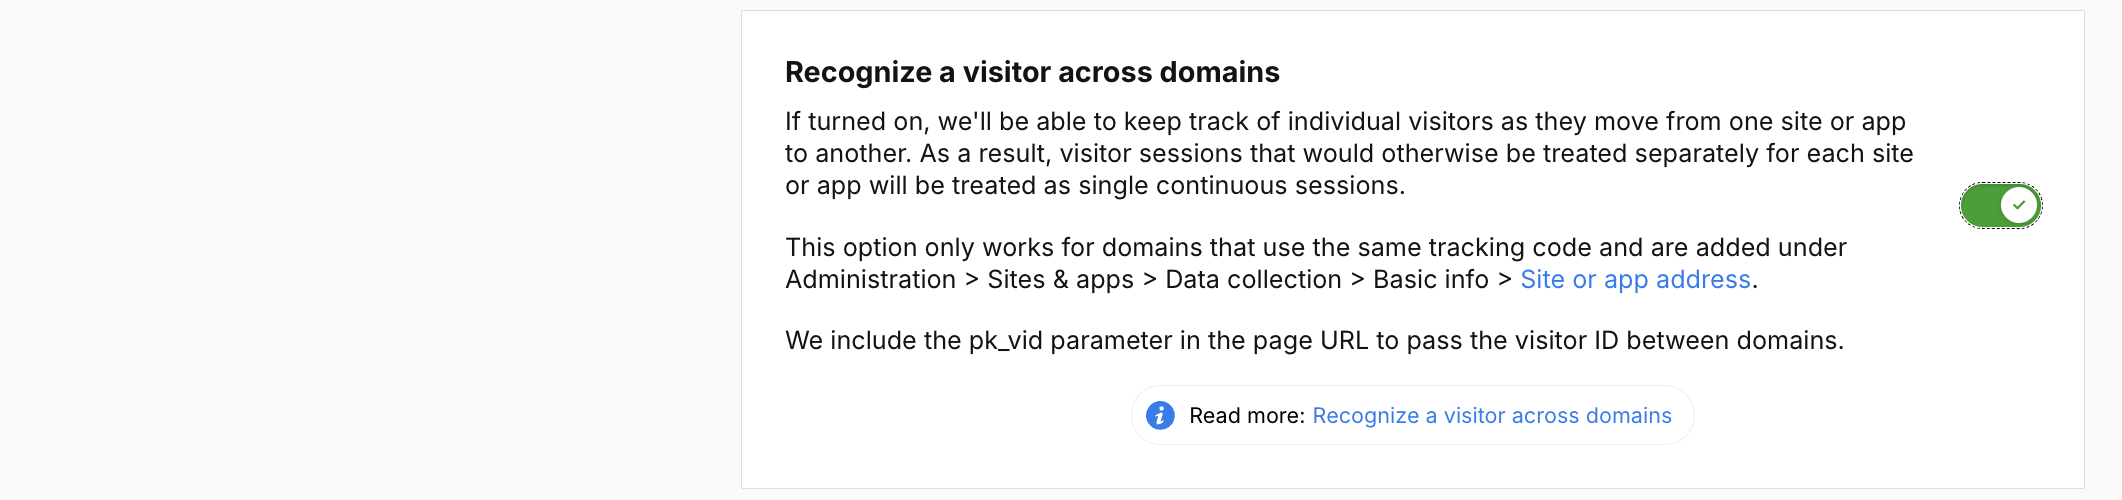
9. In Data collection, turn on Recognize a visitor across domains.
10. In the same box, turn on Outlinks and downloads.

11. When you’re done, click Save.
12. Click Publish.
Navigation from an app to a website
To set up tracking for both an app and a website, follow these steps:
1. The navigation URL should include the parameter ?pk_vid= followed by the visitor ID. For example: https://clearbank.com/?pk_vid=25a3c7d060a94360. You can retrieve the visitor ID from the mobile Piwik PRO SDK public interface:
getTracker().getVisitorId();[PiwikTracker sharedInstance].visitorID;2. The URL can be opened in either a webview within the app or an external browser.
3. To keep the same session, the app should send the sh=0 parameter (Session hash feature disabled). In SDK version 2.0 and later, this parameter is set to 0 by default. Ensure the default settings have not been changed.
4. For more accurate tracking when switching between the mobile app and webview, we recommend setting the webview’s user agent to one generated by the Piwik PRO SDK. Use the getUserAgent() method to do this:
getTracker().getUserAgent();[PiwikTracker sharedInstance].userAgentNavigation from a website to an app
To set up tracking for both a website and an app, follow these steps:
1. A deep link should include the ?pk_vid= parameter followed by the visitor ID. For example: piwik://example?pk_vid=25a3c7d060a94360.
2. The application should use the setVisitorIdFromDeepLink() method to parse a deep link:
getTracker().setVisitorIdFromDeepLink(Uri.parse("piwik://example?pk_vid=35a3c7d060a94360"));[[PiwikTracker sharedInstance] setVisitorIdFromDeepLink:@"piwik://example?pk_vid=25a3c7d060a94360"];3. If the above method is not used, parse the deep link manually and set the visitor ID from the pk_vid parameter:
getTracker().setVisitorId("0123456789abcdef")[PiwikTracker sharedInstance].visitorID = @"12345678901234fa";