When you collect anonymous data from non-consenting visitors, their data is mixed with that of other visitors. In this article, we’ll show you how to separate this data.
Create a segment for no-consent traffic
To create a segment for anonymous traffic, follow these steps:
1. Go to Menu > Analytics.
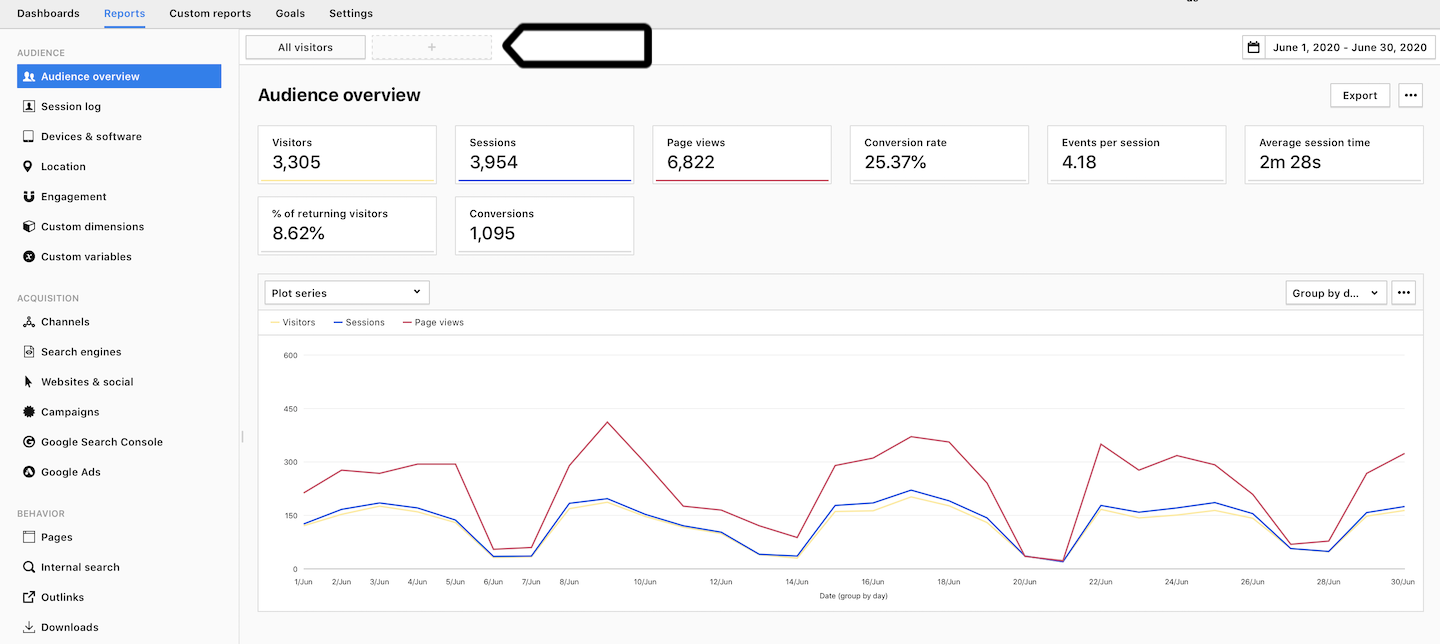
2. The option to add segments appears at the top of any open tab (Dashboards, Reports, Custom reports, Goals or Ecommerce). Click the + button.
3. Click Manage segments.
4. Click Add a segment.
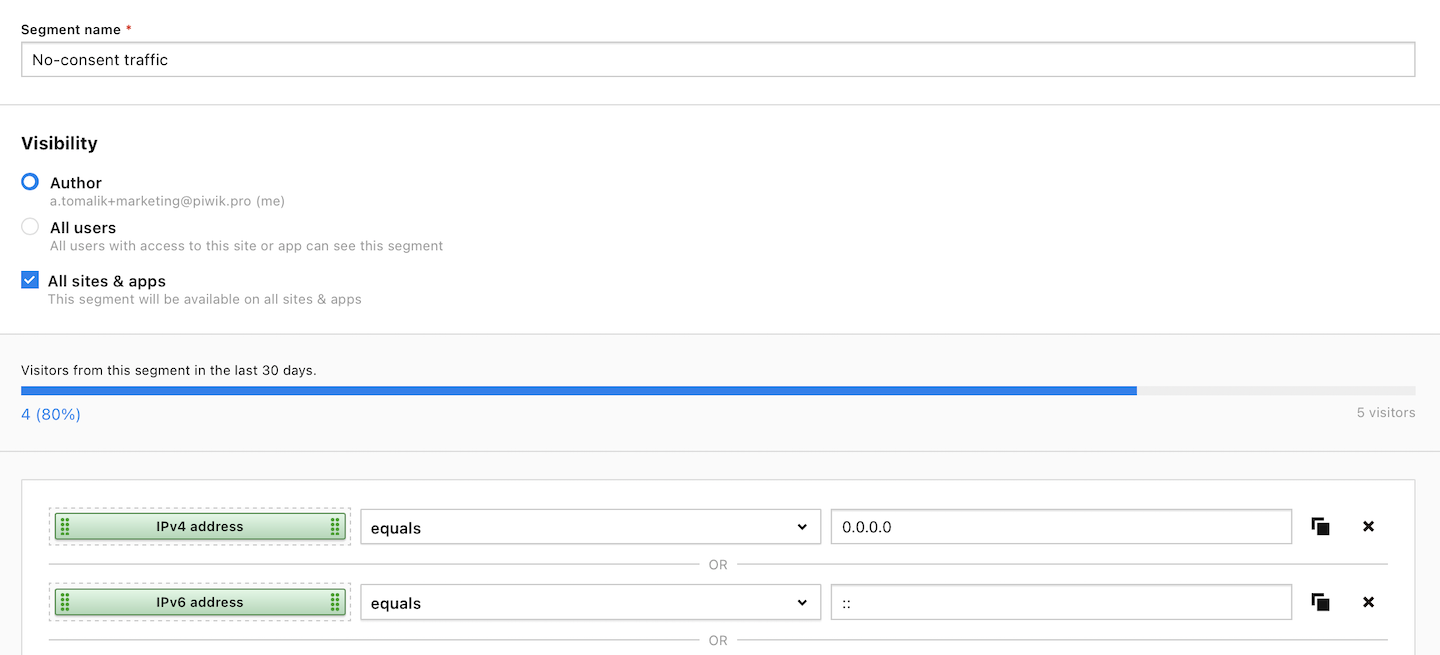
5. Name your segment. Example: No-consent traffic.
6. In Visibility, choose Author or All users. All users lets you share this segment with your teammates.
7. (Optional) Check All sites & apps to make this segment visible across all sites and apps.
8. Set the following conditions and combine them using the OR logical operator:
- IPv4 address equals 0.0.0.0
- IPv6 address equals ::
Note: Visitors’ IP addresses are fully masked if you turn on: Administration > Sites & apps > Privacy > Ask visitors for consent (on) > Collect anonymous data from non-consenting visitors (on). This is why you can use the mentioned conditions to filter out anonymous traffic.
9. Click Save.
10. Done!
Create a segment for consent traffic
To create a segment for known traffic, follow these steps:
1. Go to Menu > Analytics.
2. The option to add segments appears at the top of any open tab (Dashboards, Reports, Custom reports, Goals or Ecommerce). Click the + button.
3. Click Manage segments.
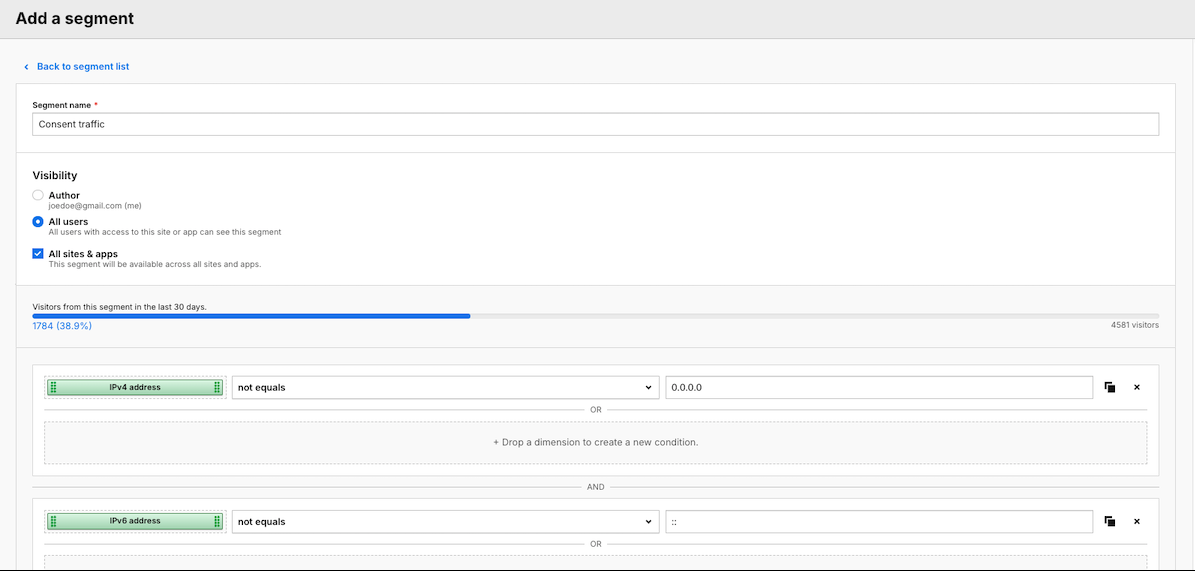
4. Click Add a segment.
5. Name your segment. Example: Consent traffic.
6. In Visibility, choose Author or All users. All users lets you share this segment with your teammates.
7. (Optional) Check All sites & apps to make this segment visible across all sites and apps.
8. Set the following conditions and combine them using the AND logical operator:
- IPv4 address not equals 0.0.0.0
- IPv6 address not equals ::
Note: Visitors’ IP addresses are fully masked if you turn on: Administration > Sites & apps > Privacy > Ask visitors for consent (on) > Collect anonymous data from non-consenting visitors (on). This is why you can use the mentioned conditions to filter out anonymous traffic.
9. Click Create a segment.
10. All done!
Compare segments in reports
To compare segments in reports, follow these steps:
1. Go to Menu > Analytics.
2. Navigate to Dashboards, Reports, Custom reports, Goals or Ecommerce.
3. Pick the report you want to view.
4. Click All visitors at the top.
5. Select the segment with no-consent traffic.
6. Click the + icon at the top.
7. Select the segment with consent traffic.
8. All done! You can now compare your traffic sources.
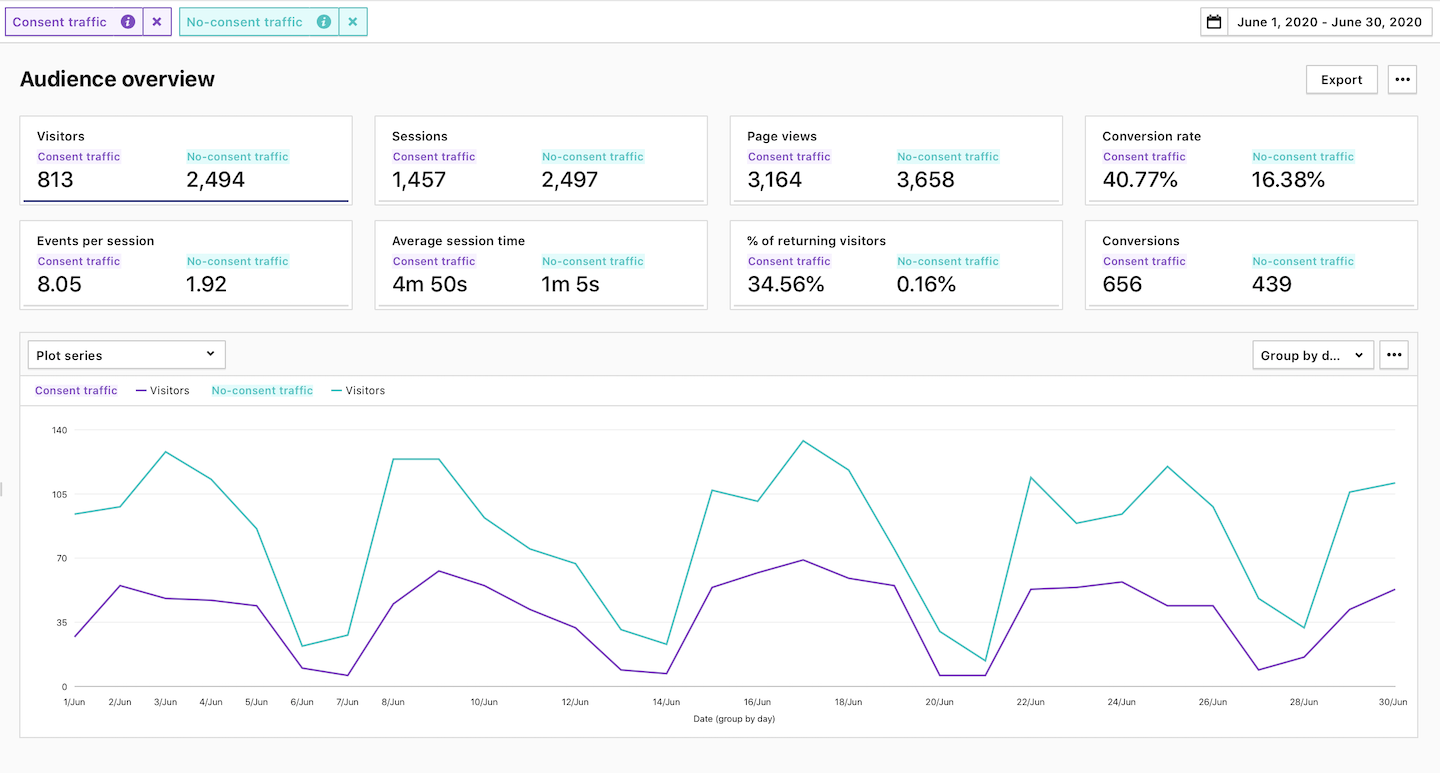
Note: We’ve found that when a company uses a consent form on its website, approximately 25 to 75 percent of visitors don’t consent to tracking or don’t make a consent decision.