Piwik PRO automatically tracks page scrolls on your website. It then saves the scroll data as custom events and shows results in custom reports or in the site inspector for Chrome.
However, if you want to change the way page scrolls are tracked, you can use a manual method.
Turn off automatic scroll tracking
Available from 16.17.0. In versions below 16.17.0, just skip this step.
The first thing you need to do is turn off the automatic scroll tracking, otherwise the data will be collected twice.
To turn off automatic scroll tracking, follow these steps:
1. Go to Menu > Administration.
2. Navigate to Sites & apps.
3. Choose the site or app you want to work with.
4. Navigate to Data collection.
5. In Page scrolling, turn off Measure scroll depth.

6. Done!
Set up custom events with scroll triggers
Next, you need to create custom event tags for different scroll points. You can go with the easy option of four tags at 25%, 50%, 75% and 100%, or pick your own points.
When creating a custom event tag, you can use the following framework:
1. Event category: built-in page scroll (or Heatmap events for versions below 16.17.0)
Note: Use exactly this name if you want to use the collected data for scrollmaps in the site inspector for Chrome.
2. Event action: 25%, 50%, 75% and 100%
3. Event name: Leave it empty if you want to collect data for scrollmaps in the site inspector for Chrome.
Note: Each custom event contains information about a page URL so you don’t need to include it in custom event settings.
We’ll show you how to set up a custom event tag for a 25% scroll mark, and you’ll be able to repeat these steps for other marks.
To set up the tag for a 25% scroll mark, follow these steps:
1. Go to Menu > Tag Manager.
2. Click Add a tag.
3. Select the following tag template: Custom event.
4. Click Next.
5. Name your tag.
6. Fill in the following fields:
- Category:
built-in page scroll(orHeatmap eventsfor versions below 16.17.0) - Action: 25%
- Name: – (Leave it empty.)

7. In Tag triggers, click Add a trigger.
8. Choose the following trigger type: Page scroll.
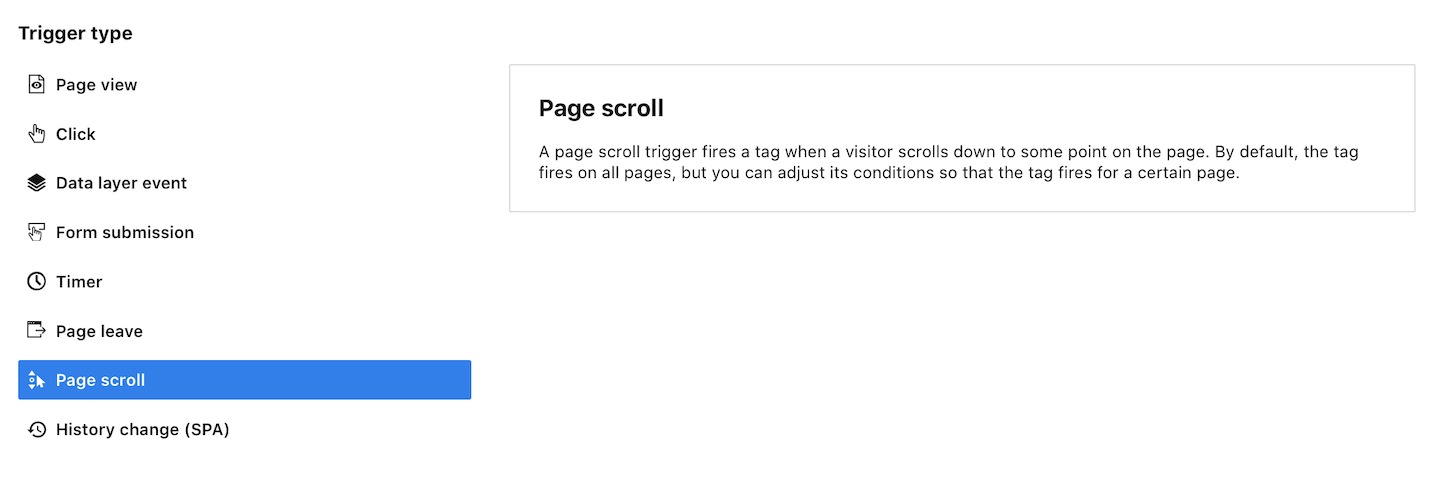
9. Click Next.
10. Name the trigger.
11. In Amount of page scrolled, set the percentage to 25%.

Tip: Percentage depth is the most common way to grasp scroll depth. However, if you prefer an absolute measure, switch from percentages to pixels and track the scroll distance in pixels. This is handy for comparing across devices with varying relative percentage heights.
12. (Optional) In Event conditions, define trigger conditions. You can choose to fire your tag only on certain pages.
13. In Multiplicity, select Once for each page view. This is the best option to see how far people scroll down the page.

14. When you’re done, click Save.
15. Test your tag in debug mode.
16. When you’re happy with how the tag works, click Publish.
17. Done! Now you’re collecting scroll data.
You can now repeat these steps to set the 50%, 75% and 100% marks. Remember to change the action to 50%, 75% and 100% and the percentages in your trigger settings.
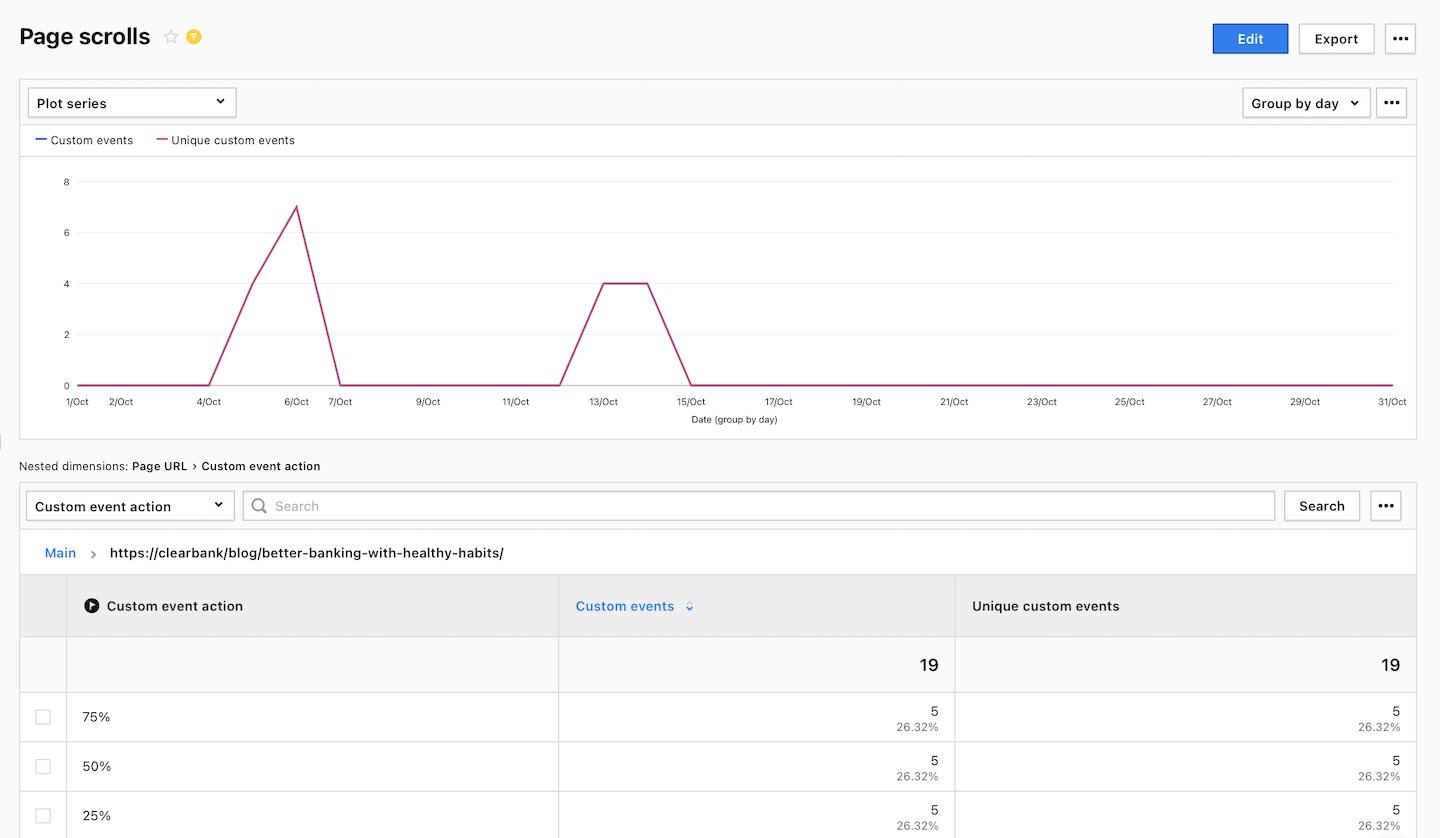
Set up reporting for page scrolls
As the last step, you can set up a custom report to see page scrolls for each page.
To set up reporting for page scrolls, follow these steps:
1. Go to Menu > Analytics.
2. Navigate to Custom reports.
3. Click Add a report.
4. Choose the following report type: Table.
5. Click Select.
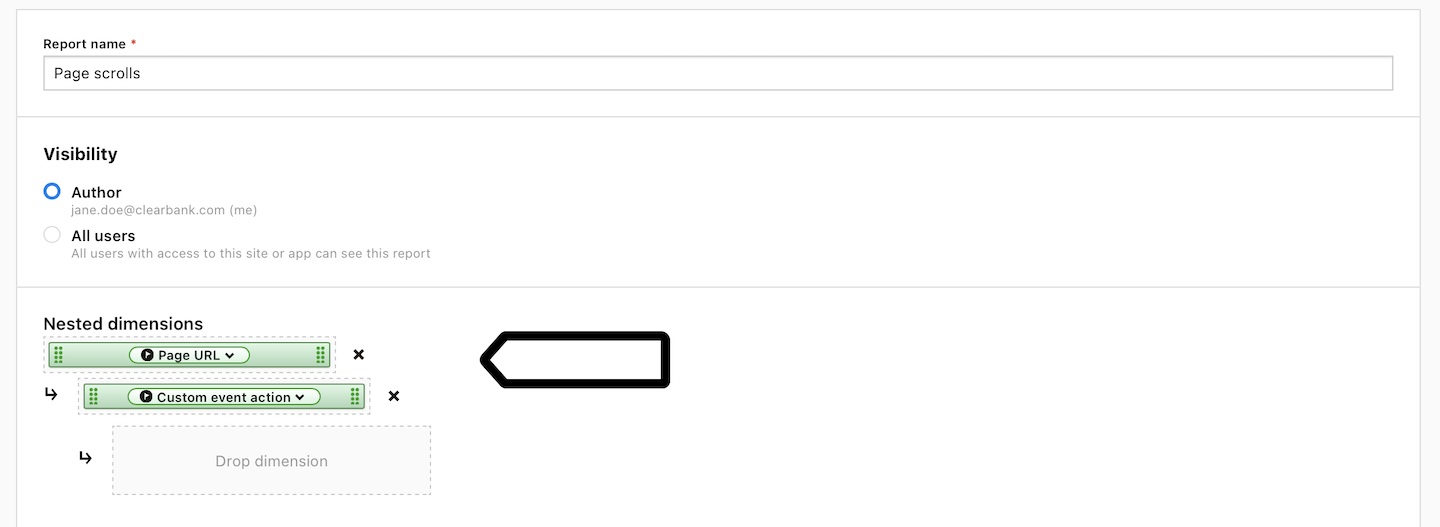
6. Name your report. Example: Page scrolls.
7. In Visibility, choose Author or All users. All users lets you share this report with your teammates.
8. In Nested dimensions, set the following dimensions:
- Page URL
- Custom event action
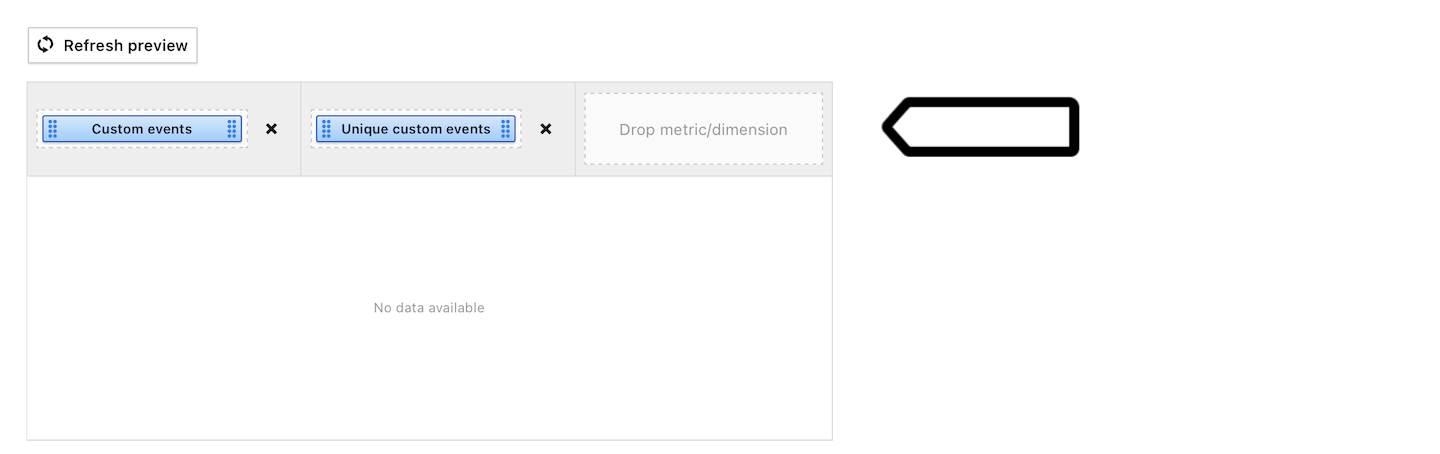
9. Add the following metrics:
- Custom events
- Unique custom events
10. (Optional) Set up Default sorting options.
Tip: Default sorting makes the data appear in your report in a specific order based on the selected dimension or metric.
11. In Filter dimension, set the following filter: Custom event category is built-in page scroll.

12. Click Save.
13. All done! You can now view scroll data when clicking on a page URL.