A User ID is an additional piece of information that can be collected on your site. It can be the same user ID used in your CMS, CRM or sales system. By collecting this information, you can create a segment and view all sessions associated with a particular visitor, which can be helpful in analyzing their behavior on your site.
In this article, we’ll show you how to set up a User ID.
Before you start
Here are a few helpful things to know before you start:
- A
User IDlets you identify a visitor across multiple devices. If a visitor logs in and switches between a laptop, mobile device and tablet, they will be recognized as the same visitor thanks to theirUser ID. - The
User IDoverwrites theVisitor IDin a deterministic way. This means that for each uniqueUser ID, there will always be the sameVisitor ID. However, theUser IDdoesn’t play a direct role in identifying a visitor’s session. - This setup is for websites only. If you want to set up a
User IDfor mobile devices, use our SDKs: Android, Flutter, React Native or iOS.
Set up a user ID (when it’s present on every page)
In this example, we’ll show you how to add a User ID when a visitor is logged into the app, and we have their customerId available in a data layer.
Note: Use this method only if you can access a User ID on every page of your site. If the identifier isn’t available at some point, the tracker will assign an empty value to the User ID, causing data inconsistency. If you’re not sure that a User ID is available everywhere, use the method described in the next section.
1. Let’s say a visitor logs into a banking app.
2. In the data layer, we’ve got the following information:
<script>
window.dataLayer = window.dataLayer || [];
window.dataLayer.push({
'customerId': 'ABC123',
'app' : 'banking app',
'plan': 'basic'
});
</script>3. We can use customerId from this data layer as our User ID.
4. We’ll set up a data layer variable that will pull out information about customerId.
5. Go to Menu > Tag Manager.
6. Navigate to Variables.
7. Click Add a variable.
8. Name the variable: Customer ID.
9. Select the following variable type: Data layer.
10. In Data layer variable name, type: customerId.

11. Click OK.
12. Test your variable in debug mode.
13. When you’re happy with how the variable works, click Publish.
14. Navigate to Tags.
15. On the left, click Piwik PRO.
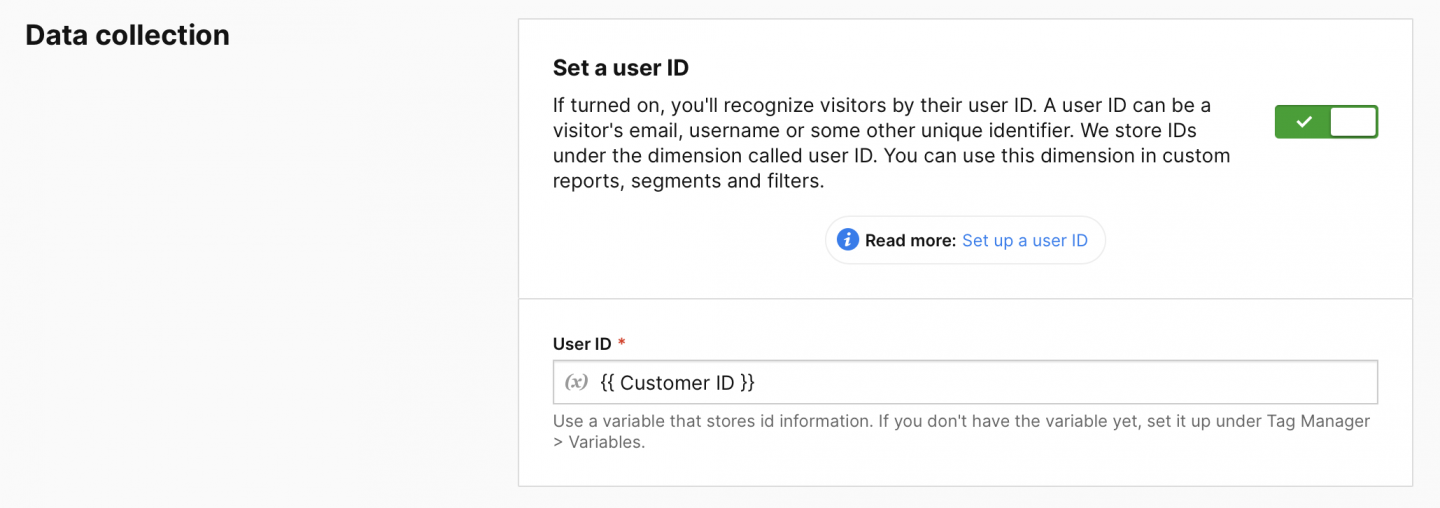
16. In Data collection, turn on Set a user ID.
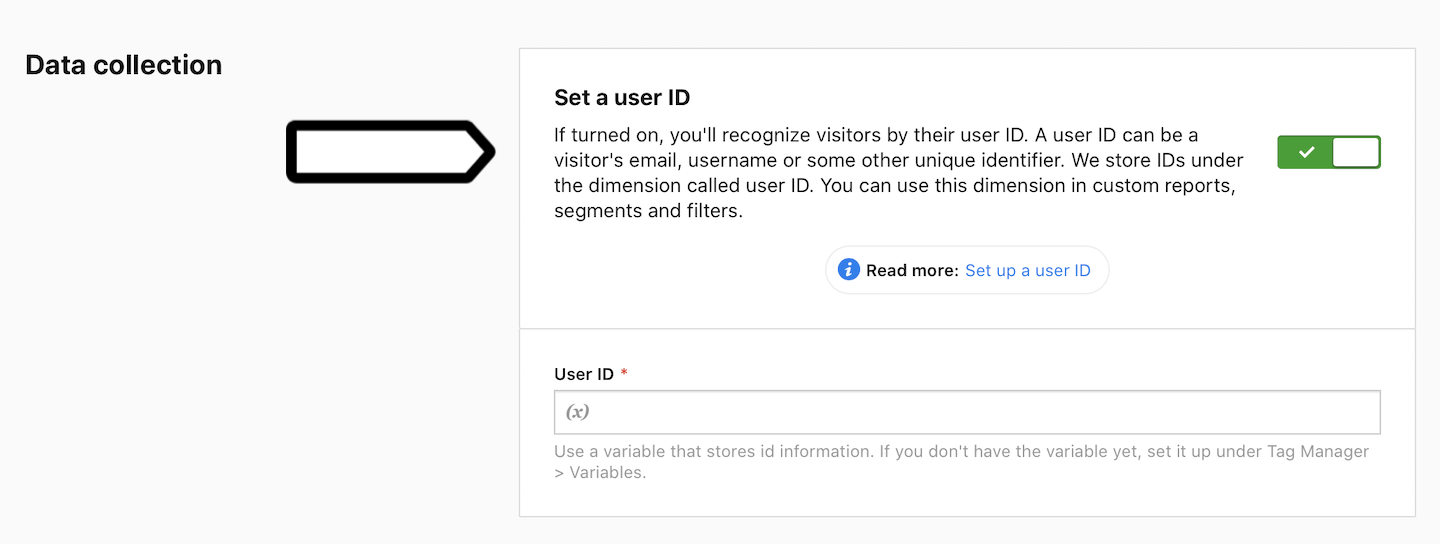
17. Type in the variable that you set in the previous steps. In our case, the variable is {{ Customer ID }}.
18. When your’re done, click Save.
19. Test your tag in debug mode.
20. When you’re happy with how the tag works, click Publish.
21. Job done!
Set up a user ID (when it’s not present on every page)
In this example, we’ll show you how to add a User ID when a visitor is logged into the app and their customerId is not available in the data layer everywhere on your site. To do this, we’ll use a custom tag that captures the User ID when present and passes it to the tracker.
Note: Use this method when you can’t access a user identifier on every page of your site. It will prevent the tracker from assigning an empty value when the User ID isn’t available.
1. Let’s say a visitor logs into a banking app.
2. In the data layer, we’ve got the following information:
<script>
window.dataLayer = window.dataLayer || [];
window.dataLayer.push({
'customerId': 'ABC123',
'app' : 'banking app',
'plan': 'basic'
});
</script>
3. We can use customerId from this data layer as our User ID.
4. We’ll set up a data layer variable that will pull out information about customerId.
5. Go to Menu > Tag Manager.
6. Navigate to Variables.
7. Click Add a variable.
8. Name the variable: Customer ID.
9. Select the following variable type: Data layer.
10. In Data layer variable name, type: customerId.
11. Click OK.
12. Test your variable in debug mode.
13. When you’re happy with how the variable works, click Publish.
14. Navigate to Tags.
15. Click Add a tag.
16. Choose the following tag template: Custom code and click Next.
17. Name your tag.
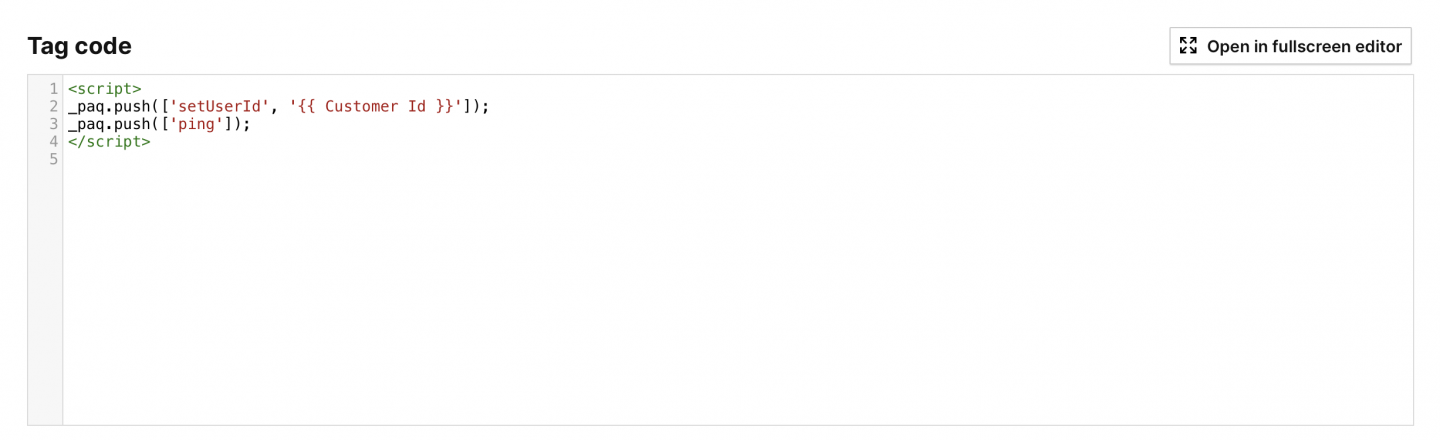
18. In Tag code, type the following code:
<script>
   _paq.push(['setUserId', '{{ Customer ID }}']);
   _paq.push(['ping']);
</script>
_paq.push(['setUserId', '{{ Customer ID }}']);: This sets the{{ Customer ID }}variable as theUser ID._paq.push(['ping']);: This sends theUser IDto the tracker.
19. In Tag triggers, click Add a trigger.
20. Select the following type: Page view and click Next.
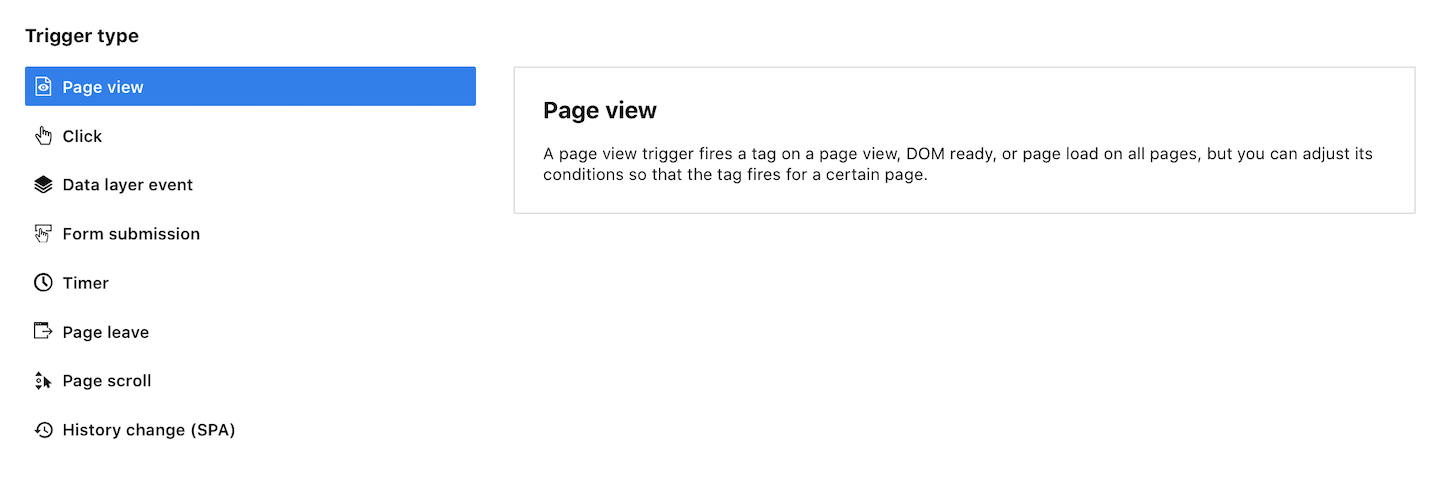
21. Name your trigger.
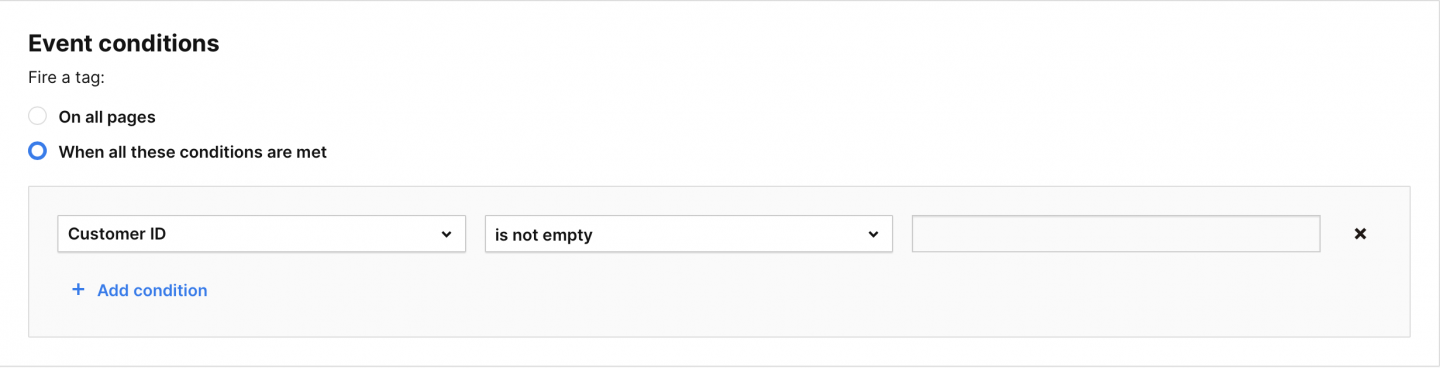
22. In Event conditions, define the following condition: Customer ID is not empty.
23. When you’re done, click Save to save the trigger and Save to save the tag.
24. Test your tag in debug mode.
25. When you’re happy with how the tag works, click Publish.
26. Done!
Reset a user ID
In some cases, you may need to reset a User ID. For example, when a visitor logs out and continues to browse your site, you may no longer want to send requests to the tracker using that ID.
To reset a User ID, follow these steps:
1. Create a custom code (async) tag with the following code:
<script>
  _paq.push(['resetUserId']);
</script>
Note: In this case, we don’t need to send a ping request because after applying this method, the user ID won’t be in the tracker, and all future events won’t have the user ID string.
2. Create a trigger to fire this tag under desired conditions. For example, when a visitor logs out.
For developers: See our developer guides for more information on User ID.
3. Done.