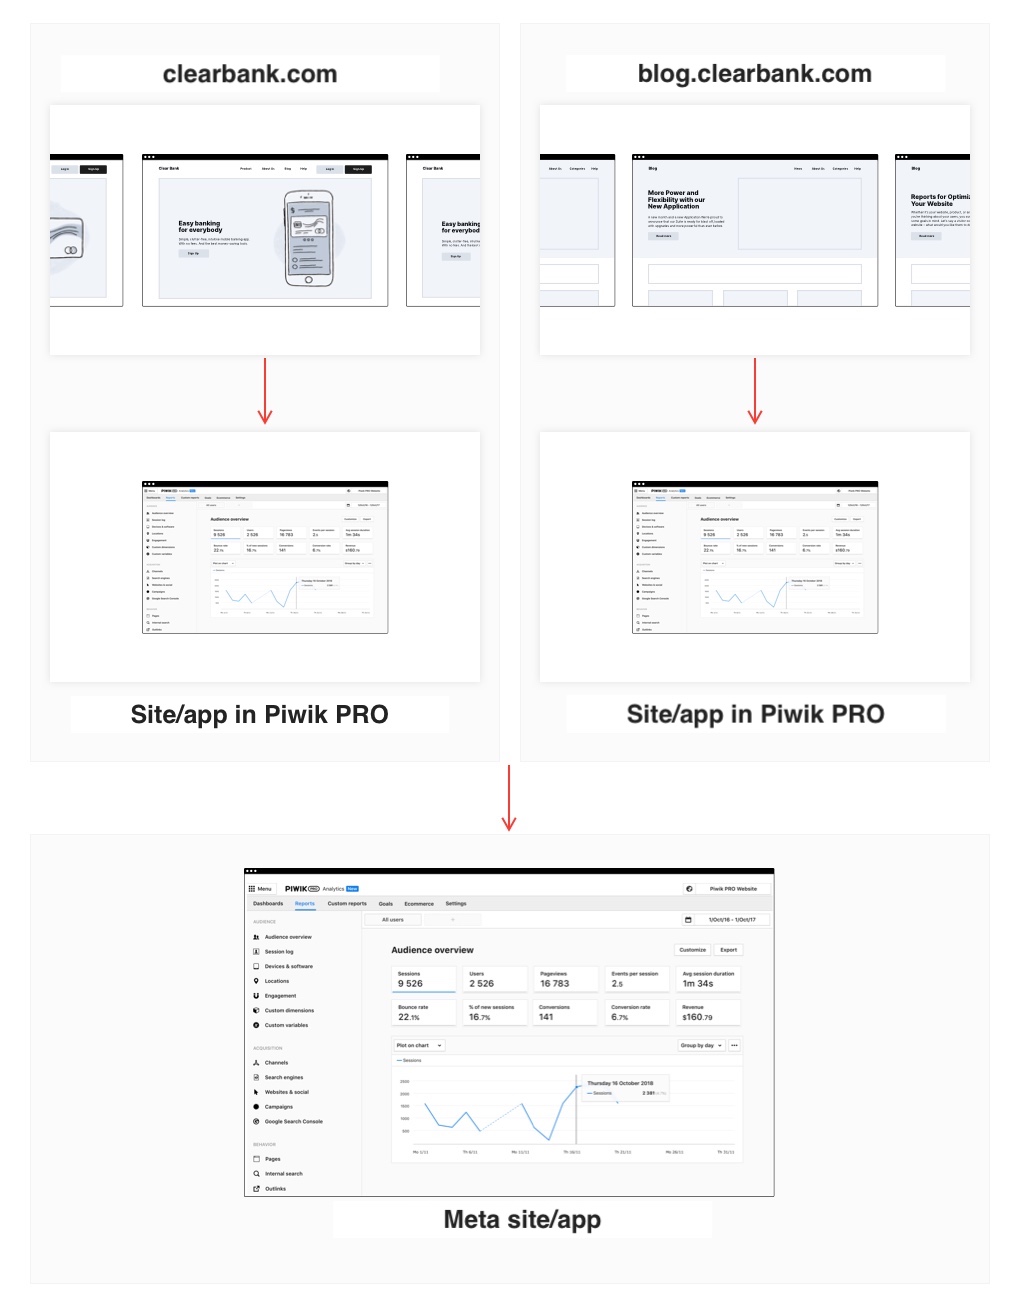
Meta sites & apps (aka roll-up properties) help you see data from multiple sites or apps in one report or on one dashboard. The sites or apps remain separate and you track them using a unique tracking code for each one. This way, you can choose to see your data separately or combined in a meta site/app.
In addition to this, meta sites/apps also let you create a meta setup in Tag Manager, which means that you can apply the same tag, trigger or variable to all linked sites/apps at once.
A good example would be if we have a product site (clearbank.com) and a blog (blog.clearbank.com). We collect data for each site separately because they have different goals and audiences. However, if we want to see data from both sites together, we can create a meta site/app. And if we want to run an online campaign on both sites, we can create a popup for that meta site/app in Tag Manager.
In this article, we’ll walk you through the meta site/app setup.
Before you start
Here are some key things you should know about meta sites & apps:
- If you want to share a meta site/app with your teammates, you need to give them permissions. Meta sites/apps have separate permissions and they are different from the permissions for individual sites/apps.
- A meta site/app combines data from connected entities but doesn’t track visitors across domains or subdomains. A visitor who moves from one site to another is counted separately for each site.
Create a meta site & app
To create a meta site/app, follow these steps:
1. Go to Menu > Administration.
2. Navigate to Meta sites & apps.
3. Click Add a meta site or app.
4. Name the meta site/app.
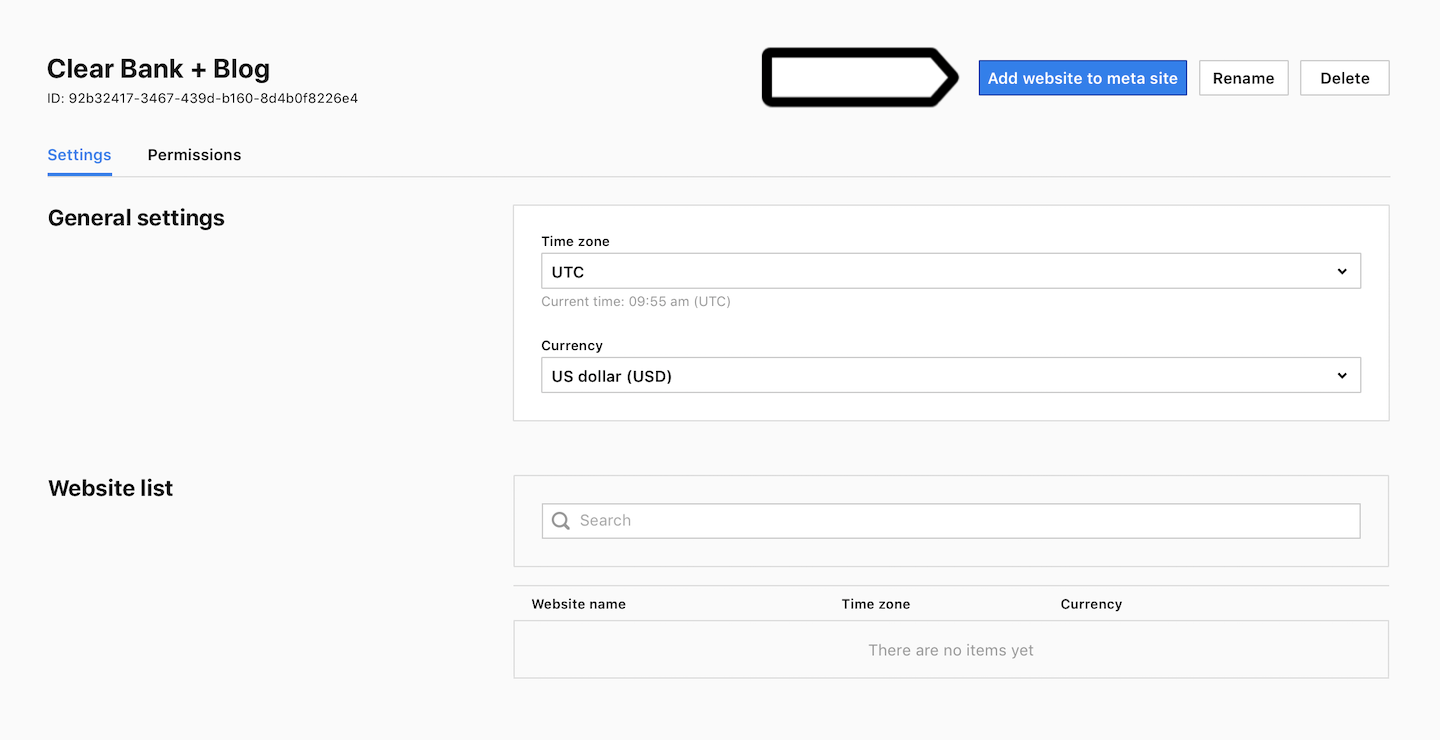
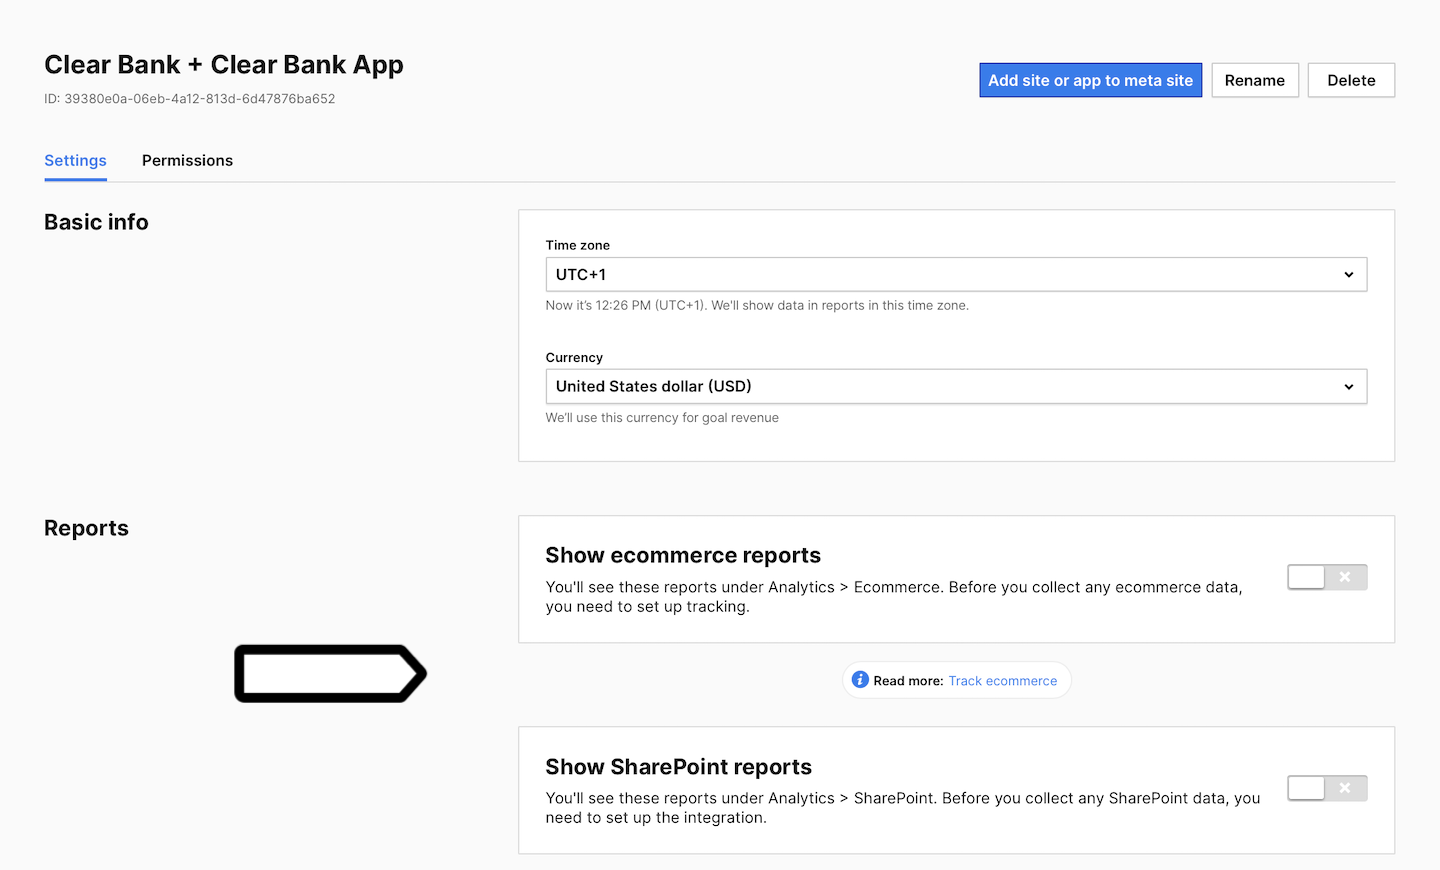
5. Click Add site or app to meta site.
6. Pick the sites/apps you want to connect and move them to the column on the right.
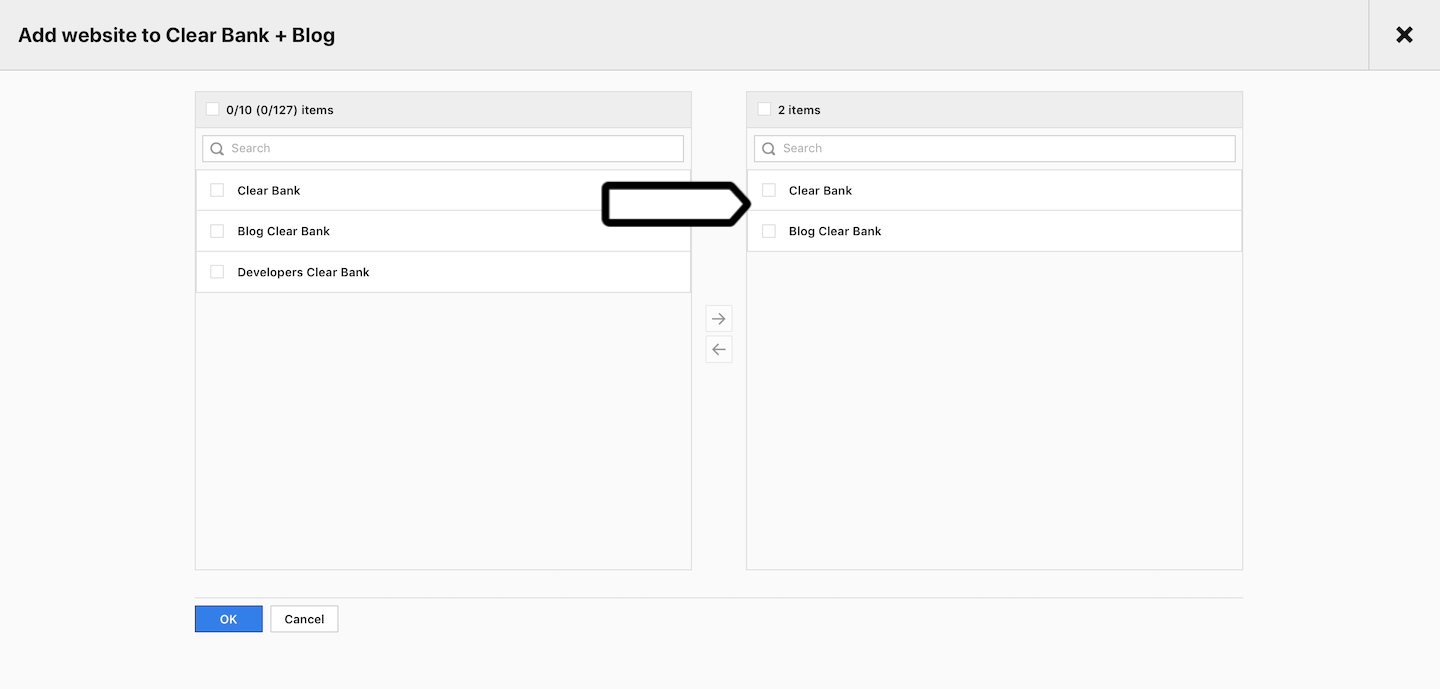
7. Click Save.
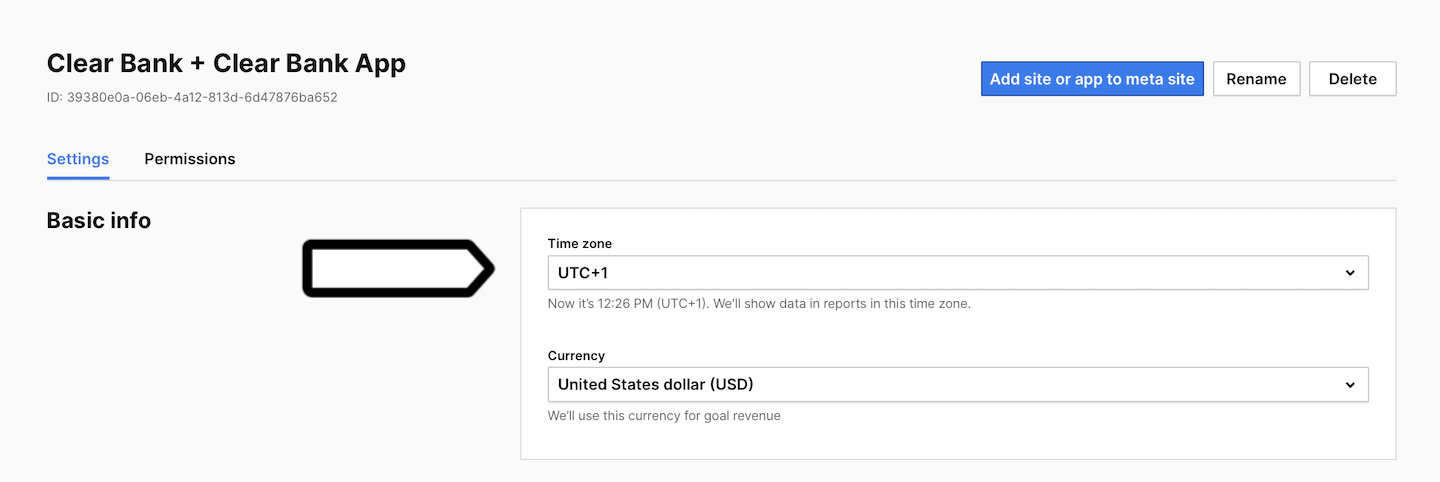
8. Make sure the connected sites/apps have the same time zone and currency. Otherwise, the data won’t be accurate.
9. In Reports, turn on or off Show ecommerce reports and Show SharePoint reports.
10. Navigate to Permissions and grant permissions to users or groups.
View reports for a meta site & app
To view reports for a meta site/app, follow these steps:
1. Go to Menu > Analytics.
2. Navigate to Dashboards, Reports, Custom reports or Goals.
3. Click on the site/app picker in the upper right corner.
4. Pick the meta site/app you want to work with.
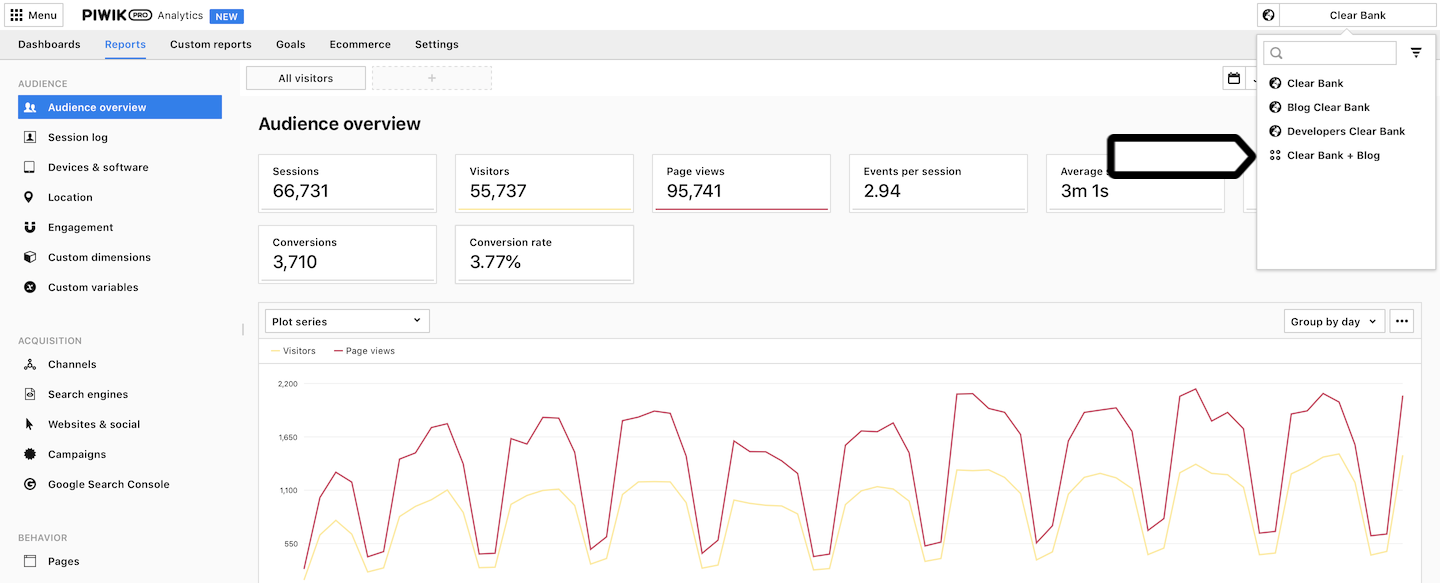
5. If you have trouble finding your meta site/app, use a filter in the site/app picker.

6. Open the report you want to analyze.
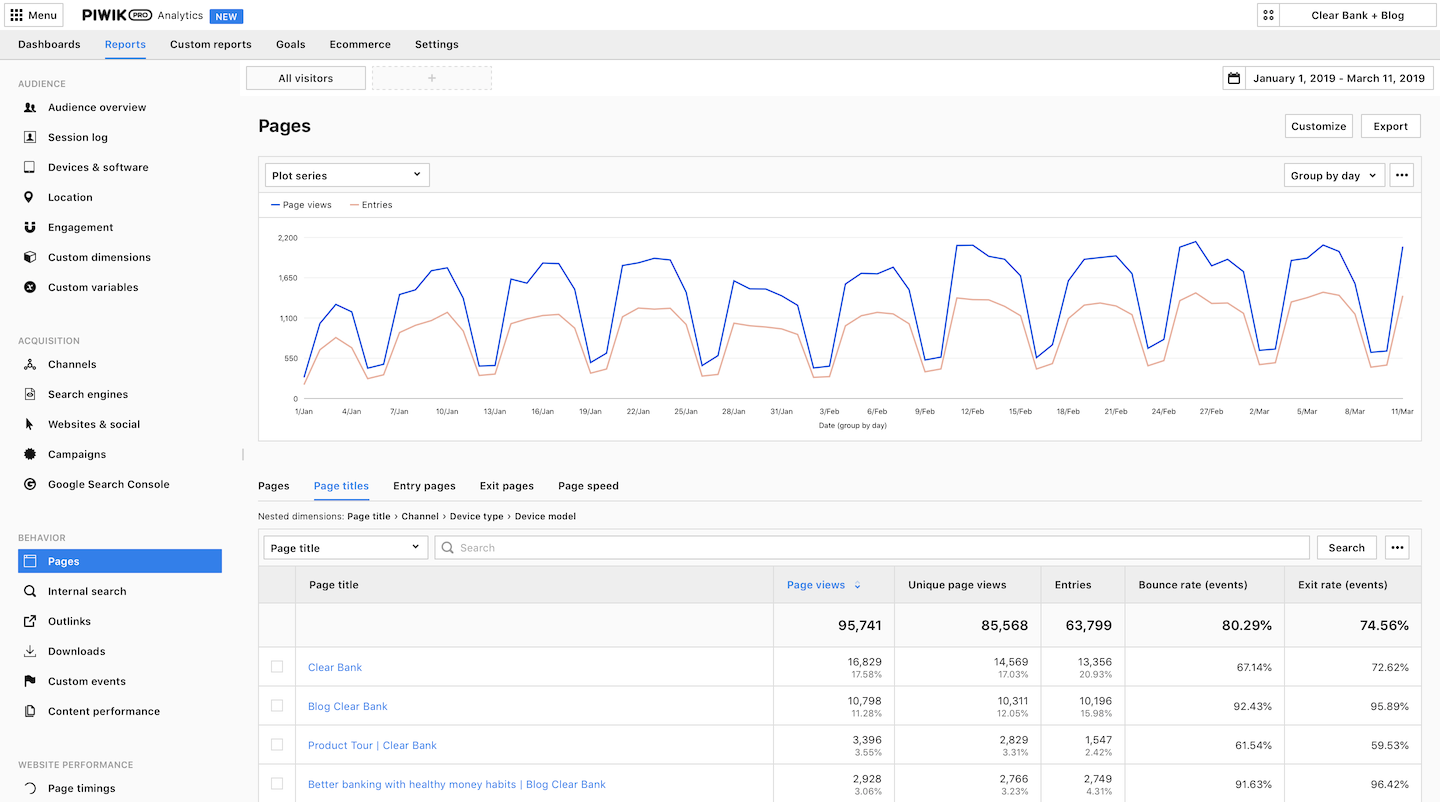
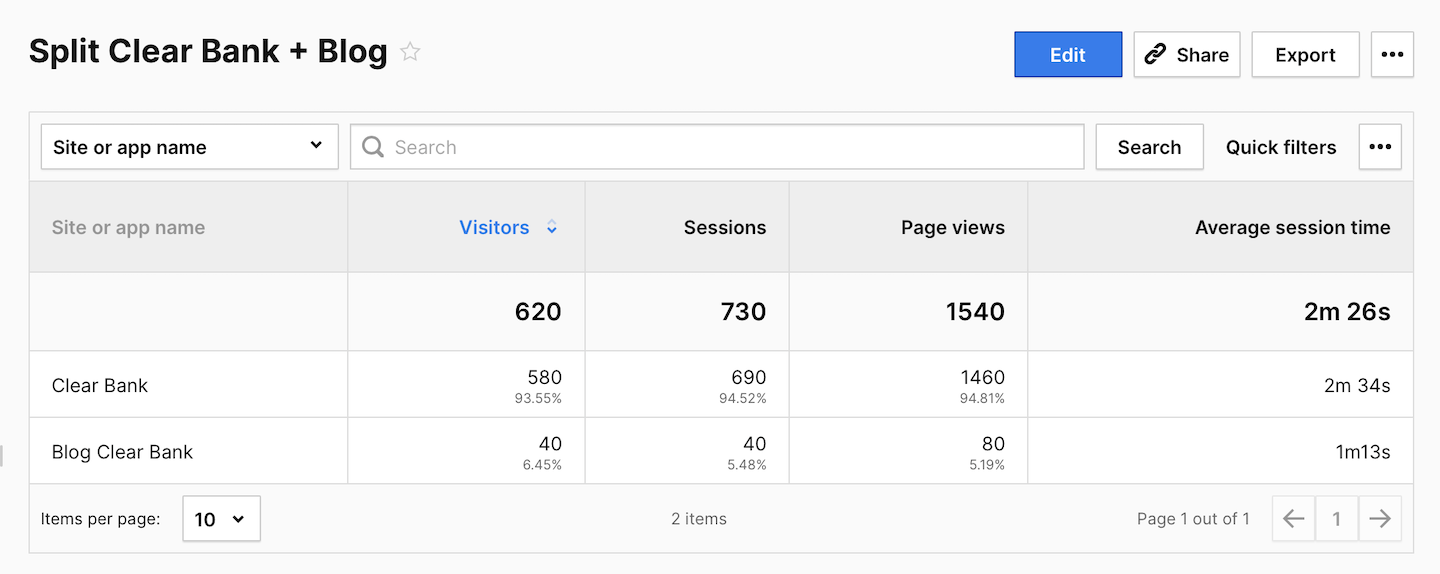
Create a custom report to compare sites/apps
Once you create a meta site/app, data in reports will be presented as a total from all connected entities. However, there’s a custom report you can build to see and compare data from each linked site/app.
To create a custom report comparing sites/apps, follow these steps:
1. Go to Menu > Analytics.
2. Navigate to Custom reports.
3. Click Add a report.
4. Pick a report type.
5. Name the report.
6. In Visibility, choose Author or All users. All users lets you share this report with your teammates.
7. On the right, pick the following dimension: Site or app name.
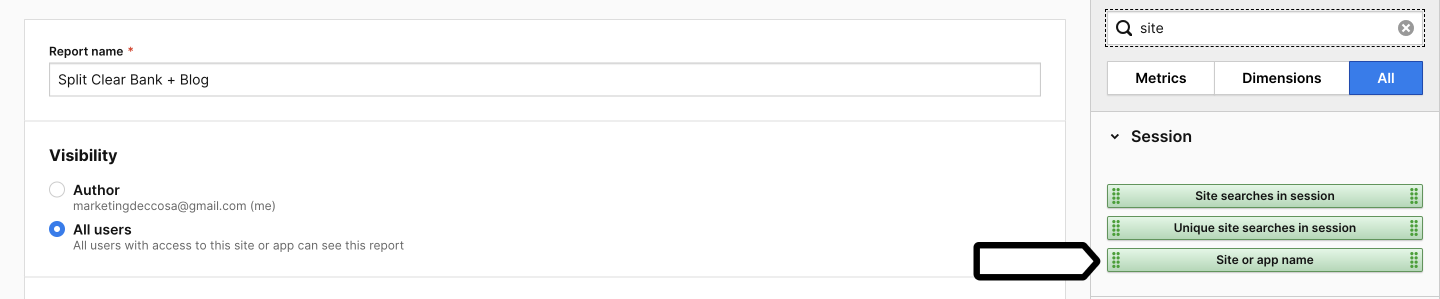
8. Drag and drop the dimension to the designing space.
9. Add other dimensions and metrics you want to see in the report.
10. (Optional) Add a filter to the report.
11. When you’re finished, click Create a report.
12. All done! You can now view your report with data for each site/app.
Map custom dimensions
Custom dimensions are tracked for each site/app in specific slots. When you link several sites/apps, you need to map these slots for custom dimensions to display correctly. Let’s look at an example.
We have two sites, each with an event custom dimension set.
| Site/app | Event custom dimension | Slot |
|---|---|---|
| Clear Bank | Blog author | 1 |
| Blog Clear Bank | Blog author | 1 |
We link these two sites by creating a meta site/app. Once that’s done, we need to create a mapped custom dimension that will combine data from both slots.
| Site/app | Event custom dimension | Slot | Meta site/app | Event custom dimension | Mapped slot |
|---|---|---|---|---|---|
| Clear Bank | Blog author | 1 | Clear Bank + Blog Clear Bank | Blog author | 1 |
| Blog Clear Bank | Blog author | 1 |
The mapped slot will take data from slot 1 from Clear Bank and from slot 1 from Blog Clear Bank.
Note: Currently, it’s not possible to pick two different slots for one mapping because Piwik PRO can only combine data from the same slot number. To make your mapping work, you need to use the same custom dimension type in the same slot on each site/app. (Look at the example in the table above. Both sites have the same dimension type and the same slot.)
To map a custom dimension, follow these steps:
1. Go to Analytics > Settings.
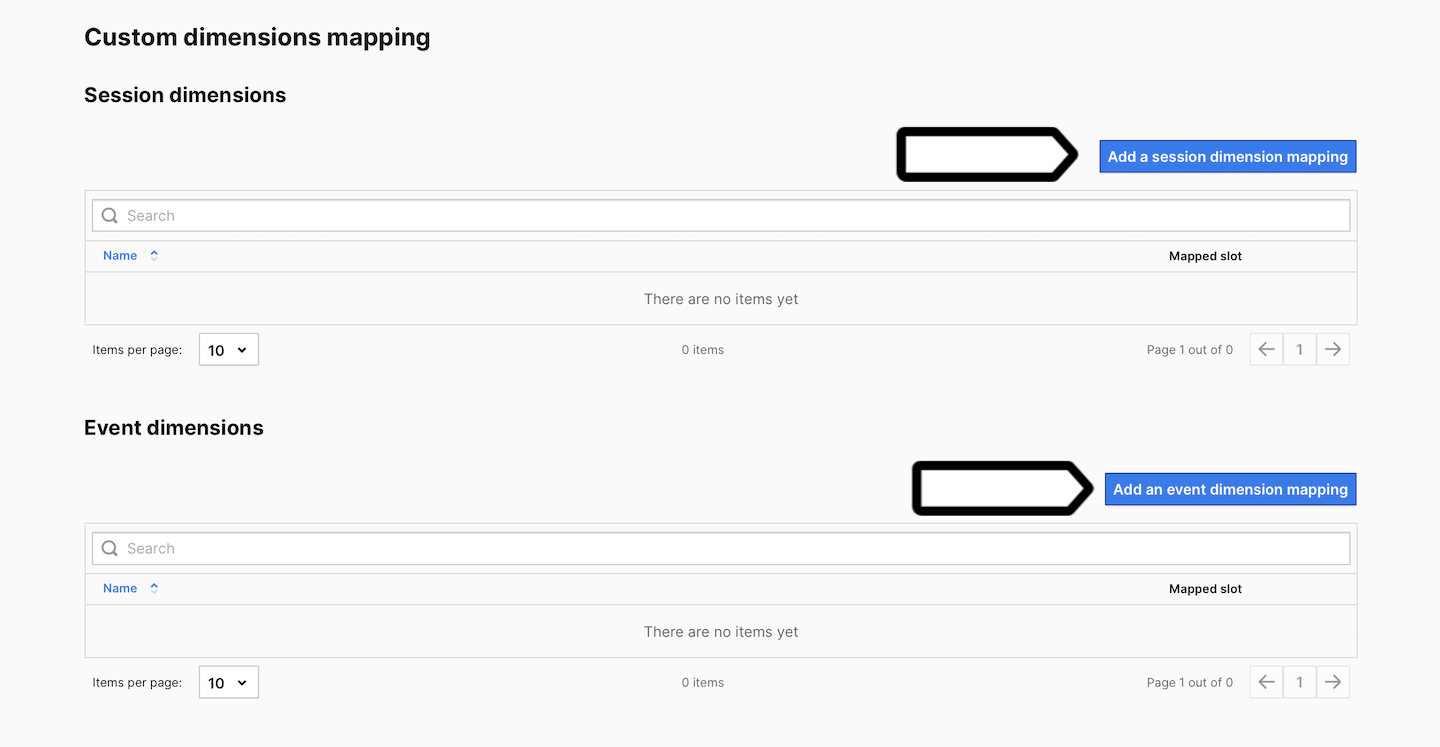
2. On the left, click Custom dimensions.
3. Choose a meta site/app from the site/app picker.
4. Click Add session dimension mapping or Add event dimension mapping.
5. Name the dimension and enter the mapped slot.
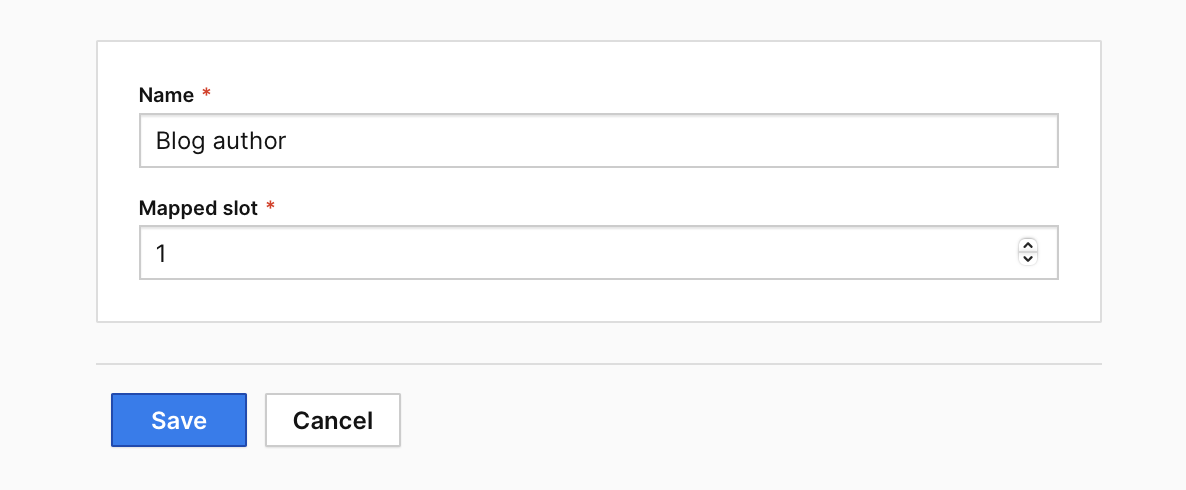
Note: If your mapped slot is 1, Piwik PRO will merge data from all slots with number 1 from linked sites/apps.
6. Click Save.
7. Done! You can now see merged data in Analytics > Reports > Custom dimensions.
Map goals
Goals are created separately for each site/app. When you link several sites/apps, you need to map goals to see them in goal reports.
To map goals, follow these steps:
1. Go to Analytics > Goals.
2. Choose a meta site/app from the site/app picker.
3. Click Add goal mapping.
4. Name the mapped goal.
5. Pick the site/app and goal you want to map.
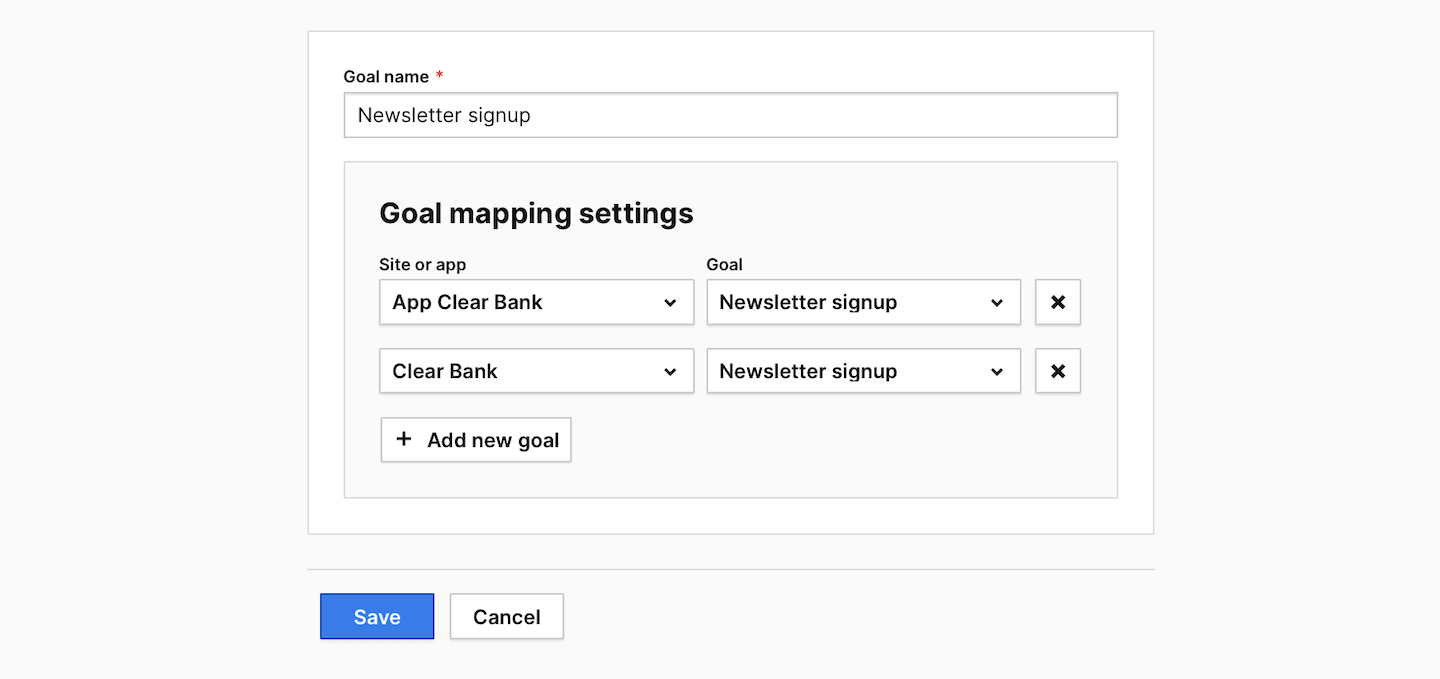
6. Click Save.
7. Job done! You can now see combined data for both goals in Analytics > Goals.
Add a meta setup in Tag Manager
Available from 16.37.0
To add a meta setup in Tag Manager, follow these steps:
1. Go to Menu > Tag Manager.
2. Pick the meta site/app name from the picker in the upper right corner.
3. Set up the tags, triggers and variables you want to use.
4. Navigate to any site/app that belongs to this meta site/app.
5. Click Debug.
6. Check if your meta tags, triggers and variables work correctly.
7. If everything is right, navigate back to the meta site/app.
8. Click Publish.
9. Bravo! Your meta setup is now present across all linked sites and apps.
Note: For more on a meta setup, see this article.