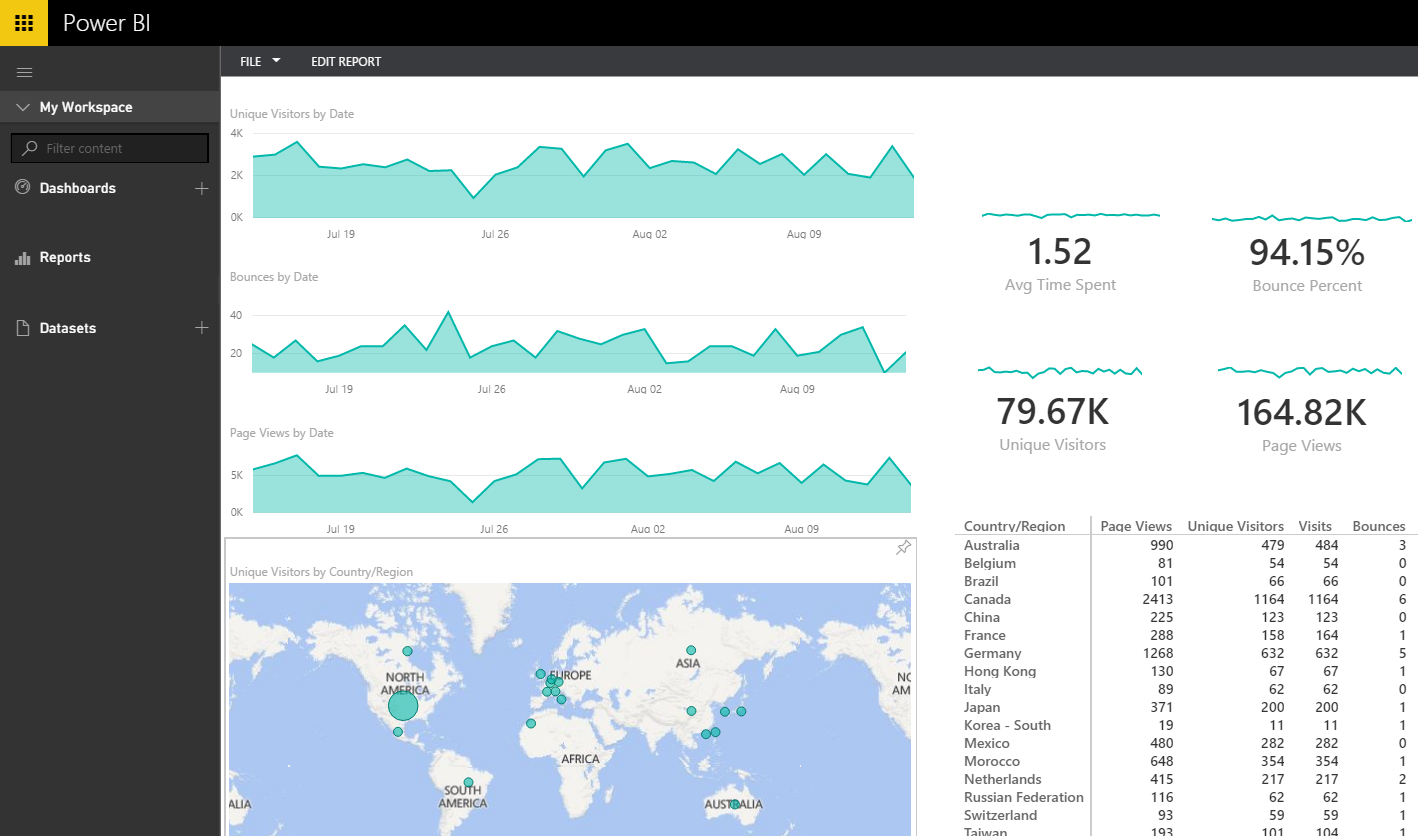
When you want to use data collected by Piwik PRO in Microsoft Power BI Desktop, you need to use our custom data connector. Once the integration is complete, you can start creating powerful data visualizations on dashboards and reports in Microsoft Power BI Desktop.
To integrate with Microsoft Power BI Desktop, follow these steps:
Note: This integration isn’t listed in Microsoft Power BI extensions yet. We plan to publish it there soon. Until then, you need to add the extension manually.
1. Update your Microsoft Power BI Desktop to the latest version.
2. Download the .mez file with our connector.
3. On your computer, find the following directory: My Documents\Microsoft Power BI Desktop\Custom Connectors. If the directory doesn’t exist, create one.
4. Add the downloaded file with our connector to the folder Custom Connectors in the found directory: My Documents\Microsoft Power BI Desktop\Custom Connectors.
5. Open your Microsoft Power BI Desktop.
6. Go to File > Options and settings > Options > Security.
7. In Data Extensions, check Allow any extension to load without validation or warning.
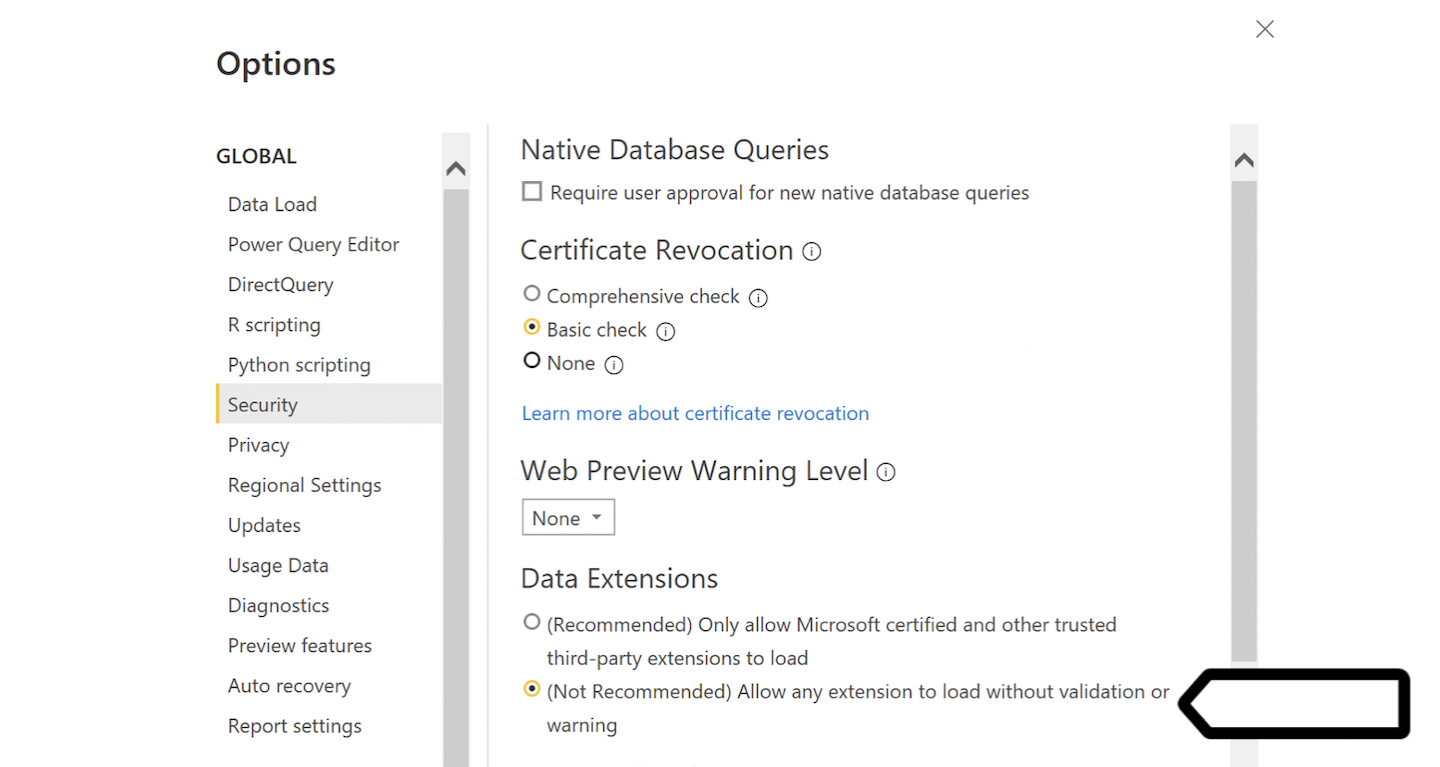
8. Click Save.
9. Done! Now the extension is available in your Microsoft Power BI Desktop, and you can connect to Piwik PRO.
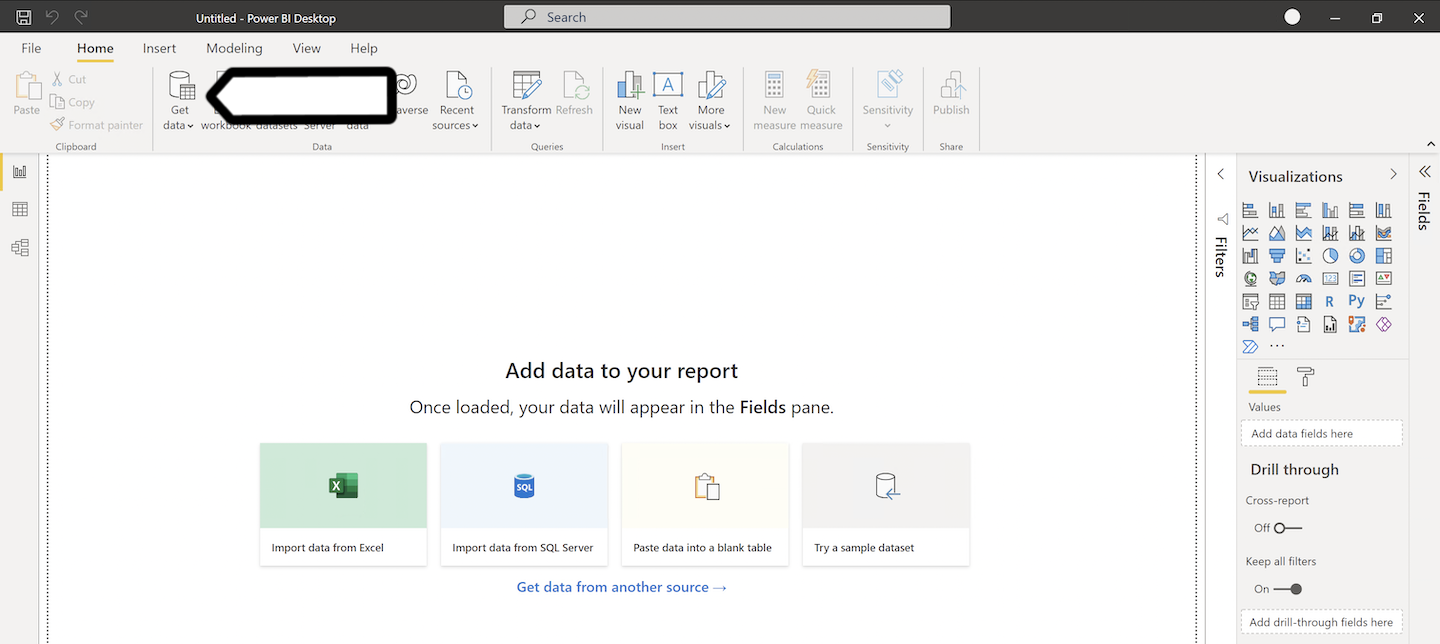
10. Create a new workbook or data source.
11. Click Get Data.
12. Look for Piwik PRO Analytics. This is our connector.
13. Click Connect.
14. Click Continue.
15. In Account address, enter your account address.

Tip: Your account address is the URL you use to log in to Piwik PRO. Example: https://example.piwik.pro.
16. Click OK.
17. Next, enter your Client ID and Client secret. Where to find it?
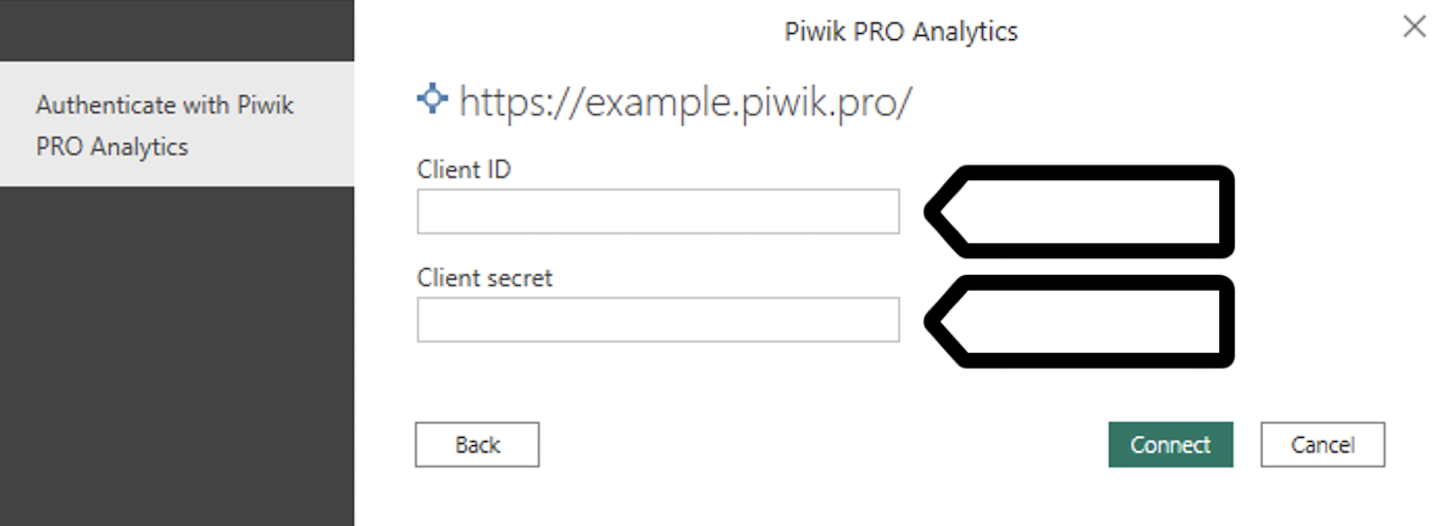
18. Click Connect.
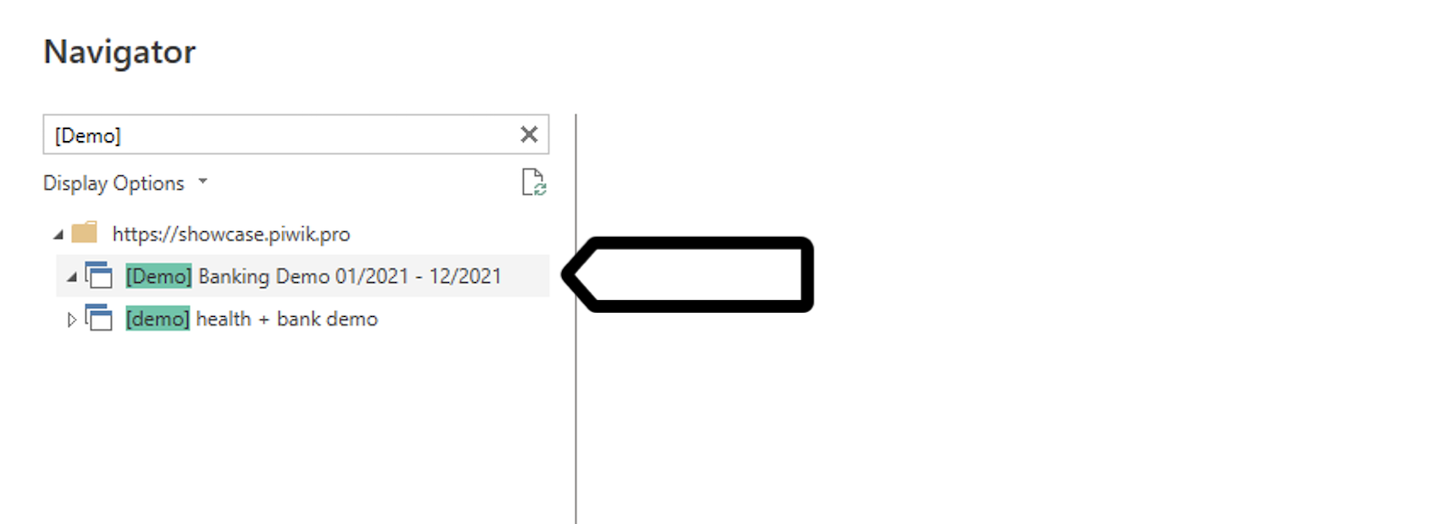
19. In Navigator, select the site or app from which you want to get data.
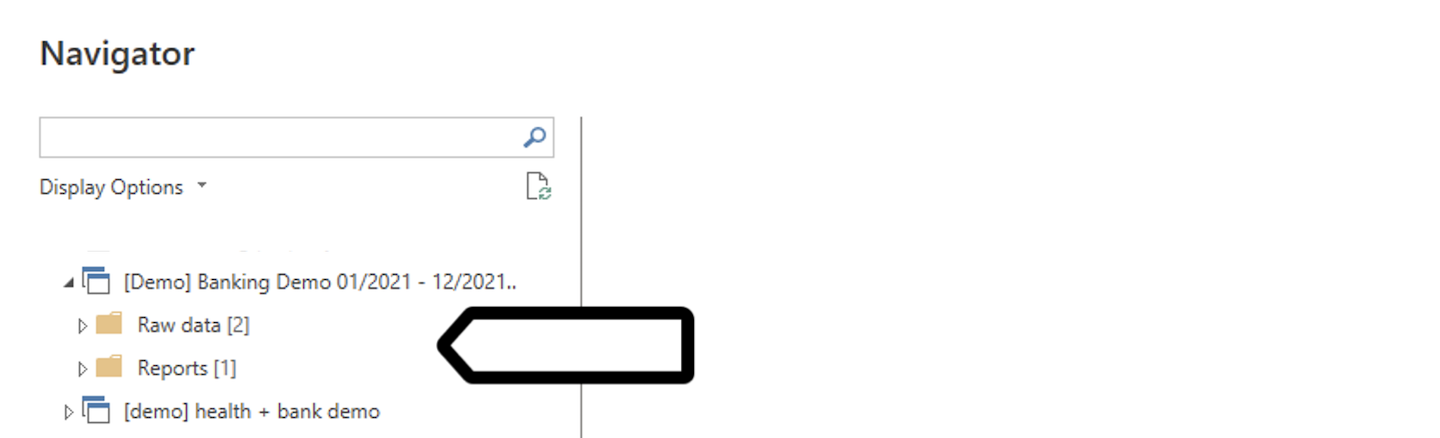
20. Select the data format you want to download:
- Raw data: Allows you to download raw session and event data.
- Reports: Allows you to query the database and download data, just like reports in Piwik PRO.
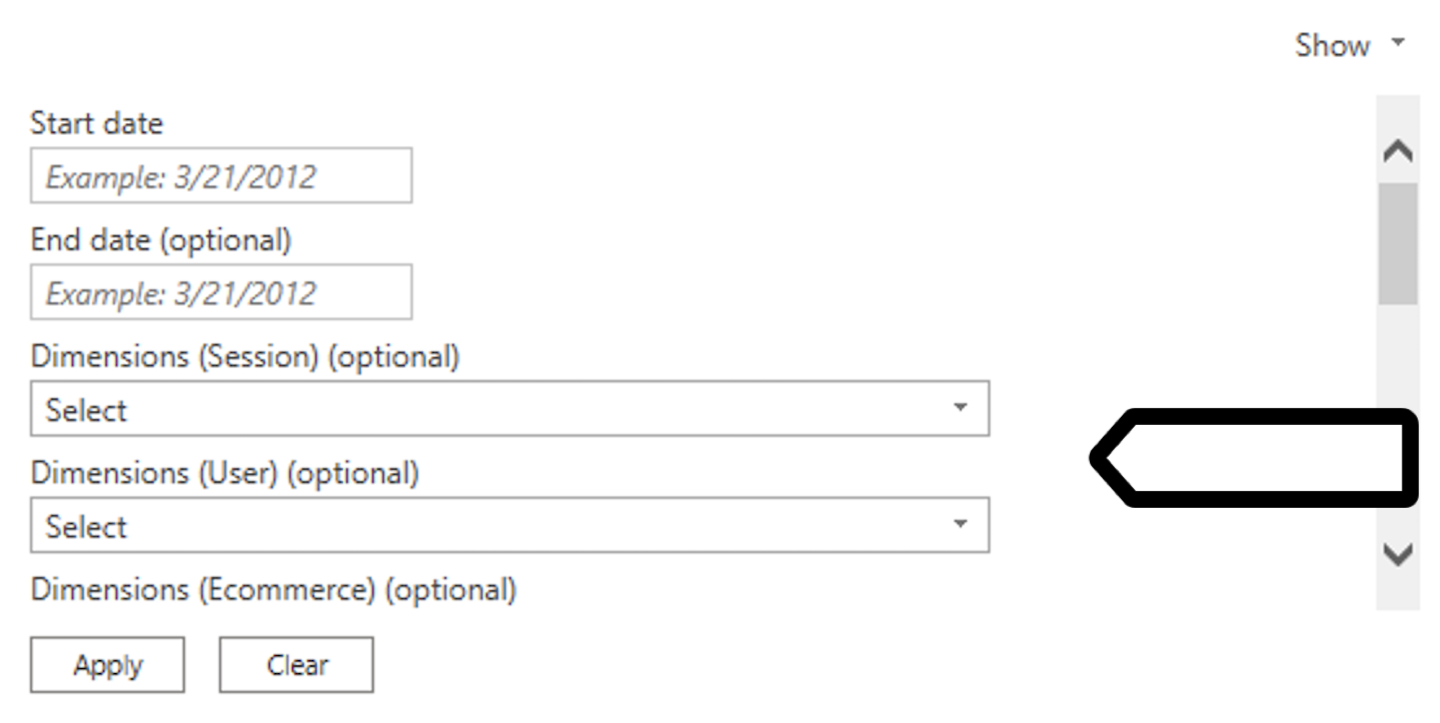
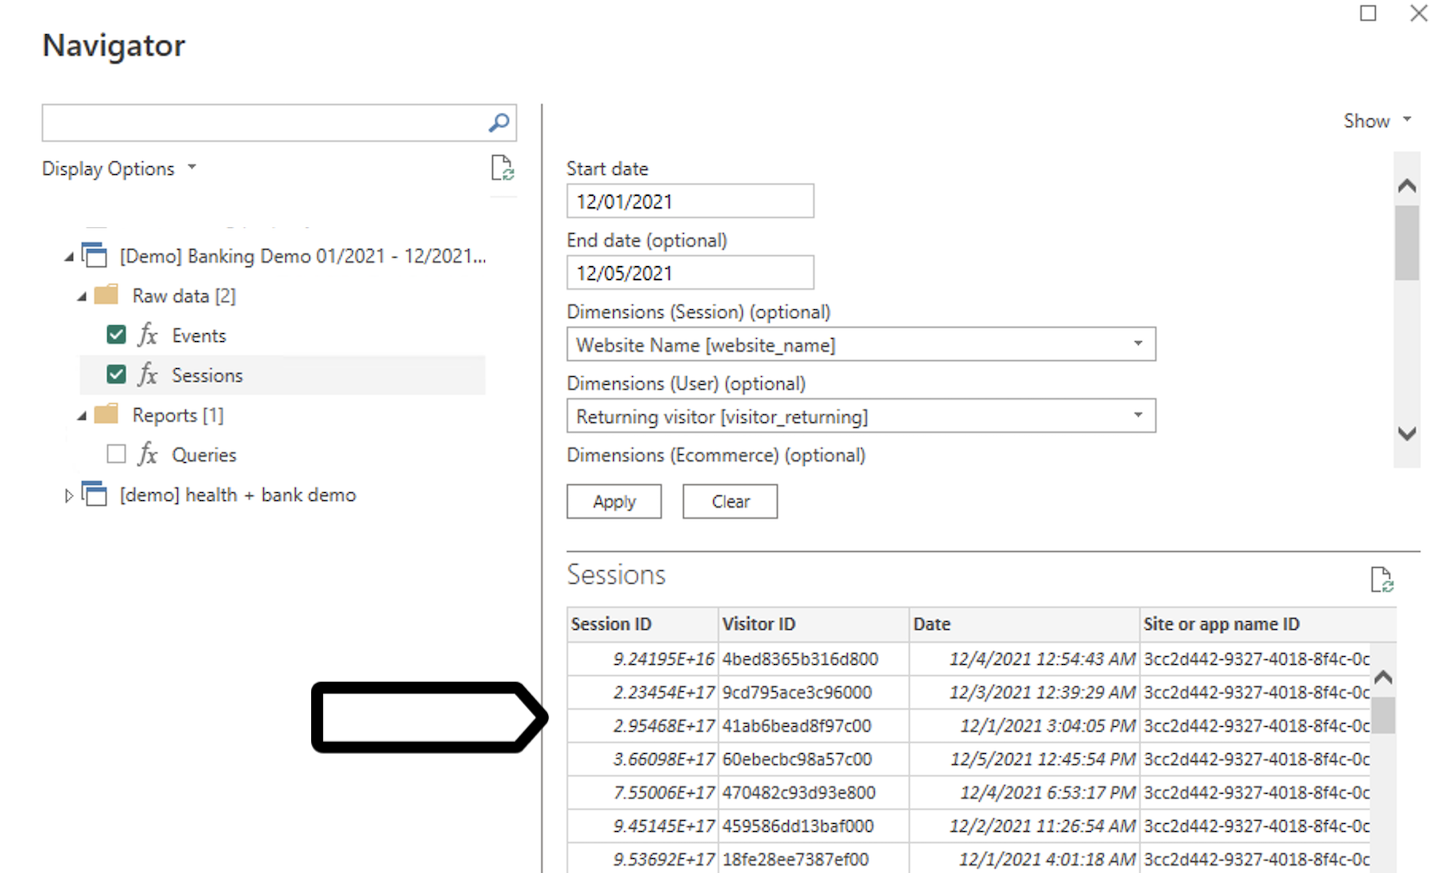
21. Enter the start date and optional end date.

Note: If you don’t enter an end date, our connector will automatically set the current date and you’ll be able to use the Refresh button to trigger the download of the latest data.
22. (Optional) Select the dimensions, metrics and other parameters you want to see in Power BI.
Note:
- If you picked the report data format and want to use dates, you’ll need to select the Timestamp dimension. In raw data, these dates are automatically included. Read more
- You could get a
400: Bad requesterror if you try to combine dimensions and metrics that can’t be used together in one query because of conflicting scopes. Read more - The following data can’t be imported because its format doesn’t match the column structure: sessions_goals, sessions_goal_uuid and all product-scoped dimensions.
23. Click OK.
24. Click Apply to see the preview.
Note: If you select too much data, the preview may not work.
25. Click Load to load all data or Transform Data if you want to do some transformations first.
26. All done! Your data will soon appear in Microsoft Power BI Desktop.
