Note: This integration is in beta and requires a Power BI Desktop account. We plan to release a built-in integration for Microsoft Power BI service soon.
When you want to use data collected by Piwik PRO in Microsoft Power BI service, you need to use our custom data connector. Once the integration is complete, you can start creating powerful data visualizations on dashboards and reports in Microsoft Power BI service.
To integrate with Microsoft Power BI service, follow these steps:
1. Install an on-premises data gateway on the server. The gateway helps you access data on that server.
2. Download the .mez file with our connector and add it to any folder on the server.
3. Turn on custom connectors in the on-premises data gateway and point to the added folder as the location for custom connectors.
4. On your computer, open Microsoft Power BI Desktop. At this point, you should already have the integration with the desktop version set up. If you haven’t already done so, see these instructions.
5. Connect to the Piwik PRO Analytics data source and download the data you want.
6. (Optional) If you want to use incremental refresh, follow the next optional steps.
7. (Optional) First, follow these steps from Microsoft.
8. (Optional) In the Filter data step, set a filter for the Date column. Don’t publish your report yet.
9. (Optional) On the Home ribbon in Power Query Editor, select Advanced Editor.
10. (Optional) Find the function call that loads the data and replace the first two date parameters with DateTime.Date(RangeStart), DateTime.Date(RangeEnd) respectively.
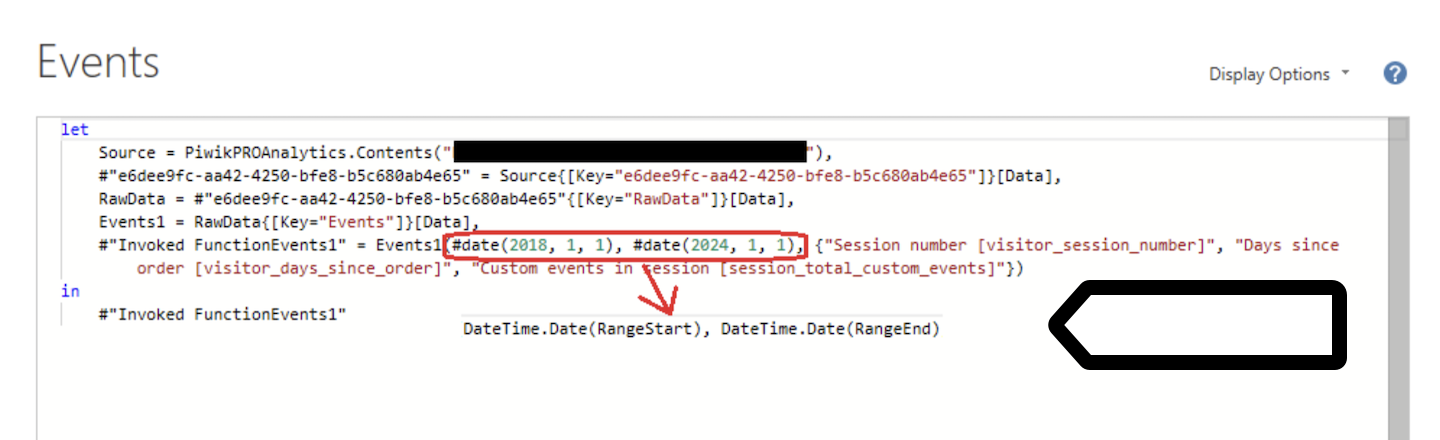
11. (Optional) Click Done.
12. Publish the dataset and report from Power BI Desktop to Power BI service.
13. Log in to Power BI Service.
14. Go to Settings > Manage connections and gateways.
15. In Connections, click New to create a new connection.
16. Select On-premises.
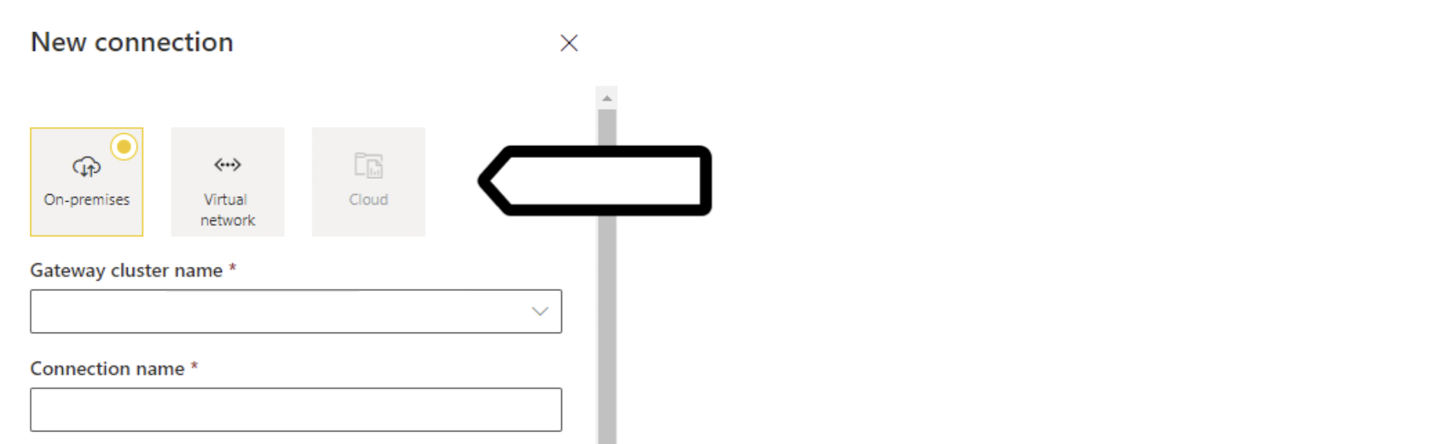
17. Select your Gateway cluster name and name your connection.
18. In Connection type, select Piwik PRO Analytics.
19. In Account address, enter your account address.
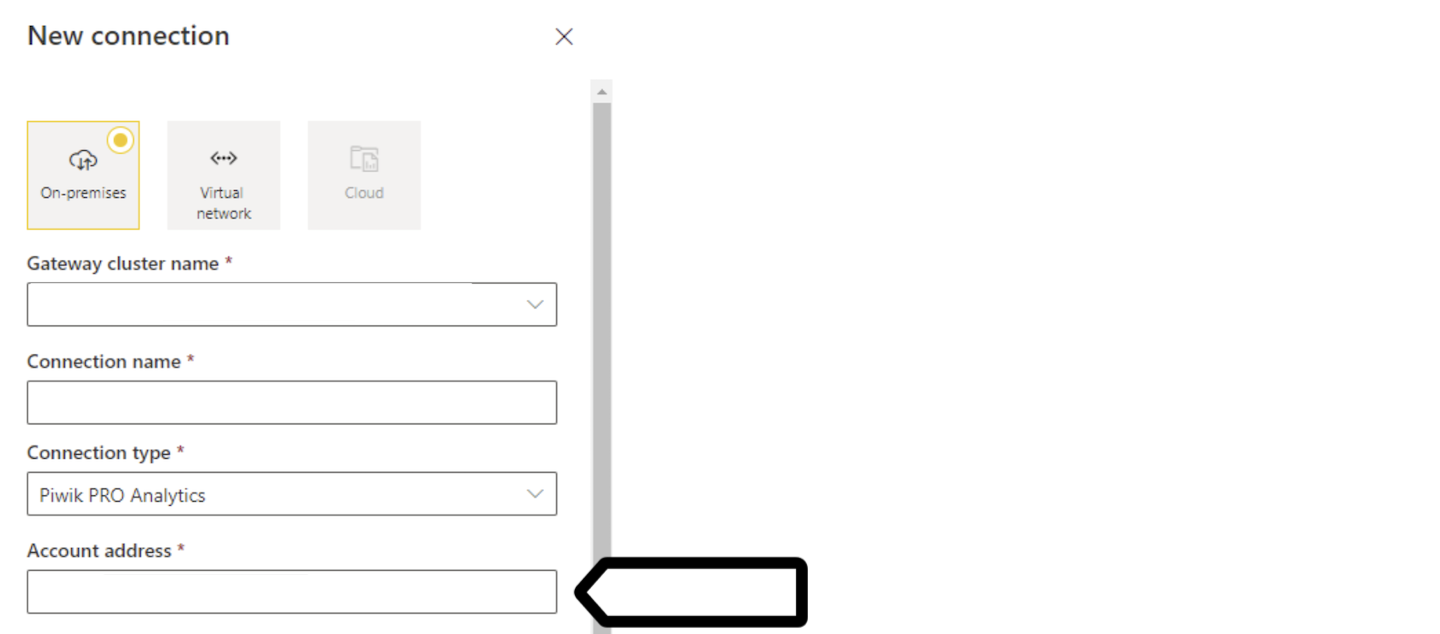
Tip: Your account address is the URL you use to log in to Piwik PRO. Example: https://example.piwik.pro.
20. In Authentication, enter the following information:
- Username: Client ID (Where to find it?)
- Password: Client secret (Where to find it?)

21. Click Create.
22. Open the workspace where you published your dataset and report.
23. Find your published dataset and click the ⋯ three-dot icon.
24. Select Settings.

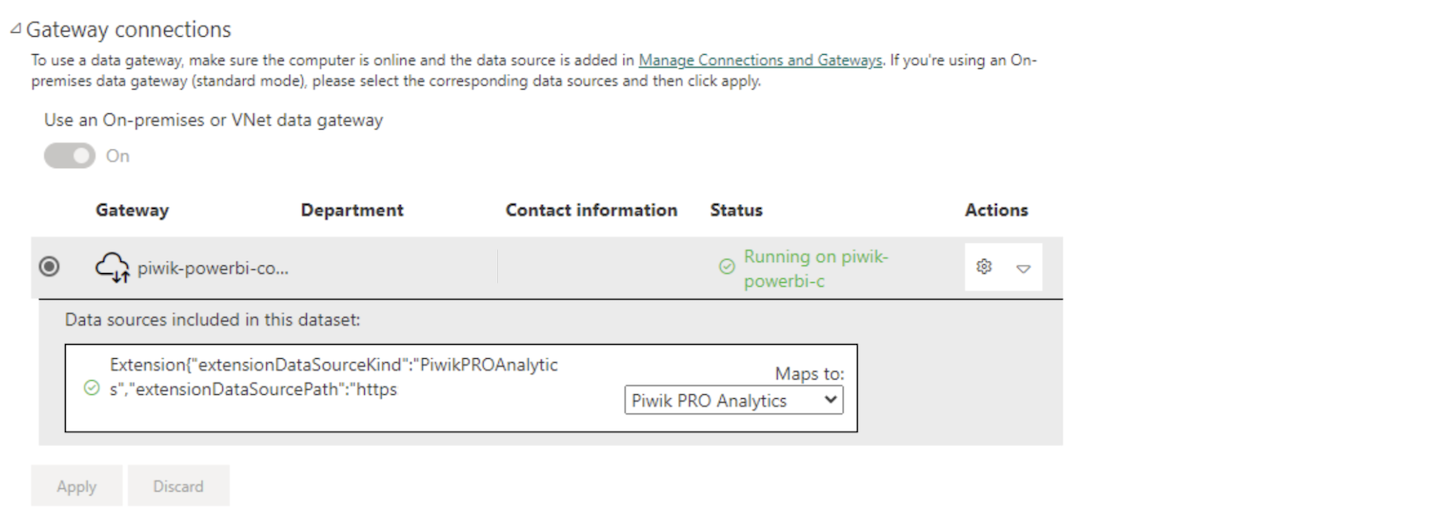
25. In Gateway connections, map the data source to the connection and click Apply.
26. In Refresh, set a refresh schedule and click Apply.

27. Reopen the workspace and click Refresh Now to trigger a dataset refresh.
28. Job done! Now your data is automatically refreshed in Power BI service. You can also publish reports from Power BI Desktop or create and edit reports in Power BI service.