Deprecated: SharePoint integration will be fully supported until the end of 2025. The exact sunset dates are not confirmed yet, but we’ll keep you posted. Also, this integration is not available to new customers.
Integration for: Microsoft SharePoint On-premises 2013, 2016, 2019, Subscription Edition.
When you want to collect data about SharePoint users in your company, you need to integrate Piwik PRO with SharePoint. SharePoint sites can’t be tracked like a regular website, so they need a dedicated setup. The integration takes a few larger steps and may involve a few people from your company, but we’ll try to show you the path as clearly as possible.
Steps
- Install the connector between SharePoint and Piwik PRO
- Set up tracking for a site collection
- Turn on SharePoint reports in Piwik PRO
Install the connector between SharePoint and Piwik PRO
As the first step, you need to install the connector between SharePoint and Piwik PRO.
Needed permissions and modules:
- RDP access to SharePoint Server
- SharePoint farm admin account
- PnP PowerShell 3.23.2007.1 or higher (If you don’t have it installed yet, deployment scripts will install it automatically.)
- Windows Management Framework 5.1
- For Subscripton Edition, we recommend using the latest cumulative update.
Note: For SharePoint 2019 or Subscripton Edition, you need to create and register an app catalog.
- Open your SharePoint 2019 or Subscripton Edition.
- Go to Central Administration.
- In Web Application, choose the application used as a tracker. Example:
https://piwik-sp:0000/. - Click OK.
To install the connector, follow these steps:
1. Run Windows PowerShell as a farm administrator in the context of the SharePoint folder in the installation directory.
2. In PowerShell, navigate to the script folder.
3. Run the Provision-ToSharePoint.ps1 script using the command: .\Provision-ToSharepoint.ps1.
4. You’ll see the Piwik PRO connector loaded.
5. Run the Provision-ToSharePoint.ps1 script and add correct parameters.
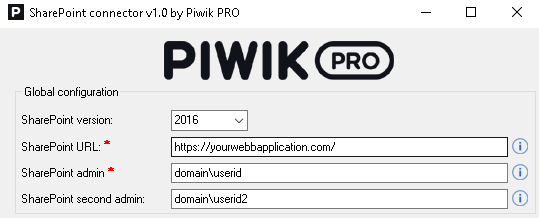
6. In Global configuration, enter the following details:
- SharePoint version: 2013, 2016, 2019 or Subscription Edition.
- SharePoint URL: Your SharePoint account address. Example:
https://example.sharepoint.com. - Note: If you want to install this connector on several accounts, you need to run this script again for each account.
- SharePoint admin: A farm admin account. Example:
domain\username. - SharePoint second admin (optional): An additional admin. They’ll have access to the Piwik PRO connector. Example:
domain\username.
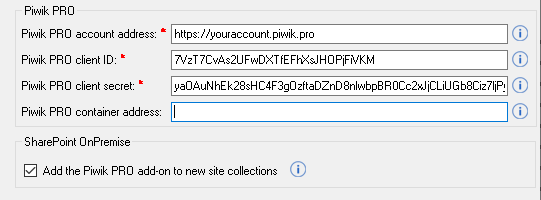
7. In the Piwik PRO section, enter the following details:
- Piwik PRO account address: The address you use to log in to Piwik PRO. Example:
https://yourname.piwik.pro. - Piwik PRO client ID: A part of your API credentials. You can create it in Menu > Profile > API keys. Where to find it?
- Piwik PRO client secret: A part of your API credentials. You can create it in Menu > Profile > API credentials. Where to find it?
- Piwik PRO container address (optional):
- For standard installation: Keep it empty.
- For non-standard installation: Enter your Piwik PRO account address with containers added to the address.
- For standard domains:
https://yourname.containers.piwik.pro - For custom domains:
https://yourname.piwik.pro/containers. This address may be different for Piwik PRO on-premises or private cloud accounts. Contact us to get the right address.
- For standard domains:
- Add the Piwik PRO add-on to new site collections: If checked, you’ll see the Piwik PRO add-on in the site collection settings. To set up and activate site tracking, you’ll need to go to SharePoint > Settings > Piwik PRO.
8. Click Save and install.
9. After the script is finished, you’ll see the Piwik PRO Administration site in SharePoint.
Note: If you receive any error messages, contact our support team.
Set up tracking for a site collection
As the second step, you need to turn on tracking for a site collection in SharePoint. A site collection is SharePoint’s name for something similar to a website. It’s a group of sites that have the same owner and share administrative settings.
Needed permissions: Site Collection Administrator in SharePoint.
To turn on tracking for a site collection in SharePoint, follow these steps:
1. Log in to SharePoint.
2. Navigate to the site collection that you want to work with.
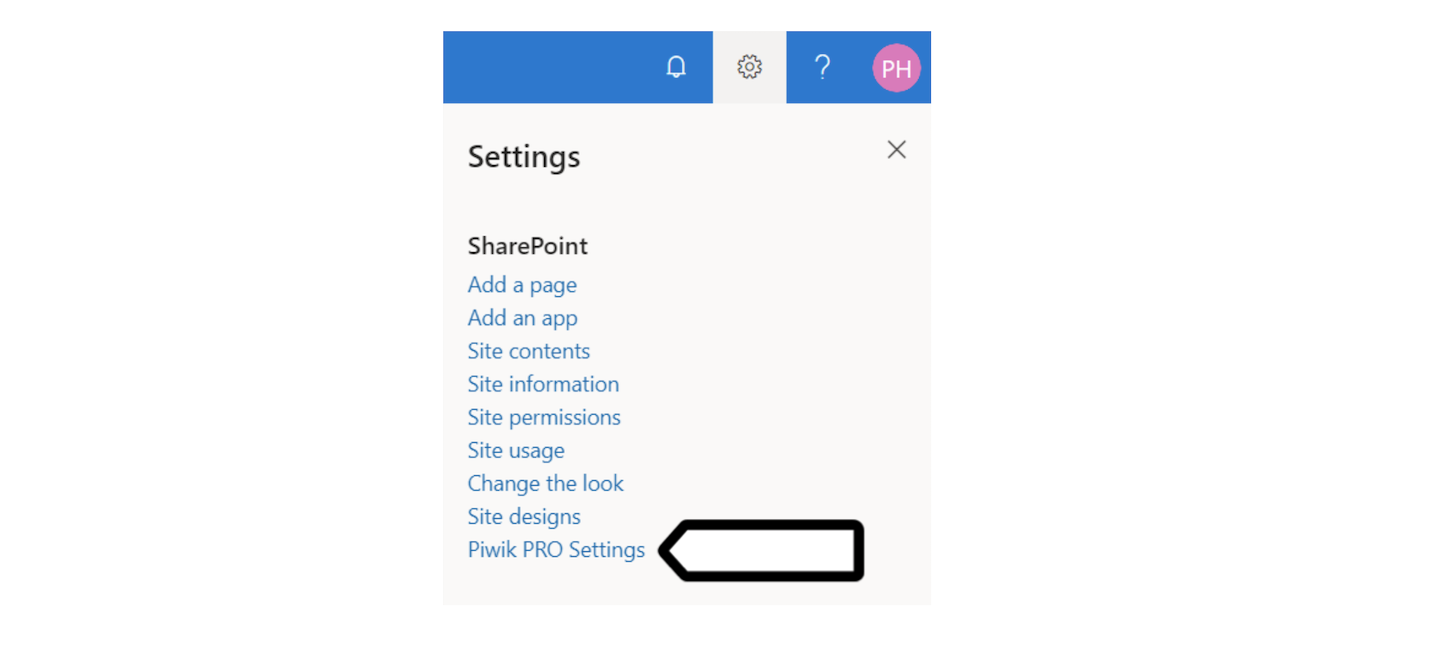
3. Click on the settings wheel in the menu bar.
4. Choose Piwik PRO settings.
5. In Site collection settings, check Enable tracking.
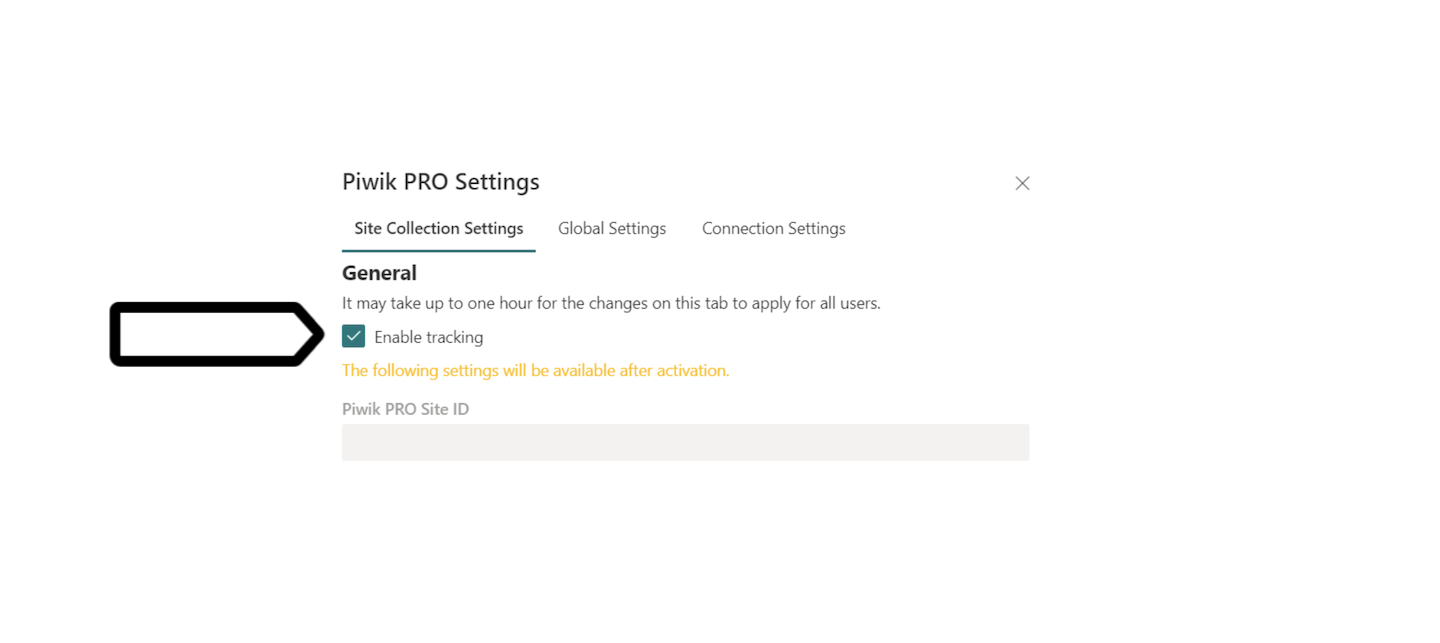
Note: It may take up to 30 minutes for tracking to start off because SharePoint’s search crawl needs to notice changes in settings. Also you may need to empty a browser cache because it stores tracker settings for 1 hour, or you can wait for it to refresh.
6. To check if tracking for a site collection is active, look for User information under Piwik PRO Settings. This section will only appear if tracking has started.
7. You can also check the tracking status on SharePoint’s administration site: <your SharePoint URL>/sites/PiwikAdmin > Site contents > Piwik PRO site directory.
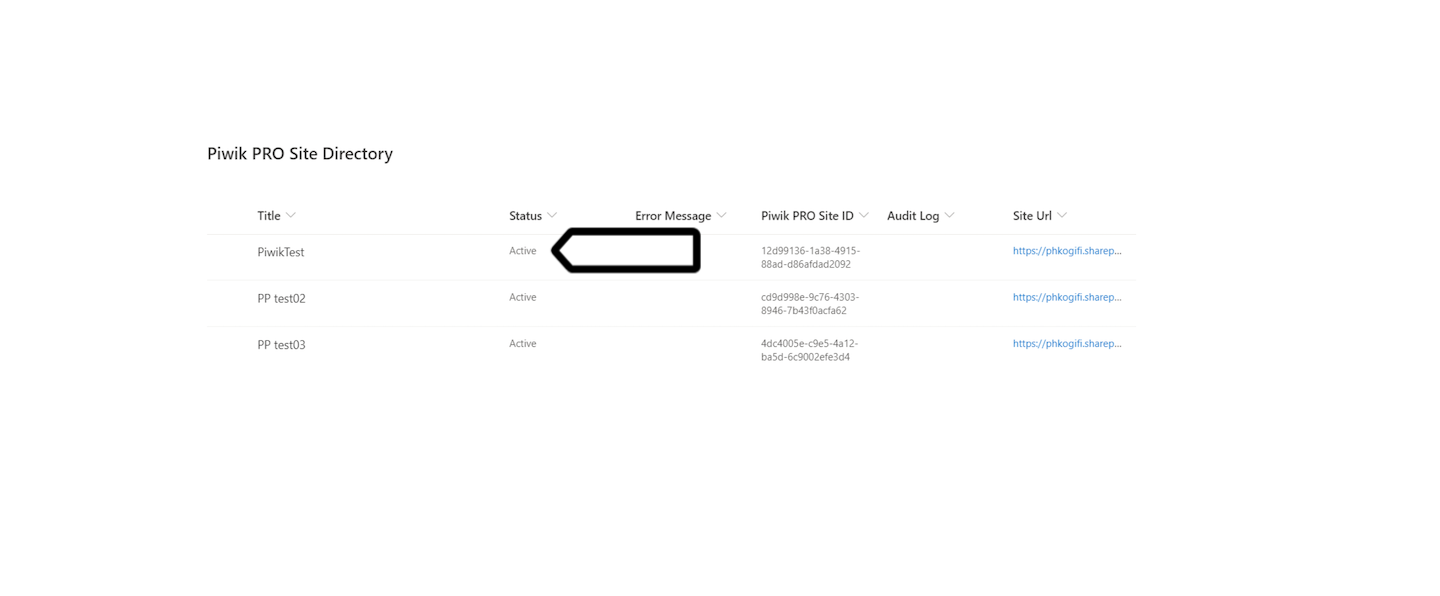
Note: Active means that Piwik PRO tracks the site collection. The tracked site collection will be automatically added as a new site to Piwik PRO.
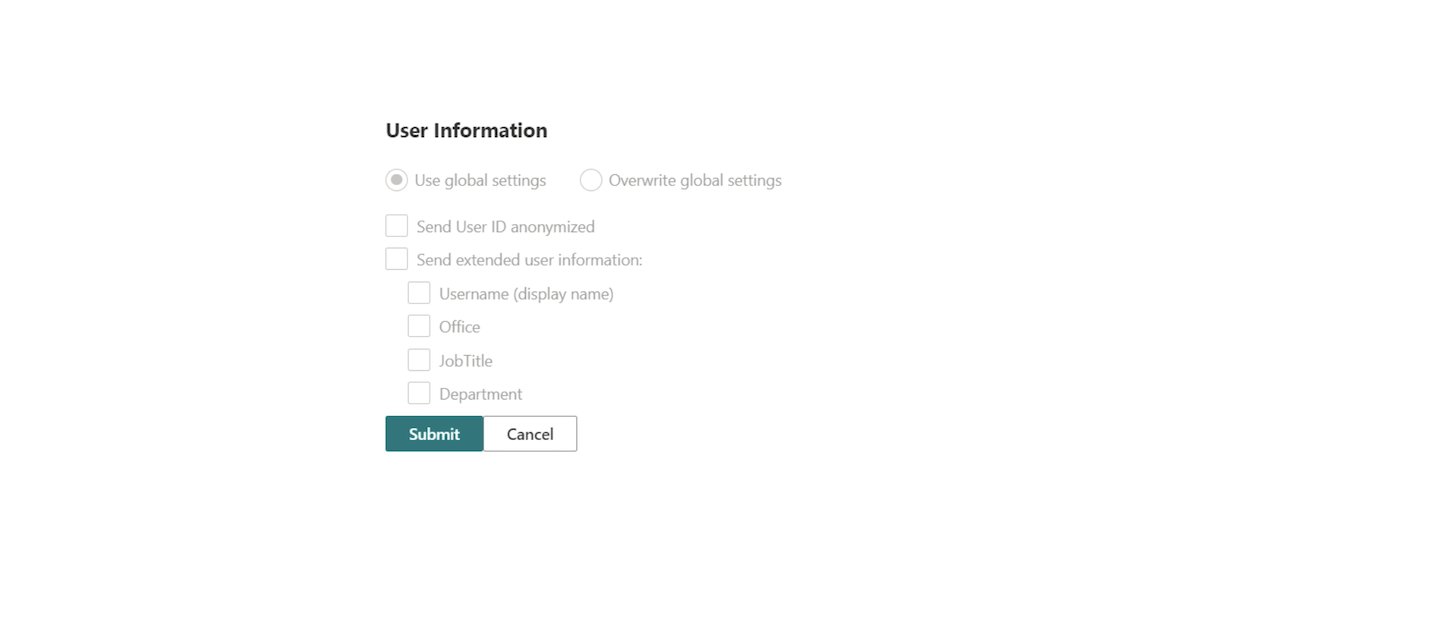
8. In User information, you can choose to anonymize user IDs and collect additional data:
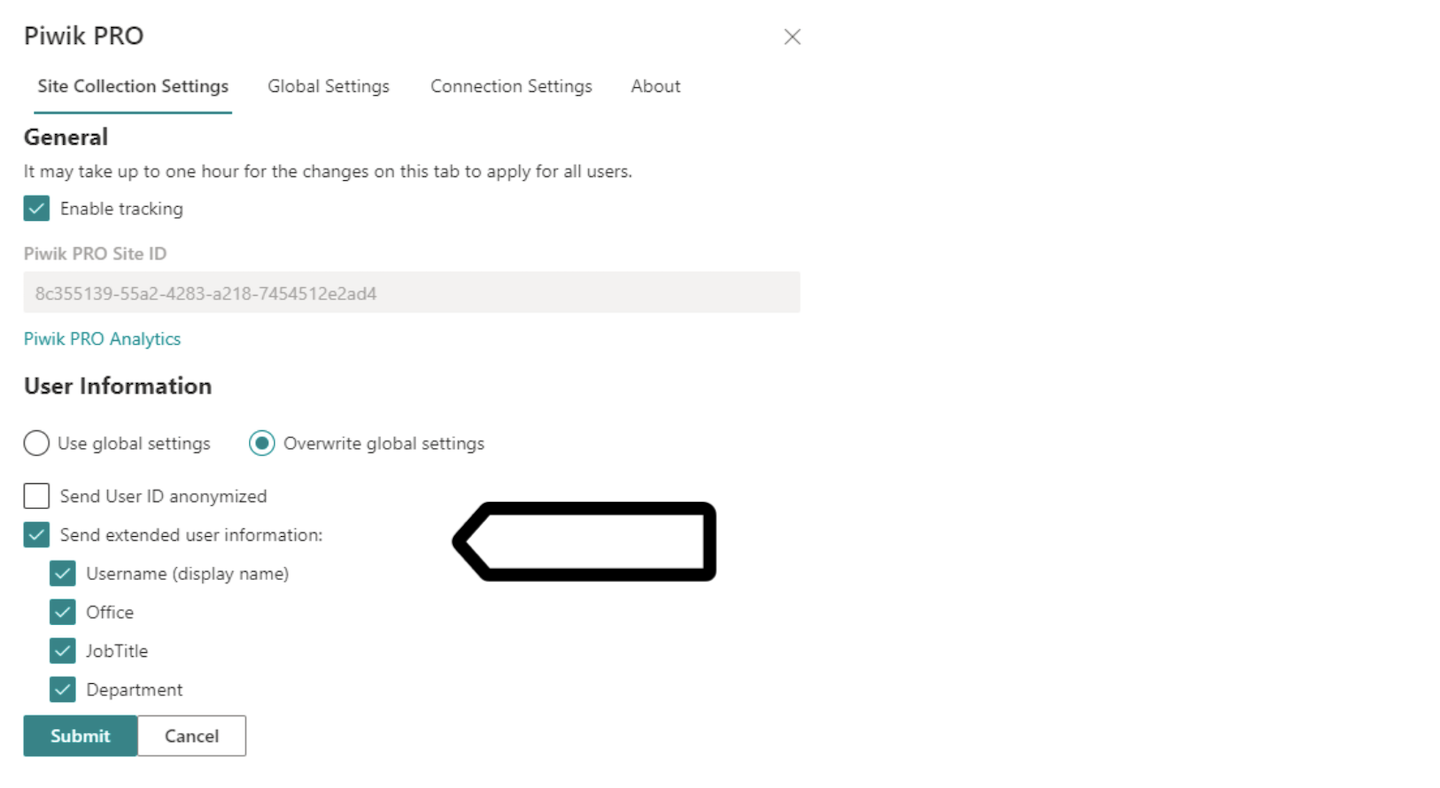
- Send User ID anonymized: Users will still be recognized, but we’ll hide their ID.
- Send extended user information: Check if you want to collect additional user data as custom dimensions in Piwik PRO Analytics:
- Username (display name)
- Office
- JobTitle
- Department
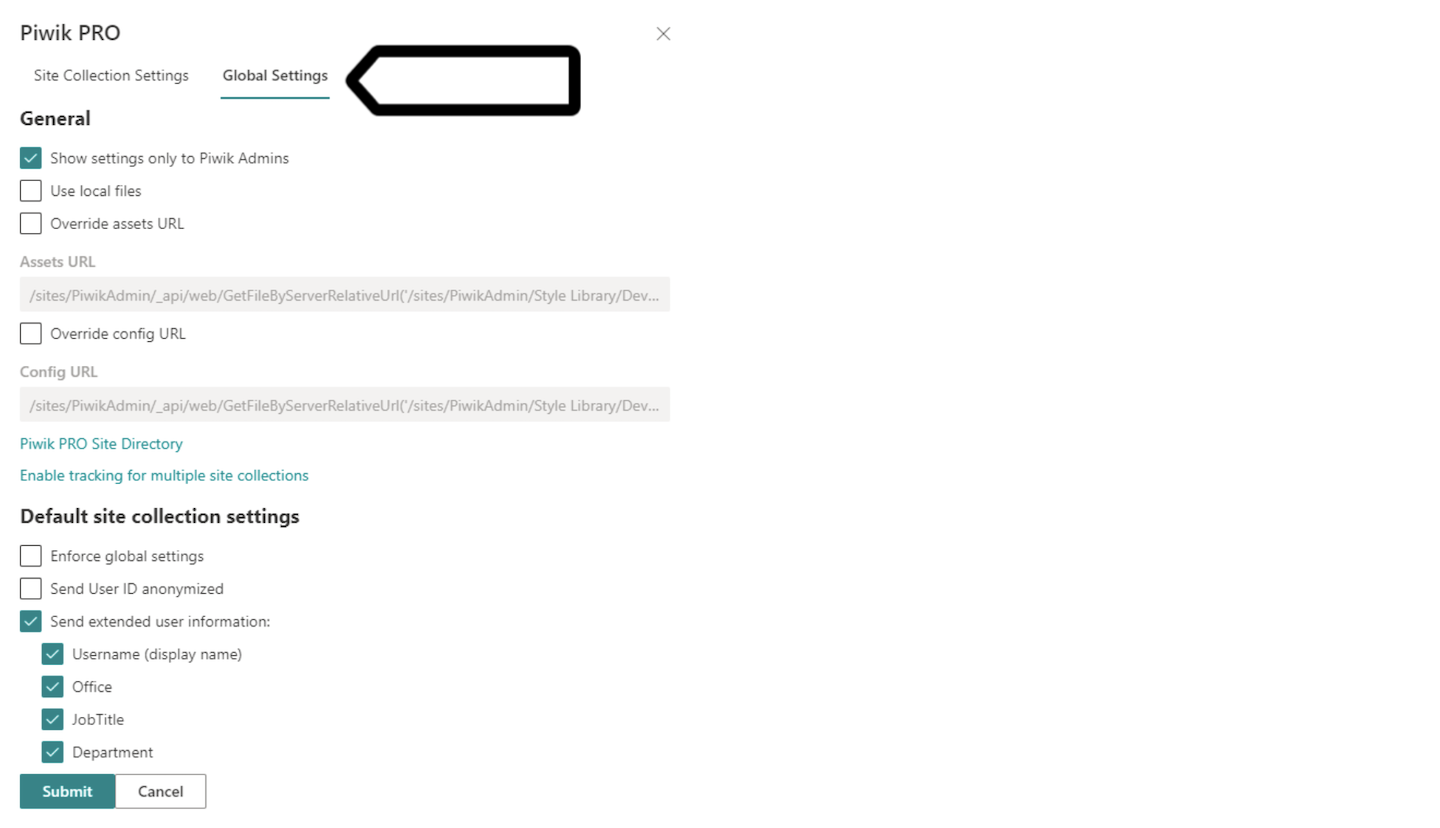
9. You can also change settings for all sites at once in Global Settings.
Turn on SharePoint reports in Piwik PRO
As the last step, you only need to turn on SharePoint reports in Piwik PRO.
Needed permissions: owner
To turn SharePoint reports on, follow these steps:Available from version 16.0.0. For versions below 16.0.0, go to Menu > Administration > Websites & apps > Settings > Integrations.
1. Go to Menu > Administration.
2. Select a website you want to work with.
3. Navigate to Reports.
4. Turn on SharePoint reports.
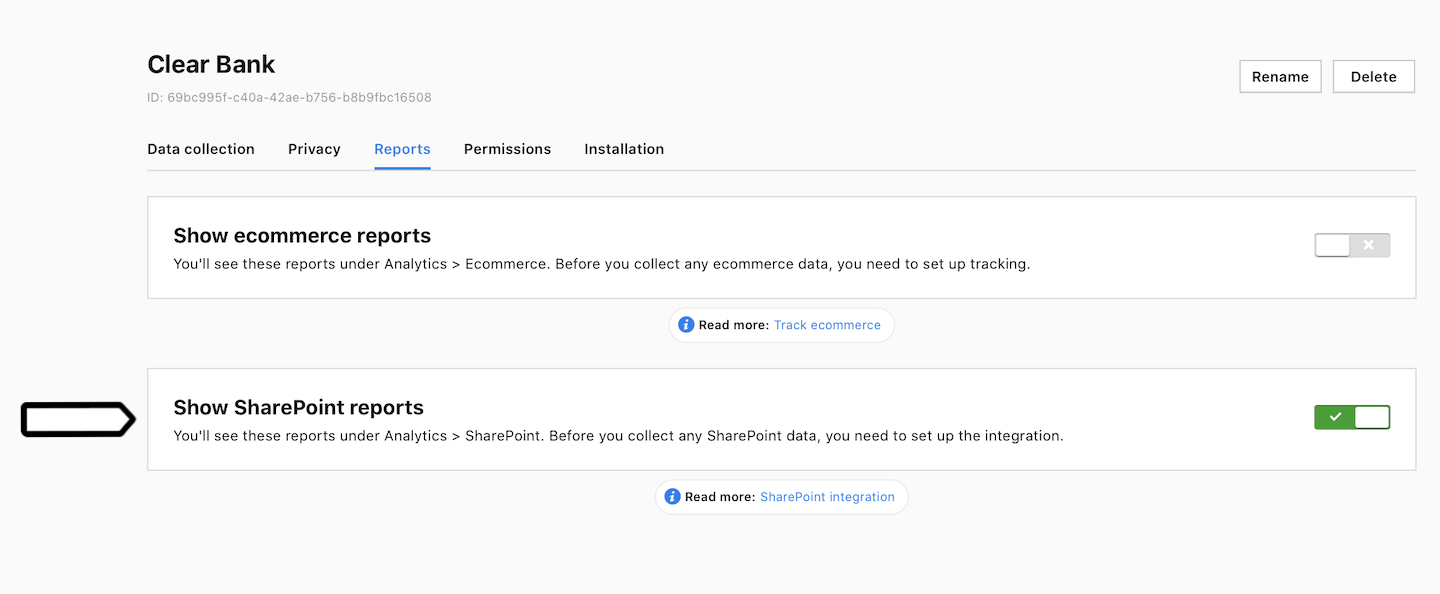
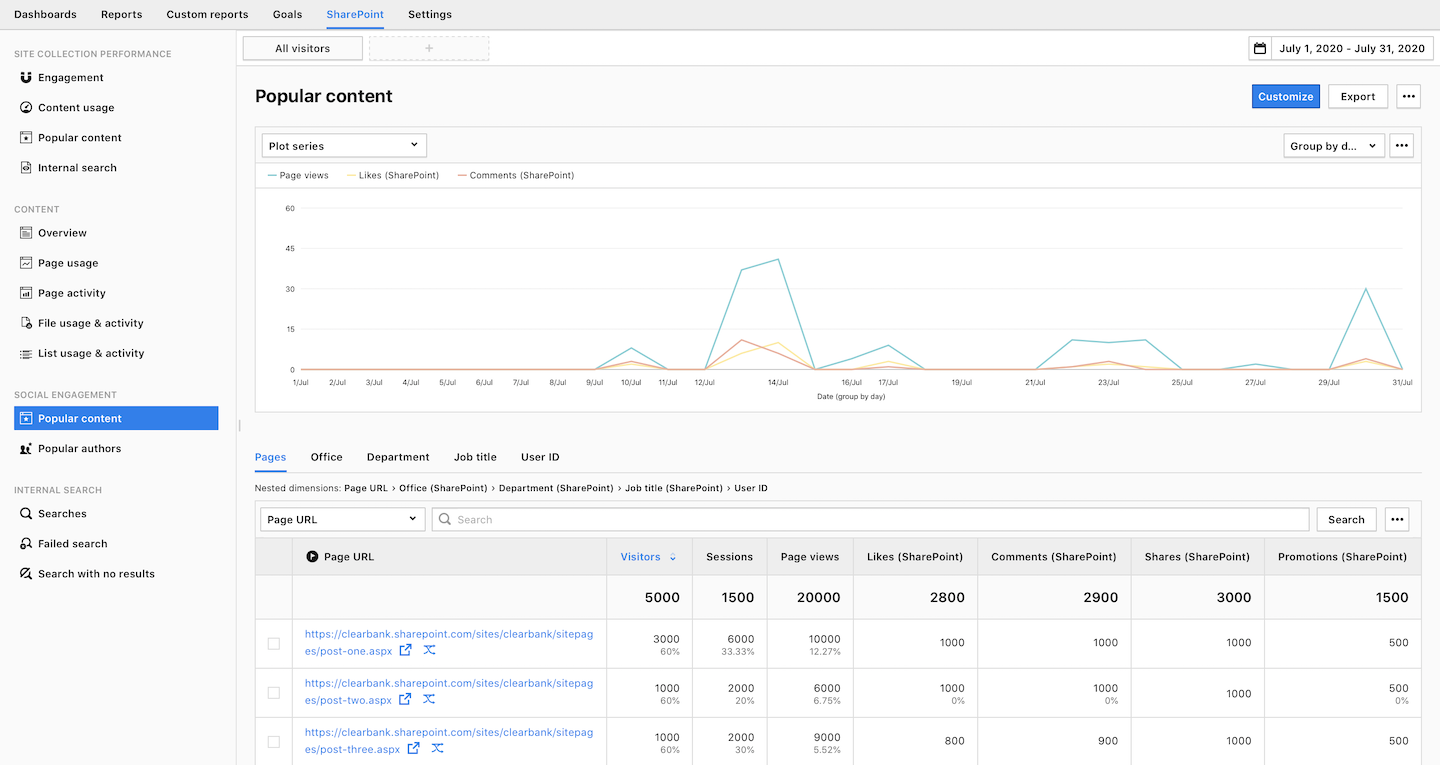
5. Now SharePoint reports will appear under Analytics > SharePoint.
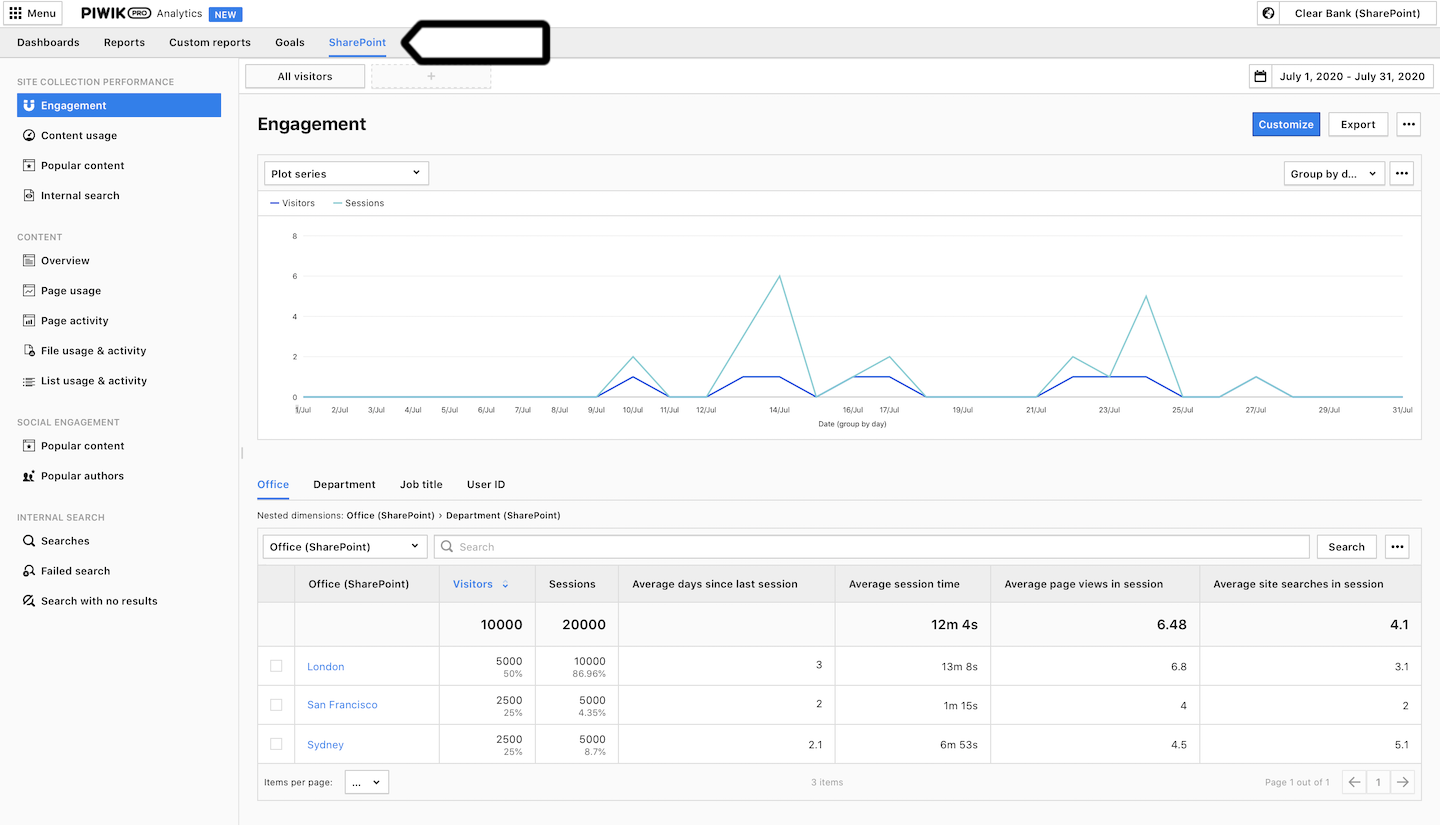
Tip: Read more about SharePoint reports.