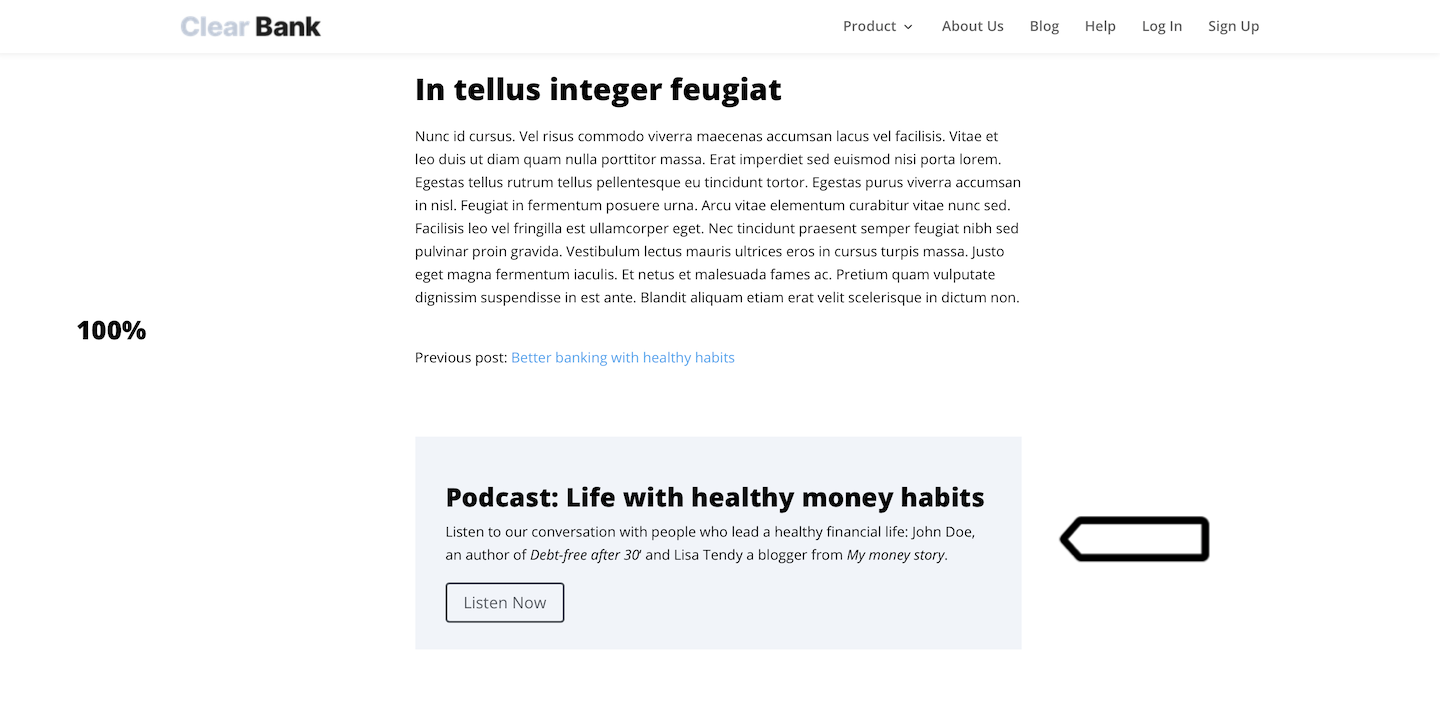
A custom content tag lets you add contextual ads, like banners or info boxes, or other content to your website. Contextual ads fit nicely into the content of your website and are less distracting than popups.
In this article, we’ll explain how to set them up.
Before you start
Here are some things to know before you start:
- You need to know a bit about HTML and CSS to design your ad, but the tag setup is easy.
- The ad is part of the website content, so you need to indicate where exactly it should be placed. For this you can use div ID, section ID, block ID and so on.
- By default, this tag appears for visitors who agree to A/B testing and personalization. But you can change its settings.
- This tag loads at the same time as other tags.
Set up a custom content tag
To set up a custom content tag, follow these steps:
1. Design and code your contextual ad in HTML.
2. Go to Menu > Tag Manager.
3. Navigate to Tags.
4. Click Add a tag.
5. Choose the following tag type: Custom content.
6. Click Next.
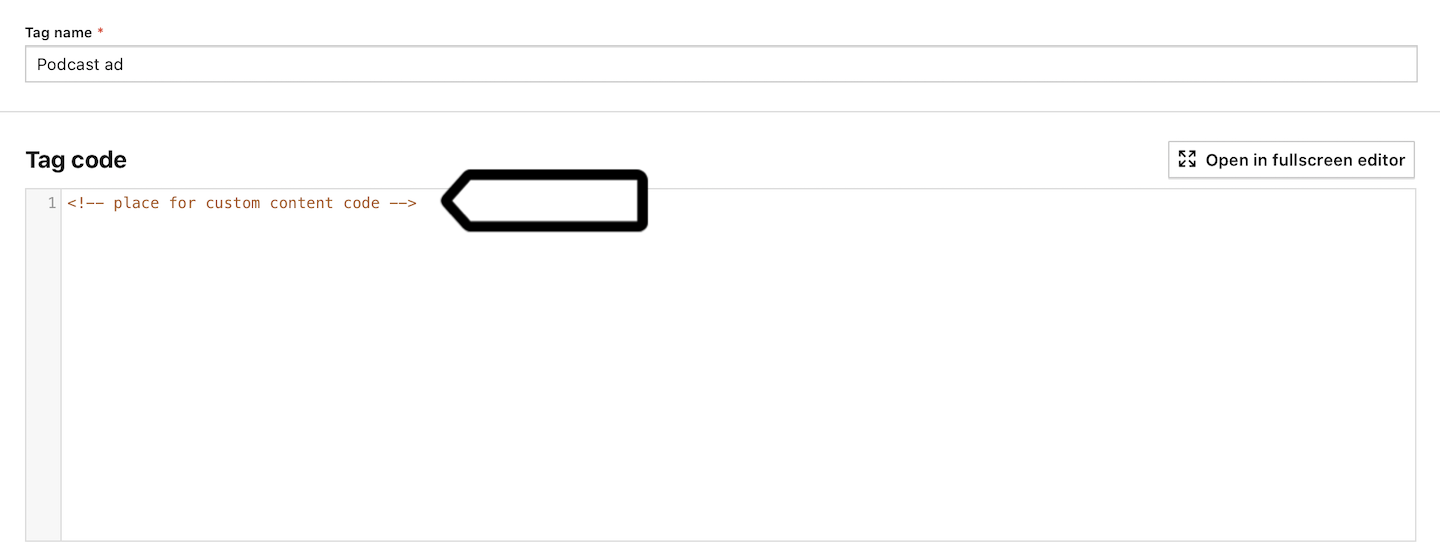
7. Name your tag.
8. In HTML tag code, type the code with your ad.
9. In Content placement, enter the ID of the page section where you want the ad to appear.

10. In Advanced tag settings, choose the tag type. By default, your ad appears to visitors who agree to A/B testing and personalization, but you can change this.

11. Respect opt-out and DNT is turned on by default. Leave it as is if you want to respect visitors who’ve turned on the Do-Not-Track feature in their browsers or who’ve opted out of tracking using our opt-out form.
12. Enable document.write is turned off by default. Turn it on only if your tag needs it.
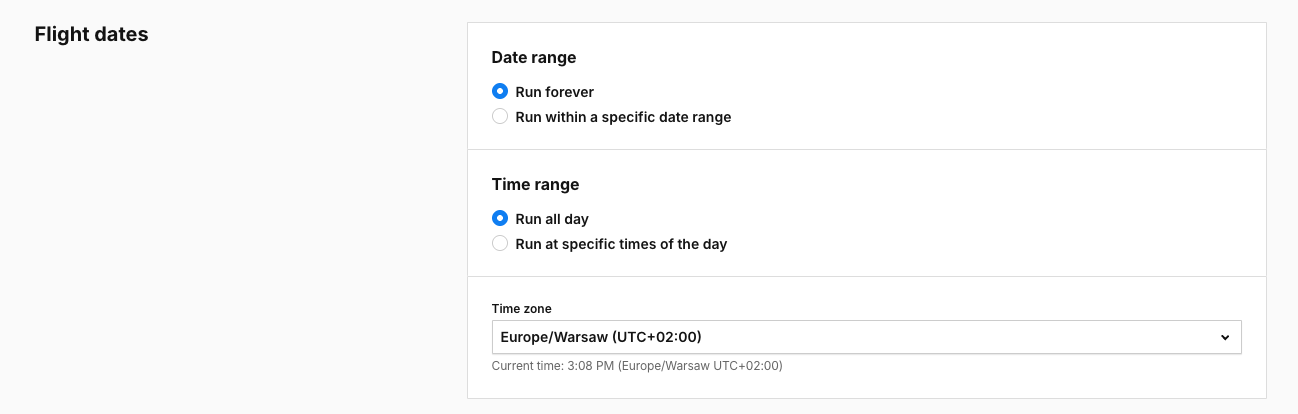
13. In Flight dates, set the date and time when the tag will fire.
14. In Tag triggers, click Add a trigger or Choose existing trigger to set up a trigger for your tag.
Tip: We recommend triggering the custom content tag multiple times. Otherwise, your contextual ad might appear and disappear when a visitor refreshes the page.
15. When you’re done, click Save.
16. Test your tag in debug mode.
17. When you’re happy with how the tag works, click Publish.
18. All done!
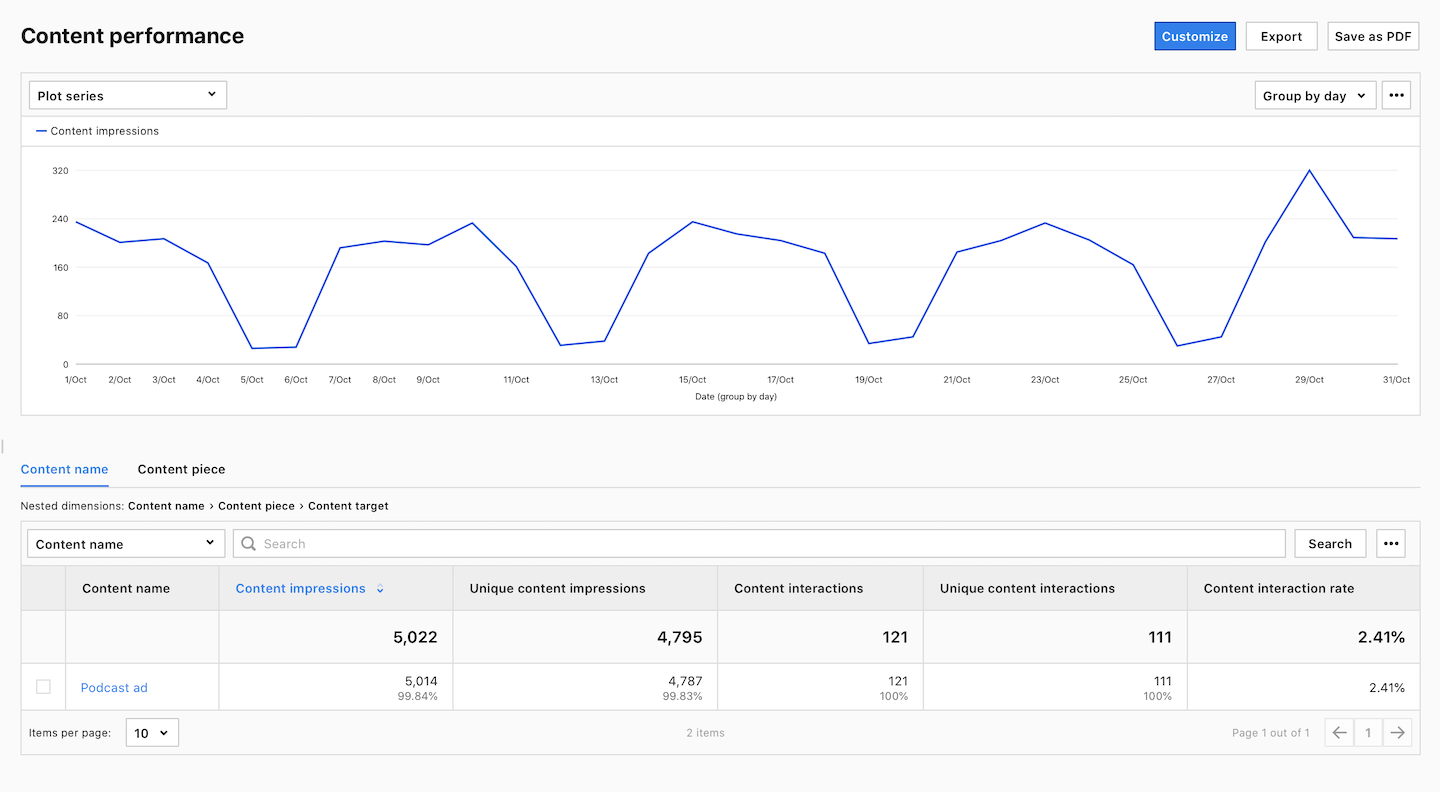
Track content impressions
To start tracking content impressions, follow these steps:
1. Go to Menu > Tag Manager.
2. Navigate to Tags.
3. On the left, click Piwik PRO (tracking code).
4. In Data collection, turn on Interactions with popups and content.
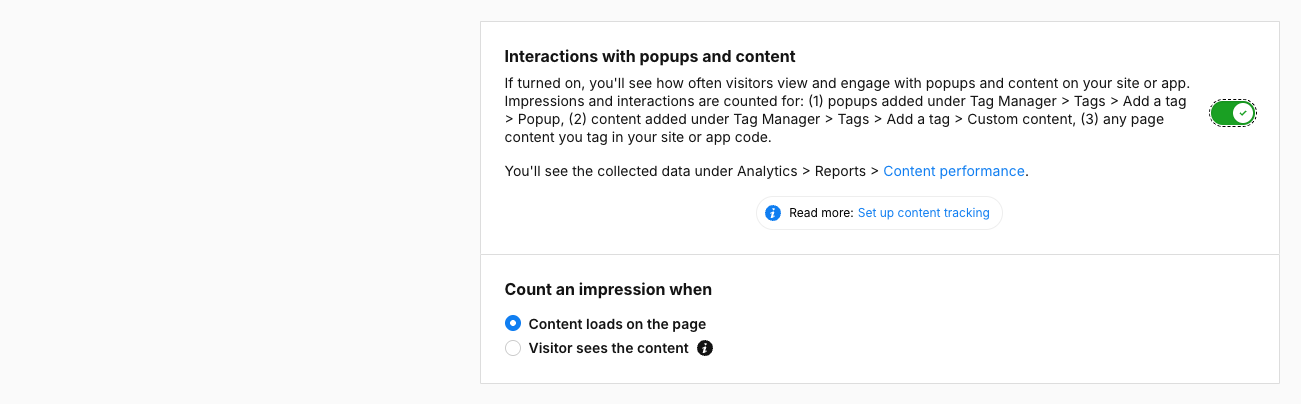
5. All set! The tracker will now begin counting ad views on your site. And you’ll be able to find all the stats in Menu > Analytics > Reports > Content performance.