If you ever need to separate your office traffic from the rest, you can do so using two segments in Piwik PRO. One will show visitors from your office based on IP addresses, and the other will cover the remaining traffic.
Note: These segments won’t work if you’re masking IP addresses.
Create a segment for internal traffic
To create a segment for internal traffic, follow these steps:
1. Find your office’s IP address. Example: 178.43.222.111.
2. Go to Menu > Analytics.
3. Navigate to Settings.
4. On the left, click Segments.
5. Click Add a segment.
6. Name your segment.
7. In Visibility, choose Author or All users. All users lets you share this segment with your teammates.
8. (Optional) Check All sites & apps to make this segment visible across all sites and apps.
9. Add your office’s IP address in the segment conditions. Example: IPv4 address equals 178.43.222.111.

10. Click Save.
11. Done!
Create a segment for external traffic
To create a segment for external traffic, follow these steps:
1. Find your office’s IP address. Example: 178.43.222.111.
2. Go to Menu > Analytics.
3. Navigate to Settings.
4. On the left, click Segments.
5. Click Add a segment.
6. Name your segment.
7. In Visibility, choose Author or All users. All users lets you share this segment with your teammates.
8. (Optional) Check All sites & apps to make this segment visible across all sites and apps.
9. Add your office’s IP address in the segment conditions. But also set `IPv6 is not empty`. Example: IPv4 address not equals 178.43.222.111 or IPv6 is not empty.
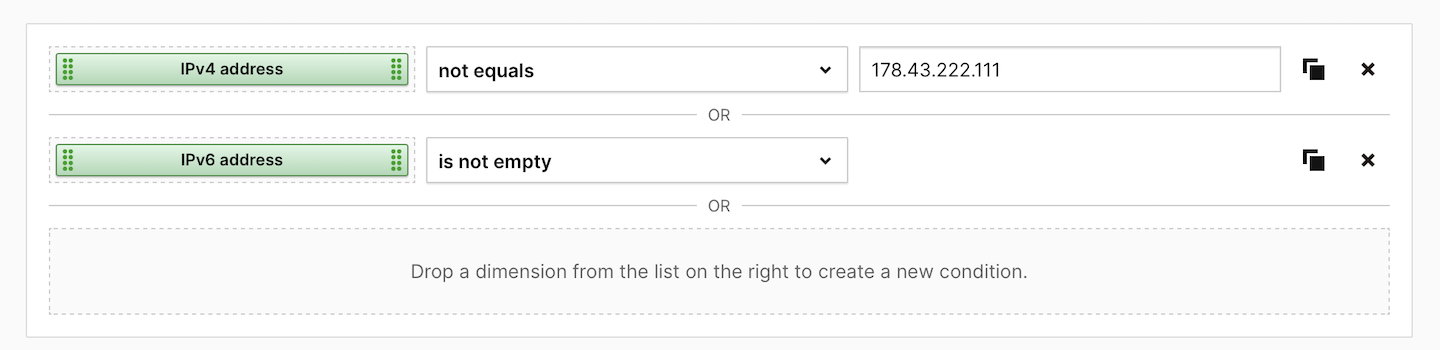
Note: You need to set `IPv6 is not empty` because otherwise the segment will exclude all IPv6 addresses.
10. Click Save.
11. Done!
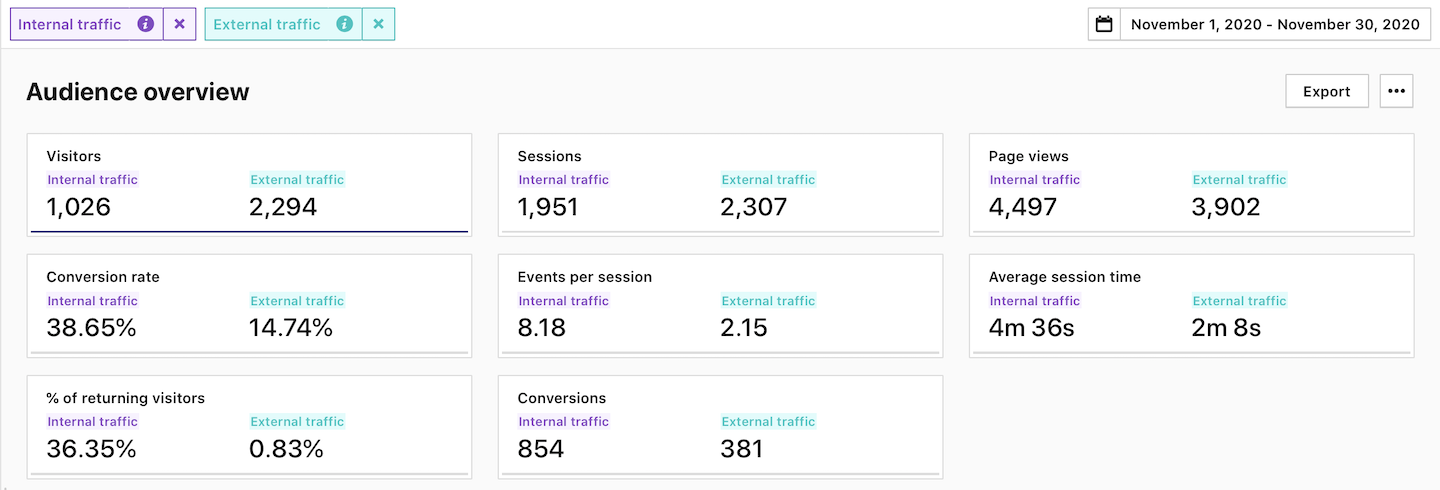
Compare segments in reports
To compare segments in reports, follow these steps:
1. Go to Menu > Analytics.
2. Navigate to Dashboards, Reports, Custom reports, Goals or Ecommerce.
3. Pick the report you want to view.
4. Click All visitors at the top.
5. Select the segment with internal traffic.
6. Click the + icon at the top.
7. Select the segment with external traffic.
8. All done! You can now compare your traffic sources.