Note: This method is only for accounts with versions below 16.5.0. For version 16.5.0 and higher, use the HTML5 video tracking tag.
When you want to track HTML5 videos embedded on your website, you need to set up custom tracking in Tag Manager. In this article, we’ll show you how to do it.
To set up HTML5 video tracking, follow these steps:
1. Use the code from this library. Look for: Video tracking for HTML5 videos.
Note: This code automatically locates <video> elements on a web page and observes user interactions with the videos. These interactions are recorded as custom events.
2. Click Customize if you want to set up some elements in the code.
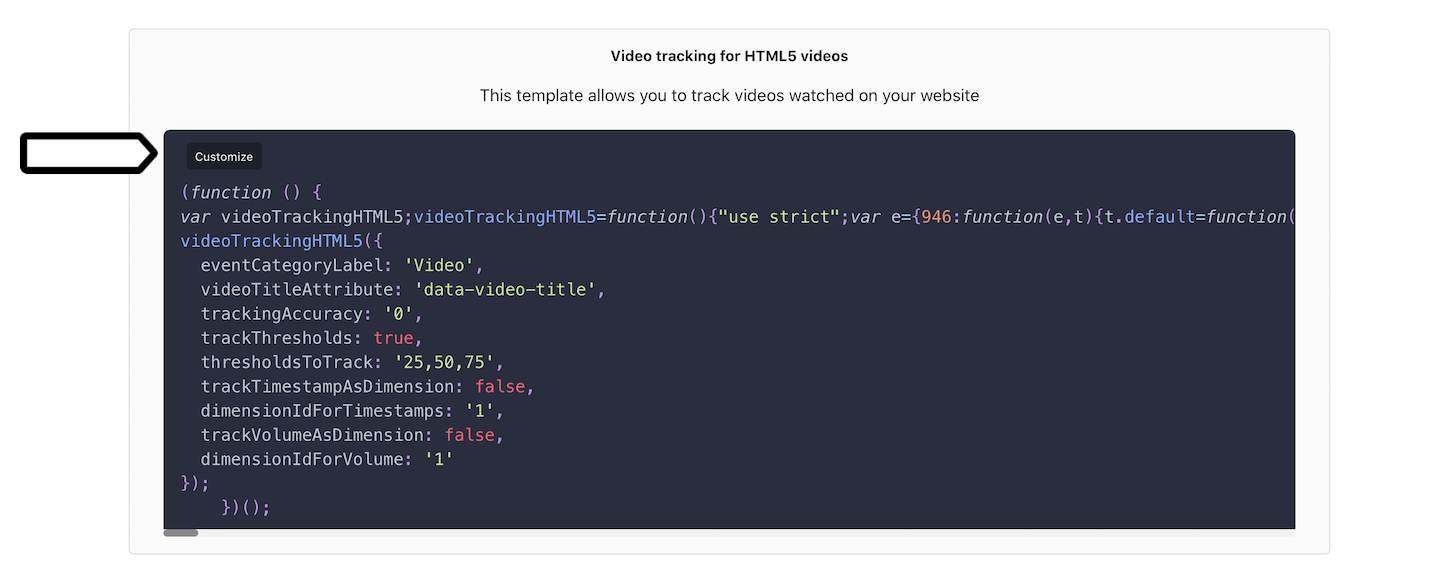
In the code, you can set up the following elements:
- Video element CSS selector: By default, this code captures interactions with all videos on a page. You can track interactions only with selected videos by using the CSS selector.
- Event category label: The category under which custom events are tracked. You can use it to filter events in reports and create custom reports.
- Video title attribute: Used to store the video title as a custom event name. You need to set it as an additional data attribute of your <video> element. If this attribute can’t be found, the source file’s name is used as a custom event name.
- Tracking accuracy: Each event has a timestamp expressed in seconds. This attribute can make timestamps more precise. You can set from 0 to 3 decimal places. We recommend leaving 0 because then your reports will be more readable.
- Track progress percentage thresholds: If checked, you’ll track percentage thresholds along with interaction timestamps.
- Progress thresholds: Percentage thresholds that track how far a visitor viewed a video.
- Additionally track the timestamp as a custom dimension: If checked, you’ll track full timestamps with 5 decimal places. They will be stored as custom dimensions.
- Custom dimension ID for storing timestamps: If you track timestamps as a custom dimension, create a custom dimension under Analytics > Settings > Custom dimensions and enter the dimension ID here.
- Additionally track volume level as a custom dimension: If checked, you’ll track the volume level as a percentage. It will be stored as a custom dimension.
- Custom dimension ID for storing volume level: If you track volume level as a custom dimension, create a custom dimension under Analytics > Settings > Custom dimensions and enter the dimension ID here.
- Isolated: If checked, the code will be isolated from the source code to avoid code conflicts.
3. Log in to Piwik PRO.
4. Go to Menu > Tag Manager.
5. Navigate to Tags.
6. Click Add a tag.
7. Choose the following tag template: Custom code.
8. Click Next.
9. Name your tag.
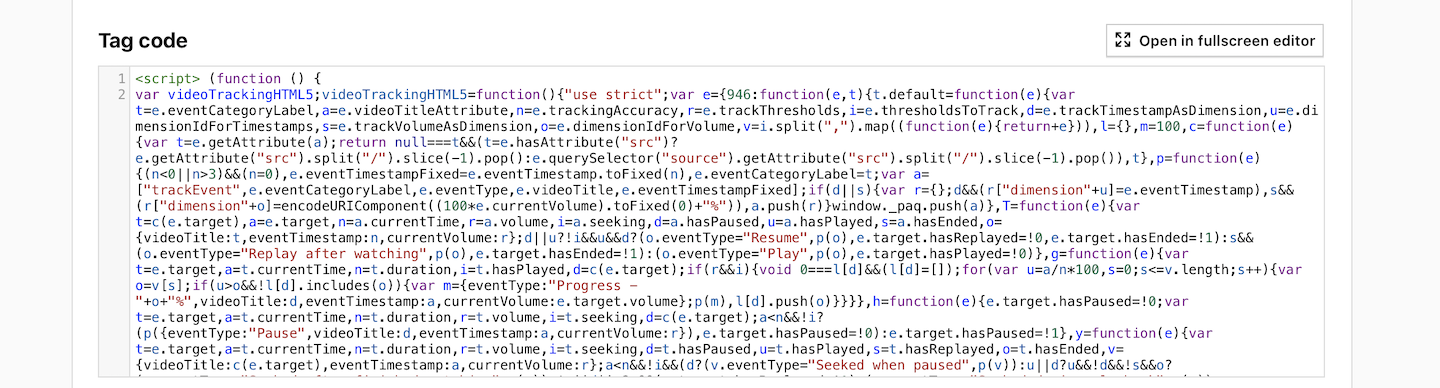
10. In Tag code, paste the code from step 2 wrapped in <script> </script>.
11. In Advanced tag settings > Consent type, select the following type: Analytics.

Note: Set it up if you use a consent form on your site. This tag will only fire for visitors who accept the selected consent type.
12. In Tag triggers, click Choose existing trigger.
13. Select All page views and click OK.
14. Click Add to save the tag.
15. Test your tag in debug mode.
16. When you’re happy how the tags work, click Publish.
17. All done! Piwik PRO is now set up to track events on HTML5 videos embedded on your website.
Interactions tracked for HTML5 videos
Here’s a full list of interactions tracked with our code for HTML5 videos:
- Play: A user clicks the play button for the first time in a given page load.
- Pause: A user pauses the video.
- Resume: A user resumes the video after pausing it.
- Progress – x%: A user reaches a percentage threshold in their watch time. By default, the thresholds are: 25%, 50%, 75%. You can change thresholds or turn this option off when customizing the code.
- Watched: A user watched the video till the end.
- Replay after watching: A user plays again the video they already watched.
- Seeked before playback: A user changes the playback time before they start to watch a video.
- Seeked during playback: A user is seeking on the timeline during playback.
- Seeked when paused: A user pauses a video and seeks on the timeline.
- Seeked after finished watching: A user finishes watching a video and seeks on the timeline.
- Tab unloaded during video play: Checks if the user left the page while the video is playing. A user closed the page or navigated to another page.
- Muted: A user mutes the video sound.
- Unmuted: A user unmutes the video sound.
- Volume down / Volume up: A user changes the video volume. When you see timestamps for this event, it can mean that your video volume is too high or too low.
Interactions are tracked as custom events. In each custom event, you’ll see:
- Category: By default, it’s set as Video. You can change this name by customizing the code.
- Action: One of the interactions with your video.
- Name: The title of your video.
- Page url: A page where your video was watched.

Reports
Now, let’s look at a few reports that you can use to see your video interactions.
To find video interactions, follow these steps:
1. Go to Menu > Analytics.
2. Navigate to Reports > Behavior.
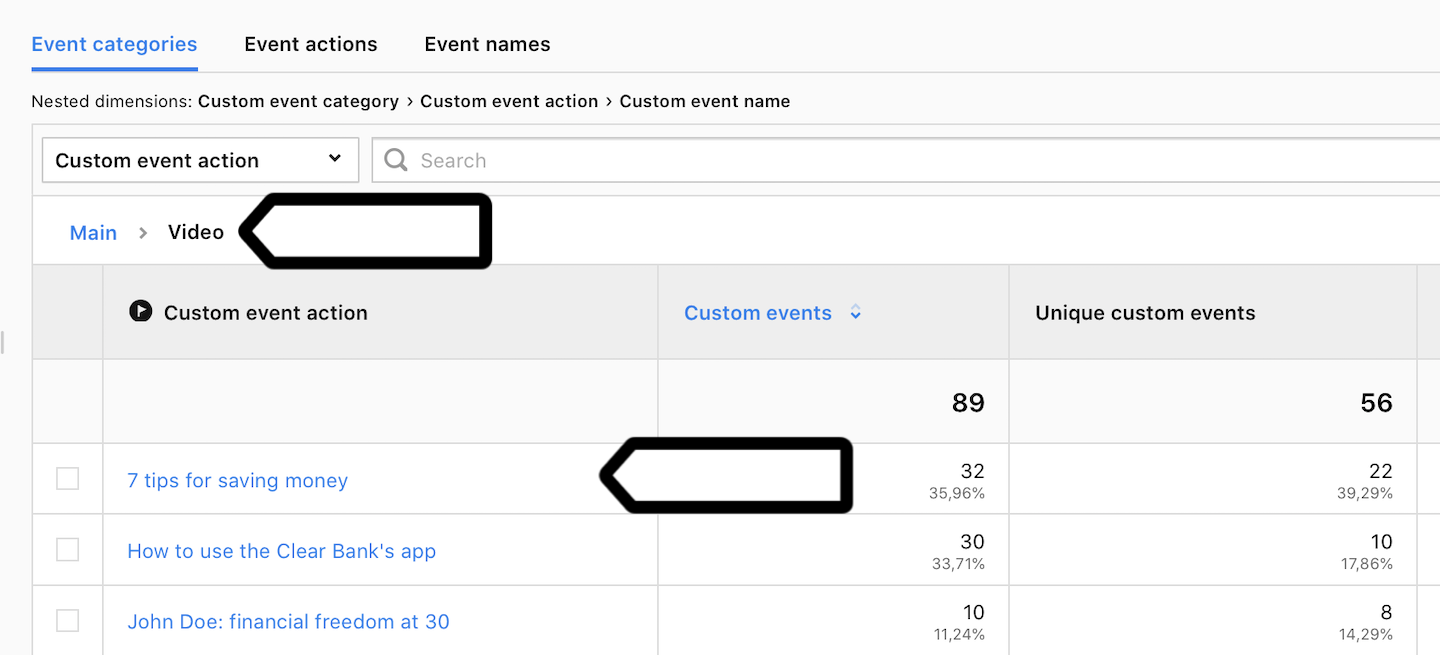
3. On the left, click Custom events.
4. In Event categories, Click Video and you’ll see event names that show video titles.
5. Done!
You can also create custom reports, to organize your video data the way you want. Here’s one exemple.
To create a custom bar-chart report, follow these steps:
1. In Piwik PRO, create a custom report with the following setup:
- Report type:
bar chart. - Data to plot:
custom event value,custom event actions,custom events. - Filter dimensions:
- Custom event category is Video.
- Custom event name contains (case sensitive)
<name of your video>.
2. Your report will look something like this:
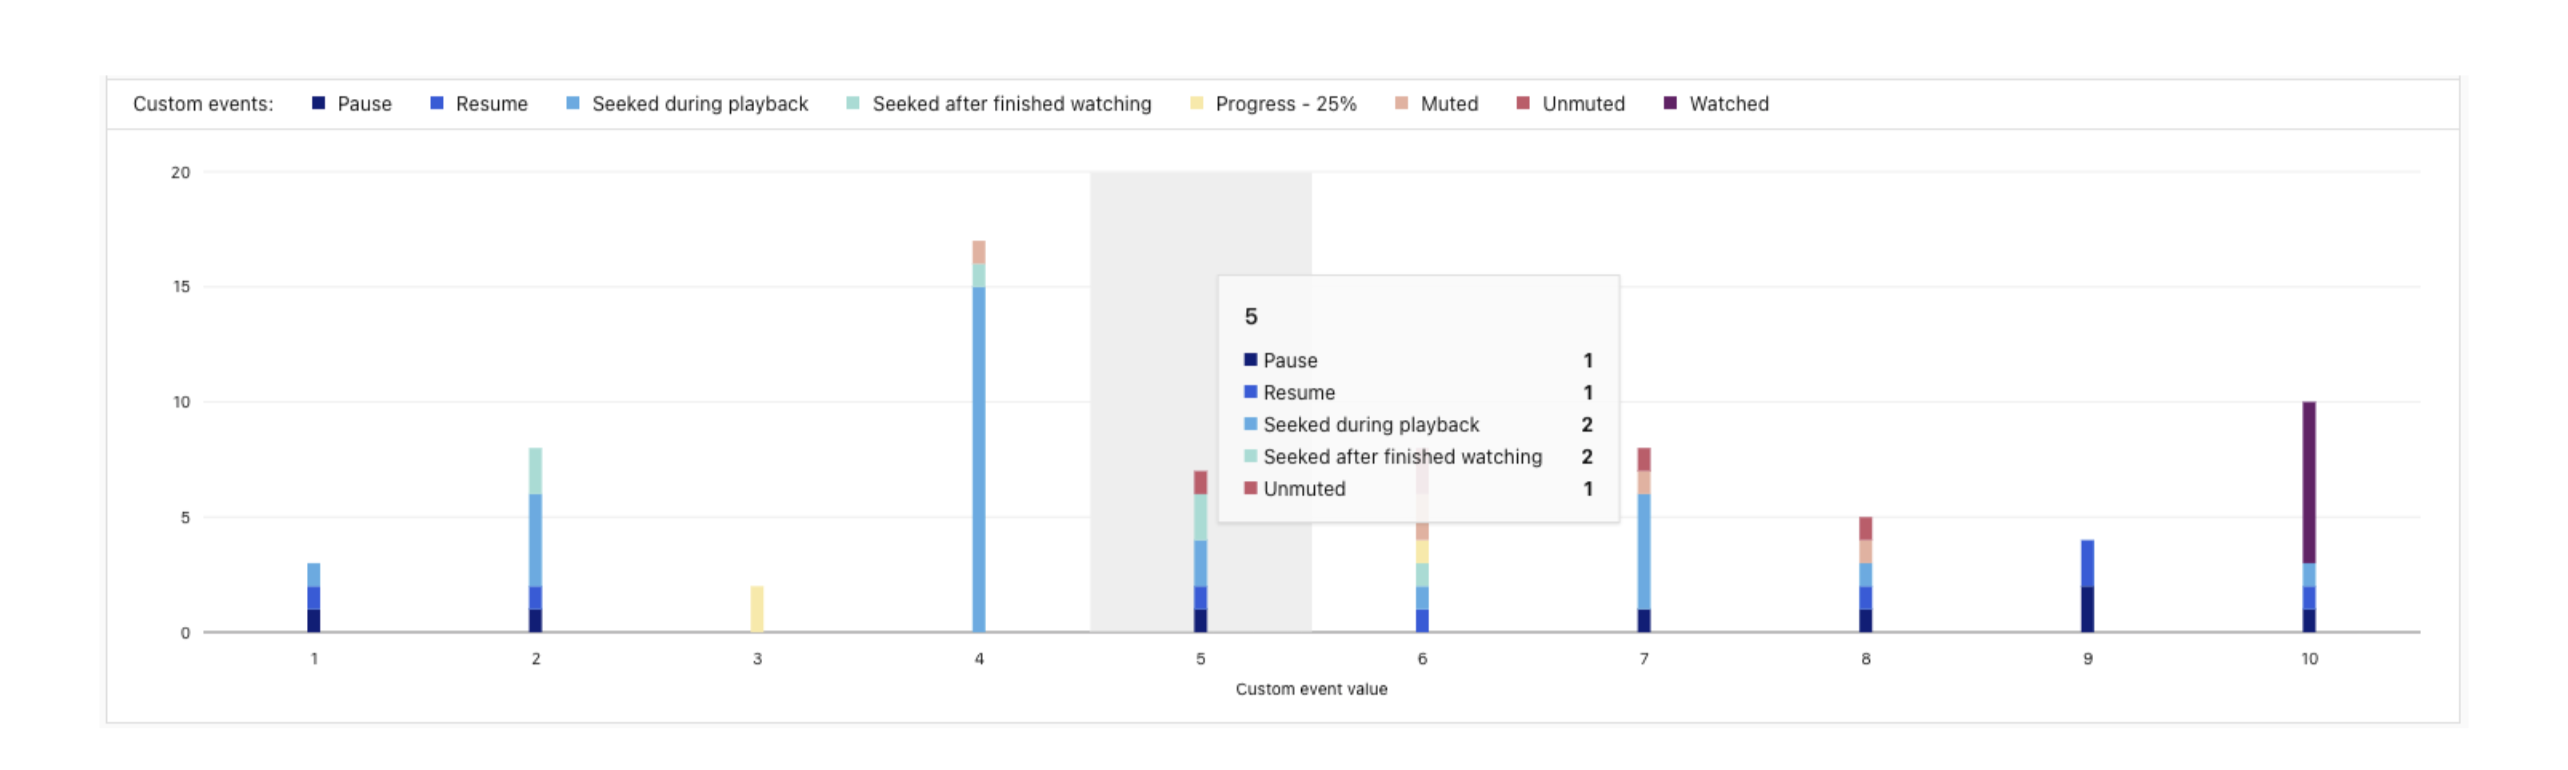
In the report above, you’ll see interactions for each second. To make this report look more clear, you can group dimension values.
To group dimension values, follow these steps:
1. Go to Menu > Analytics.
2. Navigate to Settings.
3. On the left, in APP SETTINGS, click Dimension value grouping.
4. Click Add a dimension value grouping.
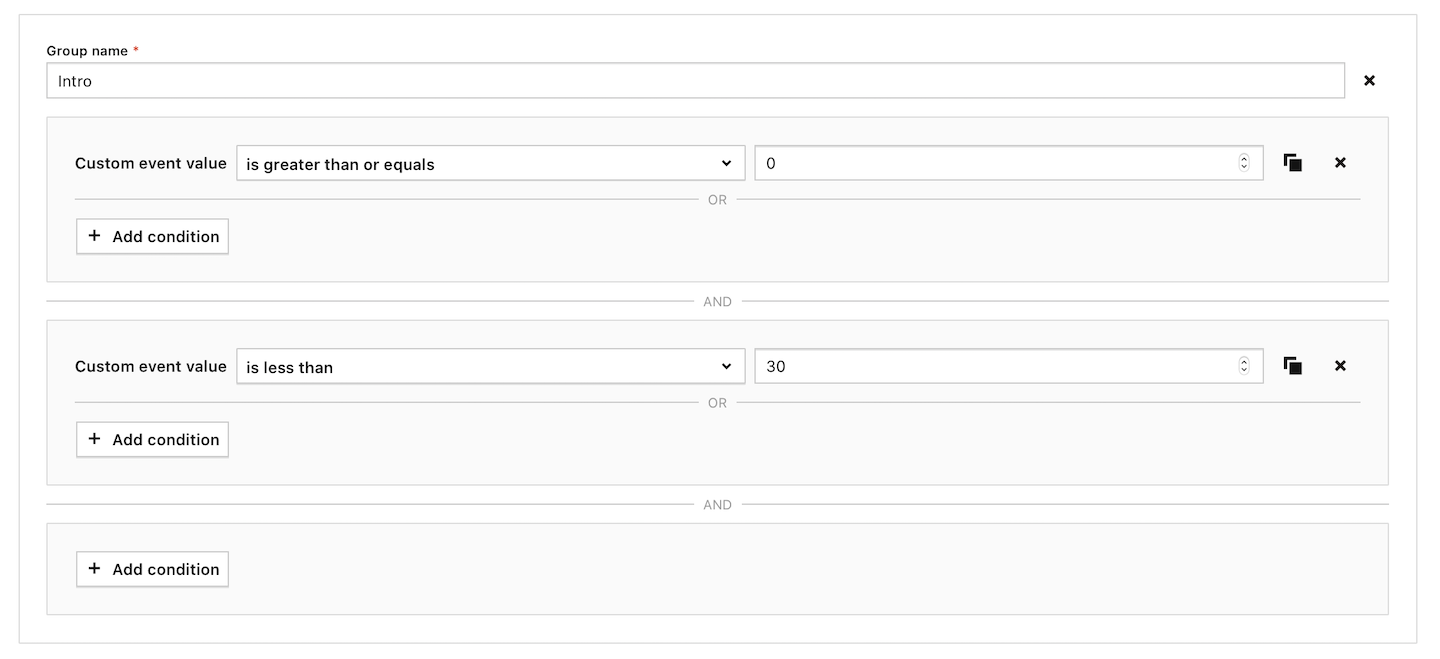
5. Name the grouping, for example Video sections.
6. Set visibility options.
7. In Group dimensions values, pick the dimension Custom event value.
8. Click Add a group.

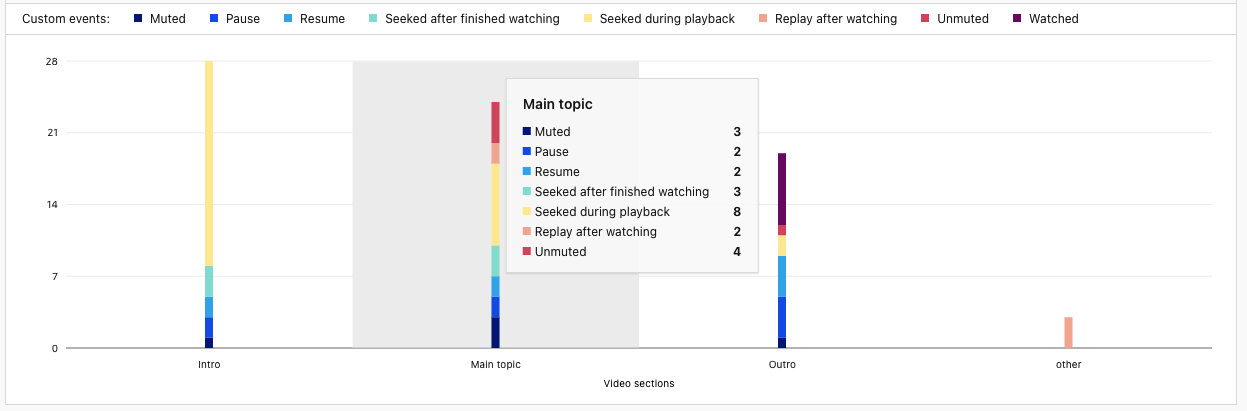
9. Create groups. For example: Intro, Main topic and Outro.
8. When you’re done, click Save.
9. In your custom report, change custom event value to the name of your grouping.
10. Now your custom report will look something like this: