You can collect data about how users view and interact with the popups and content on your website or app. This information gives you a peek into what your audience likes, helping you improve their experience.
In this guide, we’ll show you how to set it up step by step.
Before you start
Here are some things to know before you begin:
1. You can collect data about impressions and interactions for:
- Popups added under Tag Manager > Tags > Add a tag > Custom popup.
- Content added under Tag Manager > Tags > Add a tag > Custom content.
2. Any page content you tag in your website’s code.
Turn on popups and content tracking
To turn on data collection for popups and content, follow these steps:
1. Go to Menu > Tag Manager.
2. Navigate to Tags.
3. On the left, click Piwik PRO (tracking code).
4. In Data collection, turn on Interactions with popups and content.
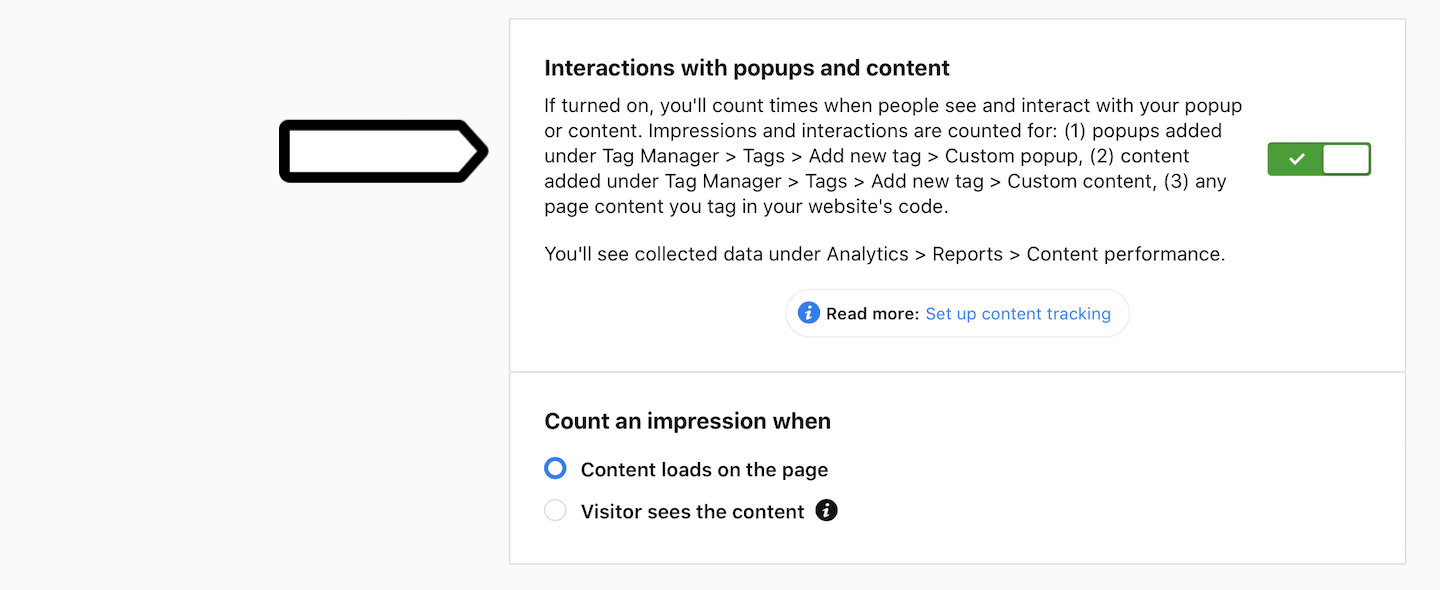
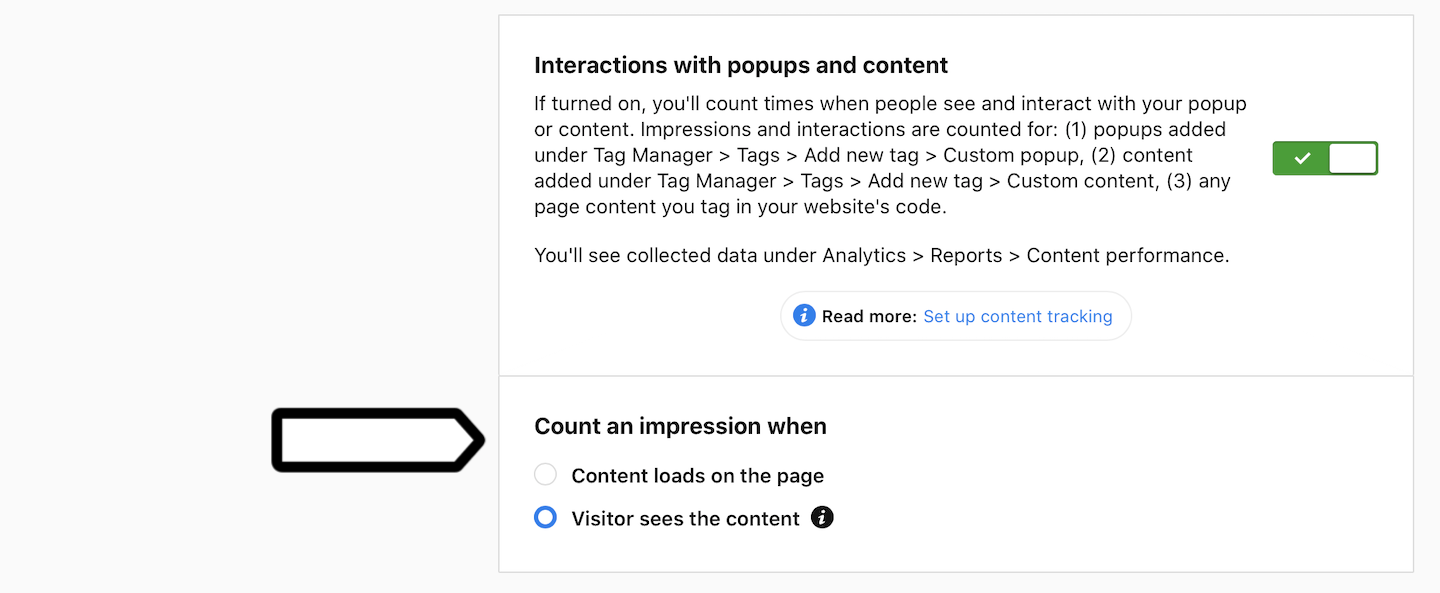
5. In Count an impression when, you can set up the following elements:
- Content loads on the page
- Visitor sees the content: A visitor scrolls down the page and sees your content.
6. When you’re done, click Save.
7. Click Publish.
8. All done!
Tag an element on your website
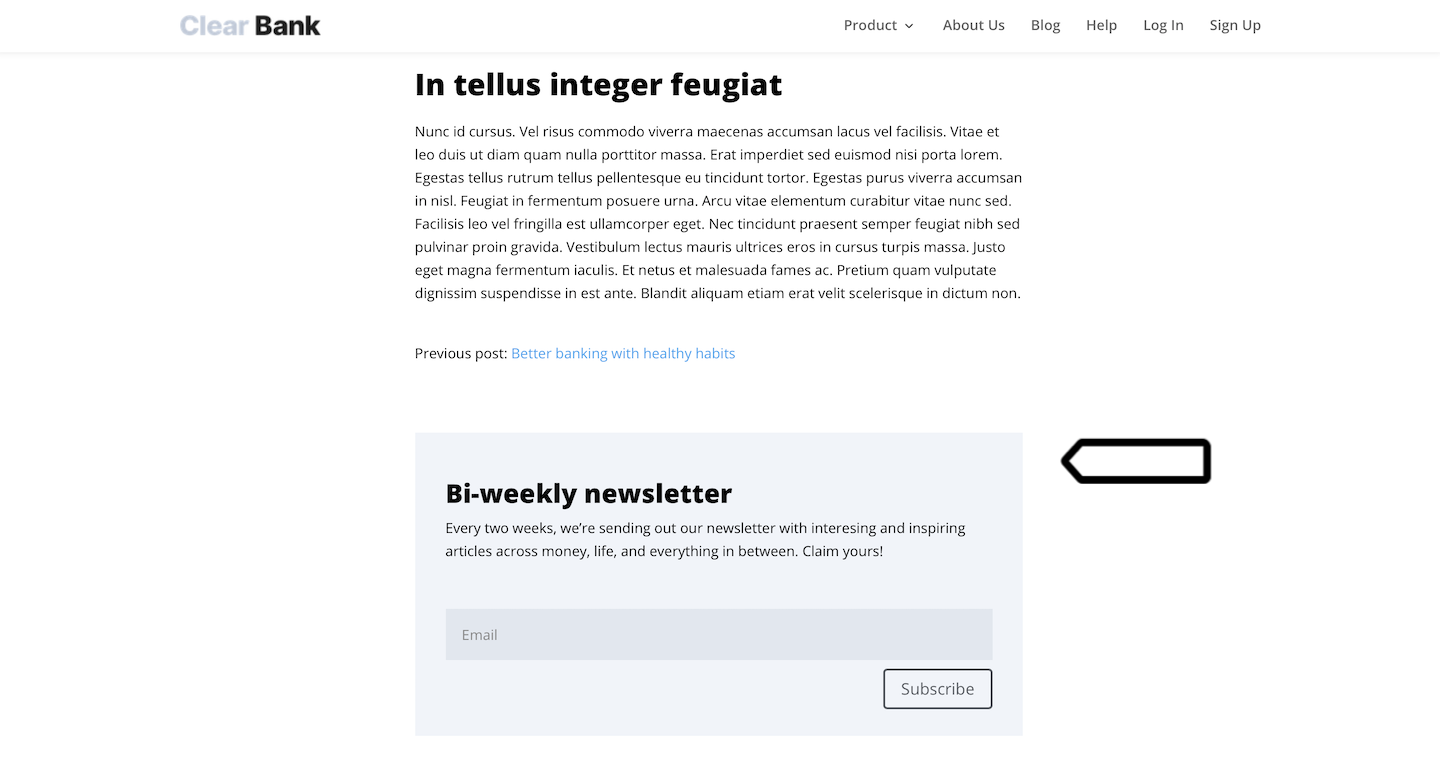
To track data about how people interact with any content on your site, you’ll first need to label it. Let us show you an example from our Clear Bank demo website.
On our demo site, we’ve got a newsletter signup displayed as a banner. We’re curious to know how many people look at the banner and hit the signup button. To do this, we’ll tag this banner.
To tag your site’s element, you can use the following attributes or CSS classes:
- Content block: This is an element on your website that includes a content name, piece and target. You can tag it using
[data-track-content]or.piwikTrackContent. - Content name: It’s the name you give to the content block you’re tracking. This name will show up in your report. To tag it, use
[data-content-name=""]. - Content piece: This represents a part of the content block you’re tracking, like a creative, banner or video. The name of this piece will also appear in your report. To tag it, use
[data-content-piece=""]or.piwikContentPiece. - Content target: This is the specific thing within the content block that you’re tracking, like a link in the content block. The target will also show up in your report. To tag it, use
[data-content-target=""]or.piwikContentTarget.
To tag your site’s element, follow these steps:
1. Find the element on your website that you want to track. Example: the div class of your banner.
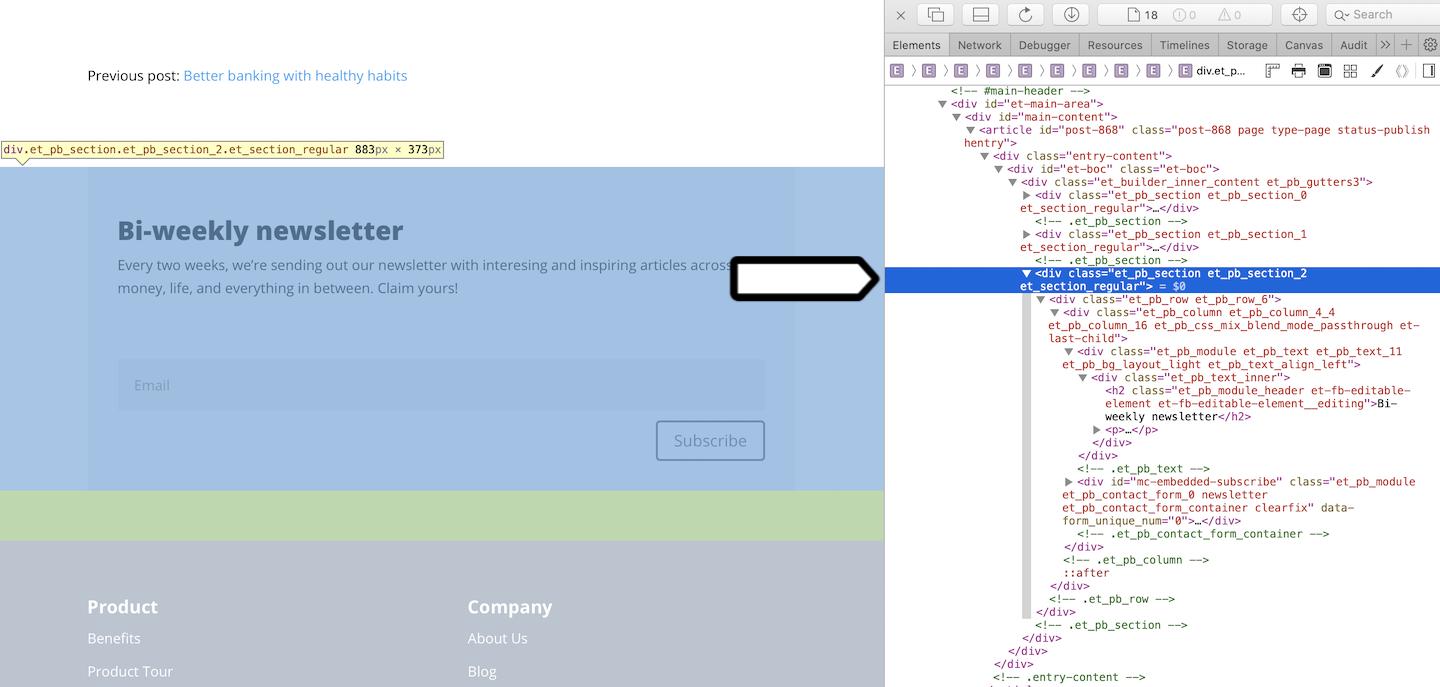
2. Add a .piwikTrackContent class or a data-track-content attribute to your HTML.
Examples:
<div class="et_pb_column et_pb_column_4_4 et_pb_column_16 et_pb_css_mix_blend_mode_passthrough et-last-child piwikTrackContent">or
<div class="et_pb_column et_pb_column_4_4 et_pb_column_16 et_pb_css_mix_blend_mode_passthrough et-last-child" data-track-content>3. Add a content name, piece and target to your HTML.
Examples:
<button type="submit" class="et_pb_contact_submit et_pb_button piwikContentPiece" >Subscribe</button>or
<button type="submit" class="et_pb_contact_submit et_pb_button" data-content-piece="subscribeButton">Subscribe</button>4. All done! Once the data is collected, it’ll appear in Menu > Analytics > Reports > Content performance.
Note: Read more about content performance report.
For developers: For more information on content tracking, read our developer guides.