A funnel report is a tool that helps you understand where people are leaving your website or app before they complete a specific goal. To create a funnel report, you need to define the steps (pages or events) that a person typically goes through to reach the goal. Then, you can see how many people make it through each step and where they are most likely to drop off.
In this article, we’ll show you how to set up a funnel report.
Before you start
Here are some things to know before you begin this process:
- You can track page-to-page and event funnels.
- You can create up to five steps for the funnel.
- The funnel works for data collected before it was set up.
- The funnel shows drop-offs and conversions within a single session. If a visitor completes the final action in multiple sessions, the funnel won’t catch it.
Available from 16.7.0You can set steps as required or optional. Visitors who skip optional steps remain in the funnel and aren’t counted as drop-offs.Versions below 16.7.0All funnel steps are required. Visitors who skip any step are counted as drop-offs.
Set up a page-to-page funnel
Let’s take an example of our Clear Bank demo website that has a four-step signup process. The funnel for that process might look something like this:
Signup page –> Contact info page –> Identity page –> Success page

In this example, each step is a page that a visitor must go through to reach the last step of the funnel. We call such a funnel the page-to-page funnel. To set it up, we’ll use the URL of each page.
To set up a page-to-page funnel, follow these steps:
1. Go to Menu > Analytics.
2. Navigate to Custom reports.
3. Click Add a report.
4. Select the following type: Funnel.
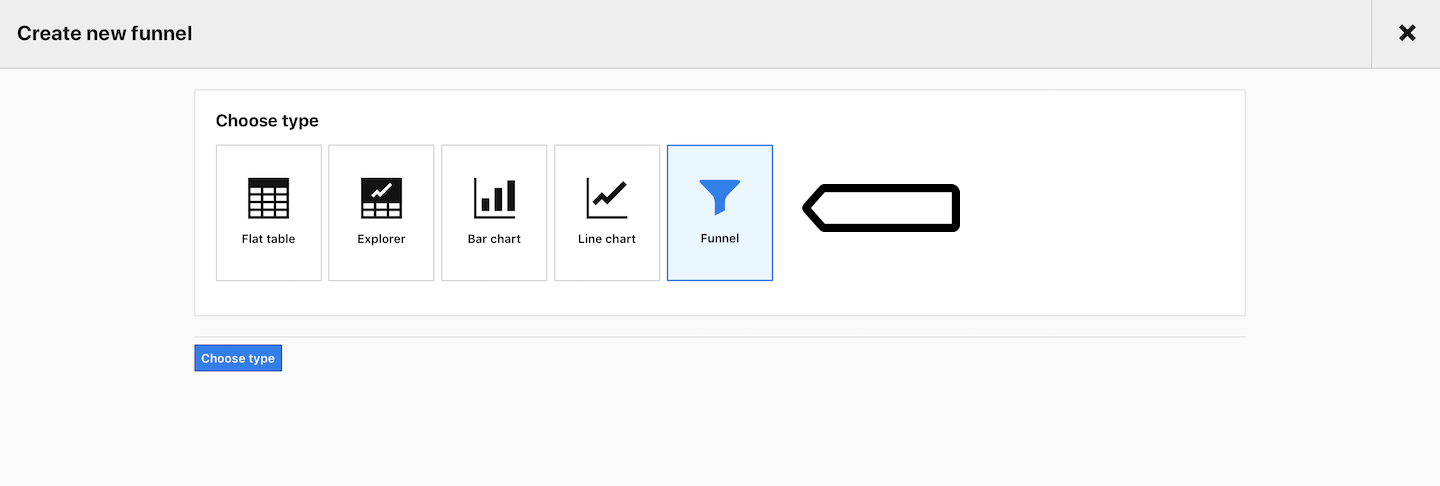
5. Name the report.
6. In Visibility, choose: Author or All users. All users lets you share this dashboard with your teammates.

7. Available from 16.0.0 Select Match page view only.

8. Available from 16.0.0 In Default metrics display, choose how the time between steps is displayed:
- Show avg. time between steps
- Show median time between steps

9. Name the first funnel step.
10. Select an event type. Example: Page view.
11. Define conditions for this step. Example: Page URL contains /clearbank/sign-up/.
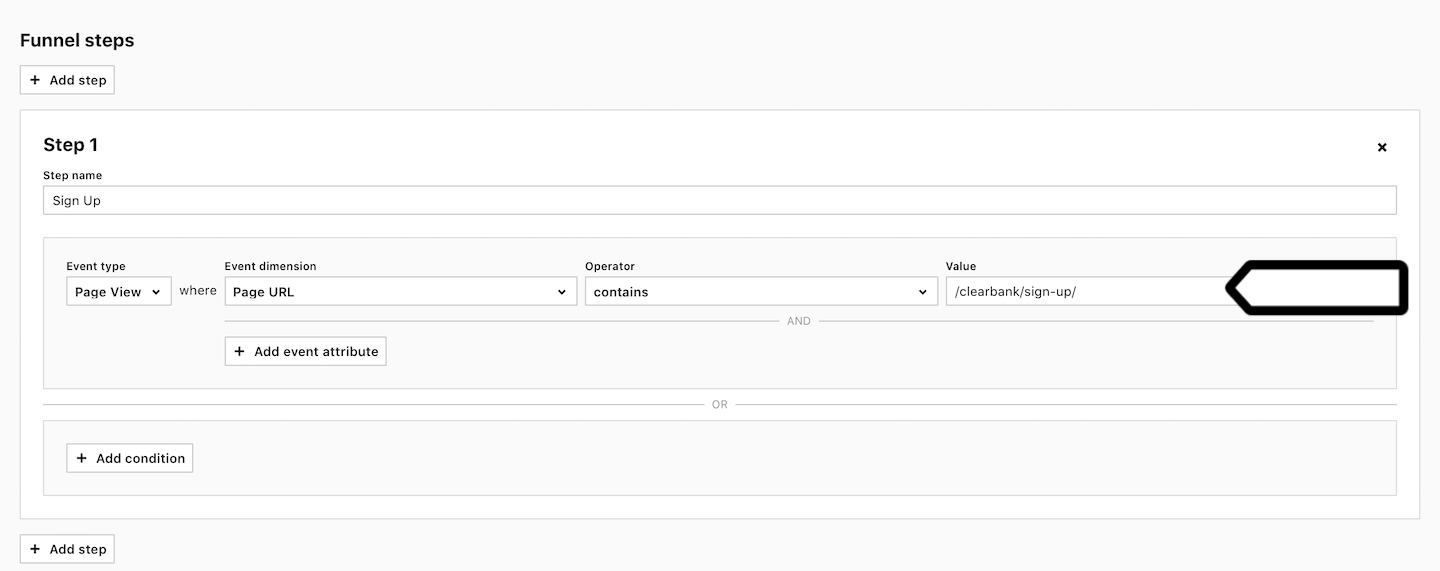
12. Click + Add step and define conditions for the second step.
13. Available from 16.7.0 After adding steps, you can make them optional. Only the last step needs to remain required.

Note: If you change a step in a funnel from required to optional, the number of sessions may be affected. Read more
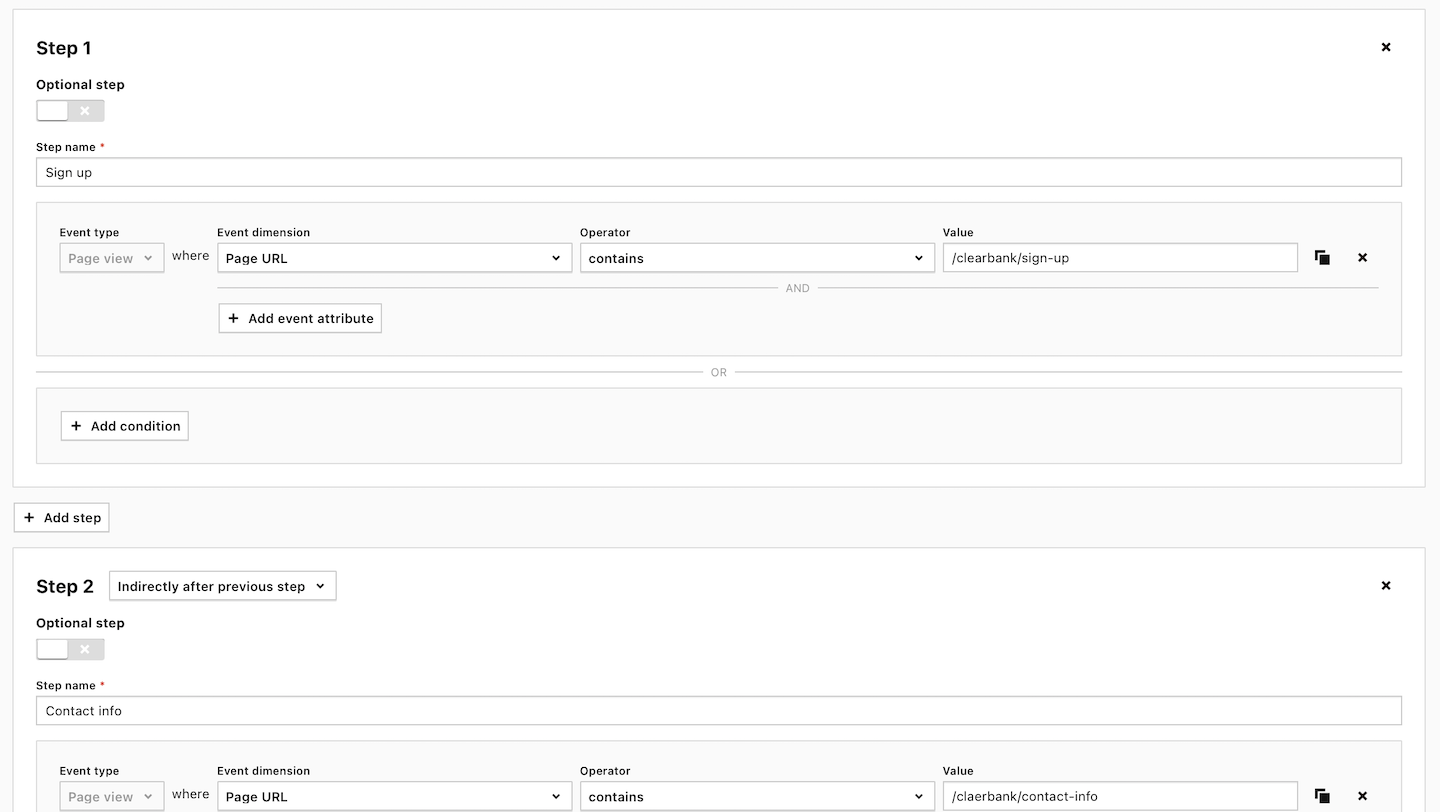
14. Available from 16.0.0 Choose whether each step should be taken:
- Directly after previous step
- Indirectly after previous step

15. Add more steps to the funnel.
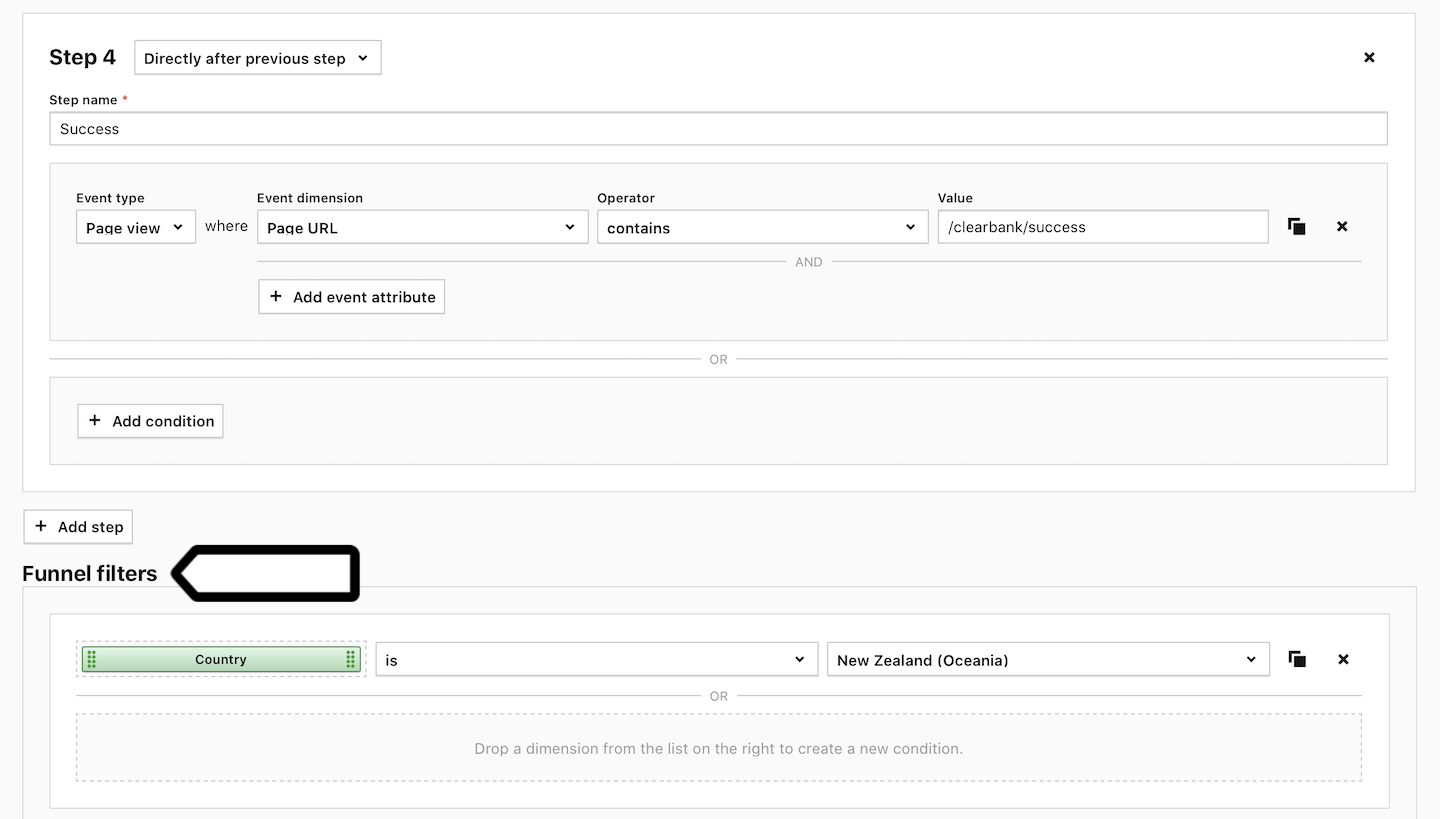
16. (Optional) Set funnel filters. Example: We use the condition Coutry is New Zealand to filter out people from that country.
17. When finished, click Create a report.
18. Task completed!
View the funnel report
To view the funnel report, follow these steps:
1. Go to Menu > Analytics.
2. Navigate to Custom reports.
3. On the left, pick the funnel report you’ve created.
4. Done! Your funnel report is now ready for in-depth analysis.
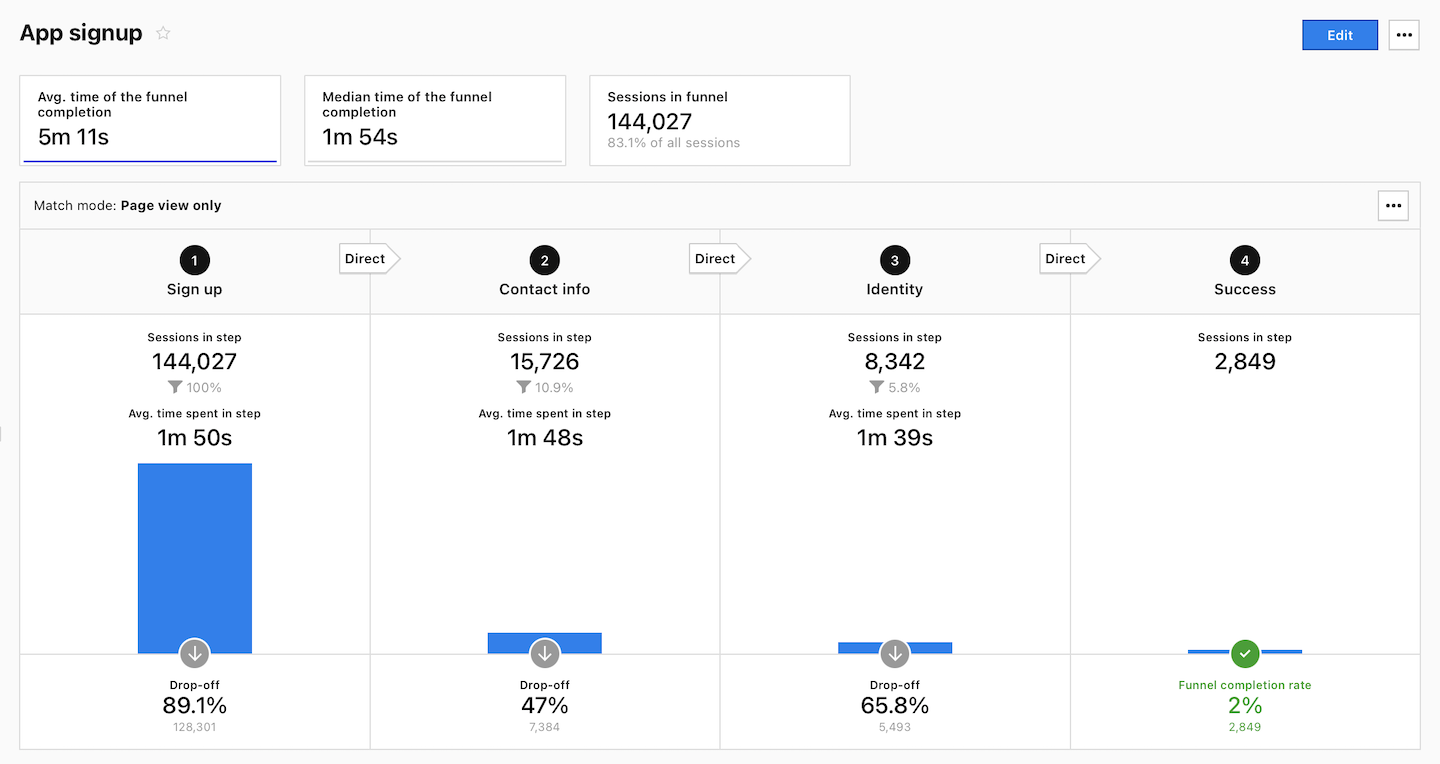
5. Click the drop-off section at the bottom of a step.
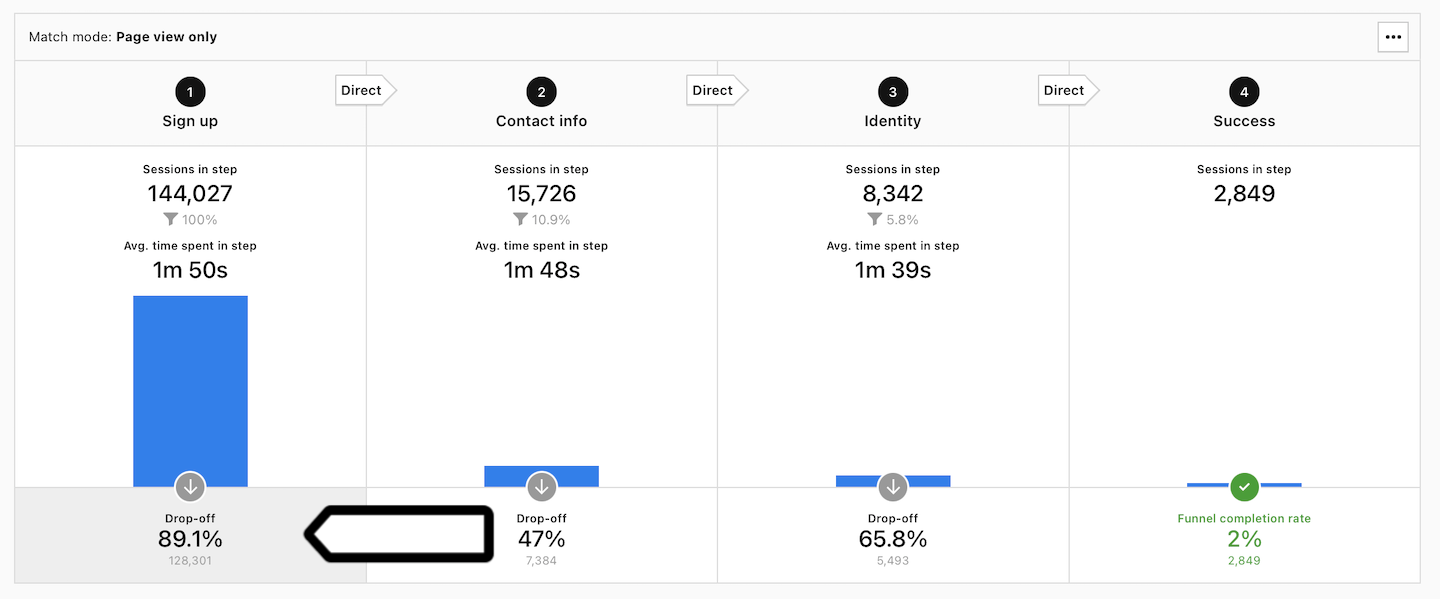
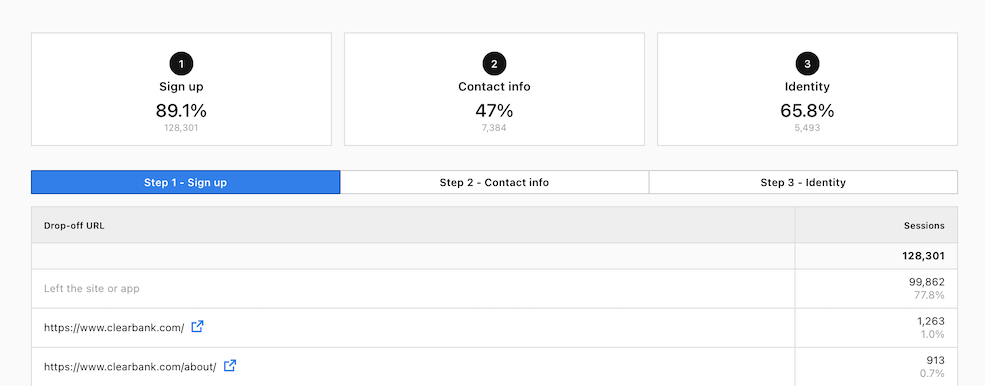
6. You’ll see the drop-off report, which will show you the drop-off rate for each step and where people are going after leaving the funnel.
We’ve shown you how to set up a funnel that tracks visitors as they move from one page to another. However, you may also want to create a funnel that tracks events like button clicks, contact form submissions or file downloads. Creating this type of funnel is similar to the page-to-page funnel. You only need to make sure that the events you want to use in funnel steps have already been set up.
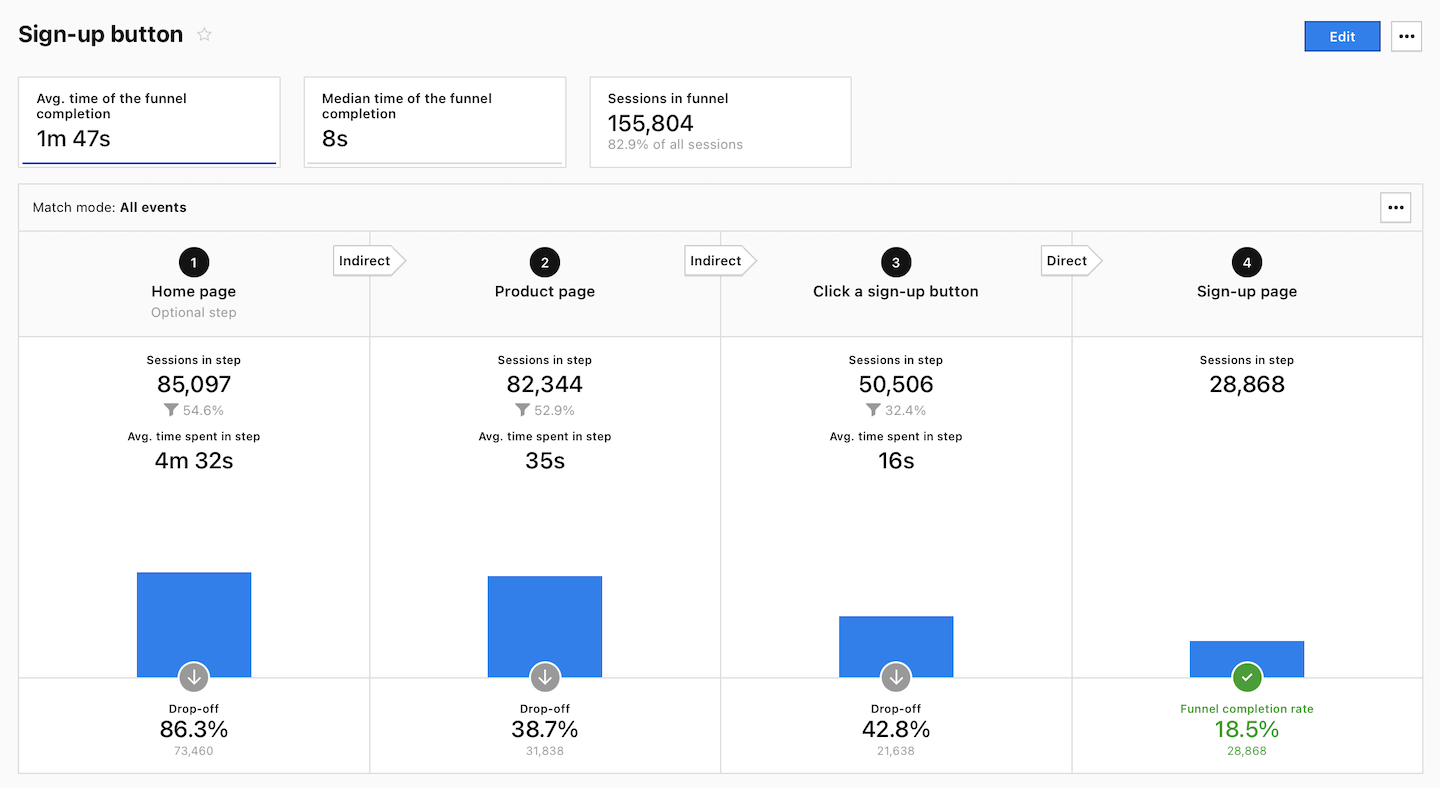
Let’s take an example from our Clear Bank demo website where a visitor can go through the following funnel:
Home page –> Product page –> Click a signup button –> Signup page

In this example, we have four steps in the funnel — three are pages (home page, product page and signup page) and one is an event (click a signup button). Before we create a funnel, we need to set up tracking for this button. (To learn how to do this, read our guide which explains how to track button clicks.) Once that’s done, we can create an event funnel.
To set up an event funnel, follow these steps:
1. Go to Menu > Analytics.
2. Navigate to Custom reports.
3. Click Add a report.
4. Select the following report type: Funnel.
5. Name the report.
6. In Visibility, choose: Author or All users. All users lets you share this dashboard with your teammates.
7. Available from 16.0.0 Select Match all events.
8. Available from 16.7.0 After adding steps, you can make them optional. Only the last step needs to remain required.
Note: If you change a step in a funnel from required to optional, the number of sessions may be affected. Read more
9. Available from 16.0.0 Choose whether each step should be taken:
- Directly after previous step
- Indirectly after previous step
10. Name each step.
11. Define conditions for each step. In our example:
- Step 1:
Page URL is https://clearbank/ - Step 2:
Page URL is https://clearbank/product-tour/orPage URL is https://clearbank/benefits/orPage URL is https://clearbank/no-fees/orPage URL is https://clearbank/security/orPage URL is https://clearbank/savings/(All these pages are product pages.) - Step 3:
Event action is Sign Up(A visitor clicks a signup button). - Step 4:
Page URL is https://clearbank/sign-up.
12. (Optional) Set funnel filters.
13. When you finish up, click Create a report.
14. Job done! You’re all set to dive into your report.
Tip: When creating steps for a funnel, you can use custom events and built-in events like outlink URL, download URL, search keyword, time on page, goal and content. You can find these built-in events in funnel step conditions.
