One of the most vibrant elements on your website is the call-to-action button. It’s eye-catching and tells a visitor to act promptly – Sign Up, Start a Free Trial or Log In! The main purpose of the button is to make a visitor click it and start a process – signup, trial or login.
Usually, there are a dozen or more buttons on your site. In most cases they all lead to the process page. It’s important to know how your buttons are performing. How many people click them? Which ones are the most clicked?
Answers to these questions can be found using web analytics. In this chapter we’ll explain how.
Find the CSS attribute of your button
To spot and record the moment when a visitor clicks a button on your website you need to use Tag Manager. Tag Manager lets you define a tag that will collect information about the button and visitor interacting with it, and the trigger will make the collecting mechanism work.
Before we start setting up the tag and trigger, we need to find the CSS attribute of your button. The button on your website usually has a CSS description – a class, ID, or both. The perfect situation is when the button has an ID, as this is a unique description of the element.
To find the CSS attribute of your button, follow these steps:
1. Open your website and spot a button.
2. Right click on the button and click Inspect or Inspect Element, depending on the browser you’re using.
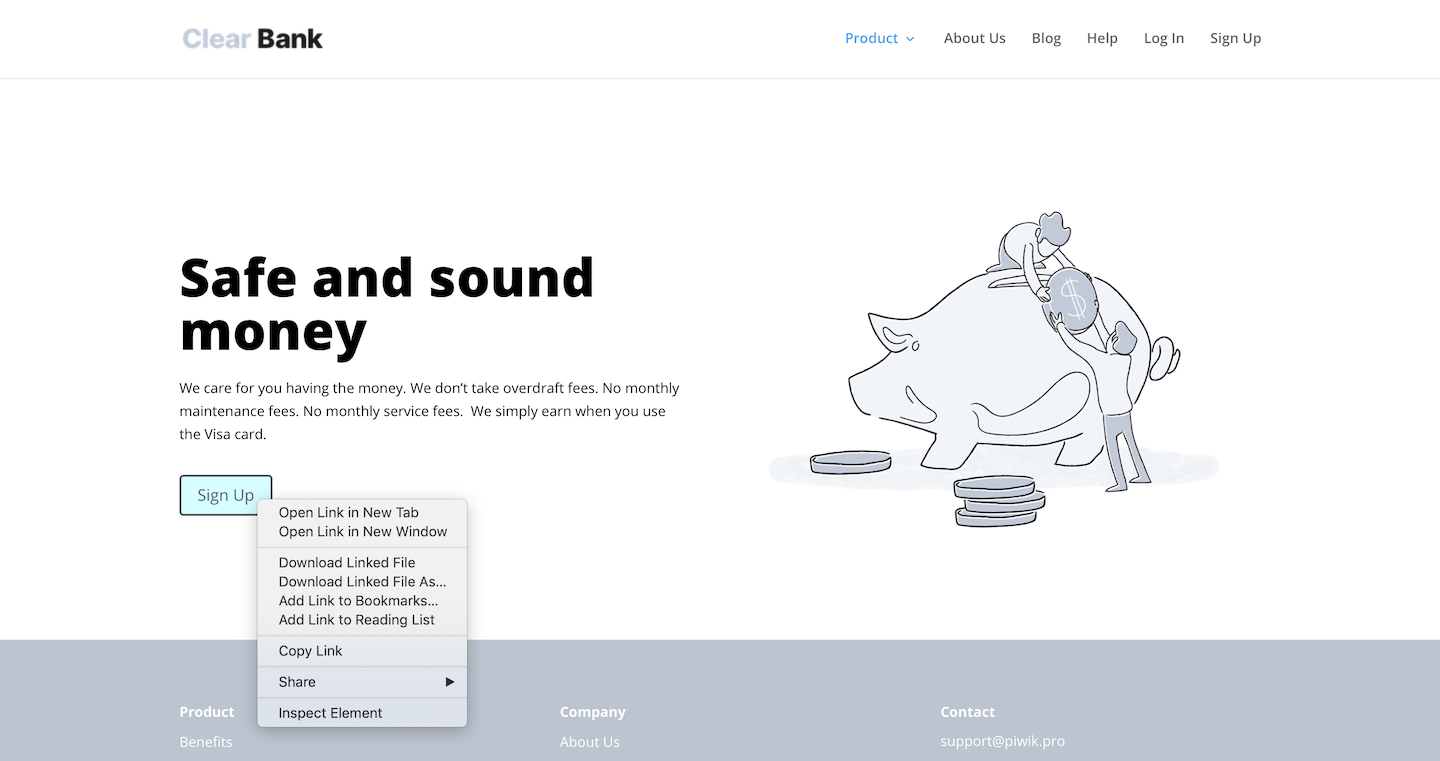
3. Now you will see lines of code that may scare you if you don’t code. But just focus on the one piece you need: the ID or class.
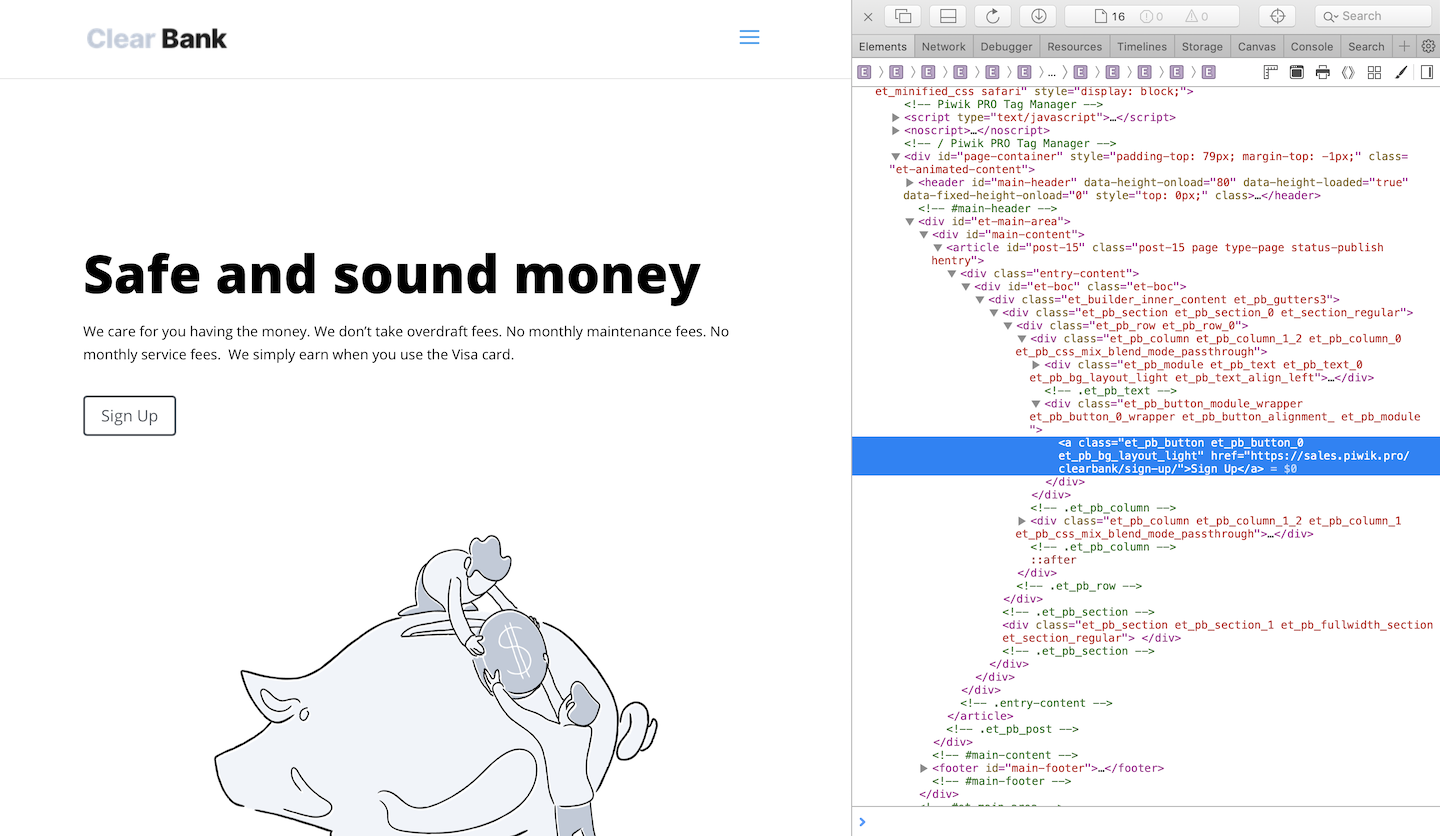
4. The code could look like this: <a href="/signup/" class="btn signup" id="content signup">
In this case, we have a class and ID in the code, so we can use one of them to define the button in Tag Manager. Just keep in mind that when you use a class for defining an element you need to make sure that this class is unique for this element. For example, if you have a class class="btn small" it can be used for various buttons on your site – signup, login or other buttons. When it’s set up like that, the Tag Manager will not be able to distinguish one button from another.
Tip: A good practice for describing buttons with CSS attributes is using a class for styling the button and an ID for marking each button in a unique way. Whenever you make any changes on your website you can include these descriptions in the scope for developers.
Set up button tracking in Tag Manager
Once you’ve pulled out information about the CSS attribute of your button, you can begin defining a tag and trigger.
To set up a tag for tracking a button, follow these steps:
1. Go to Menu > Tag Manager.
2. Click Add a tag.
3. Select the following tag template: Custom event.
4. Click Next.
5. Name the tag.
6. Set category as Button. You can use another name depending on the framework you use for organizing events in your reports.
7. Set action as a {{ Page Path }} or {{ Page URL }} variable. This way Tag Manager will pull out information about the page where the button was clicked.
8. Set name as a {{ Click ID }} variable. This way Tag Manager will capture the ID of the button so you will know which button was clicked.

9. When you’re done, click Add.
To set up a trigger for tracking a button, follow these steps:
1. Go to Menu > Tag Manager.
2. Navigate to Tags.
3. Click on the tag you want to work with.
4. In Tag triggers, click Add a trigger.
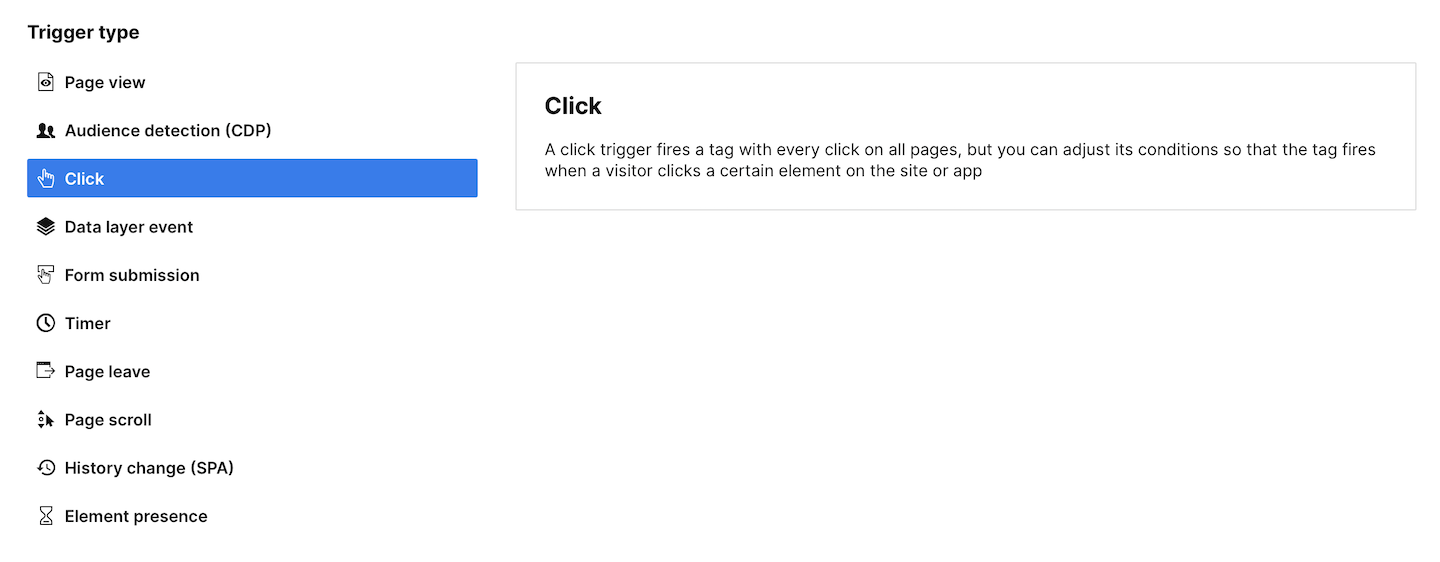
5. Choose the trigger type: Click.
6. Click Next.
7. Name the trigger.
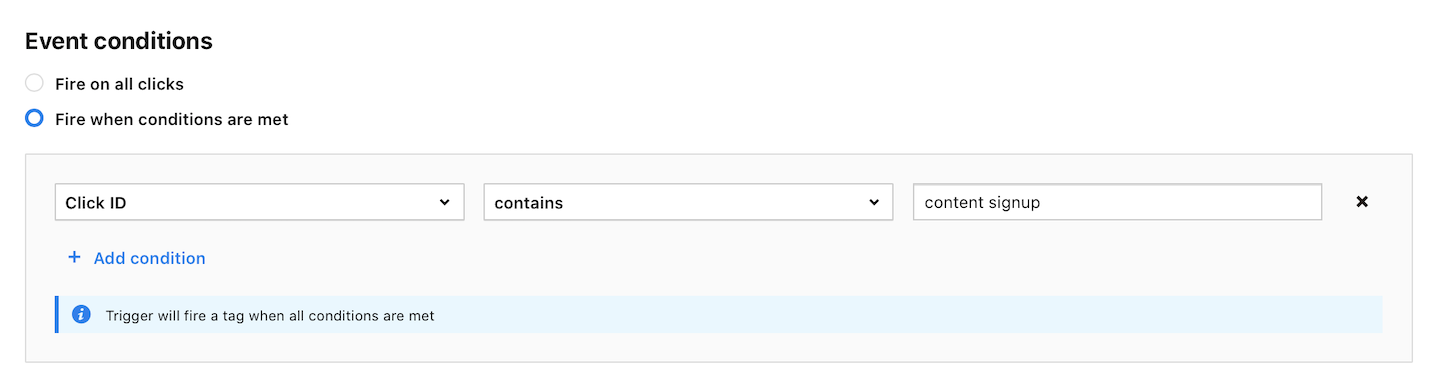
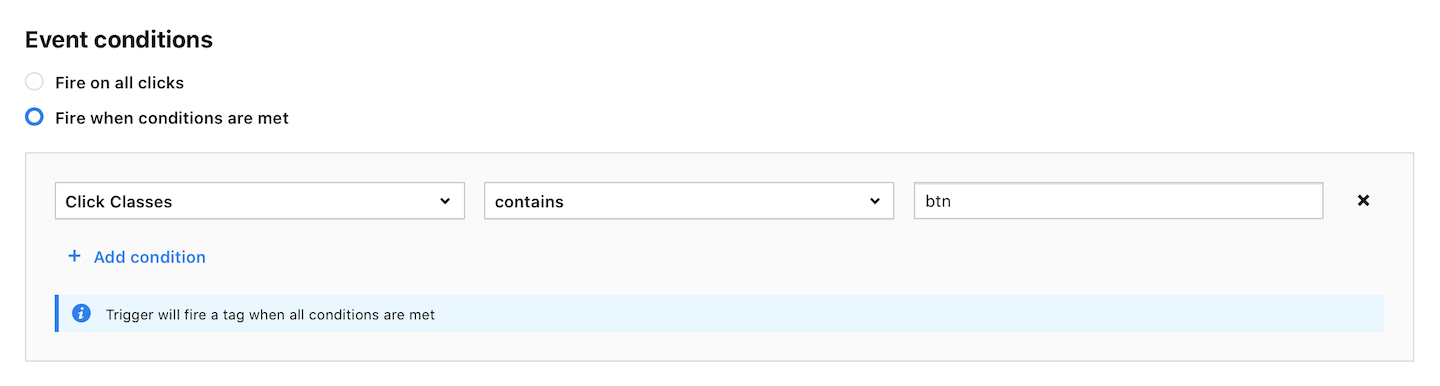
8. In Event conditions, define conditions for the trigger. For example, Click ID contains content signup, or if you don’t have a button ID, Click Class contains btn signup.
9. When you’re done, click Add.
At this point, you can check if your tag and trigger are functioning properly using debug mode in Tag Manager.
To use debug mode, follow these steps:
1. Go to Menu > Tag Manager.
2. Click Debug in the upper right corner.
3. Your website will open in a new tab with debug mode running.
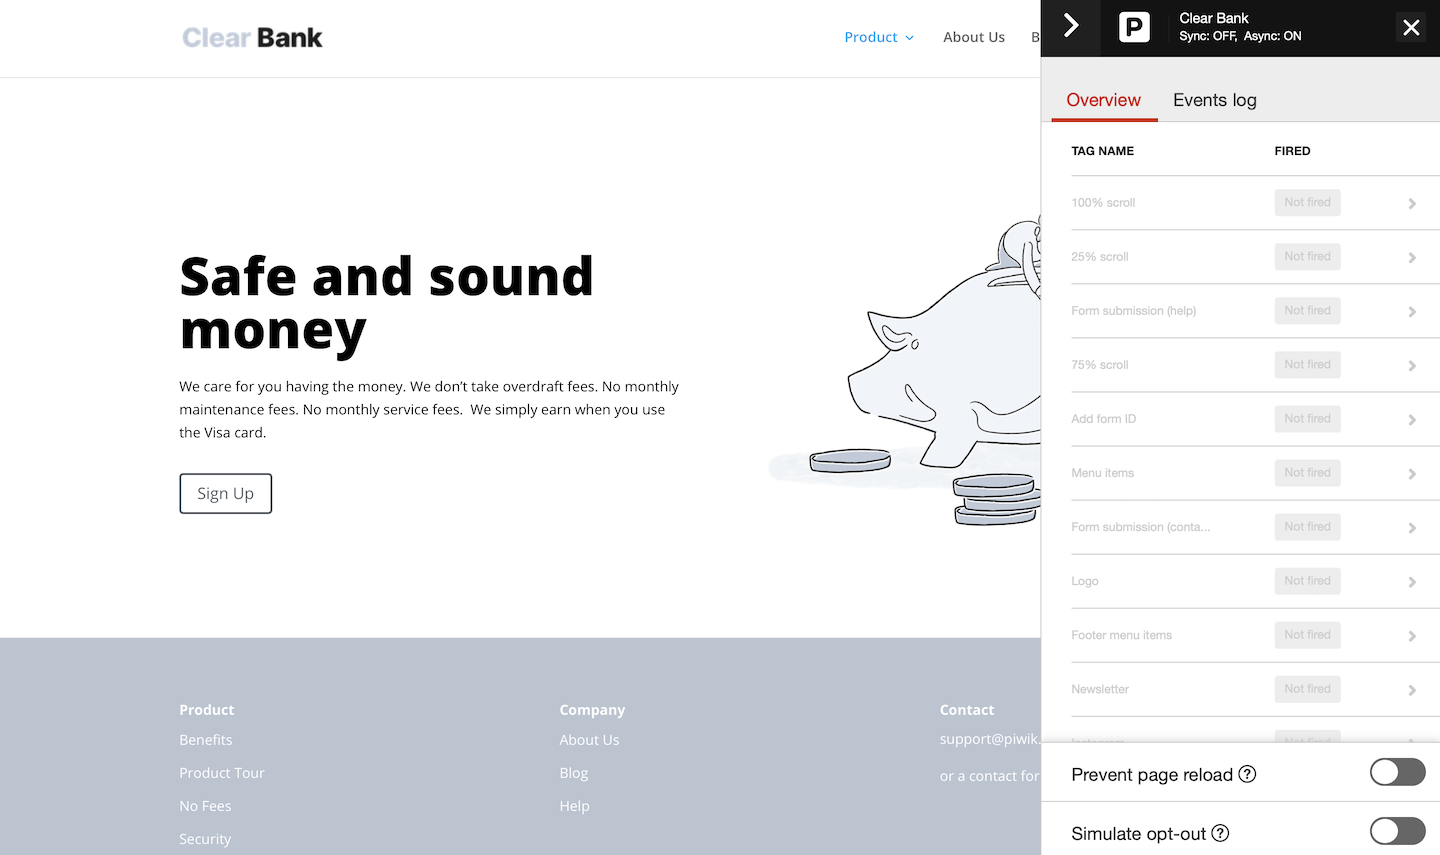
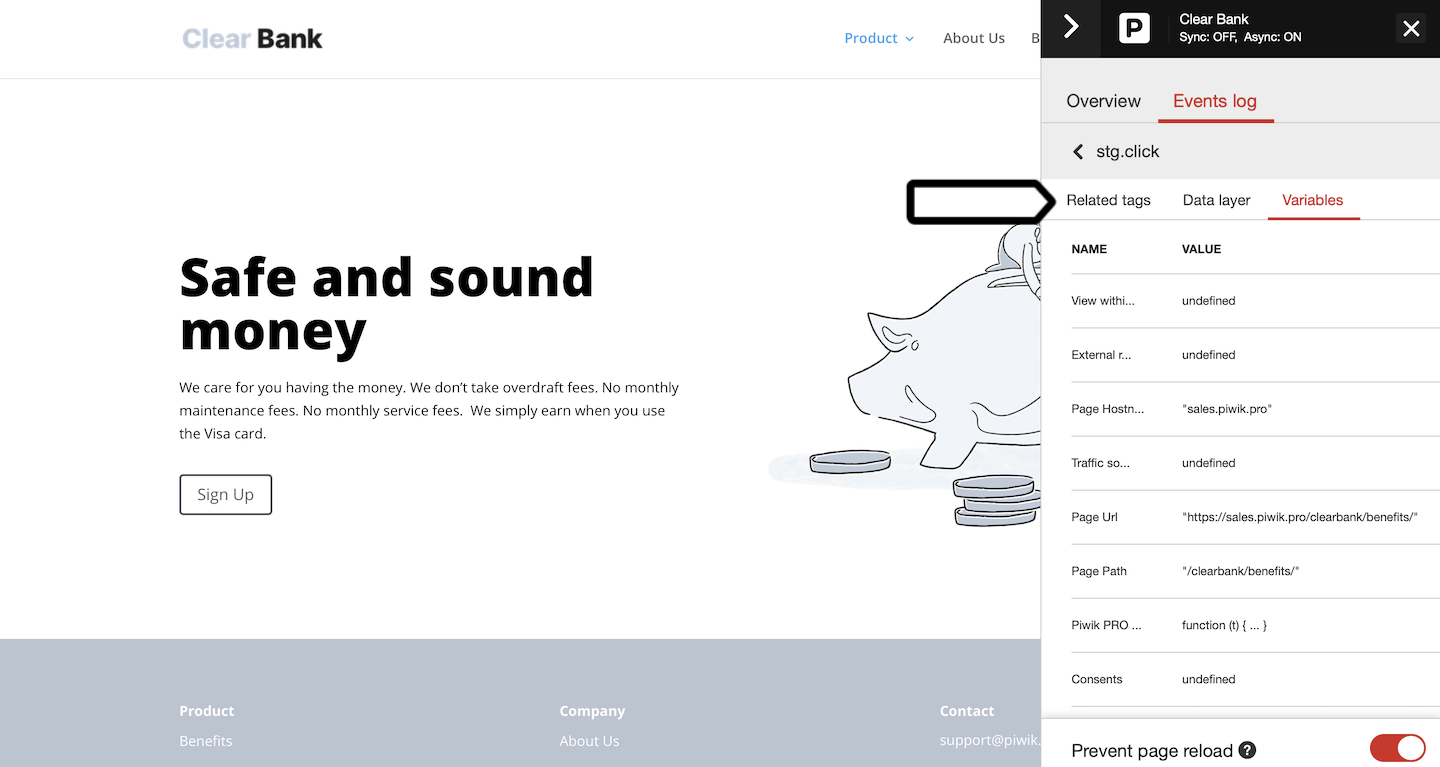
4. Go to the page with buttons you want to check and toggle the Prevent page reload option. This will freeze the page, and when you click a button it won’t open a new page.
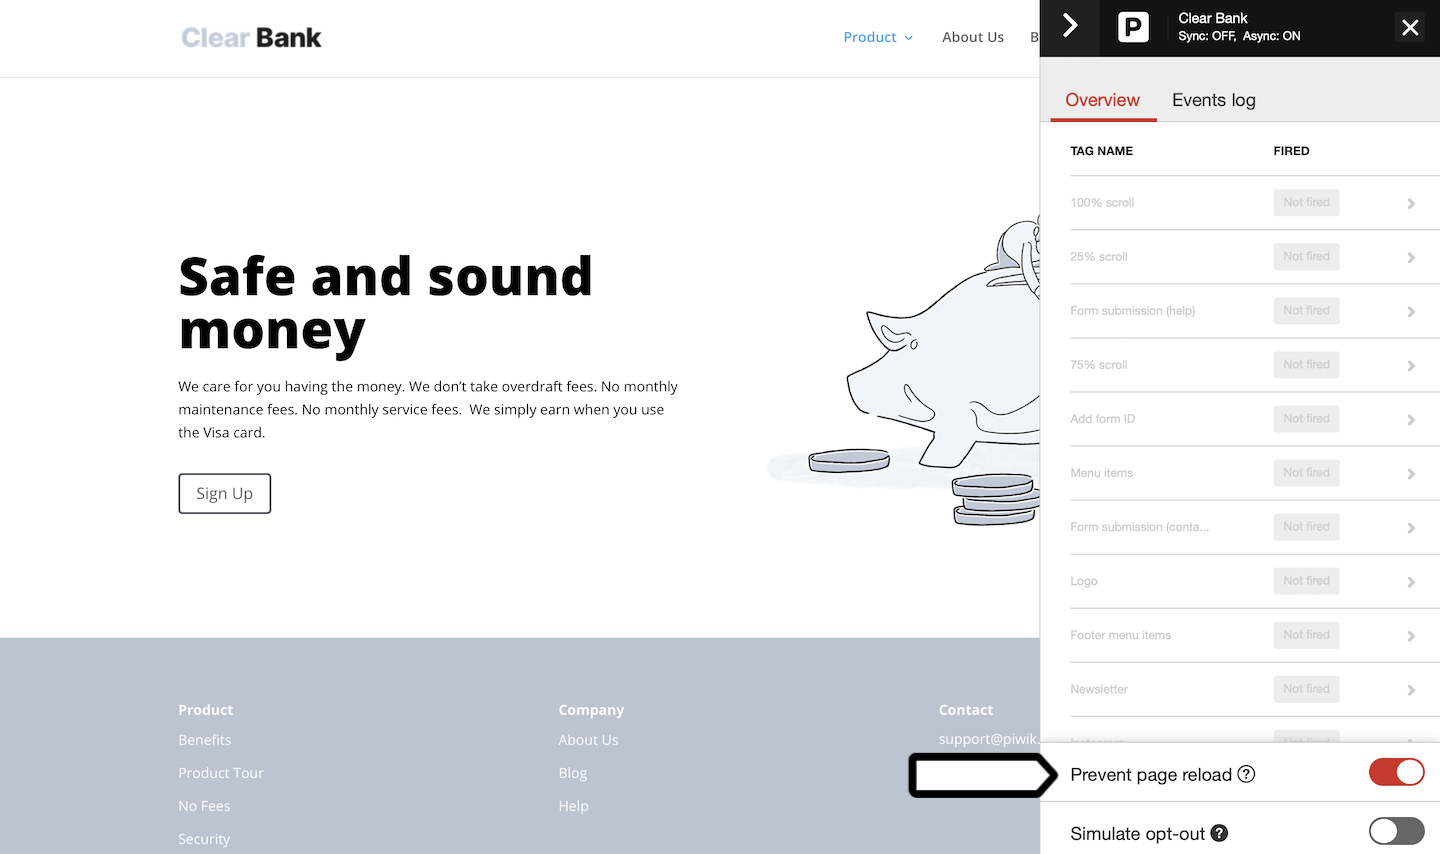
5. Click the button and see if the tag was fired.
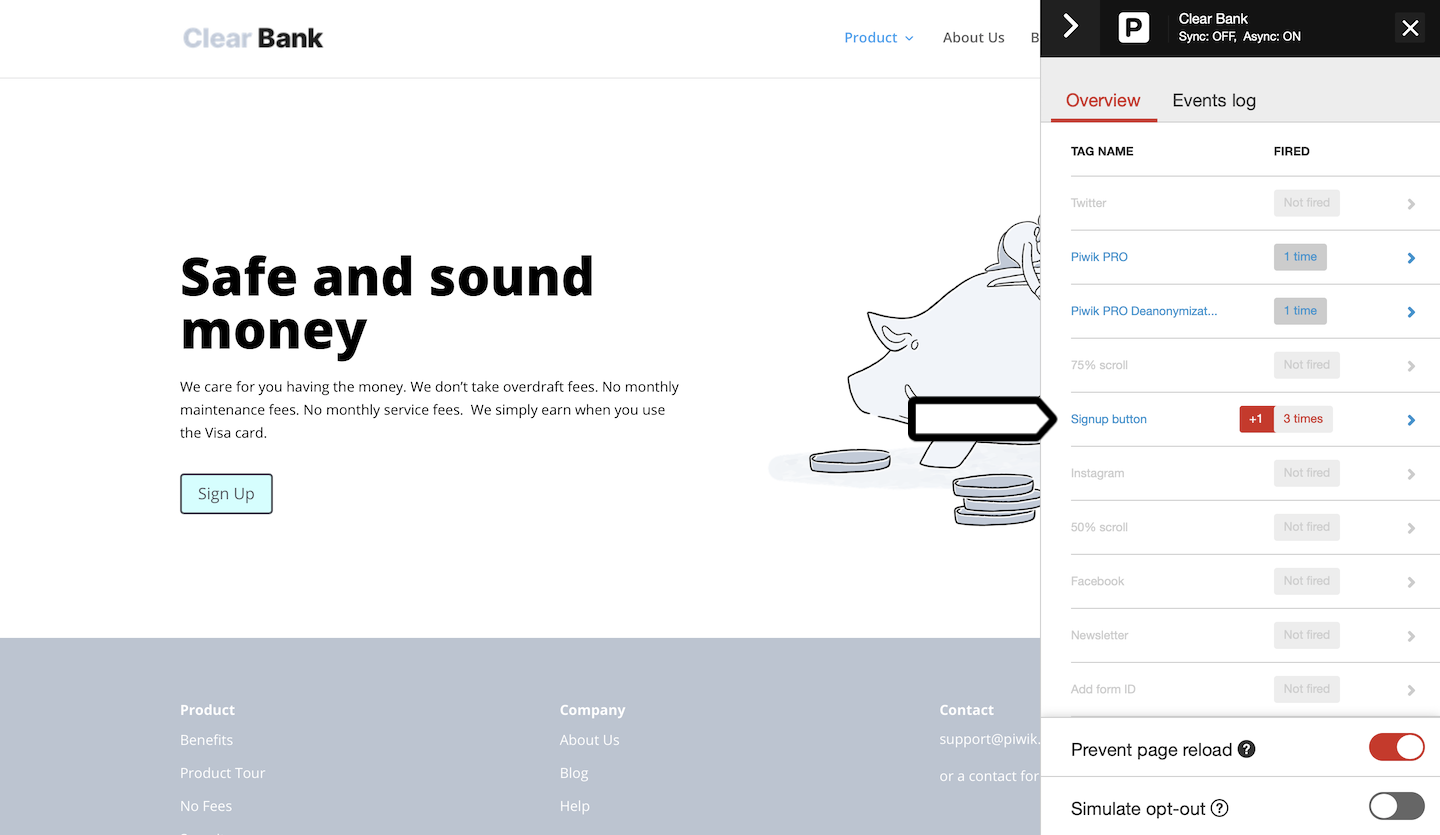
6. You can also check if data such as page path and click ID are being collected. In the debug mode, navigate to Events Log > stg.click > Name of your tag > Variables. Here you will see a list of all variables that are tracked for this tag.
7. When you’re satisfied with how the tag works, go back to Tag Manager and publish the tag.
View button tracking in a report
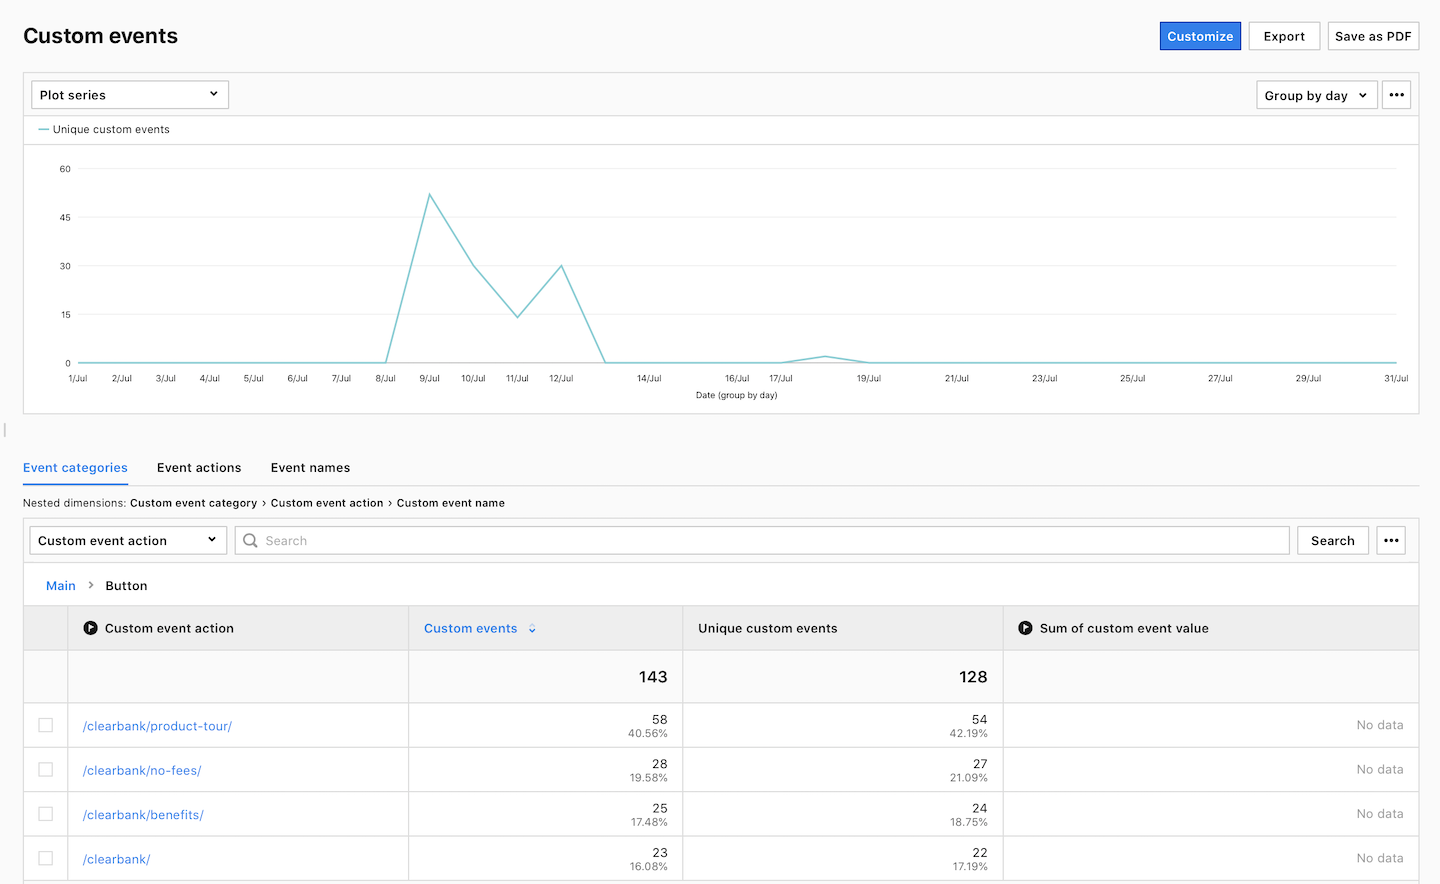
When your tag is up and running, it will pass data about button clicks to a custom event report in Analytics. The organization of data in the report depends on how you’ve defined event category, action and name. Let’s see what our report might look like.
To access the custom event report in Analytics, follow these steps:
1. Go to Menu > Analytics.
2. Navigate to Reports > Custom event.
3. Explore the report.
Another way to track buttons
Sometimes a site is designed with buttons leading to a few process pages. For example, there’s a signup button bringing a visitor to a signup page, and there’s a take-a-tour button taking a visitor to a page with a product overview.
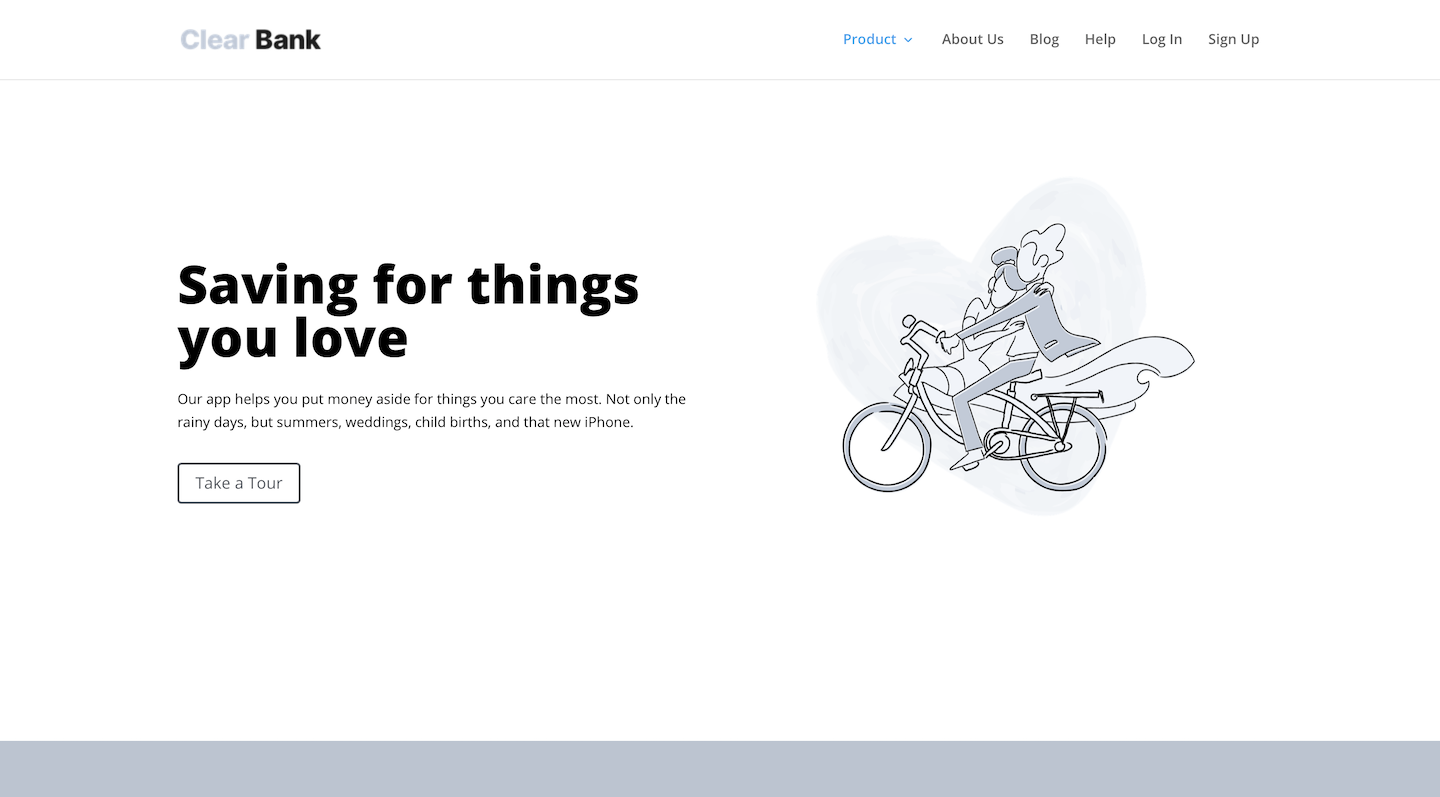
If those buttons are of the same class and don’t have a unique ID, we can’t tell which one was clicked. That is, we can’t do it with a custom event tag, but we can use a workaround. By pulling out the label of the buttons we are able to distinguish them.
To make it all work, we’ll need to use a custom tag in Tag Manager and do a bit of coding. No worries, it’s pretty easy stuff. First, we’ll create a trigger for the tag.
To create a trigger, follow these steps:
1. Go to Menu > Tag Manager.
2. Navigate to Tags.
3. Click on the tag you want to work with.
4. In Tag triggers, click Add a trigger.
5. Name the trigger.
6. In Event type, choose the following type: Click.
7. Click Next.
8. In Event conditions, define conditions for the trigger. For example, Click Classes contains btn.
9. When you’re done, click Save.
To create a custom tag, follow these steps:
1. Go to Menu > Tag Manager.
2. Click Add a tag.
3. Name the tag and select the following type: Custom code (async).
4. Click Next.
5. We’ll use the following script:
<script>
    var label_of_clicked_element = {{ Click Element }}.textContent;
    _paq.push(['trackEvent', 'Button', label_of_clicked_element, {{ Page Path }}]);
</script>
6. The script will go into Tag code.
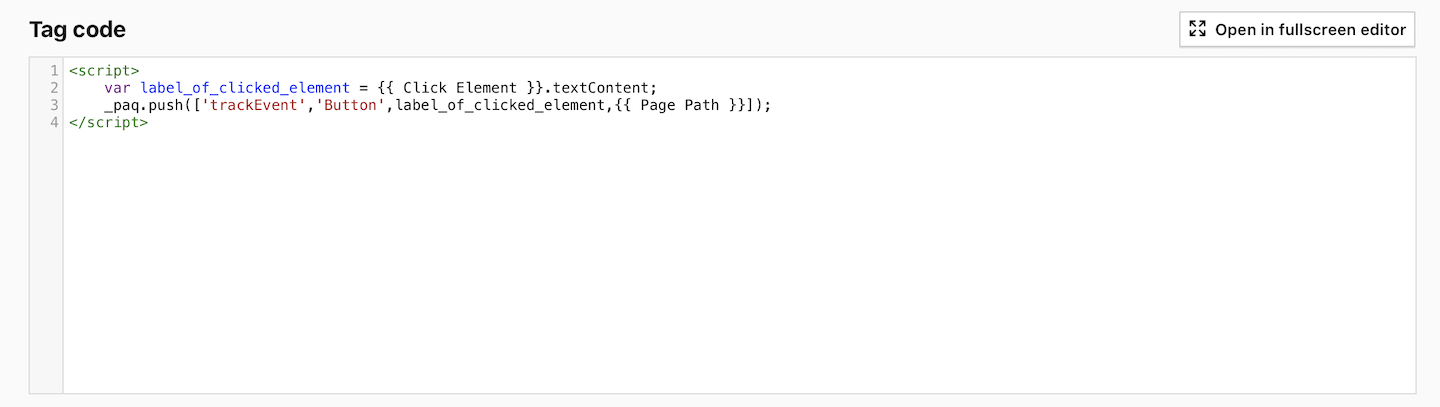
Now, let’s understand exactly what each line of code will do.var label_of_clicked_element = {{ Click Element }}.textContent;
This line of code defines a variable which holds data about the text used in the clicked element. For example, when the clicked element is a button, and the button has the text Take a Tour, the variable will capture and remember the text._paq.push(['trackEvent','Button',label_of_clicked_element,{{ Page Path }}]);
This line of code sends information about the event to Analytics. The original command looks like this:_paq.push(['trackEvent', category, action, name, value, dimensions);
As you can see, it has event category, action, name and value. These elements can be specified the same way as in a custom event tag. In our example we name:
- Category: Button.
- Action: label_of_clicked_element (That’s our defined variable).
- Name: {{ Page Path }} (A variable that pulls out the page path where an event occurred).
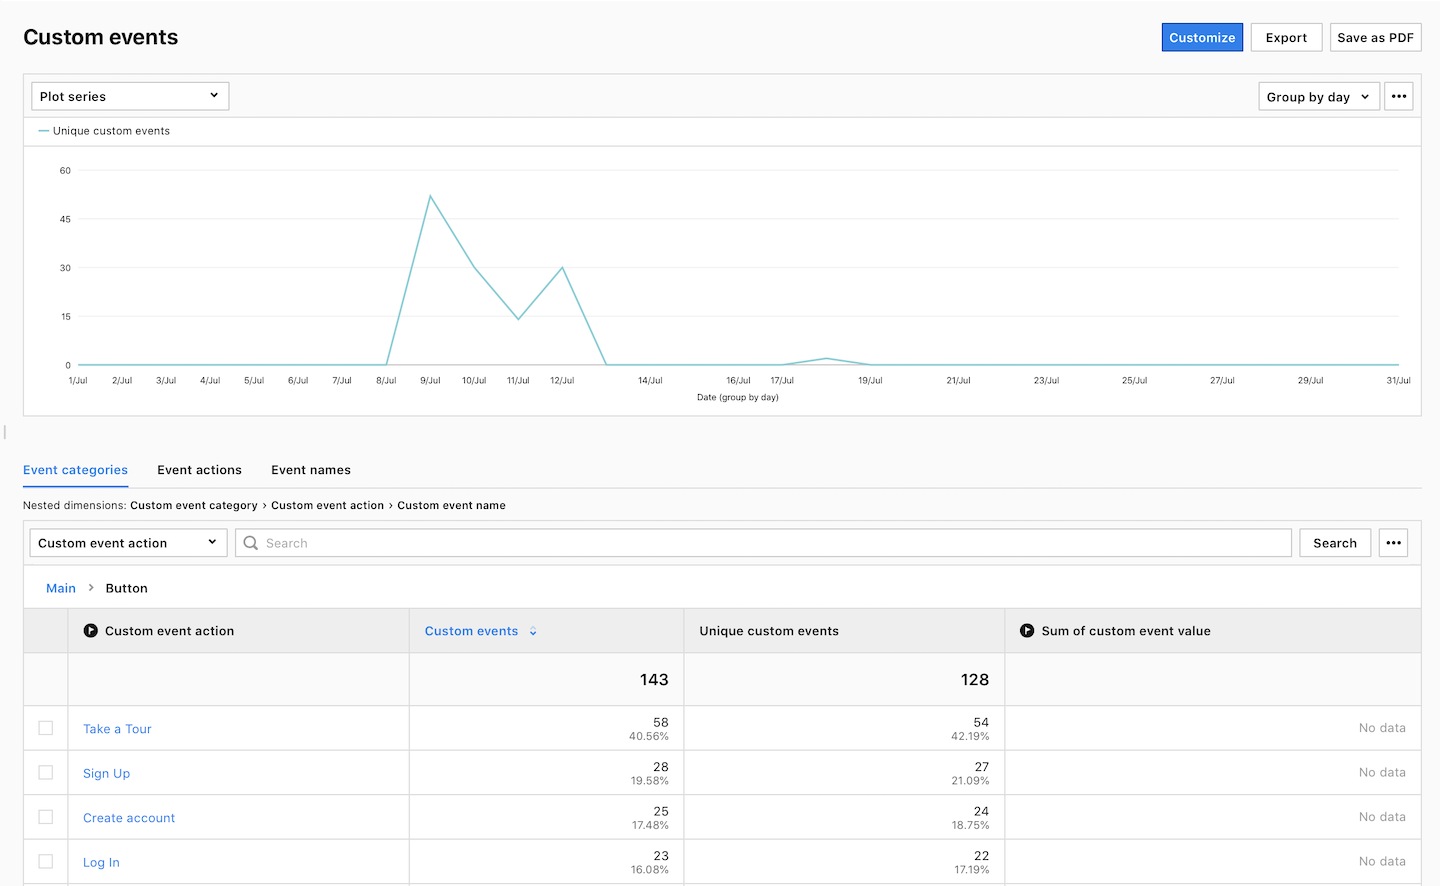
With this script, you will be ready to track buttons and capture button labels. The result is that you will know which button was clicked and where. Here’s what the event report could look like with this data.
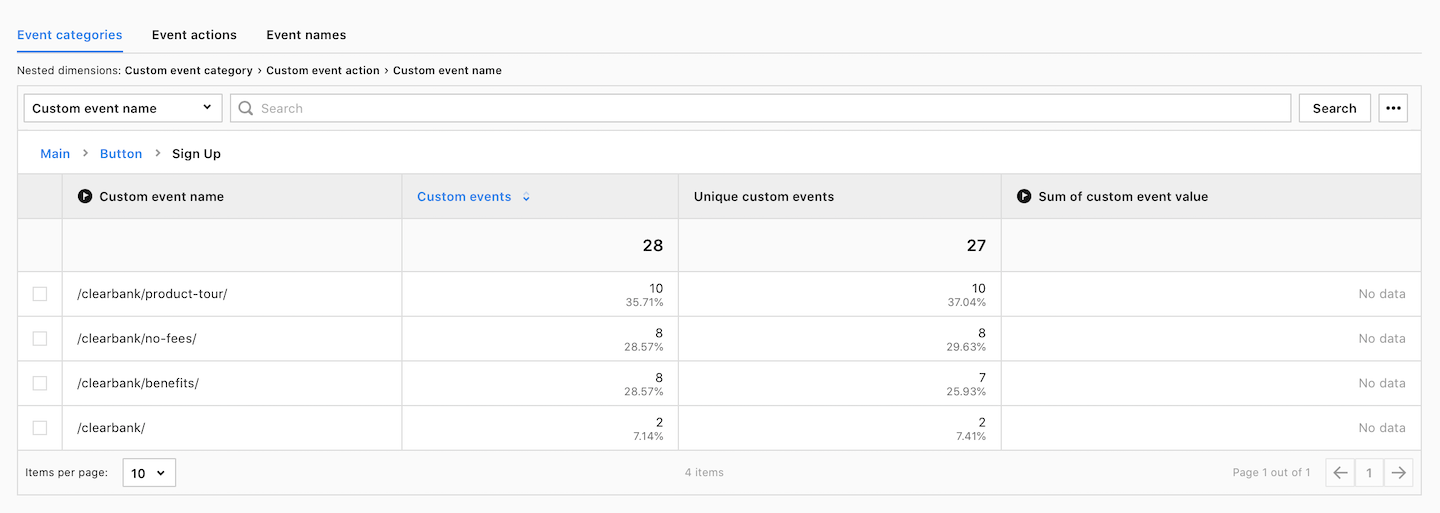
And when you dig deeper into the report, you will see pages on which people clicked the button.
Tip: You can analyze a path visitors took before they clicked the button with the reversed user flow report. We’ll describe a user flow report in chapter 11 of this guide.
With or without a bit of coding you can track buttons on your website and learn how people interact with them. The only thing to bear in mind when tracking a button with this method is that whenever a developer changes the class or ID of an element it will break your tracking. So make sure you’re informed of any code modifications and adjust your tags accordingly.