In the third chapter we talked about tracking button clicks. These are the bold elements of your website which usually lead a visitor to the actions we most desire – sign up or buy. But as we all know, not every visitor is ready to make a commitment to your business right away, and sometimes they need to contact you first – just to get in touch or find out more about your offer. In this case, they would contact you via phone, email, chat or contact form.
In this chapter, we’ll show how to track the last of the listed options – the contact form. For that, we’ll use the Tag Manager and a custom event tag template.
Form submission types
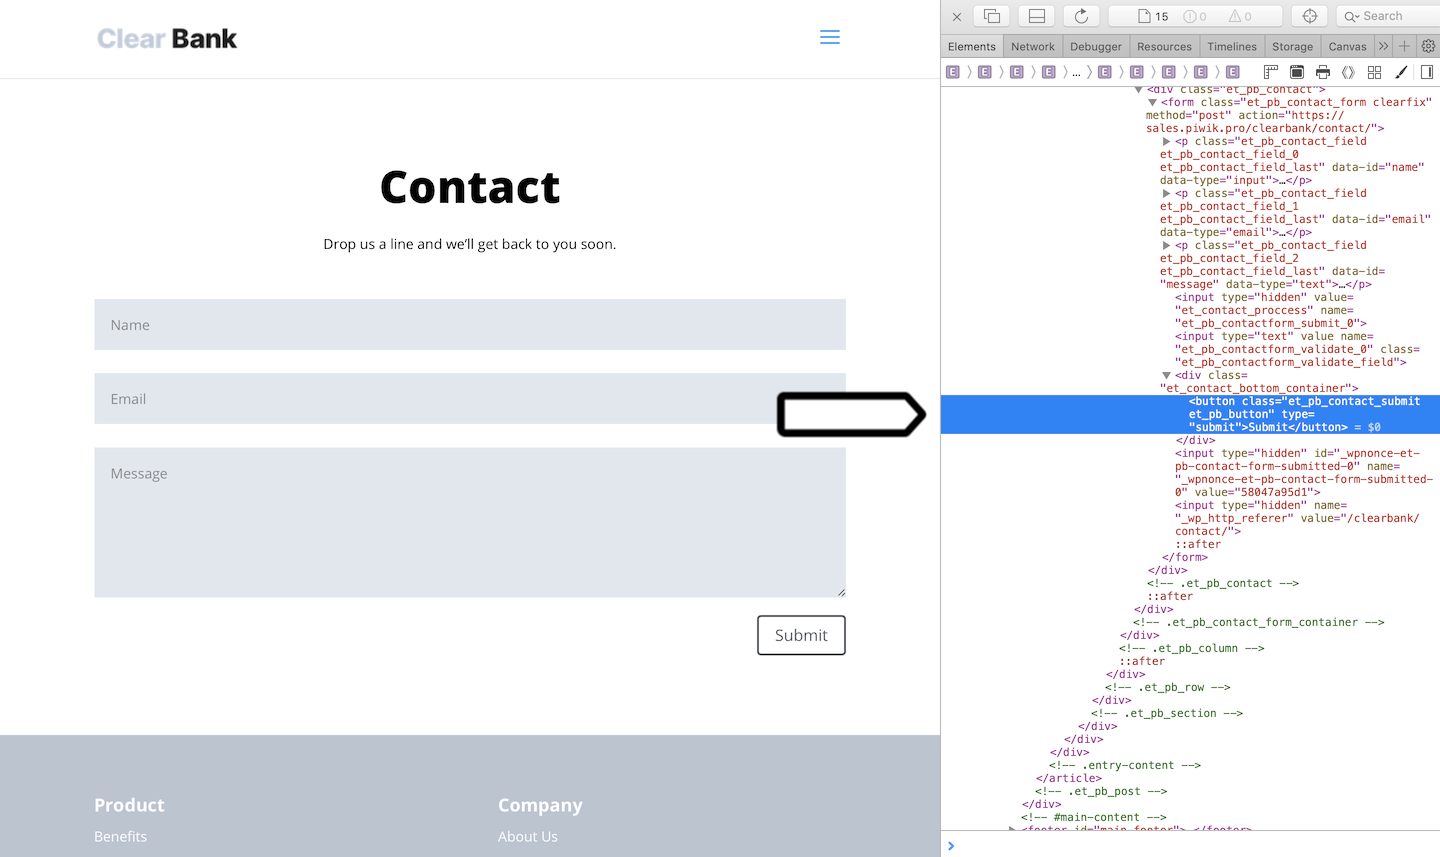
Most forms have a submit button which a visitor clicks on after filling out the form. The submit button is usually designed with a CSS attribute type=submit.
For example:<button type="submit" class="et_pb_contact_submit et_pb_button">Submit</button>
or
<input type="submit" class="et_pb_contact_submit et_pb_button" value="submit">.
When a submit button has this type of a CSS attribute, we can use a ready-made trigger called form submission to track the moment when the form is sent.
In cases when this type of CSS attribute is lacking, we need to use a click type trigger. And, like in previous chapters, we need to find a CSS class attribute for the button.
Both ways of triggering work fine and it’s up to you which approach you use. The first one is more user friendly, the second makes some users more certain that the tag will track exactly the form they want to. We’ll explain how both ways work and you’ll be able to decide for yourself.
Find the CSS attribute of the contact form
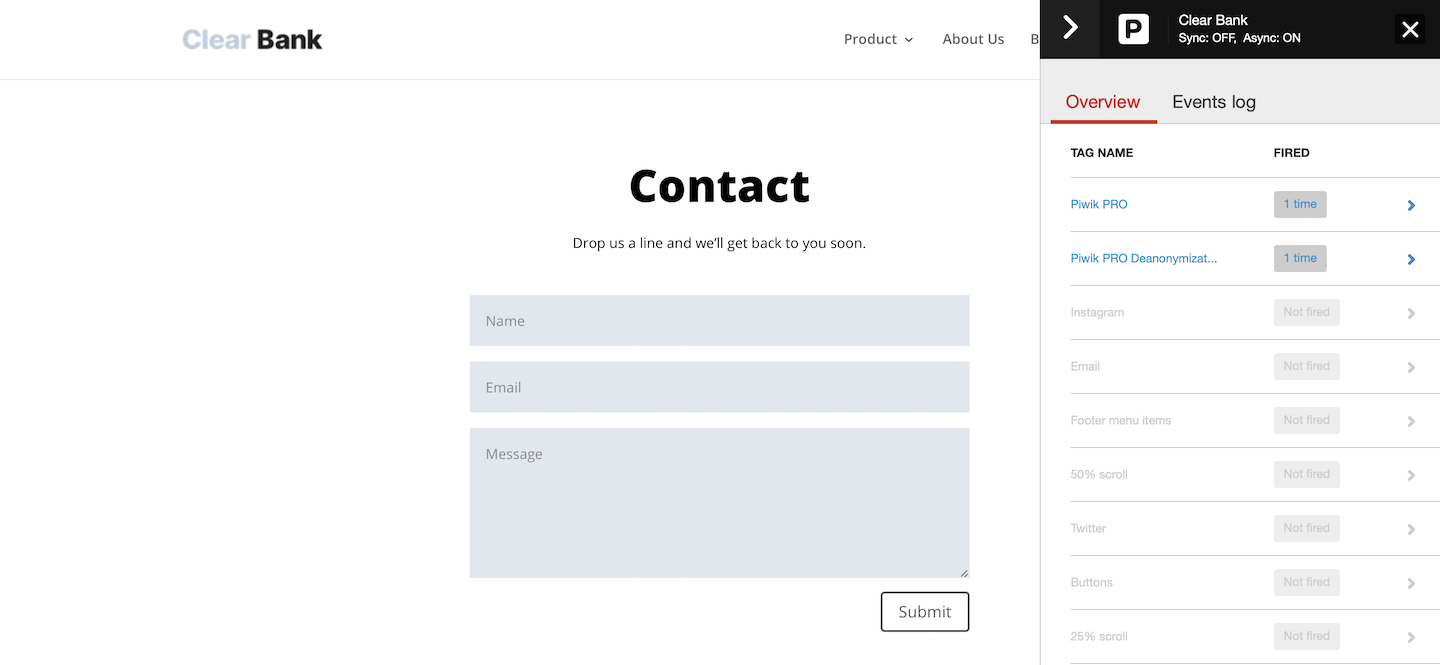
So far, we’ve been showing you how to spot CSS attributes using an inspector in your website browser. This time, we’ll guide you in how to find those attributes using debug mode. Debug mode can be used not only for checking if a tag and trigger work correctly, but also to see what interactions happen on your website.
To find the CSS attribute of the contact form using debug mode, follow these steps:
1. Open your website in debug mode. For example, our link is https://clearbank/contact/?_stg_debug.

2. Go to the page with a form that you want to track.
3. Toggle the Prevent page reload option. This will freeze the page so that when you click a submit button a new page won’t open.
4. Navigate to Events log.
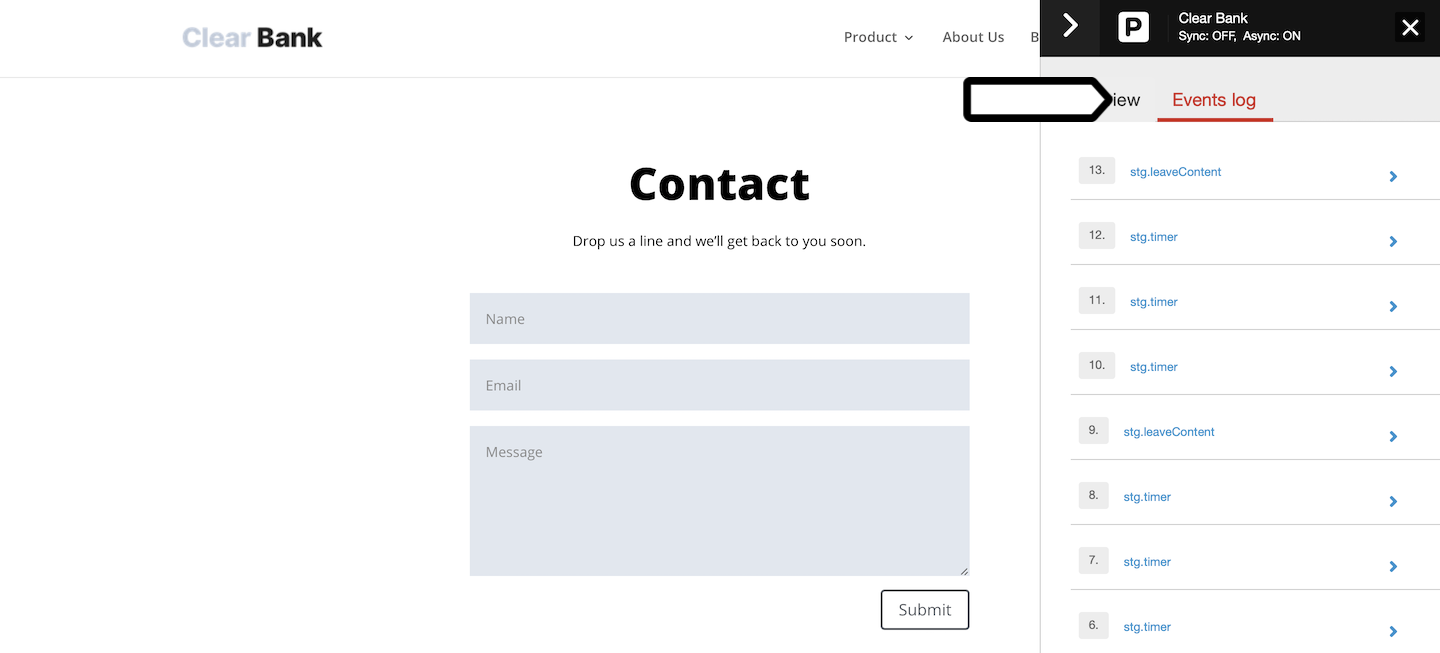
5. Click the submit button.
6. If Tag Manager spots the submit type of a CSS attribute, you will see an event stg.formSubmit. If not, you will see an event titled stg.click.
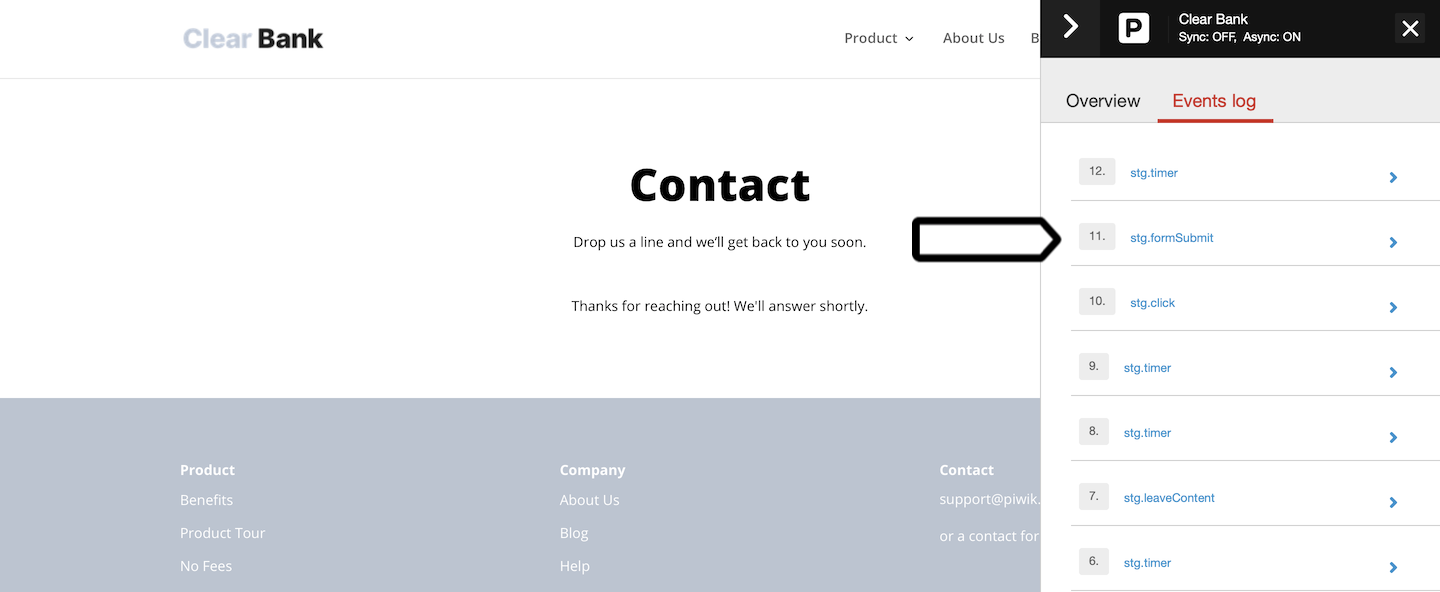
Note: When you see the event stg.formSubmit, then you know you can use the form submission trigger. If you don’t, you need to find the click class for this element.
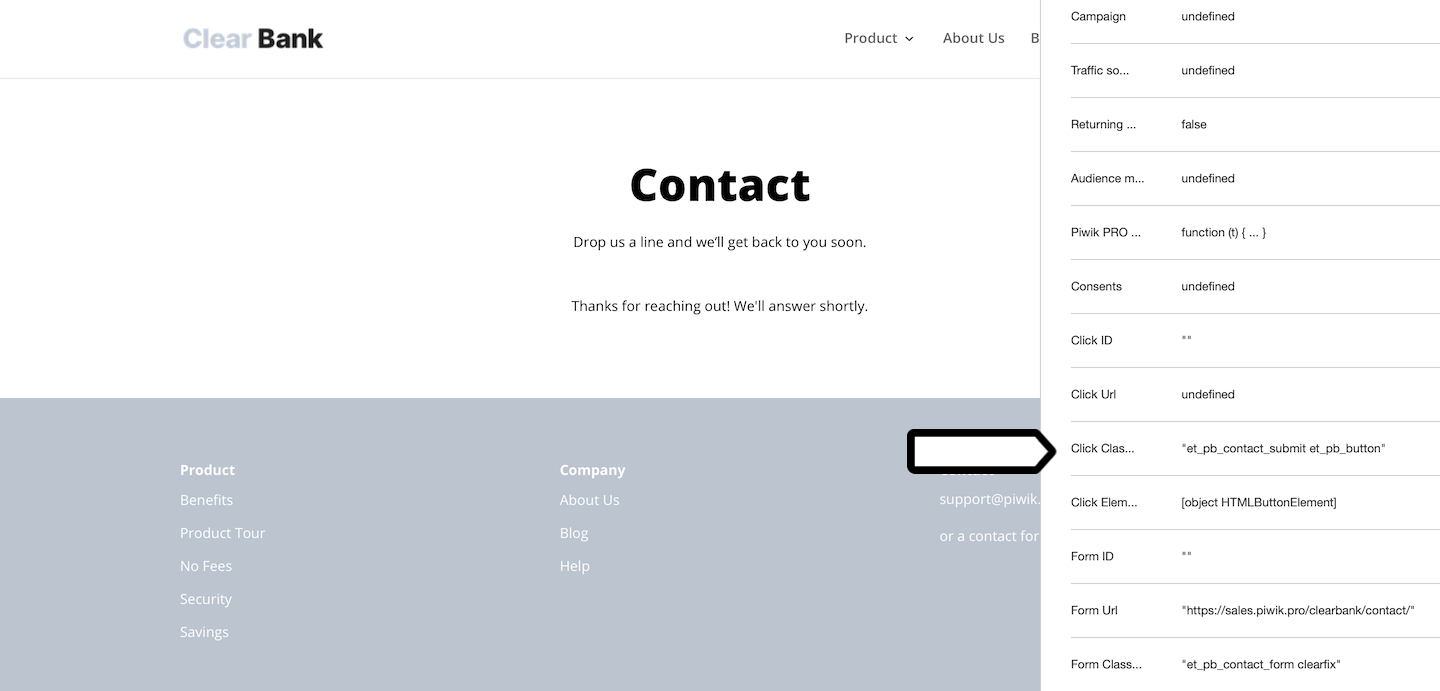
7. Click the logged element and navigate to Variables.
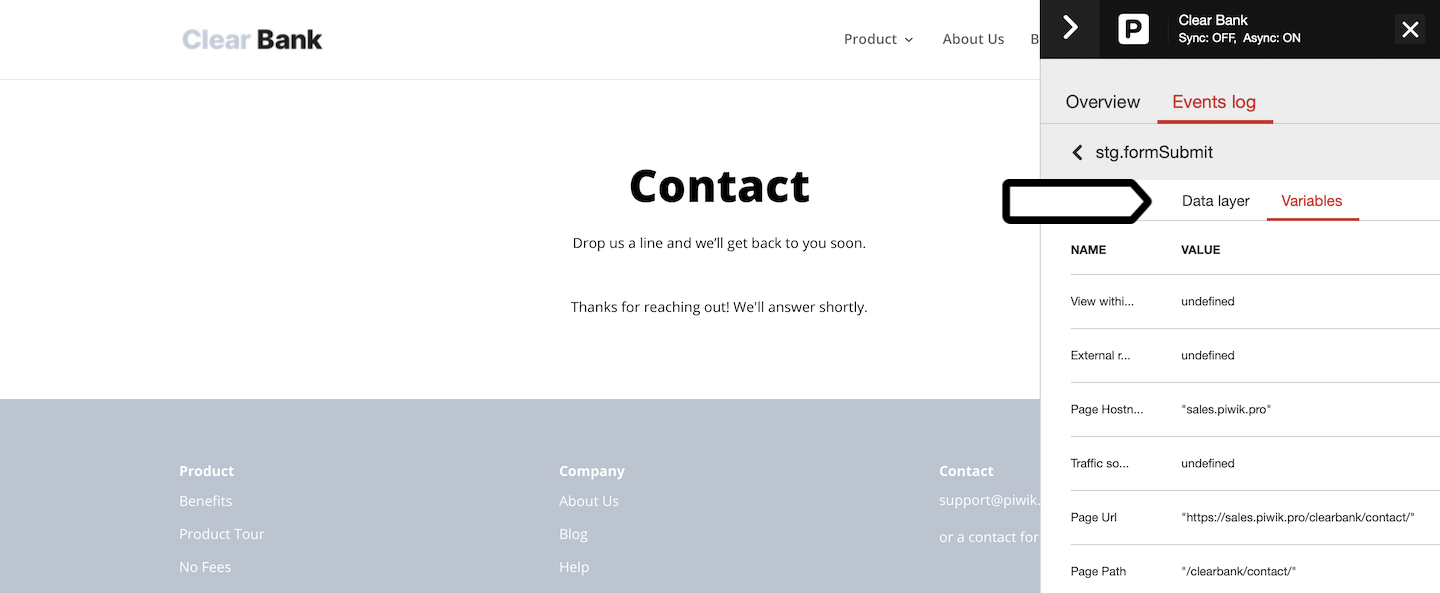
8. In Variables, you will see many types of information that the Tag Manager can capture for this element. Among them you can find the click class, which can be used for the click trigger.
Set up a form submission tracking in Tag Manager
Once you know the type of your contact form, you can create and define the tag and trigger.
To set up a tag for tracking a form submission, follow these steps:
1. Go to Menu > Tag Manager.
2. Navigate to Tags.
3. Click Add a tag.
4. Name the tag and select the following type: Custom event.
5. Click Next.
6. Set category as Form submission. You can use another name depending on the framework you use for organizing events in your reports.
7. Set action as a Contact form. For our example, we’ll use the action Contact form for a form on a contact page, and the action Help form for a form on a help page.
8. Set name as a {{ Page Path }} or {{ Page URL }} variable. This way Tag Manager will pull out information about the page where the form was submitted.

9. When you’re done, click Save.
Now we’ll show you two ways of setting up triggers – one with a form submission trigger, the other with a click trigger.
Form submission trigger
To set up a form submission trigger, follow these steps:
1. Open a created tag for tracking a form submission and scroll down until you see Tag triggers.
2. Click Add a trigger.
3. Name the trigger.
4. In Event type, choose the following type: Form submission.
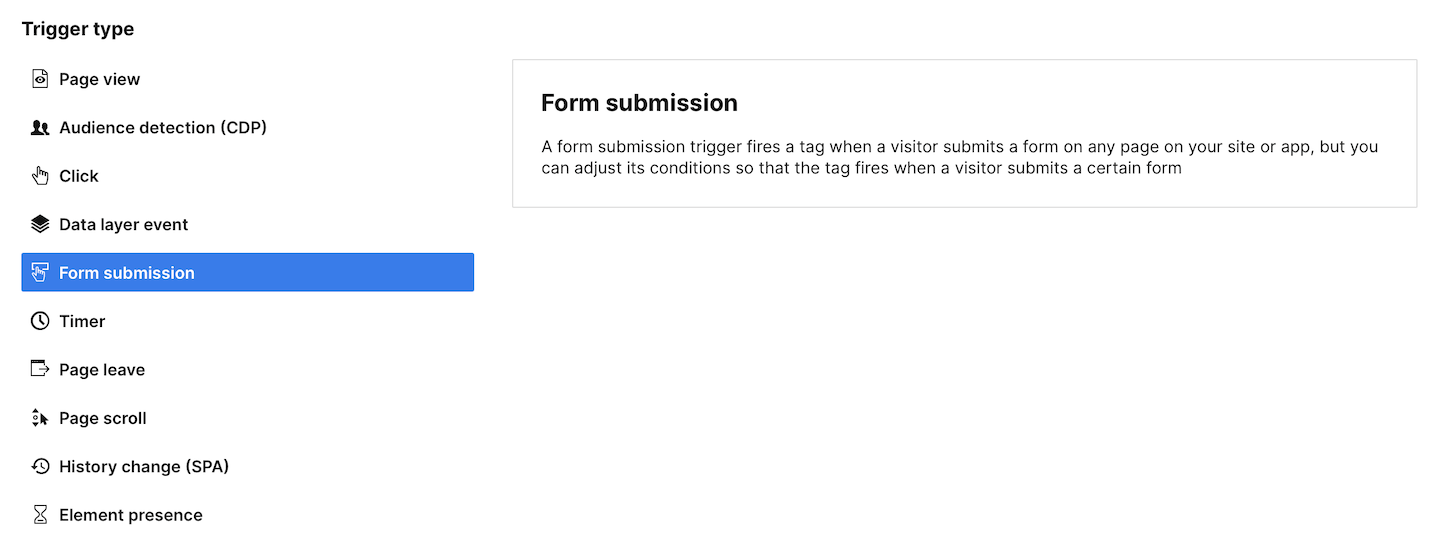
5. Click Next.
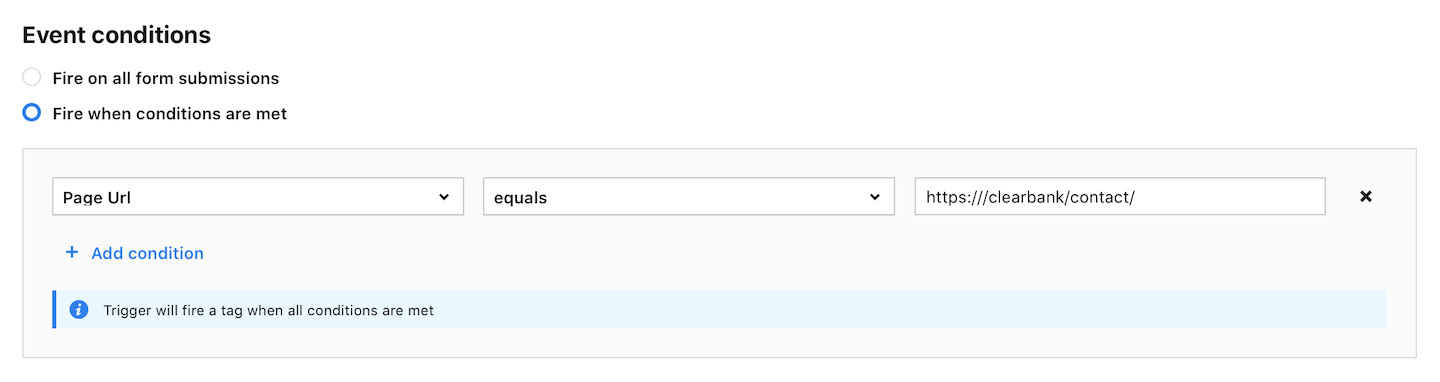
6. In Event conditions, set the condition for the tag to fire. For our example, we’ll use the condition Page URL equals https://clearbank/contact/. This way we’re making sure that this tag will fire only on a page with this contact form.
At this point, we want to tell you a bit more about possible conditions that you could use to pinpoint the contact form. This is useful when you have a few forms on your website and want to track them separately.
In trigger conditions, you can pick the following elements:
- Form ID: It will fire a tag for the form with the chosen ID.
- Form URL: It will fire a tag for the form which sends a request to the chosen URL.
- Form classes: It will fire a tag for the form with the chosen class.
- Form name: It will fire a tag for the form with the chosen name.
The elements form ID, form URL, form class, and form name are the CSS attributes of forms and you can find them using an inspector in your website browser or debug mode (Event log > Variables). For example, the code with these elements could look like this:
<form id="form" name="contact_form" class="et_pb_contact_form clearfix" method="post" action="https://clearbank/contact/" >7. When done, click Save for the trigger and click Save for the tag.
Note: If your form field returns a native HTML5 validation error, the form submission trigger won’t fire your tag.
Click trigger for form submission
Moving on to the second approach in defining triggers, let’s look at the click trigger.
To set up a click trigger for tracking form submission, follow these steps:
1. Open a created tag for tracking form submission and scroll down until you see Tag triggers.
2. Click Add a trigger.
3. Name the trigger.
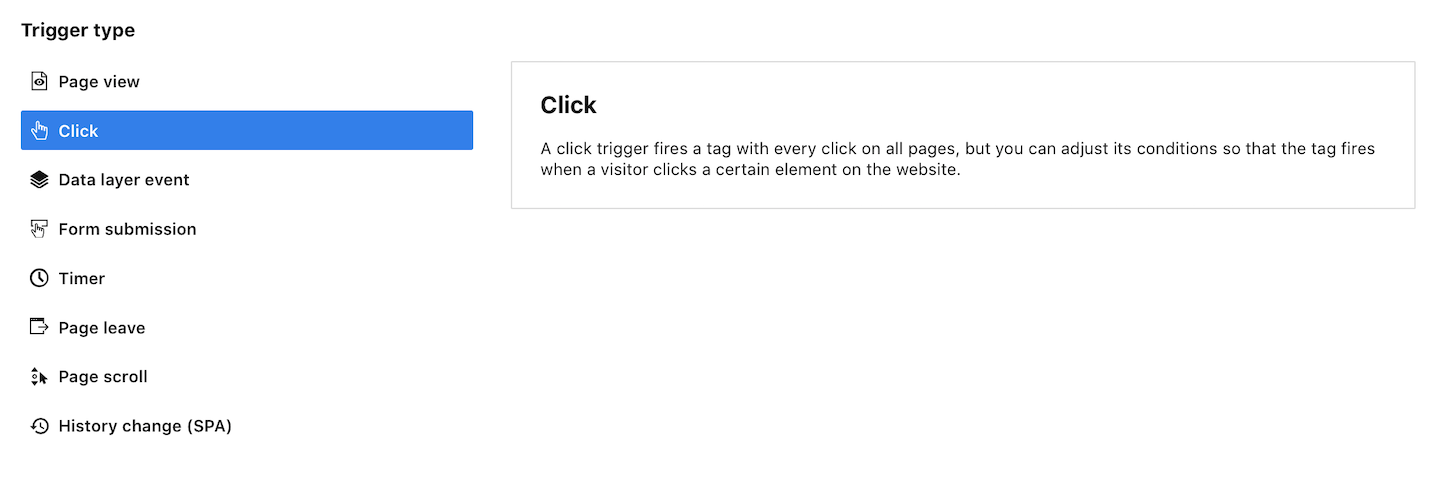
4. In Event type, choose the following type: Click.
5. In Trigger conditions, set the condition for the tag to fire. For our example, we’ll use the condition Page URL equals https://clearbank/contact/. This way we’re making sure that this tag will fire only on a page with this contact form.
When using the click type trigger, we can’t use the form CSS attributes to condition the trigger. However, we can always use the click element CSS attributes like click ID, click URL, click class or click element.
6. When done, click Save for the trigger and click Save for the tag.
We can repeat these steps to set up tracking for other contact forms on our website. Keep in mind to follow the guidance of the framework you use for your reports. In our case, that is:
- Category: Form submission.
- Action: Contact form and Help form.
- Name: {{ Page Path }} (A variable that pulls out the page path where an event occurred).
Check the setup in debug mode
Once we have tags and triggers ready, we can test if they work correctly in debug mode in Tag Manager.
To use debug mode, follow these steps:
1. Go to Menu > Tag Manager.
2. Click Debug in the upper right corner.
3. Your website will open in a new tab with debug mode running.
4. Go to the page with the contact form.
5. Toggle the Prevent page reload option. This will freeze the page so that when you click a submit button a new page won’t open.
6. Click the submit button and see if the tag was fired.

7. When you’re happy with how the tag works, go back to Tag Manager and publish the tag.
View form submission tracking in a report
Once the tags are live, data about form submissions starts being tracked. Soon you will be able to see it in the custom event report under Menu > Analytics > Reports > Custom events. The data will appear according to the framework you’re using for labeling the category, action, and name of an event. In our case, the report will look like this.
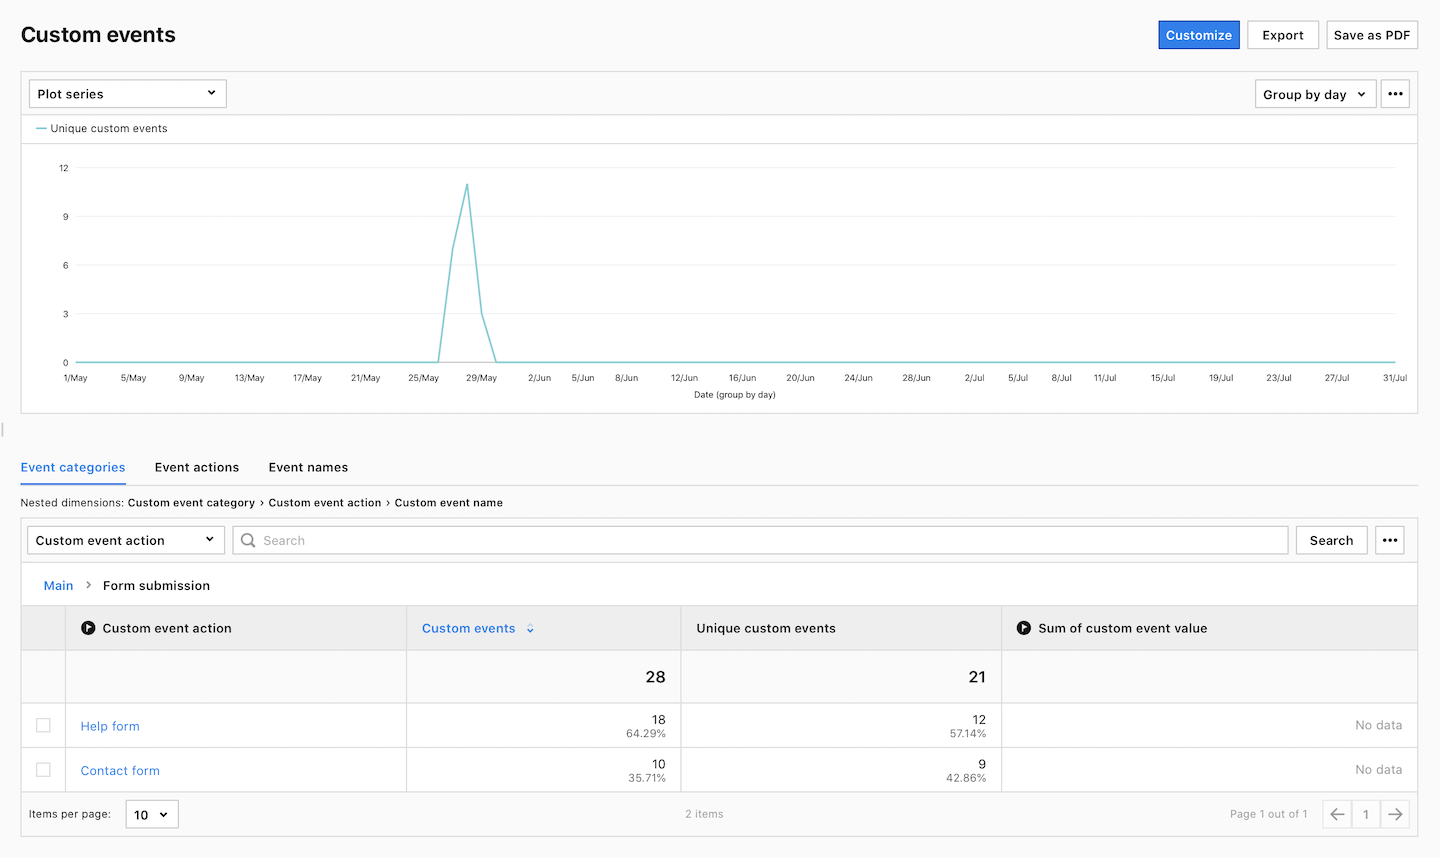
When tracking form submissions, remember to double-check that the triggers are working for exactly the forms you want to track. Be careful with the click trigger, as the CSS attribute for the submit button click may be similar to other buttons. In this case, use more conditions to specify which submit button on which page you want to track. Run the test in debug mode and when everything looks fine, publish and relax. So far, you’ve learned a lot about web analytics. High five!