In most of the chapters of this guide we’ve shown you how to track additional data like button clicks, page scrolling or form submissions. This information is important as it shows you precisely how people behave on your website, thereby helping you adjust every little element of it to better serve your visitors. It’s the little things that make the biggest difference.
Now it’s time to shift our attention to a different perspective. After diving deep into the details, we’re floating back to the surface to think about the goals you have for your website. And when we do that, we can’t help but reflect on the goals of your business.
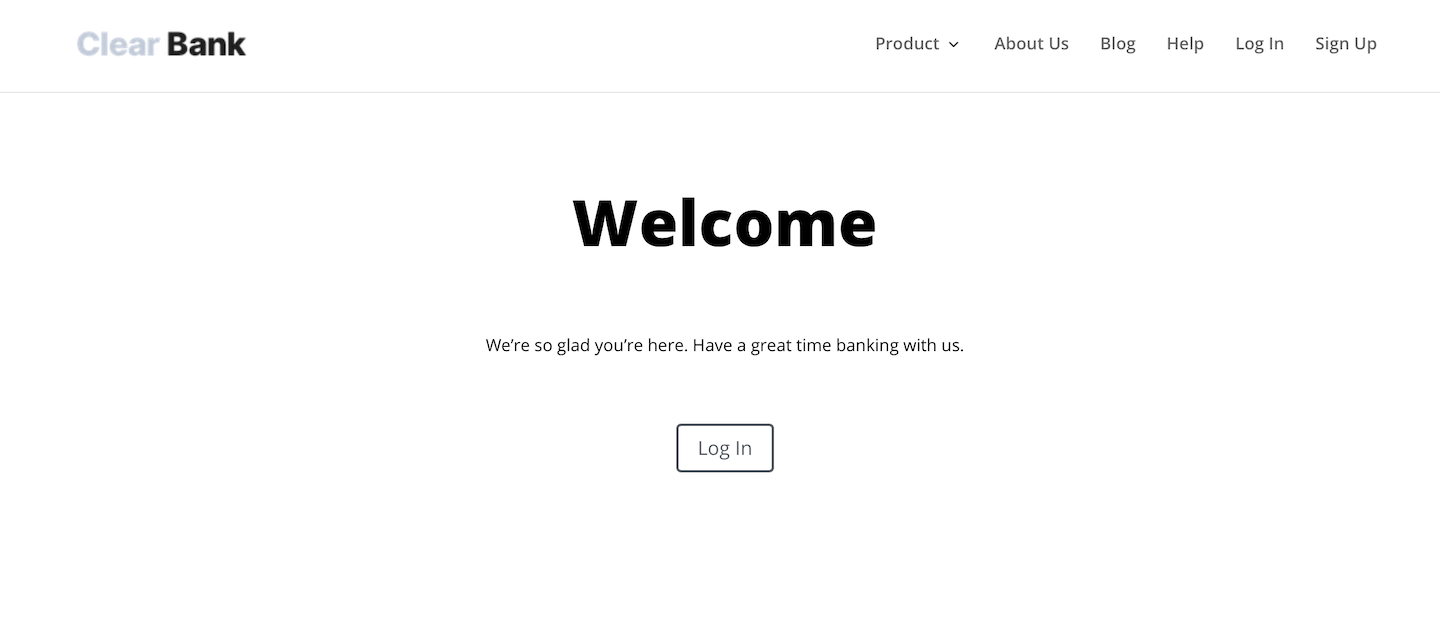
Whatever your business wants to achieve – sell a product, support software users or deliver a service – the website should reflect that goal. For example, Clear Bank wants to deliver mobile banking services and software, so their website is all about guiding visitors to sign up. The signup is the website’s goal.
One website can have several goals because different sections can have different objectives, just like different departments in your company have different purposes. For example, a blog wants readers, a career page wants job applicants, a help center wants happy users. So whenever we work with goals for our website, we need to think in detail about which section we’re setting the goal for and what the ultimate objective is for it.
We can measure goals using classic metrics like page views, bounce rate and average time on page. We’ve explained how to do that in our previous course, Analytics for Beginners, in the chapter titled “Create a tracking plan“. But when we can describe a goal as an action which a visitor takes – like signing up or sending a form – we can use an Analytics feature called goals to calculate the score. In this chapter we’ll show you how.
Set up a goal
We’ll begin with creating a goal for the Clear Bank website, which in this case is a signup. Any time a visitor finishes a signup process and gains access to the bank’s app, we treat it as a completed goal. From the website’s perspective, a completion is counted when a visitor reaches the success page of the signup process – https://clearbank/success/.
To create a goal for viewing a page, follow these steps:
1. Go to Menu > Analytics.
2. Navigate to Goals.
3. On the left, click Add a goal.
4. Name the goal.
5. Set Track goal automatically.
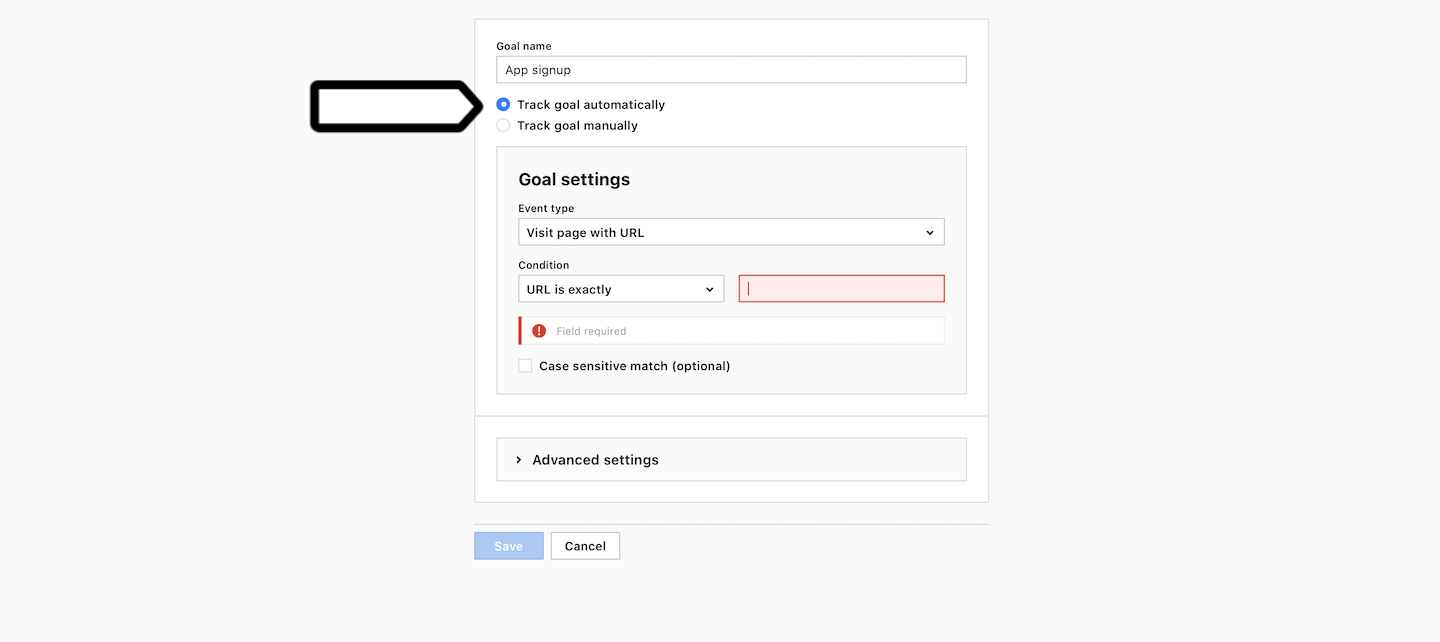
6. In Goal settings, pick an event type. Example: Visit page with URL.

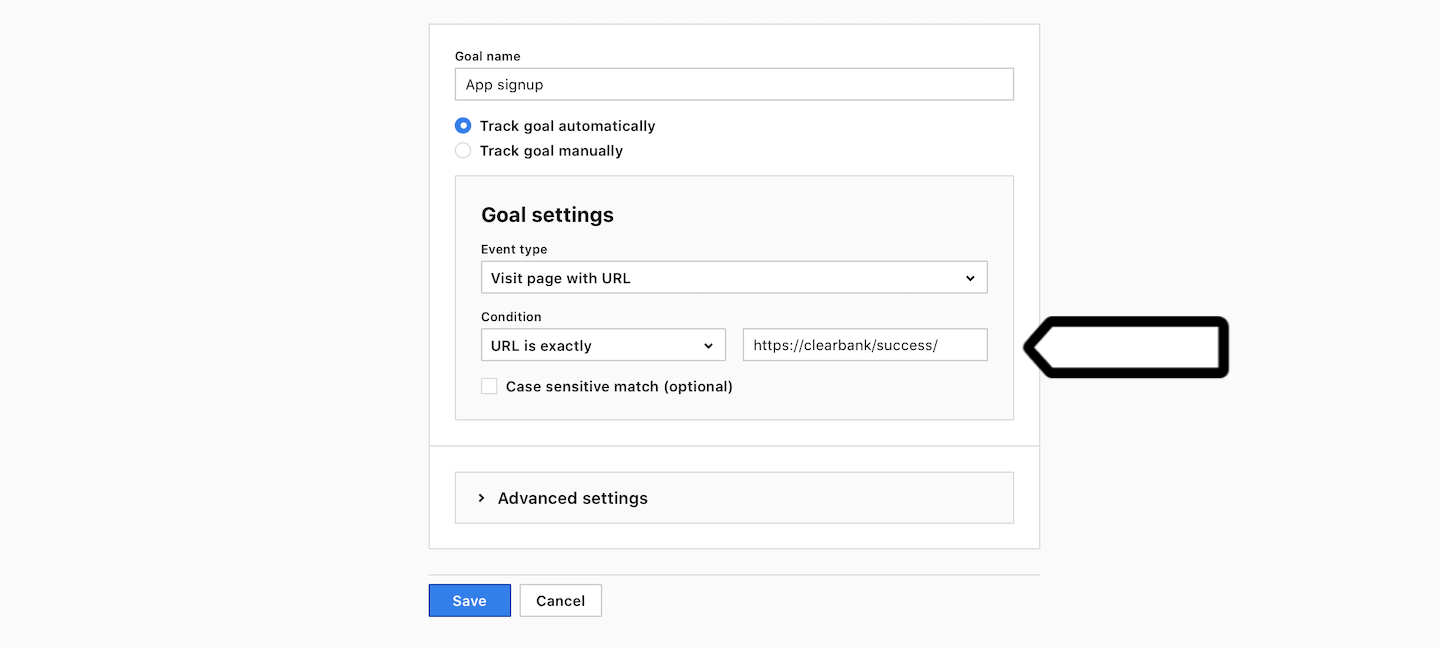
7. In Goal settings, set conditions. Example: URL is exactly https://clearbank/success/.
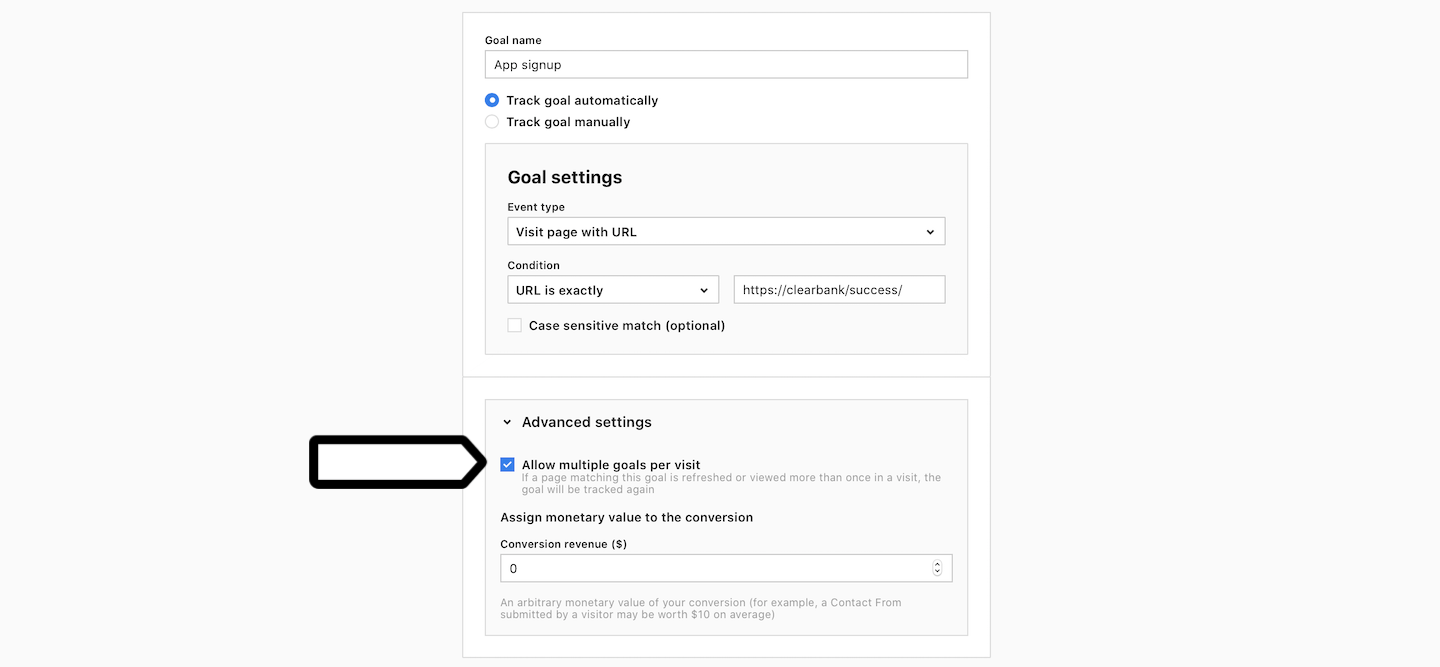
8. (Optional) In Advanced settings, you can set the following options:
- Allow multiple goals per session: Each time a visitor reaches this goal during a session, the goal will be tracked again.
- Assign revenue to goal conversion ($): A monetary value set for a goal conversion. For example, a submitted contact form may be worth $10. (The revenue currency is set in Administration > Sites & apps > Data collection > Basic info > Currency.)
In our specific example, it wouldn’t make sense to count goals multiple times in a session. We also don’t need to calculate the goal revenue.
9. When it’s all set, click Save.
Tip: You can use folders to organize your dashboards, goals, and custom reports. Add shared or private folders directly in the UI, no setup needed.
10. Bravo! Your goals is now ready.
From now on, Piwik PRO will record the moment when a visitor completes a goal and show that information in the goal report. Additionally, Piwik PRO will show a goal completion under Analytics > Reports > Session log, which we’ll discuss in detail in the last chapter.
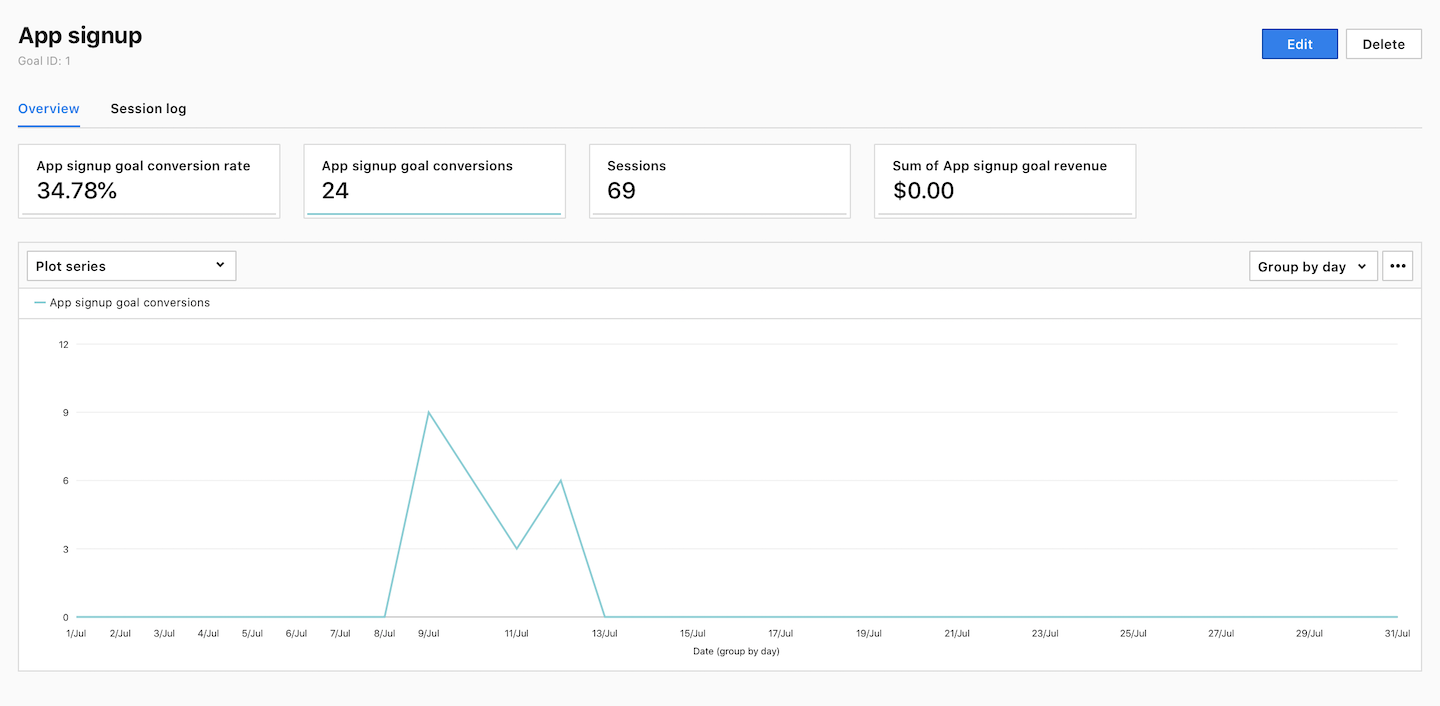
Goal report
When you want to analyze data about goals, you can use goal reports. Also, most of the core reports in Analytics, will show you data about goal conversion, goal conversion rate and goal revenue.
To view the goal report, follow these steps:
1. Go to Menu > Analytics.
2. Navigate to Goals.
3. On the left, select the goal you want to analyze.
4. Take a deep dive into your report.
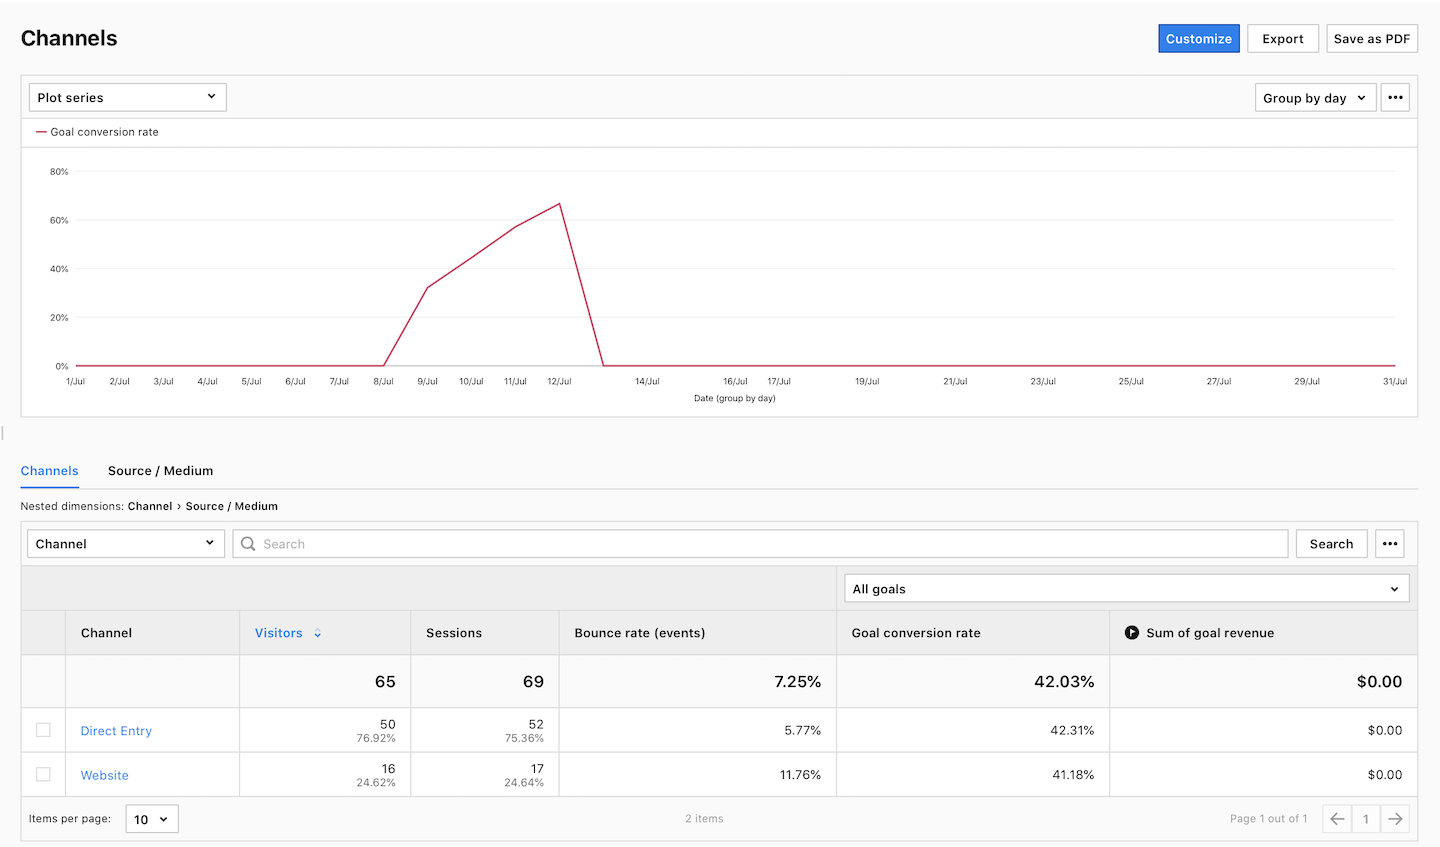
To view goal metrics in core reports, follow these steps:
1. Go to Menu > Analytics.
2. Navigate to Goals.
3. On the left, select the goal you want to analyze.
4. Almost every report will contain goal metrics like the goal conversion rate and sum of goal revenue.
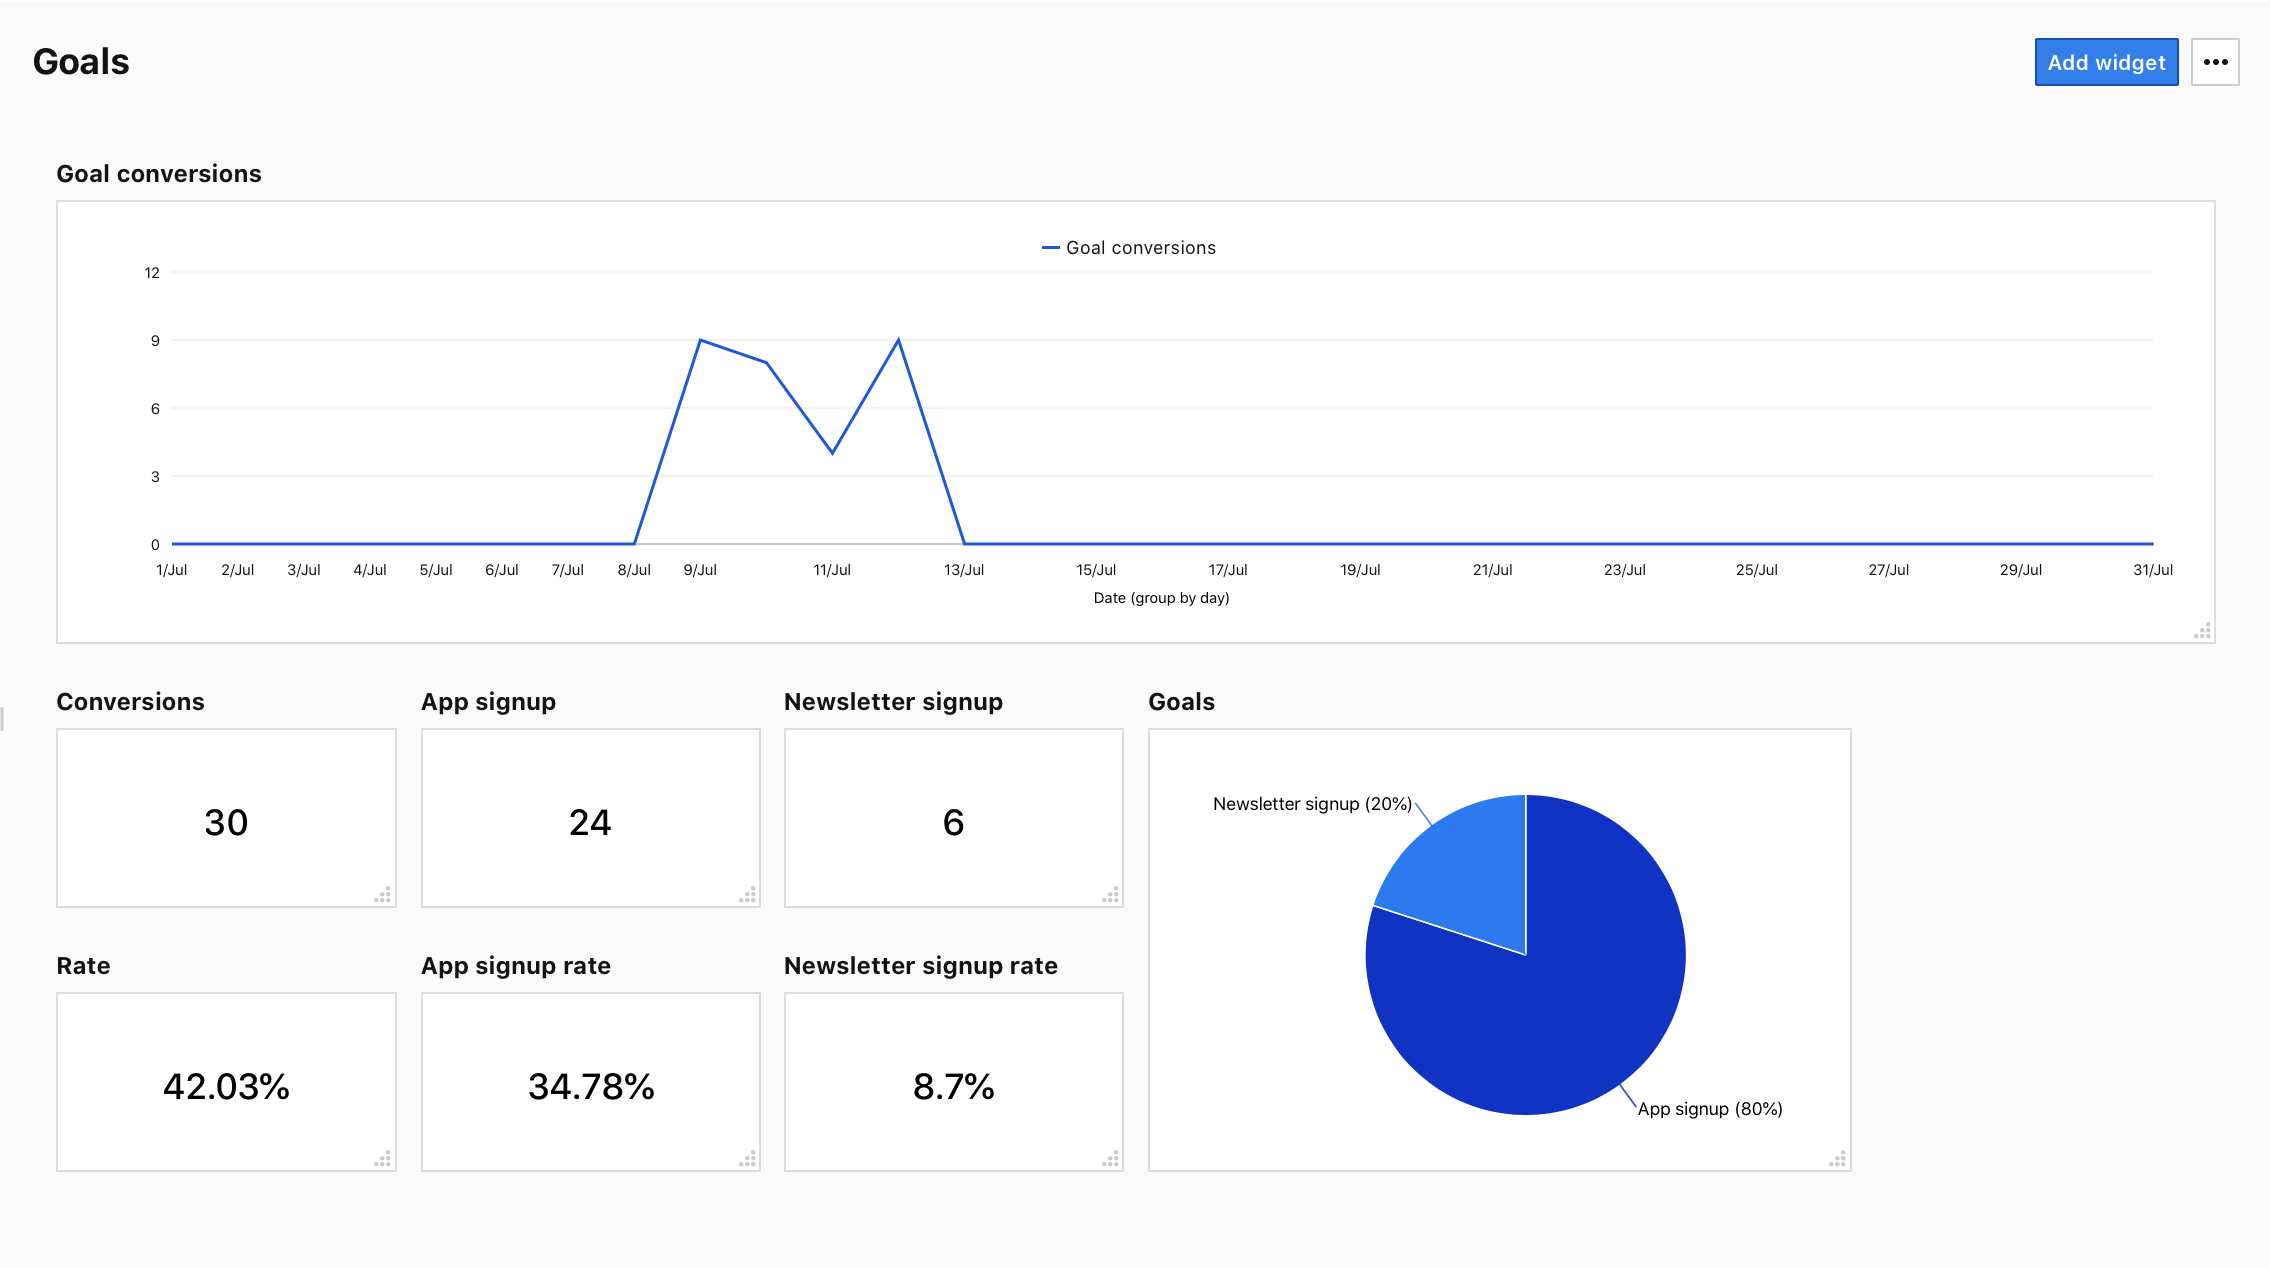
5. Goal metrics will be also avaliable in custom reports and on dashboards.
Set up a goal for newsletter signup
You can set up as many goals as you want to, but don’t spread yourself too thin. Remember, a goal is the final action a visitor takes that matters to your business. Like in a game of soccer, eleven players are on the field kicking the ball but the event that counts is when one player scores.
That said, we’d like to show you how to set up a goal for newsletter signup, as this is often a goal of a blog. Newsletter signup is tracked by a custom event in Tag Manager, which we’ve described in chapter 8.
To create a goal for newsletter signup, follow these steps:
1. Go to Menu > Analytics.
2. Navigate to Goals.
3. On the left, click Add a goal.
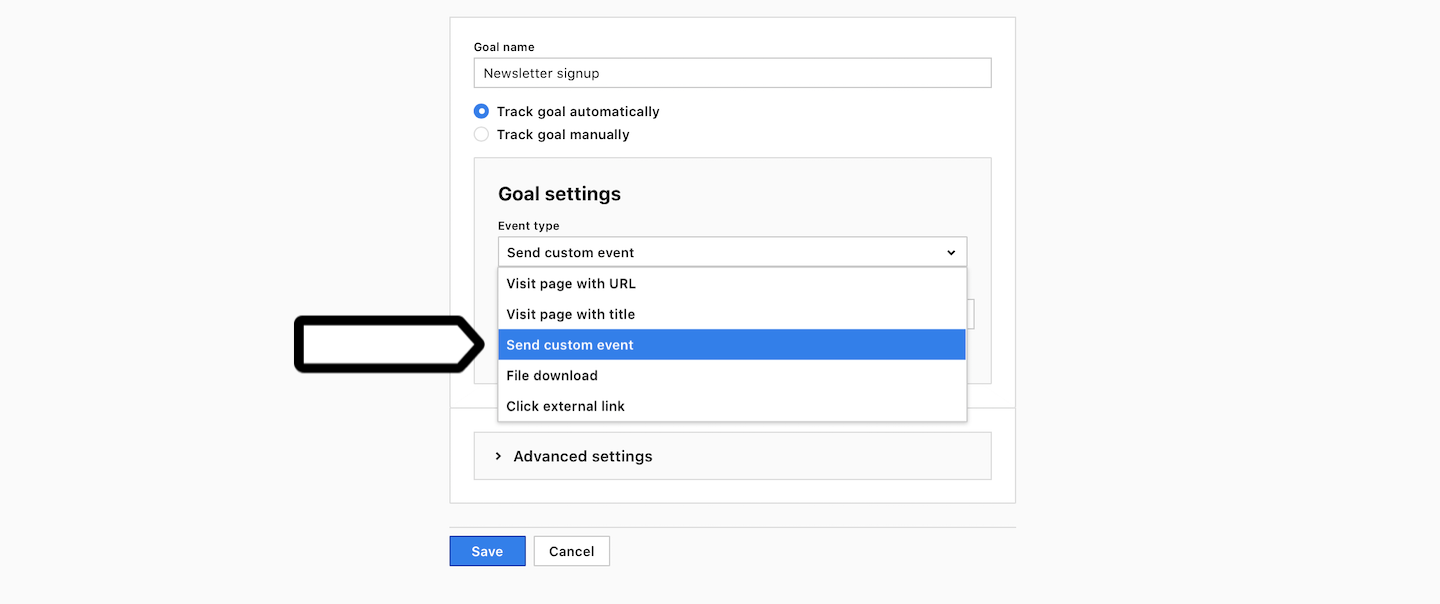
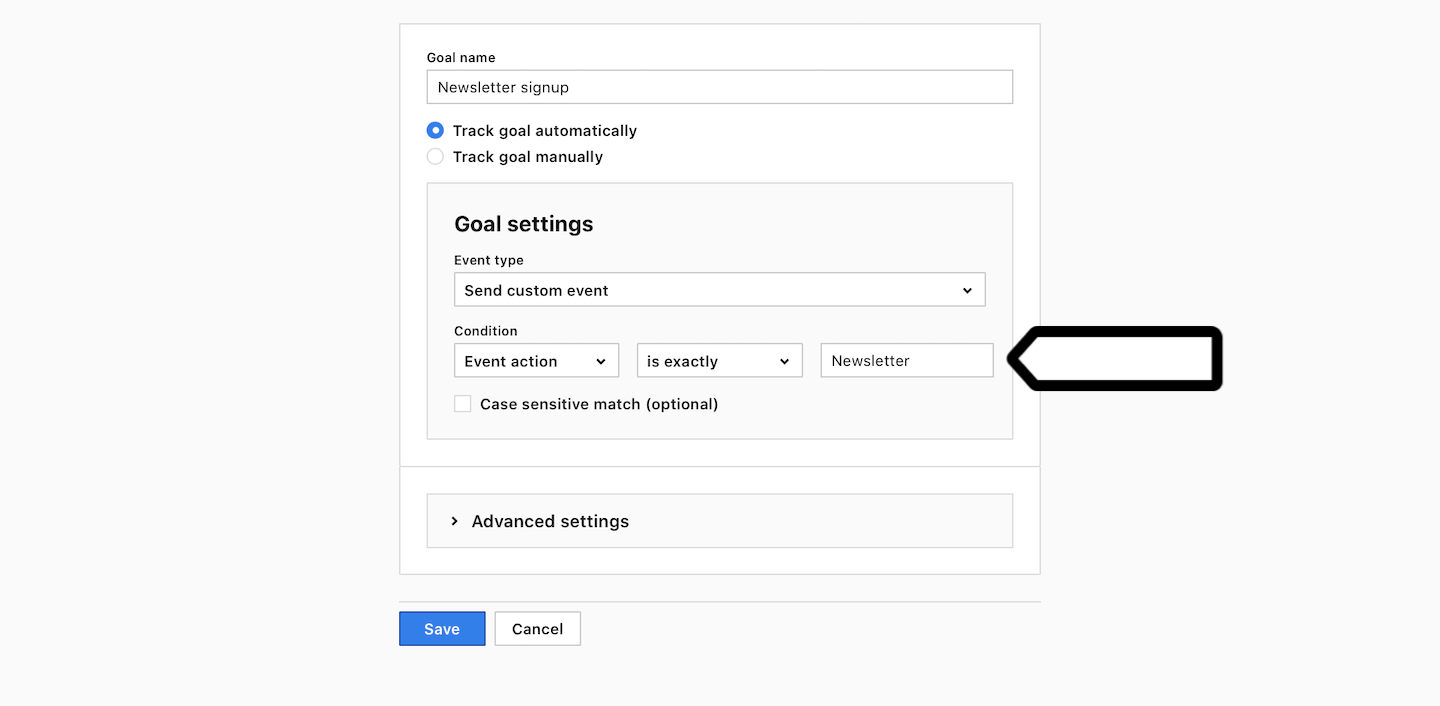
4. Name the goal.
5. Set Track goal automatically.
6. In Goal settings, pick the event type: Send custom event.
7. In Tag Manager, check the category, action or name of this event and choose one that is unique to this event. In our case, that will be the action Newsletter.

8. In Goal settings, set the condition: Event action is exactly Newsletter.
9. (Optional) In Advanced settings, you can set the following options:
- Allow multiple goals per session: Each time a visitor reaches this goal during a session, the goal will be tracked again.
- Assign revenue to goal conversion ($): A monetary value set for a goal conversion. For example, a submitted contact form may be worth $10. (The revenue currency is set in Administration > Sites & apps > Data collection > Basic info > Currency.)
10. When you finish up, click Save.
11. Viola! Now wait a few days to collect goal data, and then analyze it in Menu > Analytics > Goals.
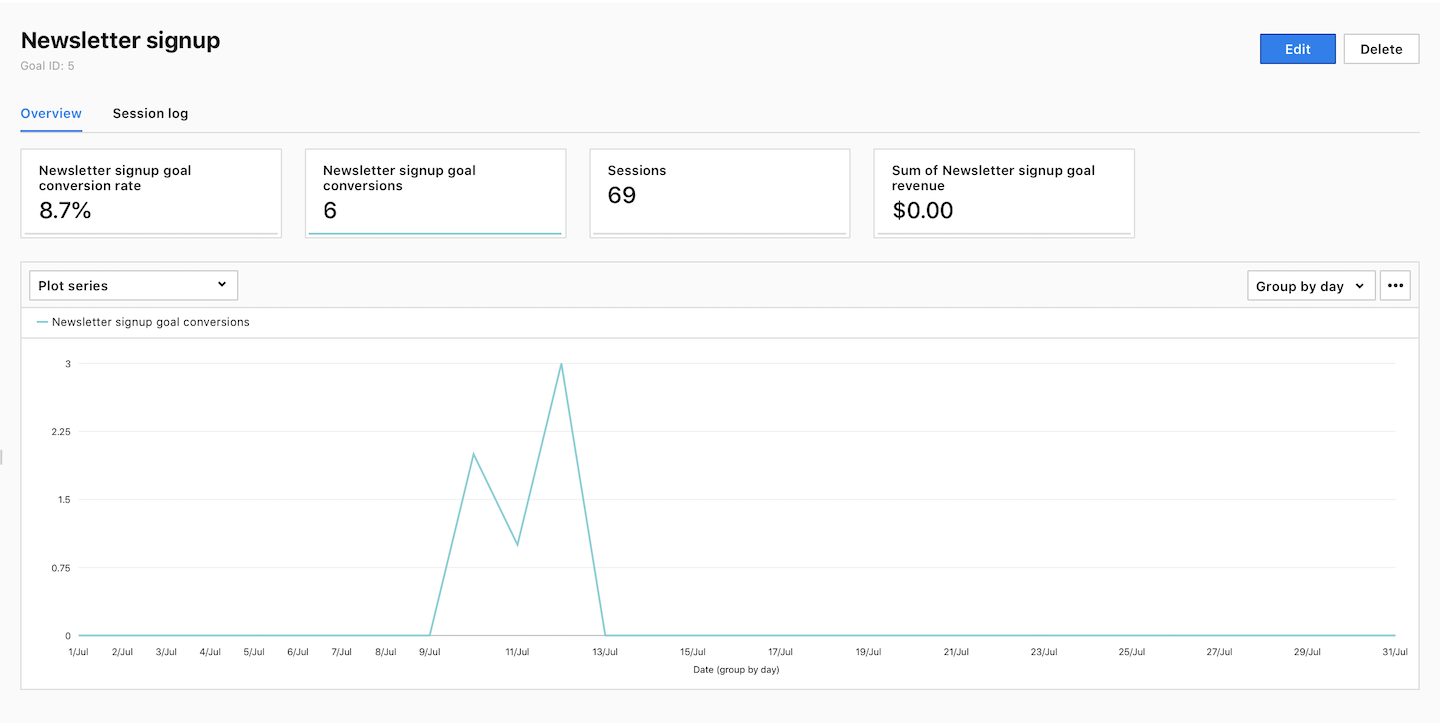
Tip: You can also build a custom report to analyze goals. Read more