A Google Ads Conversion Tracking tag tracks conversions from your Google Ads campaigns and sends them to Google Ads.
In this article, we’ll show you how to set it up.
Before you start
Here are a few things to know before you start:
- Before installing this tag, make sure your Google tag is already in place. If you haven’t set it up yet, follow the steps described in this article: Google Ads Remarketing tag.
- If you’ve got several Google Ads accounts, double-check that you’ve set up tracking for the right one. Also, make sure the Google tag on your website matches the one you’ve set in the conversion tracking.
Create a conversion action and find its ID
First, you need to define what user action you consider a conversion and find its ID. To do this, you’ll need to create a new conversion action.
To create a conversion action in Google Ads and find its ID, follow these steps:
1. Log in to Google Ads.
2. Go to Goals > Conversions.
3. Click + New conversion action.
4. Select Website and click Next.
5. Enter your website domain and click Scan.
6. Click + Add a conversion action manually.
7. Set up your conversion action and click Done.
8. Click Agree and continue.
9. Click Tag setup.
10. Click Instal the tag yourself.
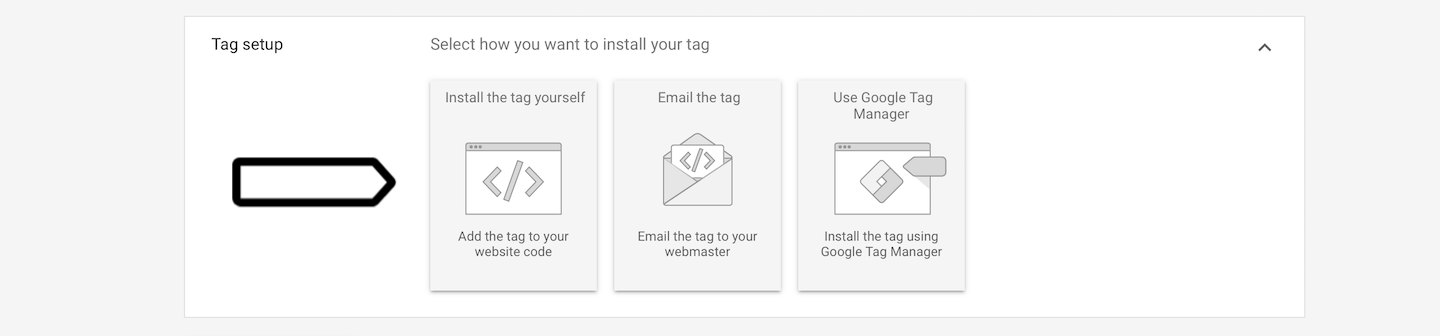
11. In Event snippet, you’ll see a piece of code. Copy the numbers after AW-*********/****************. The first number is your Google tag ID; the second is your conversion label. You’ll need them in the next steps.
Example:
<!-- Event snippet for [CAMPAIGN] WP Download conversion page -->
<script>
  gtag('event', 'conversion', {'send_to': 'AW-*********/****************'});
</script>
Set up your conversion tracking tag
To set up the Google Ads Conversion Tracking tag, follow these steps:
1. Log in to Piwik PRO.
2. Go to Menu > Tag Manager.
3. Click Add a tag.
4. Name your tag and select the following type: Google Ads Tracking Conversion.
5. Click Next.
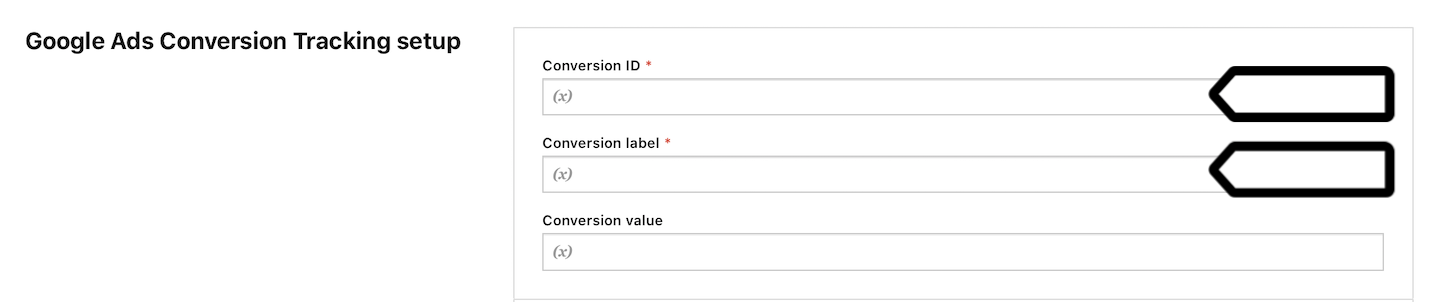
6. Paste the numbers from your conversion action ID set in Google Ads. Conversion ID is the first number after AW-; conversion label is the second number after /. Example: AW-<conversion-id>/<conversion-label>.
7. In Advanced tag settings, choose Consent type. Set it up if you use a consent form on your site. This tag will only fire for visitors who accept the selected consent type.
8. Respect opt-out and DNT is turned off by default. Turn it on, if you want to respect visitors who’ve turned on the Do-Not-Track feature in their browsers or who’ve opted out of tracking using our opt-out form.
9. In Flight dates, set the date and time when the tag will fire.
10. In Tag triggers, click Add a trigger or Choose existing trigger to set up a trigger for your tag.
Tip: When you set up conversion tracking for Google Ads, use triggers that match your conversion actions. For example, if your action is signing up for a trial, set the trigger for the last signup page.
11. Click Save.
12. Test your tag in debug mode.
13. When you’re happy with how the tag works, click Publish.
14. All set!
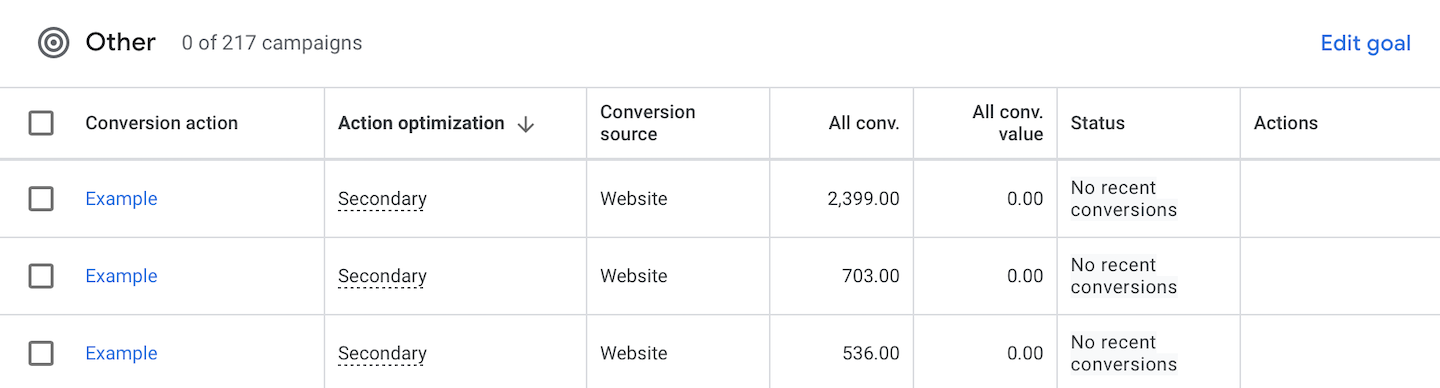
Conversion tracking report
After you’ve set up ad conversion tracking, Piwik PRO will collect and send data to Google Ads. You’ll find the counted conversions in the conversion report.
To access the conversion report in Google Ads, follow these steps:
1. Log in to Google Ads.
2. Go to Goals > Conversions > Summary.
3. Done! Data about your conversions is visible in the All conv column.