A Google Ads Remarketing tag helps you add a Google tag (gtag.js) to your website. This tag collects data about visitors and adds them to your Google Ads lists. This way, you can target specific audiences for your future ads.
In this article, we’ll show you how to set it up.
Before you start
Here are some things to know before you start:
- Remarketing lists need a minimum number of visitors for ads to display (100 or 1000, depending on the network).
- Once the Google tag is installed on your website, it automatically adds visitors to your remarketing lists according to your set rules.
Find your Google tag ID
To find your Google tag ID, follow these steps:
1. Log in to Google Ads.
2. Go to Tools > Shared library.
3. Select Audience manager > Your data sources.
4. Select Google tag and look for its ID. Example: AW-*********.
Note: Read more about a Google tag ID.
5. Copy the number after AW-. You’ll need it in the next steps.
Set up your remarketing tag
Once you have your Google tag ID, you can set up a remarketing tag.
To set up the Google Ads Remarketing tag, follow these steps:
1. Log in to Piwik PRO.
2. Go to Menu > Tag Manager.
3. Click Add a tag.
4. Name your tag and select the following type: Google Ads Remarketing.
5. Click Next.
6. Paste the number from your Google tag ID. It’s the one that comes after AW-.

7. In Advanced tag settings, choose Consent type. Set it up if you use a consent form on your site. This tag will only fire for visitors who accept the selected consent type.
8. Respect opt-out and DNT is turned off by default. Turn it on, if you want to respect visitors who’ve turned on the Do-Not-Track feature in their browsers or who’ve opted out of tracking using our opt-out form.
9. In Flight dates, set the date and time when the tag will fire.
10. In Tag triggers, click Choose existing trigger and pick All page views. This tag should fire on every page of your site.
11. Click Save.
12. Test your tag in debug mode.
13. When you’re happy with how the tag works, click Publish.
14. All set!
Create a remarketing list in Google Ads
Now your tag is collecting data on all website visitors and sending it to Google Ads. There, you can create a new remarketing list by setting conditions like page URL, referrer URL or events.
To create a new remarketing list in Google Ads, follow these steps:
1. Log in to Google Ads.
2. Go to Tools > Shared library.
3. Navigate to Audience manager > Your data segments.
4. Click + to create a new remarketing list.
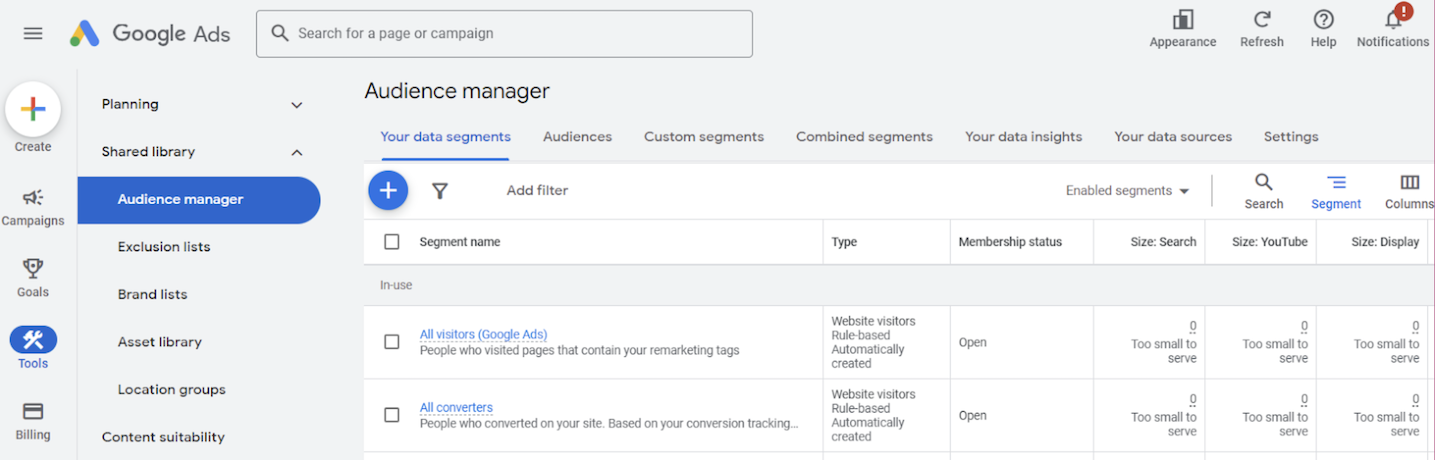
5. Pick +Website visitors.
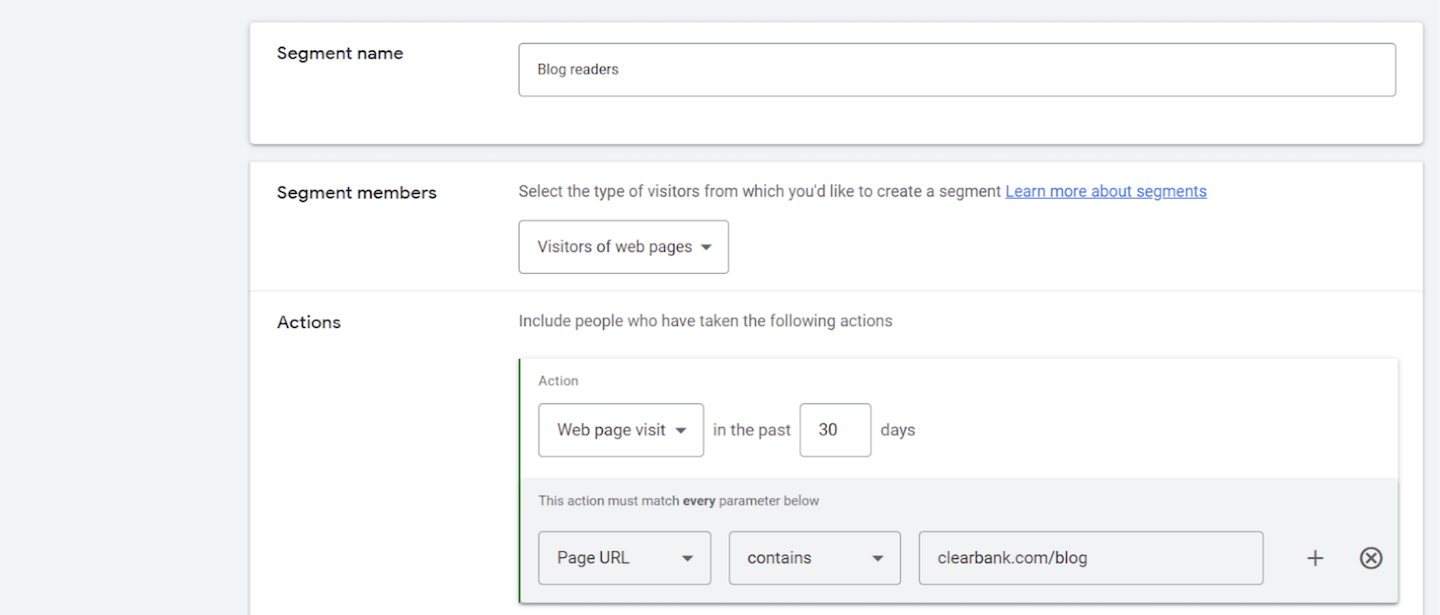
6. Name your segment.
7. Choose a template from Segment members.
8. Set rules for your segment. Example: URL contains /clearbank.com/blog.
9. Select whether you want to prefill the segment or start with a blank one.
10. Enter the membership duration.
11. (Optional) Add a segment description.
12. Click Create segment.
13. Done! Once your list is in place, feel free to set up new campaigns or ad groups in Google Ads. You can create as many remarketing lists as you like.