Note: For versions below 16.8.0, use a custom code to collect data for heatmaps and clickmaps.
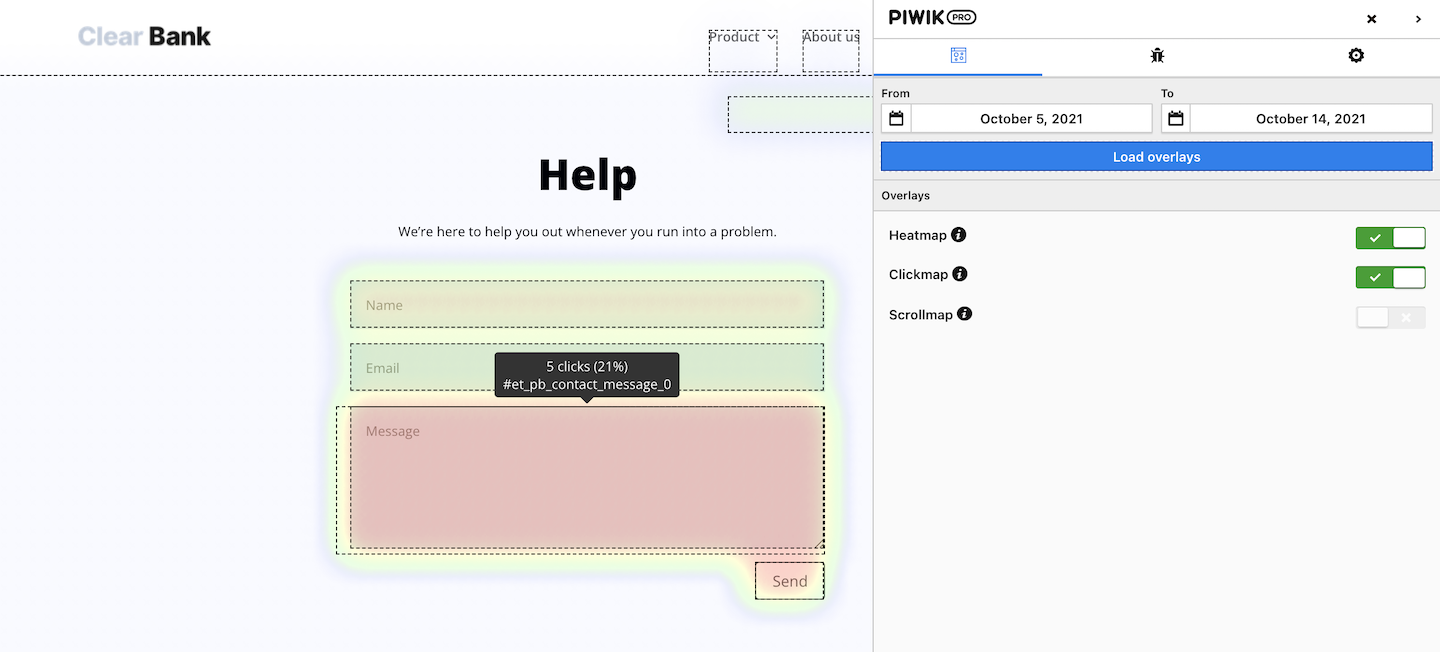
A heatmap & clickmap tag lets you collect data for heatmaps and clickmaps and then display it in the site inspector for Chrome. Heatmaps show where users clicked on a page, while clickmaps give details about clicked elements.
Before you start
Here are some things to know before you start:
- If you haven’t already, install our Chrome extension for the site inspector.
- The site inspector can also display scrollmaps, but you’ll need to set them up separately.
- Keep in mind that you can use only one heatmap & clickmap tag on a single site or app.
Add and set up a tag
To set up the heatmap & clickmap tag, follow these steps:
1. Go to Menu > Tag Manager.
2. Navigate to Tags.
3. Click Add a tag.
4. Name your tag and select the following type: Heatmaps & clickmaps.
5. Click Next.
6. In Advanced tag settings, choose Consent type. Set it up if you use a consent form on your site. This tag will only fire for visitors who accept the selected consent type.
7. Respect opt-out and DNT is turned off by default. Turn it on, if you want to respect visitors who’ve turned on the Do-Not-Track feature in their browsers or who’ve opted out of tracking using our opt-out form.
8. In Flight dates, set the date and time when the tag will fire.
9. In Tag triggers, click Add a trigger or Choose existing trigger to set up a trigger for this tag.
- Use a click trigger without conditions to track all clicks on any page.
- Use a click trigger with conditions to track specific clicks.

Note: Only a click trigger can be used for a heatmap & clickmap tag.
10. Click Save.
11. Test your tag in debug mode.
12. If everything works fine, click Publish.
13. All set! Data is now being collected. Give it two hours or so and you’ll find it in our site inspector on Chrome.