
If you use Piwik PRO with a lot of people, you can make things easier by creating groups and managing their permissions all at once. This will help you ensure that everyone on your team has the right access to the data and tools they need to do their jobs effectively.
In this article, we’ll explain how you can use groups to set permissions in Piwik PRO.
Before you start
Here are some important things to keep in mind before you start:
- You need to invite users to your account before adding them to groups. Read more
- Users can have permissions assigned directly or inherit them from one or more groups. If these permissions differ, the highest permission applies.
- Removing a user from a group or deleting a group removes the permissions they inherited from that group. They keep any permissions assigned directly or inherited from other groups.
- For sites and apps, you can assign Manage, Publish, Edit, View, or No access. For meta sites and meta apps, you can assign Manage, Edit, View, or No access.
For more details on how these permissions work together, see Manage user permissions.
Add a group
To add a group, follow these steps:
1. Go to Menu > Administration.
2. Navigate to Groups.

3. Click Add a group.
4. Name the group.
5. Click Add user to group.
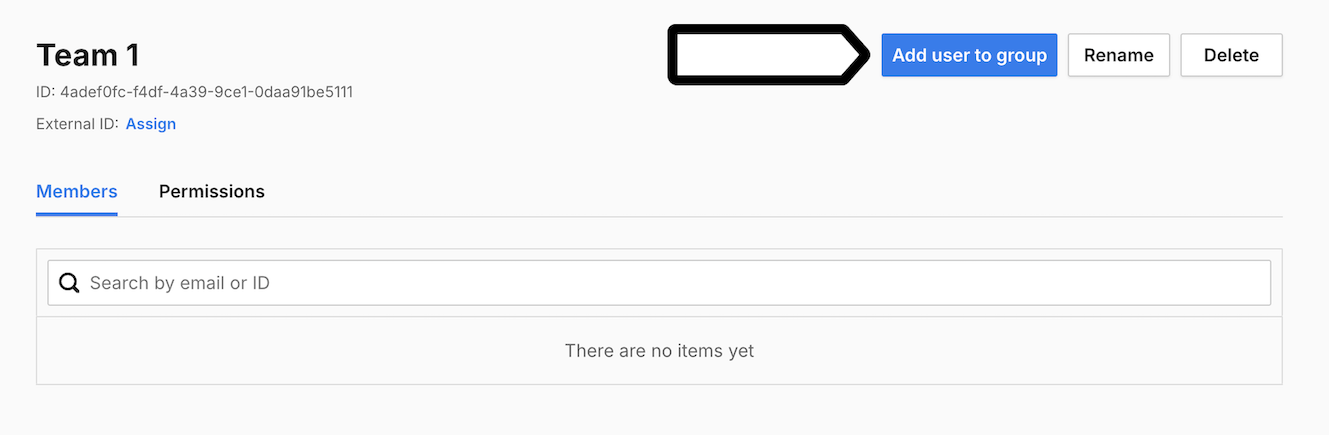
6. Pick the teammates you want to add to the group.
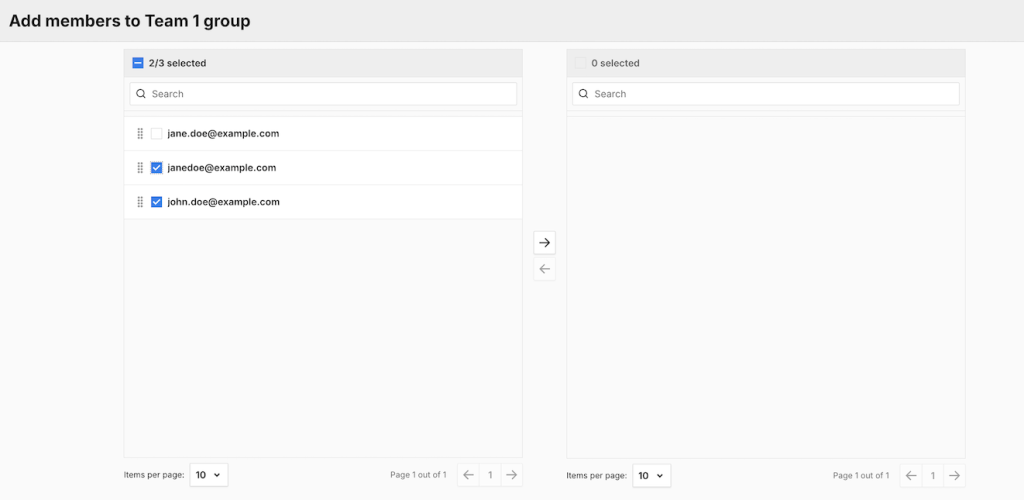
Note: Users who are already members of this group won’t appear on this list.
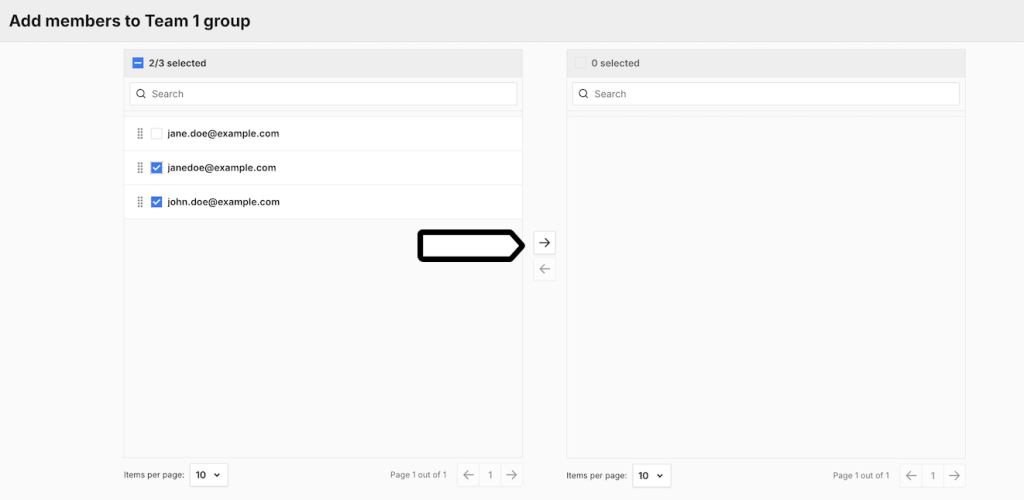
7. Click the right arrow to add your teammates.
8. Click Save.
9. Done. You’ll see your teammates on the member list. You can now assign permissions to the group.
Set or change group permissions
You can assign permissions to a group for individual sites and apps. Everyone in the group inherits those permissions.
Set permissions for sites and apps
To set or change group permissions for sites and apps, follow these steps:
1. Go to Menu > Administration.
2. Navigate to Groups.
3. Select the group you want to work with.
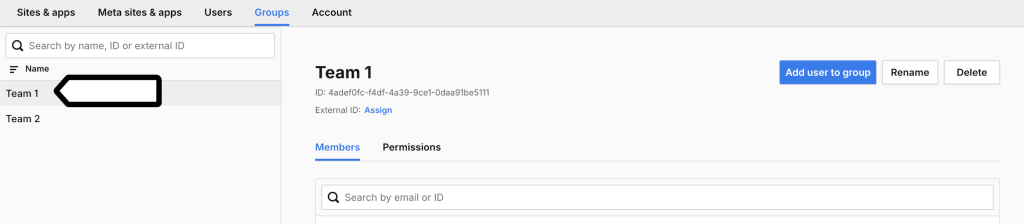
4. Navigate to Permissions.
5. Choose a permission level for each site or app you want the group to access.
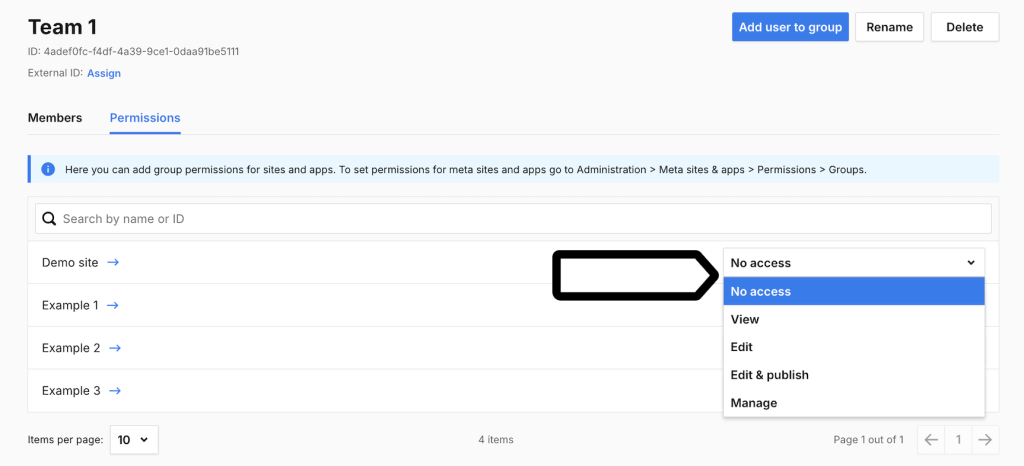
Note: If a user has a higher permission assigned directly or through another group, that higher permission applies.
6. Done.
Set permissions for meta sites and meta apps
Permissions for meta sites and meta apps are managed separately.
To assign group permissions, follow these steps:
1. Go to Menu > Administration.
2. Navigate to Meta sites & apps.
3. On the left, select a meta site or meta app.
4. Navigate to Permissions and select Groups.
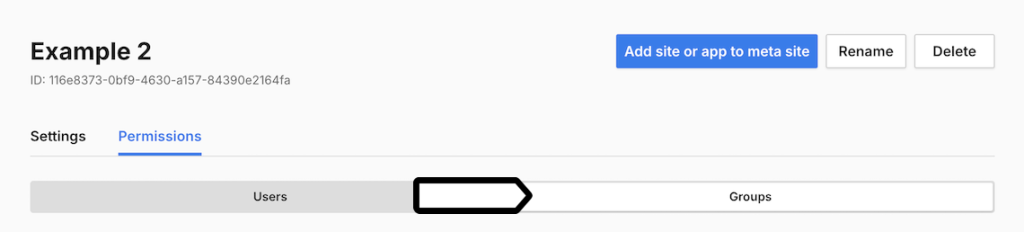
5. Find the group.
6. In User group permission, choose a permission level.
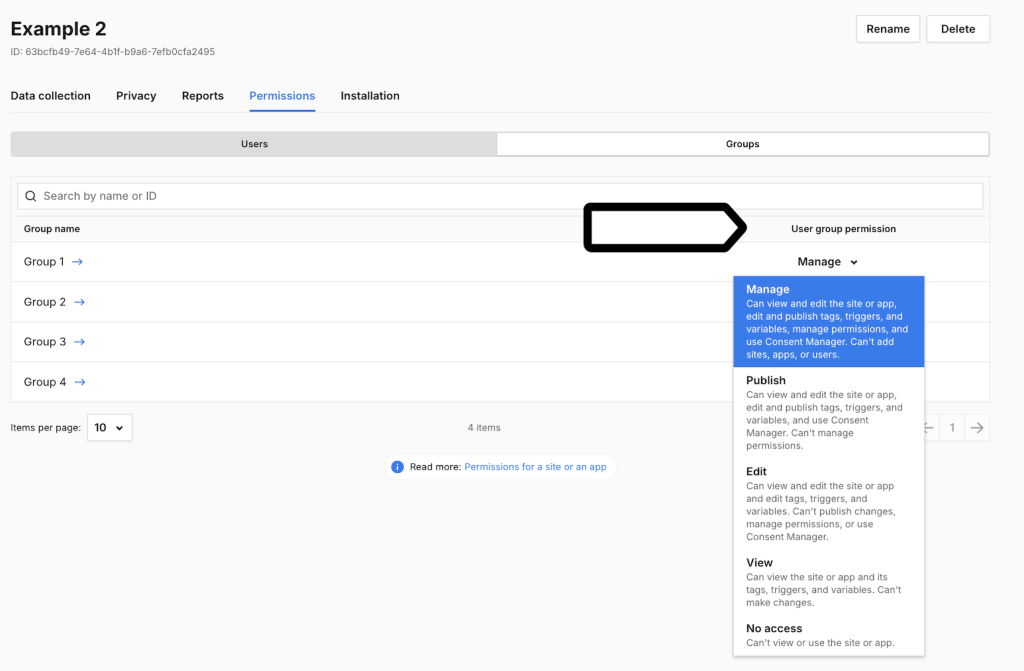
7. Done.
Add users to an existing group
To add a user to a group, follow these steps:
1. Go to Menu > Administration.
2. Navigate to Groups.
3. Select the group you want to work with.
4. Click Add user to group.

5. In Users, select the users you want to add.
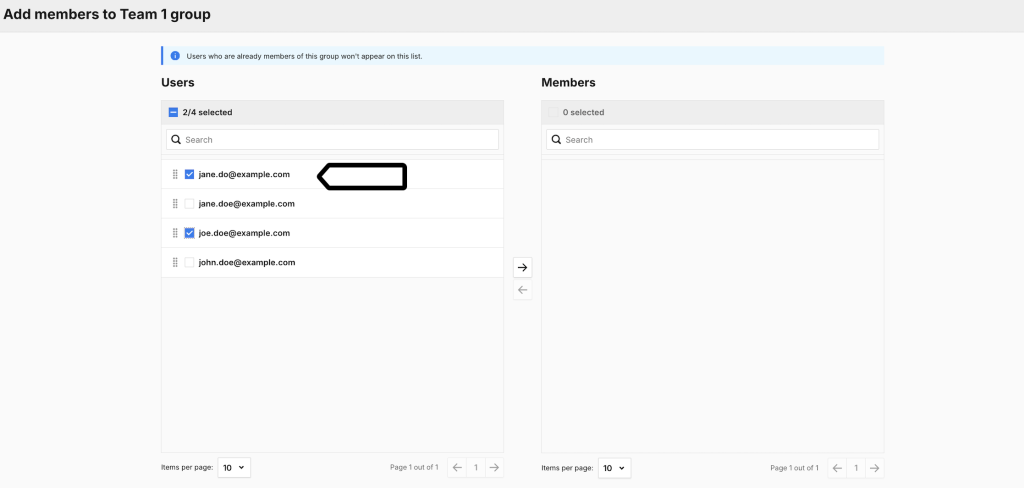
Note: Users who are already members of this group won’t appear on this list.
6. Click the right arrow.
7. In Members, select the users.
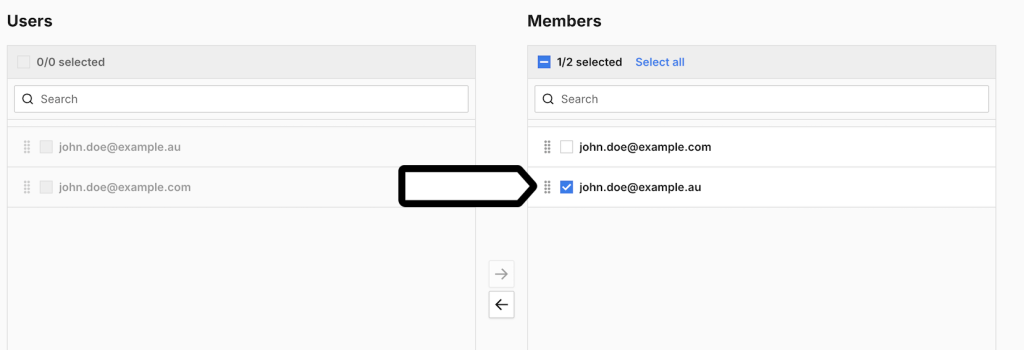
8. Click Save.
Note: The users will get the permissions assigned to the group.
Tip: You can also add a user to a group from their user profile. Read more
8. You’ll see the users on the member list.
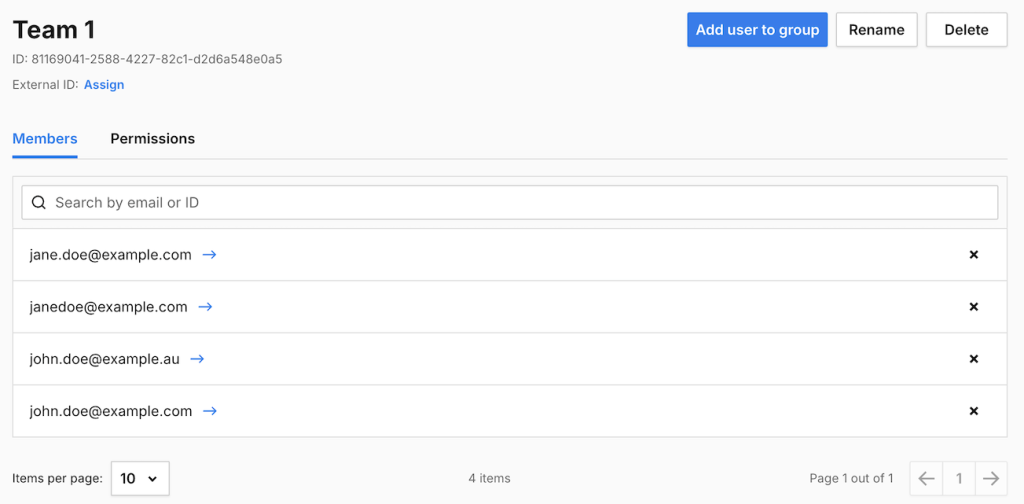
9. Done.
Remove a user from a group
To remove a user, follow these steps:
1. Go to Menu > Administration.
2. Navigate to Groups.
3. Select the group.
4. In the group, select X next to the user you want to remove. Before removing the user, keep in mind that they’ll lose permissions assigned through this group. They’ll keep any permissions assigned directly or through other groups.
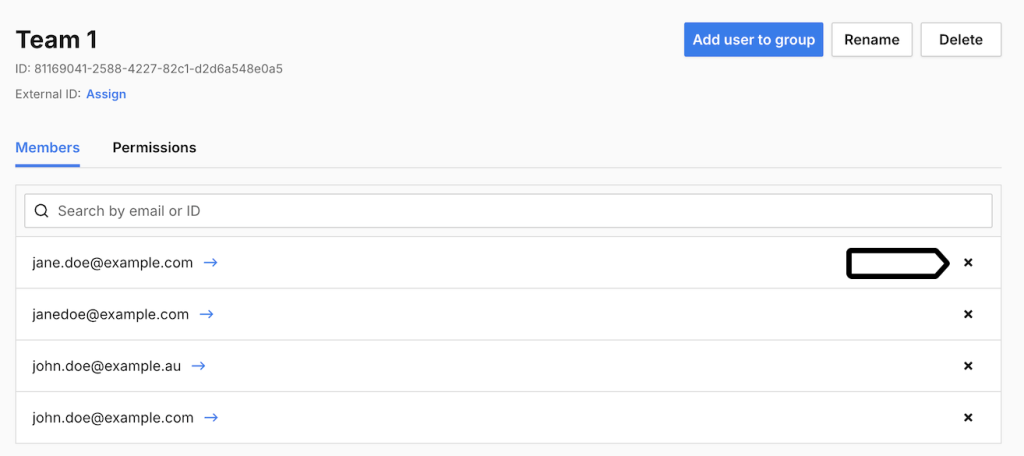
5. Done. The user loses the permissions they got from this group. They keep permissions assigned directly or through other groups.
Delete a group
To delete a group, follow these steps:
1. Go to Menu > Administration.
2. Navigate to Groups.
3. Select the group you want to delete. Before deleting the group, keep in mind that its members will lose permissions assigned through it. They’ll keep any permissions assigned directly or through other groups.
4. In that group, select Delete.
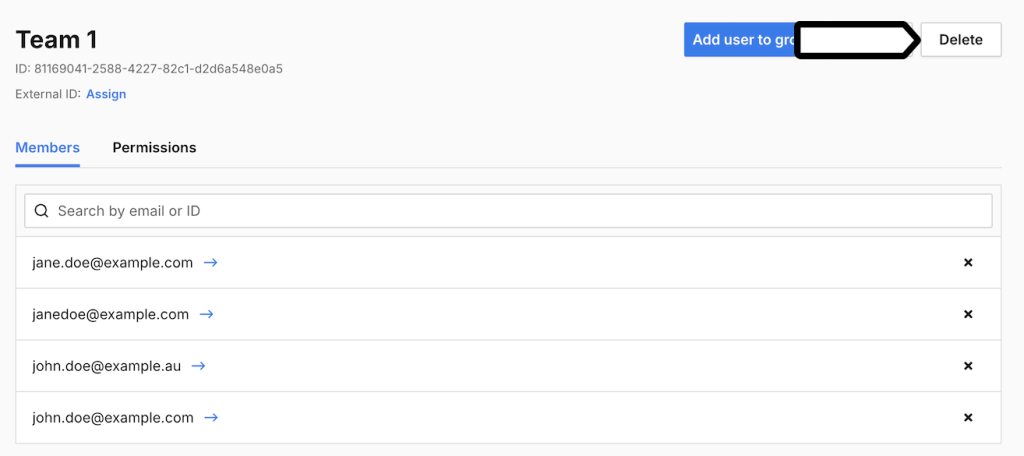
5. Click Delete to confirm that you want to delete the group.
6. Done. The group’s members lose permissions assigned through this group. They keep permissions assigned directly or through other groups.
Check permissions inherited from groups
You can check how group permissions affect a user’s access in their profile.
To check these permissions, follow these steps:
1. Go to Menu > Administration.
2. Navigate to Sites & apps or Meta sites & apps.
3. Select the site, app or meta site or meta app you want to check.
4. Go to Permissions.
5. Select Groups.
6. In User group permission, you can check the permissions assigned directly to a particular group.
Note: User group permission: The permission assigned directly to the user group.