Note: We’ll no longer offer Consent Manager for new Piwik PRO accounts.
When you collect data in countries governed by the GDPR, you need to tell visitors (aka. data subjects) how they can exercise their rights. To make this process easier, you can use our form, which allows you to gather requests and manage them effectively.
In this article, we’ll show you how to handle the requests that come in through the form.
Before you start
Here are some things to keep in mind before you start:
- Your visitors have the right to access, change or delete their personal data according to the GDPR. They also have the right to restriction of processing and right to data portability.
- You have a month to respond to a visitor’s request according to the GDPR.
- You can use our panel to view requests and change their status, but you need to process the request on your own. Usually, you’ll need to confirm the visitor’s identity and check whether the request is reasonable.
- As Piwik PRO, we never make decisions about the rights of data subjects on our own. We only act when our clients ask us to. It’s up to you to check that the person who asks for something is actually the person for whom we process personal data.
- When data subjects contact us directly instead of using the form, we pass on their request to you.
- Data subjects can also withdraw consent at any time using the consent settings added to your privacy policy.
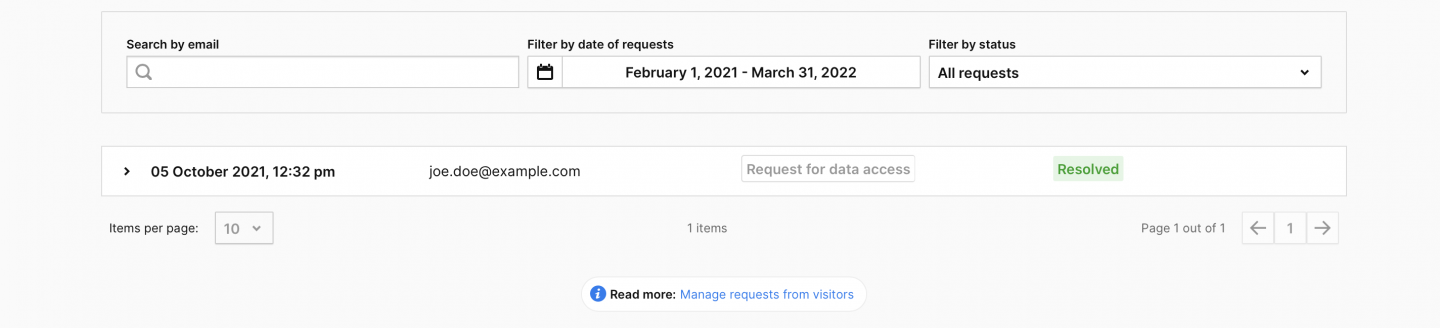
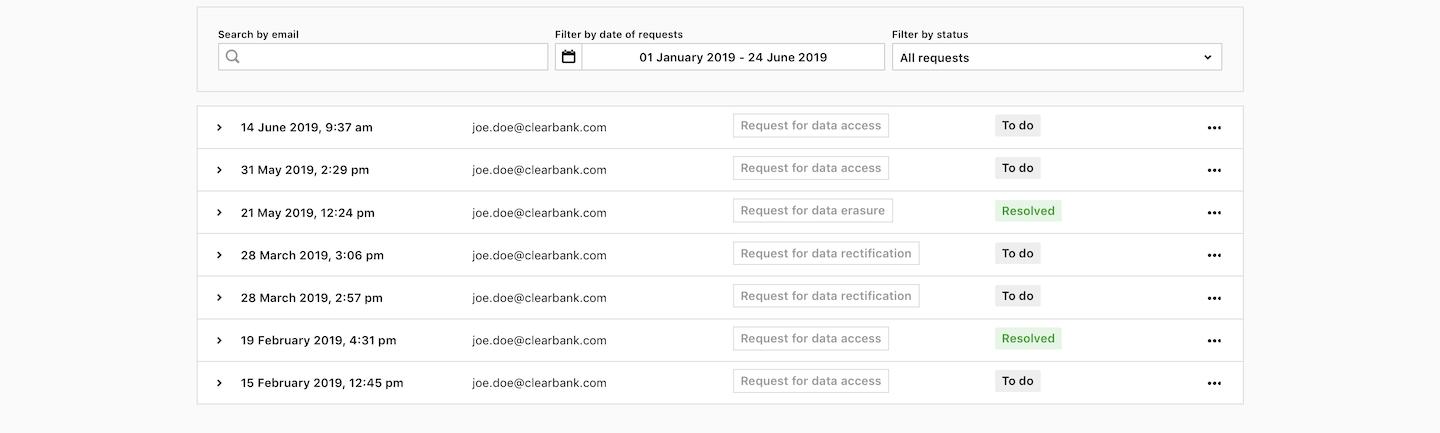
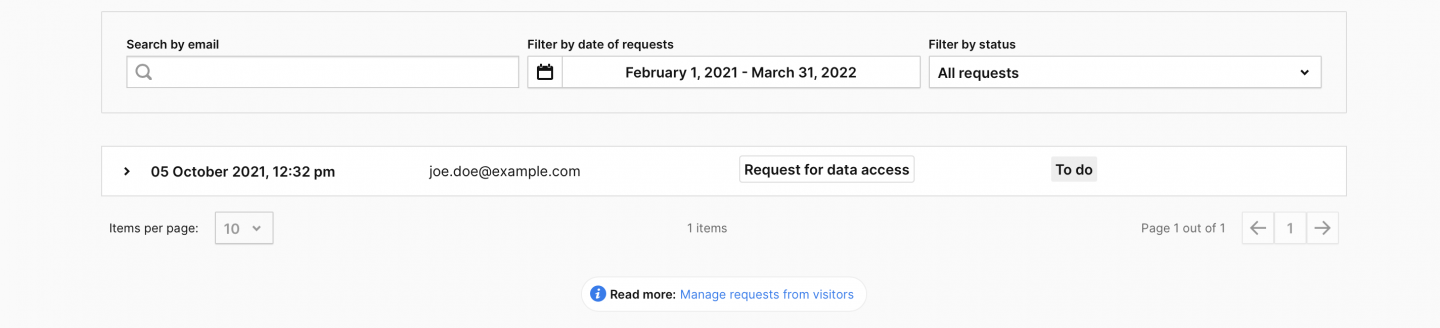
Use the panel to manage requests
To view and edit requests in Consent Manager, follow these steps:Available from version 16.0.0. For versions below 16.0.0, go to Menu > Consent Manager > Data subject requests.
1. Go to Menu > Consent Manager.
2. Choose the site/app you want to work with. Use the site/app picker in the upper right corner.
3. Navigate to Requests from visitors.
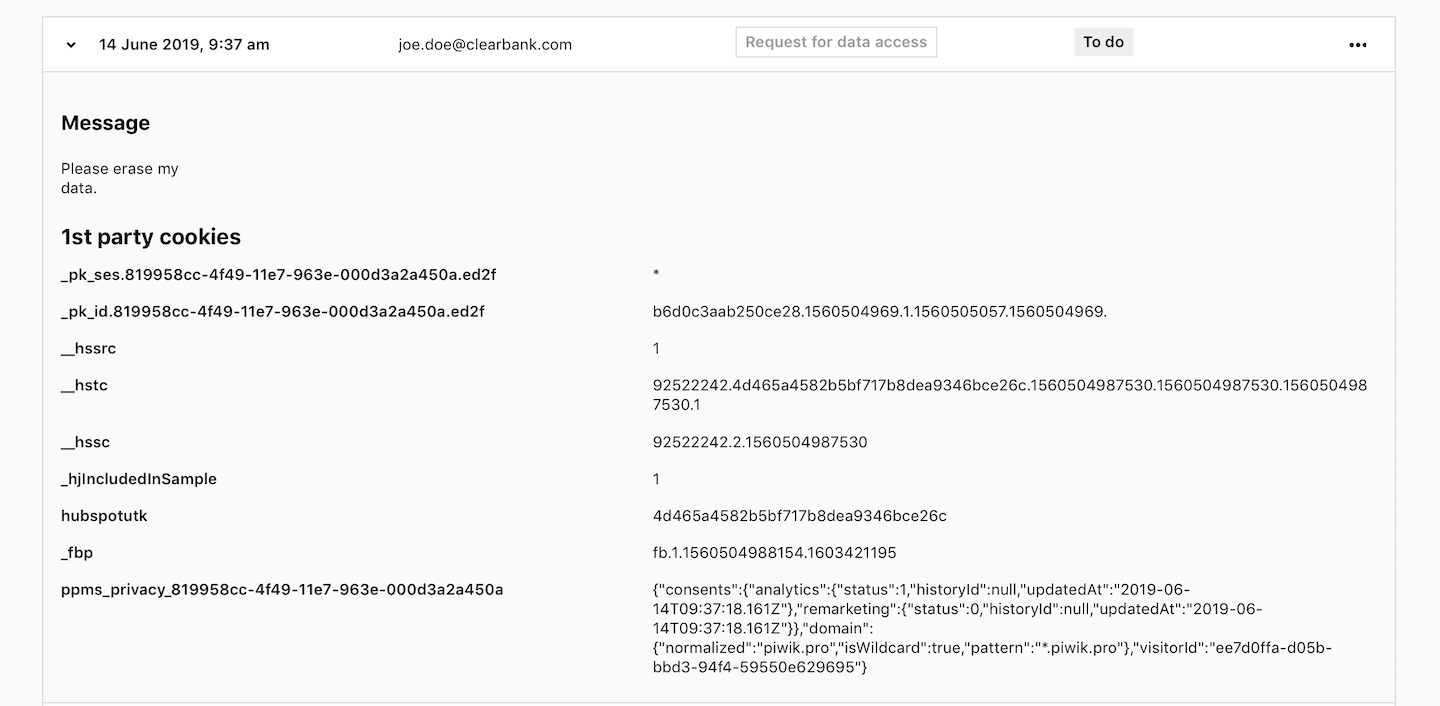
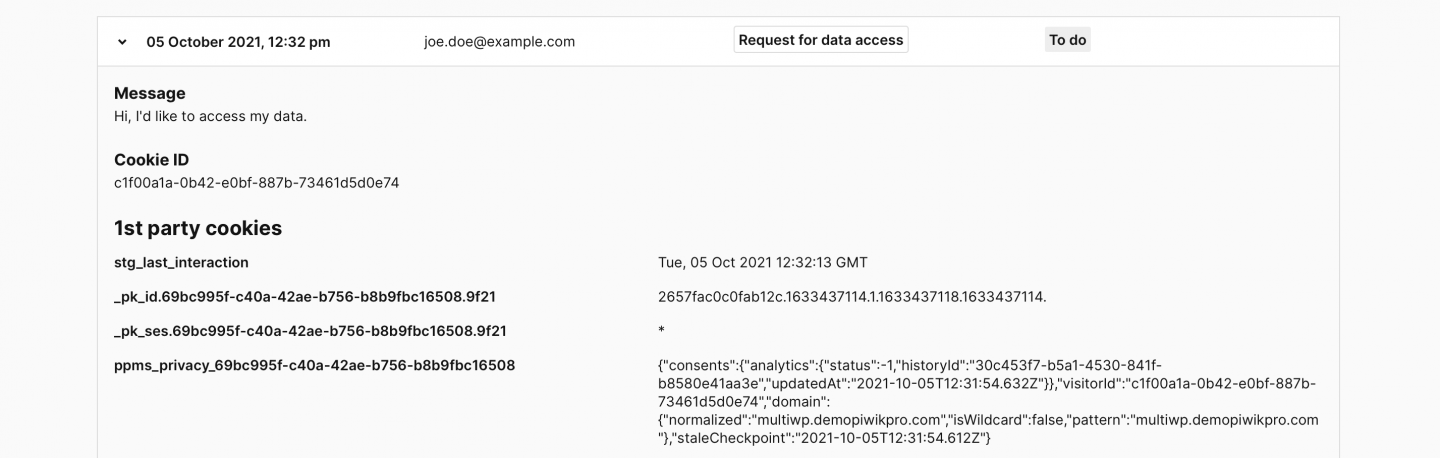
4. Click the arrow next to the request to view information about the request like the visitor’s message and their 1st party cookie data.
5. Click on the request to see the history details. The history may include the following:
- Request for data erasure
- Request for data rectification
- Request for data access

6. You can update the status for each request on the request list. Here’s the list of available status types:
- To do
- In progress
- Resolved

7. Hover over the status to see who and when set the status for this request.

8. Done!
Delete, change or restrict the processing of visitor’s data
To delete, change or restrict the processing of visitor’s data, follow these steps:
1. Go to Menu > Consent Manager.
2. Choose the site/app you want to work with. Use the site/app picker in the upper right corner.
3. Navigate to Requests from visitors.
4. Click the arrow next to the request to view information about the request.
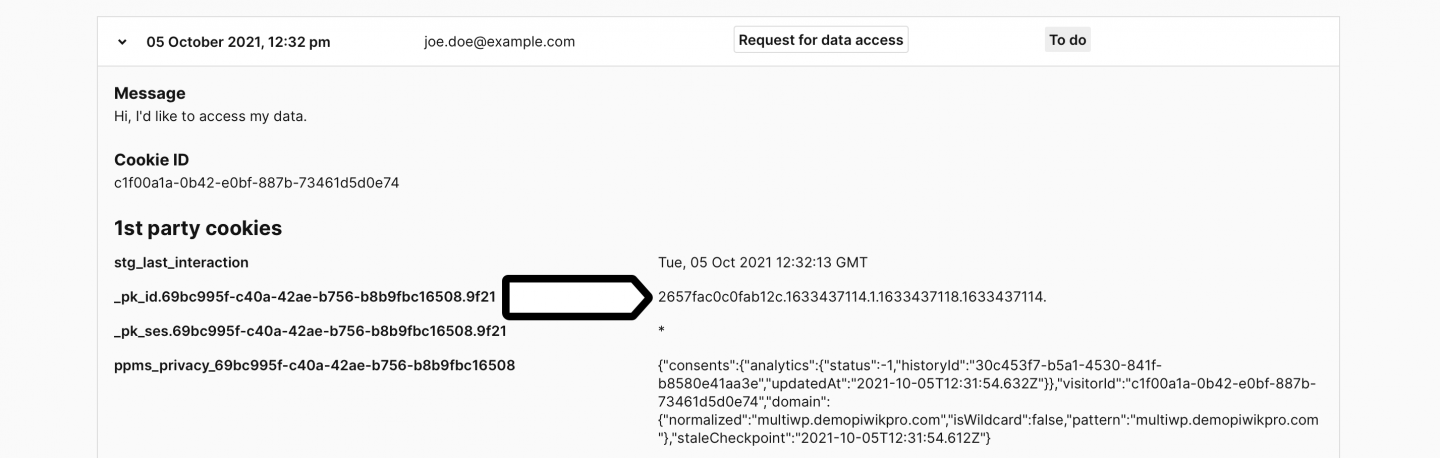
5. Find the visitor ID in the request. Check the _pk_id cookie. The visitor ID is taken from the cookie ID, which is the first value before the dot: <cookieID>.<cookieCreationTimestamp>.<visitsCount>.<currentVisitTimestamp>.<lastVisitTimestamp>.<lastEcommerceOrderTimestamp>.
In our case, the visitor ID is 2657fac0c0fab12c.
6. Copy the visitor’s email address from the request. It could be useful in identifying the visitor, but only if you are collecting it as a user ID or custom dimension.
7. Send a message to data-subject-request@piwik.pro. Include the visitor ID, the visitor’s email address and the site ID for the site the visitor’s request refers to (Where to find it?).
Note:
- Due to technical reasons, we are not able to amend collected personal information – we can only delete the whole data set for a given visitor ID/user ID.
- When restricting data processing, we’ll copy the data to a separate file and delete the original from the database.
Access or transfer visitor’s data
To access or transfer visitor’s data, follow these steps:
1. Go to Menu > Consent Manager.
2. Choose the site/app you want to work with. Use the site/app picker in the upper right corner.
3. Navigate to Requests from visitors.
4. Clink the arrow next to the request to view information about the request.
5. Find the visitor ID in the request. Check the _pk_id cookie. The visitor ID is the first value before the dot: <visitorID>.<cookieCreationTimestamp>.<visitsCount>.<currentVisitTimestamp>.<lastVisitTimestamp>.<lastEcommerceOrderTimestamp>. In our case, the visitor ID is 2657fac0c0fab12c.
6. Copy the visitor’s email address from the request. It could be useful in identifying the visitor, but only if you are collecting it as a user ID or custom dimension.
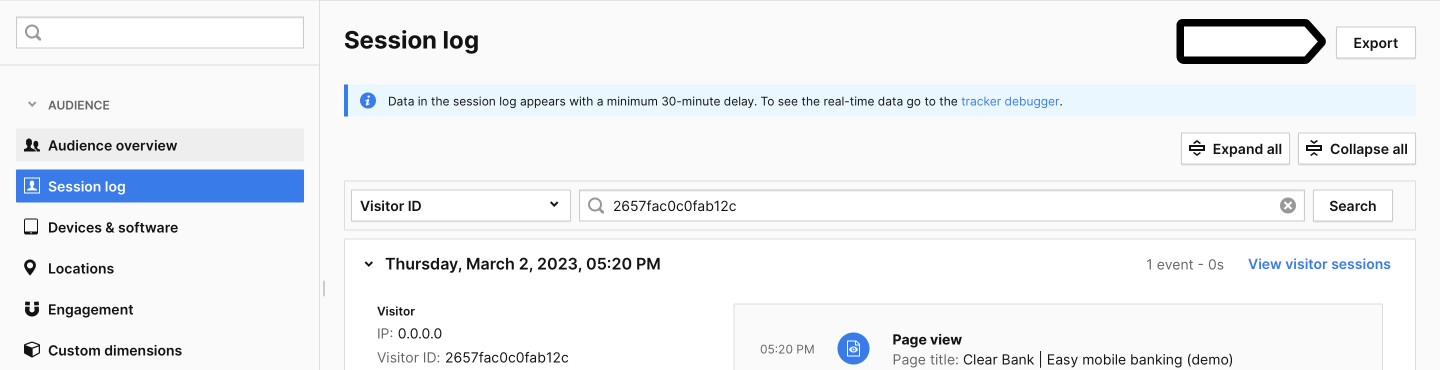
7. Go to Menu > Analytics > Reports.
8. Navigate to Session log.
9. Choose the date range: from the first day of your tracking to today.

10. Choose the filter type: Visitor ID or User ID and type the ID from the data subject request. In our case it is: 2657fac0c0fab12c.

Note: If you collect visitors’ email addresses as custom dimensions, you can create and apply a segment to the session log report to filter out visitor data.
11. Click Export.
Tip: If your site or app has a high traffic volume, the fastest way is to export reports from each month separately.
12. Send the exported report to your visitor.
13. All done! You can now change the status of the request on the list to Resolved.