Piwik PRO recognizes the pk_* and utm_* parameters. But if you need to use different ones, you can easily set them up.
Default campaign parameters
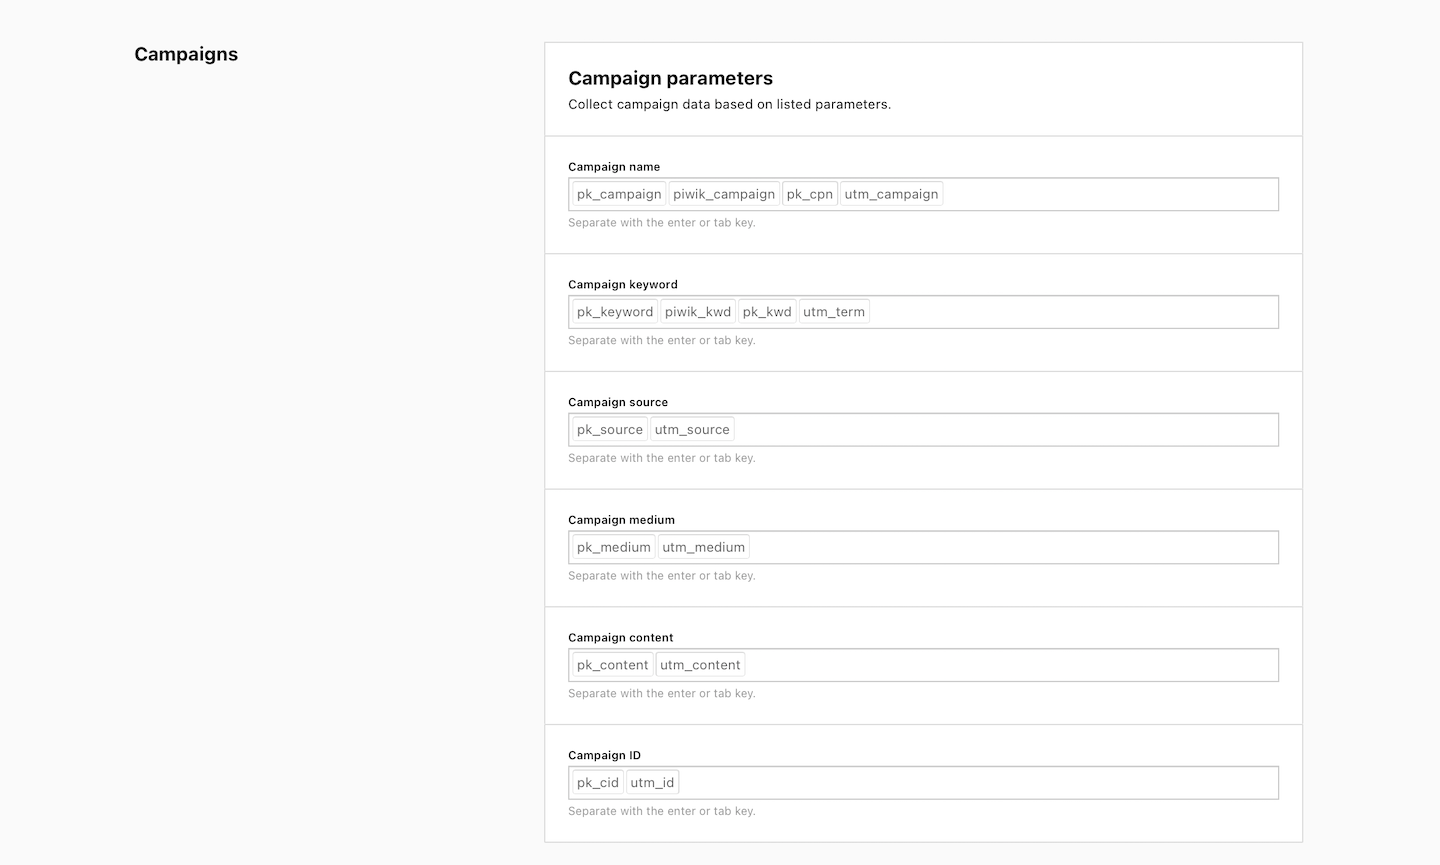
Here’s a list of all campaign parameters and the dimensions in which they store campaign data.
| Dimension | Default parameters | Required/Optional | Description |
|---|---|---|---|
| Campaign name | pk_campaign, piwik_campaign, pk_cpn, utm_campaign | Required | The name of your campaign. Example: winter_promo. |
| Source | pk_source, utm_source | Optional | It helps you identify the platform on which you run your campaign, such as a newsletter, social media site or other site. Example: Newsletter, Facebook, Google. |
| Medium | pk_medium, utm_medium | Optional | It helps you identify the method or format of your campaign, such as a banner ad, sponsored post, or click-per-click (CPC) ad. Example: banner, sponsored_post, CPC |
| Keyword | pk_keyword, piwik_kwd, pk_kwd, utm_term | Optional | Words or phrases used in paid search campaigns. Example: free_bank_account. |
| Campaign content | pk_content, utm_content | Optional | It helps you separate similar content within the same ad. For example, if you have a newsletter with two call-to-action buttons, you can tag each link for each button with a different pk_content parameter and see which version is working better. |
| Campaign ID | pk_cid, utm_id | Optional | It lets you assign a unique ID to your campaing. For example, if you use two similar creatives on Facebook and want to see which one performs better, you can tag them with different pk_cid parameters. Note: The gclid can be passed through this parameter. |
Note:
- Parameter values are case sensitive. The campaign name
winter_promois different fromWinter_Promo. - The parameter value can be up to 1024 characters.
Customize campaign parameters
You can add new campaign parameters for a single site or app or for your entire account.
For a site or app
Avaliable from version 16.0.0. For versions below 16.0.0, see this section.
To add a custom campaign parameter to a site or app, follow these steps:
1. Go to Menu > Administration.
2. Navigate to Sites & apps.
3. On the left, pick the site or app you want to set up.
4. Navigate to Data collection > Campaigns.
5. Add a new parameter to the list.
6. Done!
For the entire account
Avaliable from version 16.0.0. For versions below 16.0.0, see this section.
To add a custom campaign parameter and use it across your entire account, follow these steps:
1. Go to Menu > Administration.
2. Navigate to Account.
3. On the left, click Global site & app settings.
4. Navigate to Data collection > Campaigns.
5. Add a new parameter to the list.
6. Done!