If you want to export goal conversions from Piwik PRO to Microsoft Ads (Bing Ads) to see how your ads perform, you need to set up the export. In this article, we’ll show you how to do it.
Before you start
Here are some things to know before you start:
1. You’ll need to create a custom dimension to store your Microsoft Click ID. It will help Piwik PRO identify campaigns and other ad click attributes.
2. Make sure that a conversion tracking in Microsoft Ads has the same name as a goal in Piwik PRO.
3. Remember to set the conversion in Microsoft Ads as Offline conversion (imported from clicks). For more, see this article (part: How do I set up offline conversion tracking?).
4. Auto-tagging for Microsoft Click ID starts automatically as soon as you create your first offline conversion goal in Microsoft Ads. To see if it’s working, go to Microsoft Ads > All campaigns > Settings > Account level options.
Create a custom dimension for Microsoft Click ID
First, you need to create a session custom dimension that will hold the Microsoft Click ID.
To create a custom dimension, follow these steps:
1. Go to Menu > Analytics.
2. Navigate to Settings.
3. On the left, click Custom dimensions.
4. Click Add a session dimension.
5. Name your dimension msclkid.
6. Click Save.

Now it’s time to set up a variable that will catch the value of msclkid (Microsoft Click ID).
To set up a variable, follow these steps:
1. Go to Menu > Tag Manager.
2. Navigate to Variables.
3. On the left, click Add a variable.
4. Name your variable Microsoft Click ID.
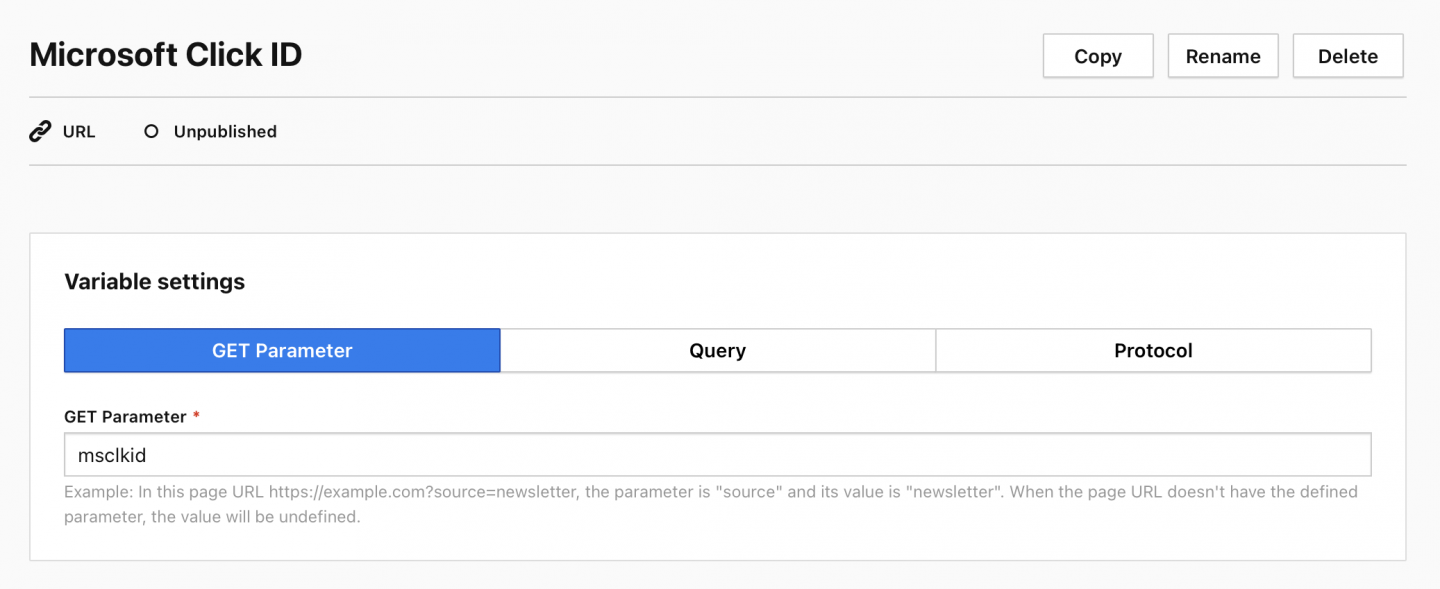
5. Choose the following variable: URL.
6. In Variable settings, choose GET Parameter.
7. In Get Parameter add: msclkid.
8. Click Add a variable.
After creating the variable, we’ll use it in a trigger to check if it has a value. If it does, it means that the visitor came from Microsoft Ads.
To add a trigger, follow these steps:
1. Navigate to Triggers.
2. On the left, click Add a trigger.
3. Name the trigger: msclkid is not empty.
4. In Event type, choose a type: Page view.
5. Click Next.
6. In Event conditions, choose: When all these conditions are met.
7. Enter your condition: Microsoft Click ID is not empty.
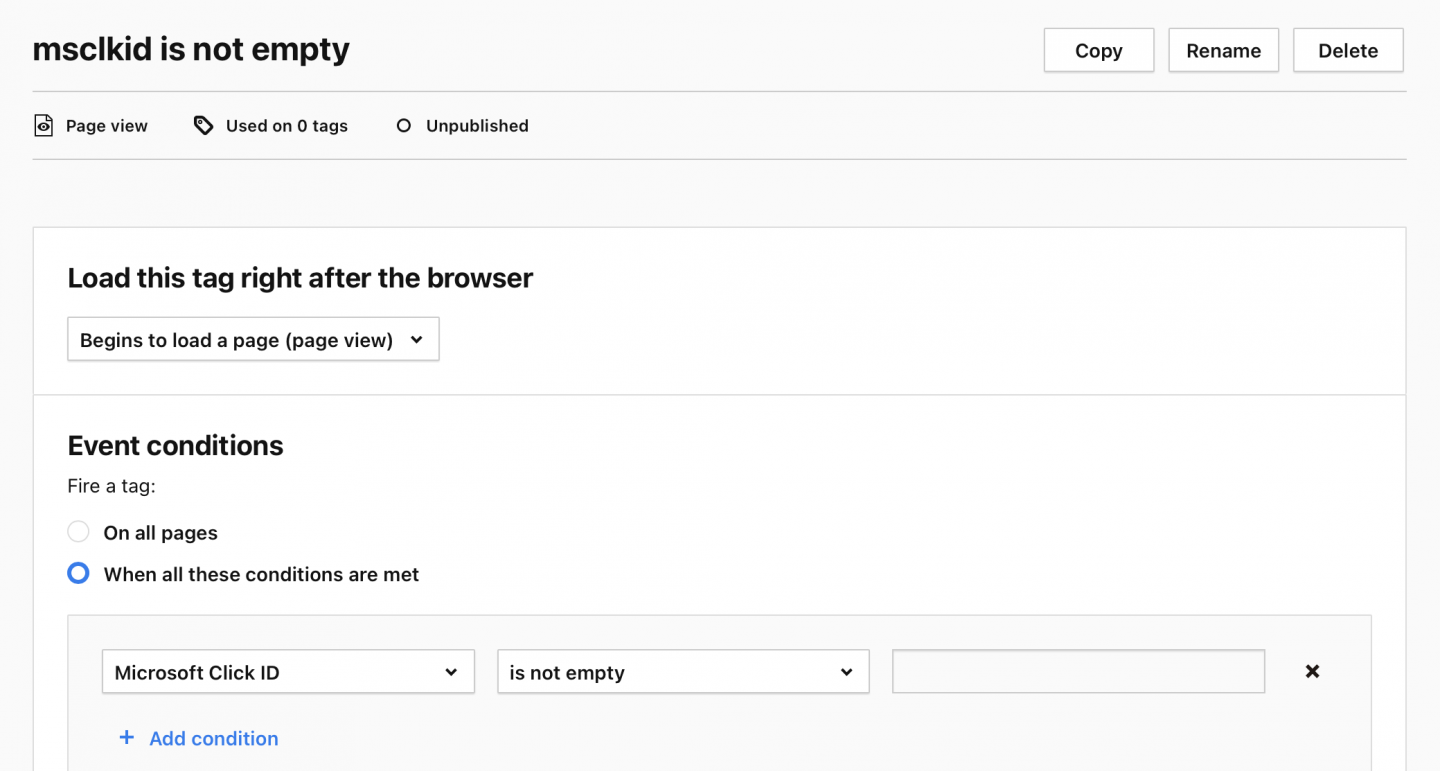
8. When you’re done, click Add a trigger.
Once we have the trigger, we can create a tag that will send the Microsoft Click ID value to the custom dimension we’ve created in the first step.
To add a custom dimension tag, follow these steps:
1. Navigate to Tags.
2. Click Add a tag.
3. Name the tag Microsoft Click Id is not empty.
4. Choose the following type: Custom dimension.
5. In Dimension, choose msclkid.
6. In Dimension value, type Microsoft Click ID.
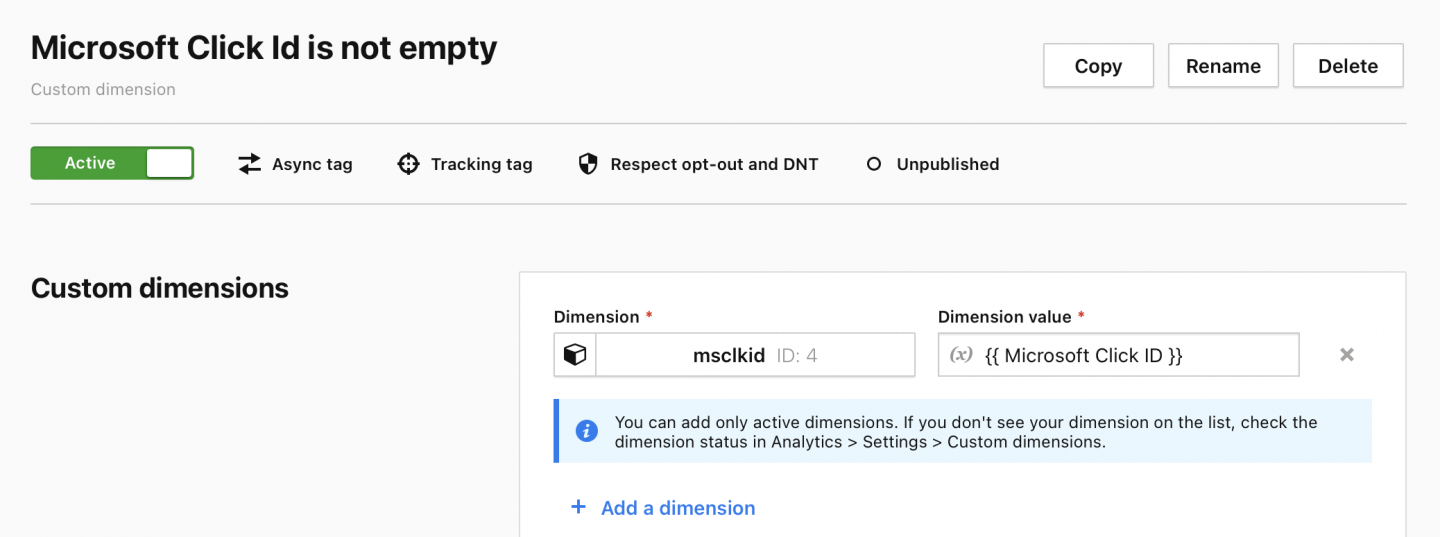
7. Click Add a tag.
8. Test your tag in debug mode.
9. When you’re happy with how the tag works, click Publish.
10. Done!
Prepare a template file
Now you’ll need to prepare a template file to which you can import data with goal conversions.
To prepare a template file, follow these steps:
1. Download the XLSX file or CSV file.
2. In the file, add the following parameters:
- TimeZone: your website’s time zone
Tip: To find your website’s time zone, follow these steps:
- Log in to Piwik PRO.
- Go to Menu > Administration.
- Navigate to Websites & apps.
- Choose the site or app from which you want to export goal conversions.
- In General settings, look for Time zone.
- Change this time zone to the one supported by Microsoft Ads.
3. Save the file.

4. That’s done!
Export goal conversions from Piwik PRO
As the next step, you need to export goal conversions from Piwik PRO to a CSV file.
To export goal conversions, follow these steps:
1. In Piwik PRO, create a custom report with the following setup:
- Report type:
table. - Dimensions:
msclkid,goal name,goal revenue,date (group by day),date (group by hour of day). - Metrics:
goal conversions. (We need to use at least one metric to create a report.)
2. Export your report to an XLSX or CSV file.
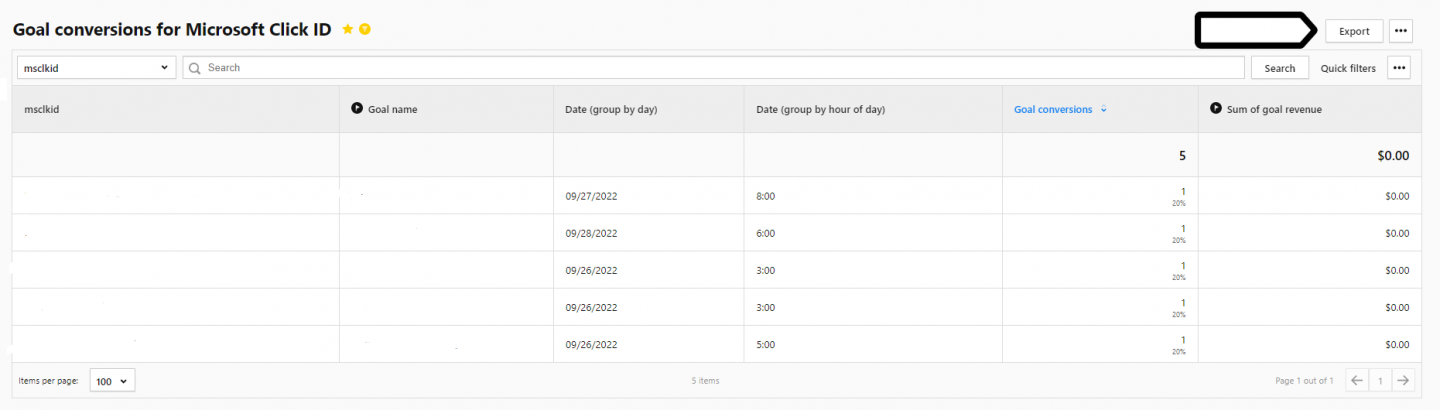
3. Done!
Format exported data in a spreadsheet
After exporting goal conversions from Piwik PRO, you need to tweak the file so that it fits the template file. You can do it either in a spreadsheet or a text editor.
To format the exported data in a spreadsheet, follow these steps:
1. Open the exported CSV file in a spreadsheet.
2. Delete the following columns: Goal ID, Goal conversion. You won’t need them.
3. Rename columns so that they fit the template:
- msclkid > Microsoft Click ID
- Goal name > Conversion Name
- Goal revenue > Conversion Value
4. Format dates.
5. Next to the Conversion Name column, insert a new column and name it Conversion Time.
6. Create a formula for the date and time concatenation. For example =CONCAT(E2;” “;F2;”:59:59″) where the E2 cell contains the date and the F2 cell an hour of the day.
Note: We add minutes and seconds at the end of the date and time because Microsoft requires precision in seconds. The export from Piwik PRO has precision in hours. We set it to the last minute and second of the hour :59:59.
7. Apply this formula to the remaining rows.
8. Now we need to replace the formula with values. Copy all cells from the Conversion Time column.
9. Paste the cells as a text in the same column. Right-click on the cell below the header row in the column and choose Paste Special > Text.
10. Delete the following columns: Date (group by day), Date (group by hour of day).
11. Done!
Prepare your file for upload to Microsoft Ads
The last step is to upload the modified CSV file to the template file. After this step, the file will be ready to be uploaded to Microsoft Ads.
To prepare your file for upload to Microsoft Ads, follow these steps:
1. Copy the formatted data and paste it to the template file.
2. (Optional) Fill in the Conversion currency column. You should fill it in if you use multiple currencies or combine data from different sites with various currencies.
3. Save the file.
4. Done! Now your file is ready to be uploaded to Microsoft Ads.
Note: Read more about adding offline conversions.