Note: This app is not listed in Shopify’s app store, so you won’t find it there. You can install it using the direct link provided below.
If you’re running an online store on Shopify, it’s easy to track how visitors interact with your site or app. The Piwik PRO Shopify app lets you collect valuable data to understand customer behavior, optimize your store, and improve marketing efforts.
The Piwik PRO Shopify simplifies the setup compared to manually installing the tracking code. The app has an easy setup and works across your entire Shopify store.
In this article, we’ll provide a step-by-step guide on how to install our app in the Shopify app store.
Note: If you prefer to install the tracking code manually, follow these instructions.
Before you start
Here are a few helpful things to know before you start:
- The Piwik PRO app for Shopify helps you collect data to use in Analytics and Data Activation, formerly Customer Data Platform (CDP). It doesn’t include Tag Manager or Consent Manager modules.
- You don’t need a Shopify Plus plan to install the Piwik PRO app in the Shopify app store.
- Piwik PRO Data Activation automatically uses data collected from your Shopify store.
- Some ecommerce events may not yet appear in the event type dimension in CDP. We’re working on adding full support for ecommerce tracking.
Install the Piwik PRO app in the Shopify app store
To install the Piwik PRO app in the Shopify app store, follow these steps:
1. Log in to your Shopify account.
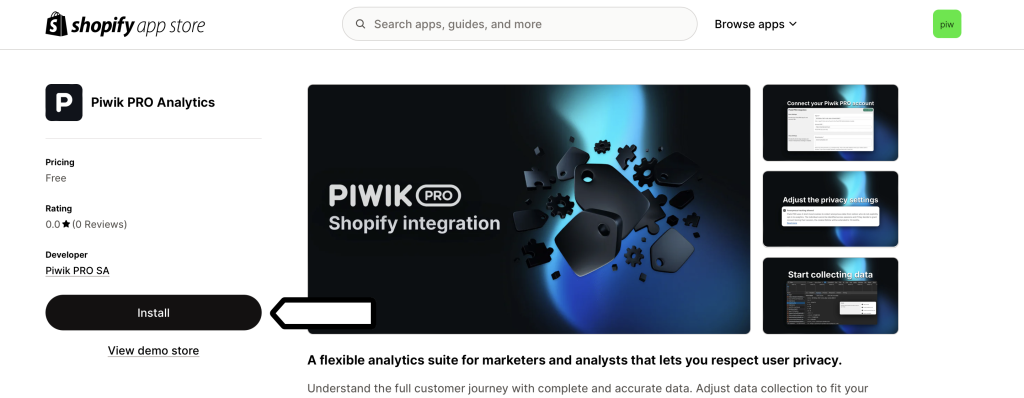
2. Go to Piwik PRO app page.
3. Click Install.
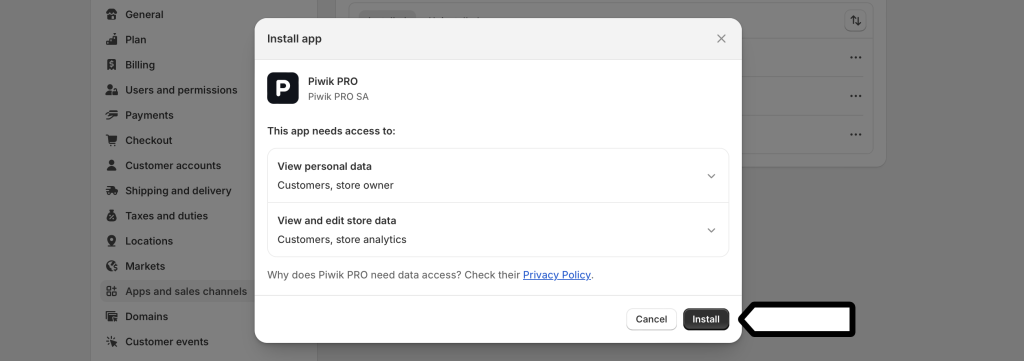
4. Confirm by clicking Install in a new window.
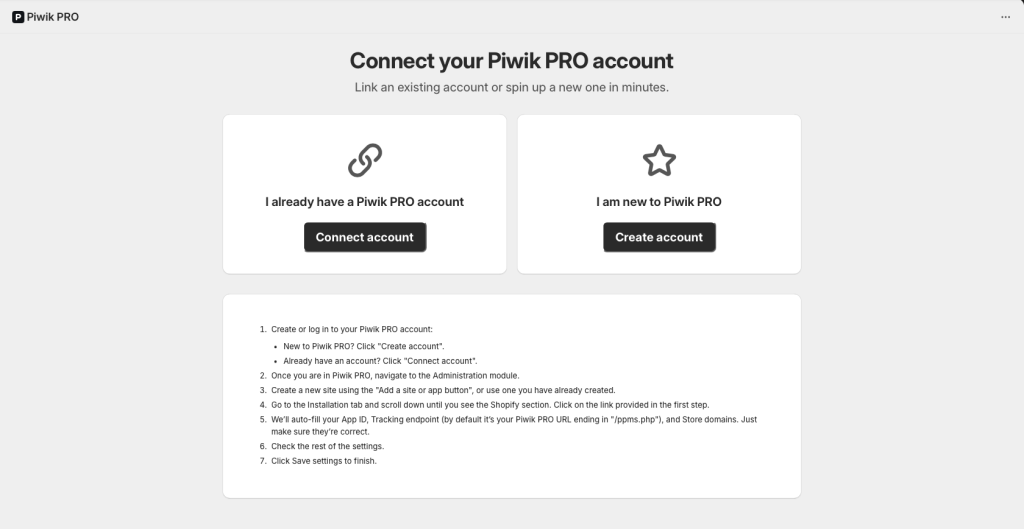
5. Once installed, you can connect your existing Piwik PRO account to Shopify or create a new one.
6. If you are new to Piwik PRO, click Create account, and follow the steps.
7. If you already have a Piwik PRO account, click Connect account.
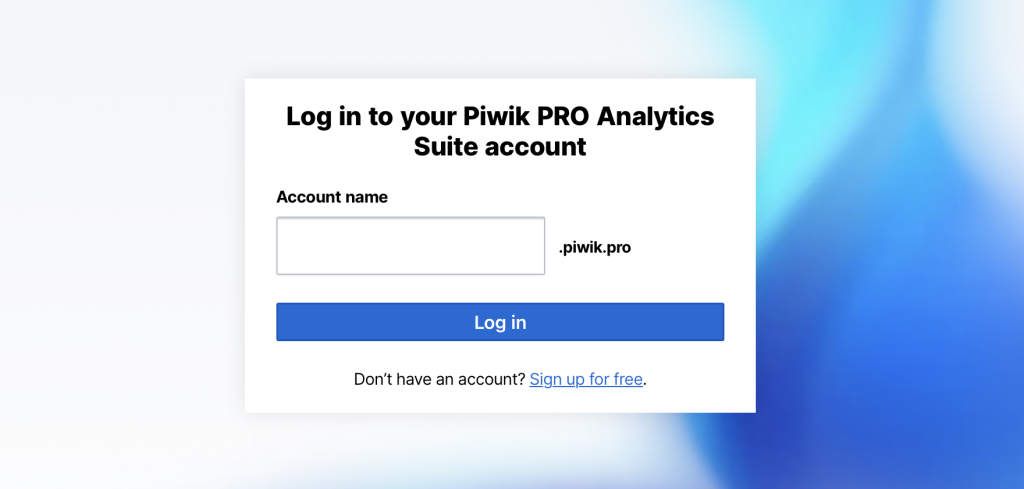
8. Log in to your Piwik PRO account.
9. Go to Menu > Administration.
10. Navigate to Sites & apps.
11. Choose your site from the list or add a new one.
12. Go to Installation.
13. Choose Shopify from the list.
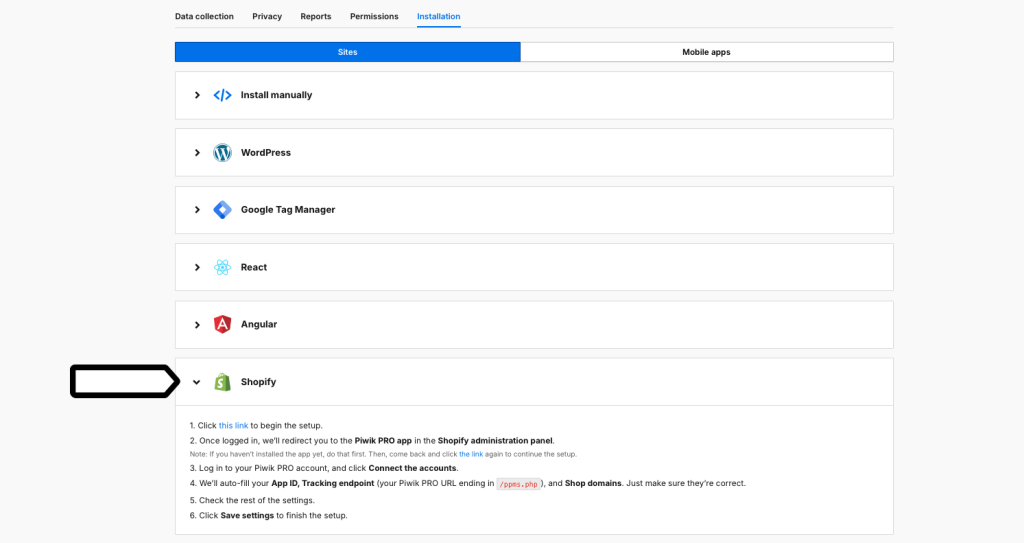
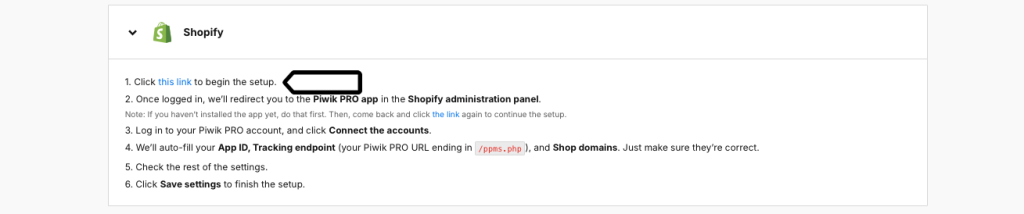
14. Click the link in the instruction to connect your Piwik PRO account to Shopify.
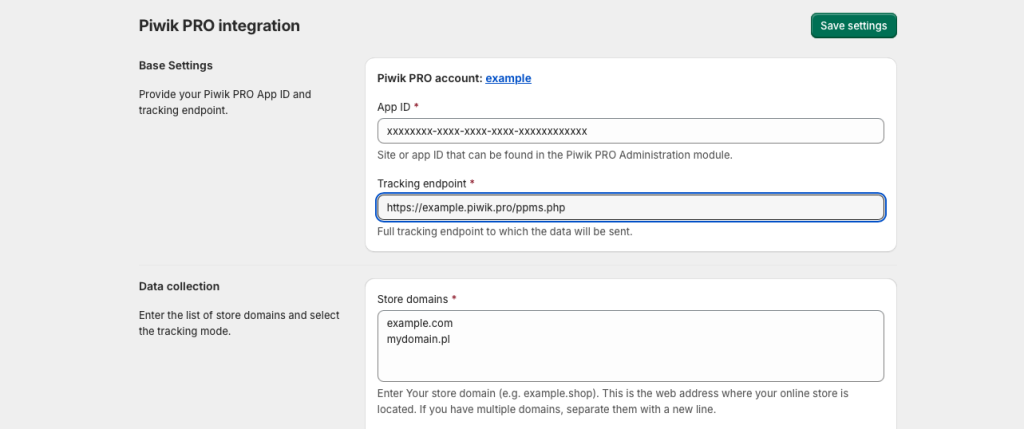
15. We’ll redirect you to the Piwik PRO app in the Shopify administration panel, where we’ll auto-fill some fields for you. Make sure the following details are correct:
- App ID,
- Tracking endpoint (your Piwik PRO URL ending in
/ppms.php), - Shop domains.
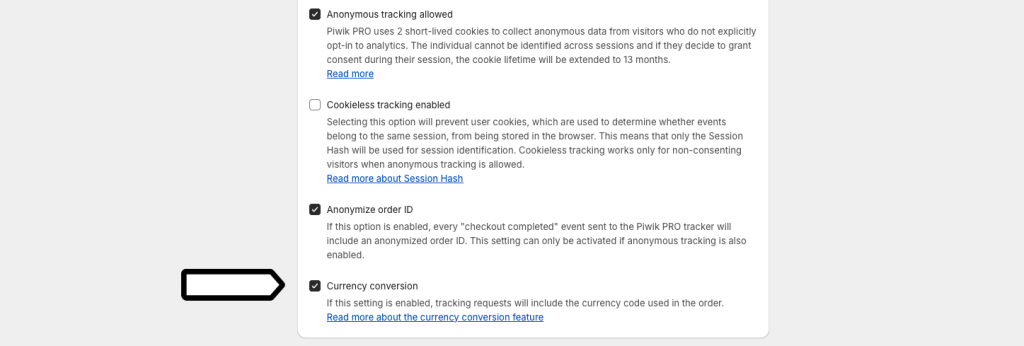
16. Decide if you want to turn on anonymous tracking. Read more
Note: Both the regular data collection and the anonymous tracking work with Shopify’s privacy API to respect visitor privacy settings. If you use a consent management tool that follows Shopify’s privacy API rules, the Piwik PRO app will use it as a source of truth when collecting data from visitors and deciding if they are anonymous or not.
Keep in mind that the Use visitor cookies setting in the Piwik PRO Administration panel doesn’t affect the Shopify app.
17. Decide if you want to turn on cookieless tracking. This option is available only if Anonymous tracking allowed is checked.
Note: Cookieless tracking works for visitors who haven’t given consent. Instead of using cookies, it assigns a session hash to recognize sessions. Read more
18. Decide if you want to attach a currency code to the ecommerce requests. It is checked by default.
19. Specify which customer data to attach to the requests.
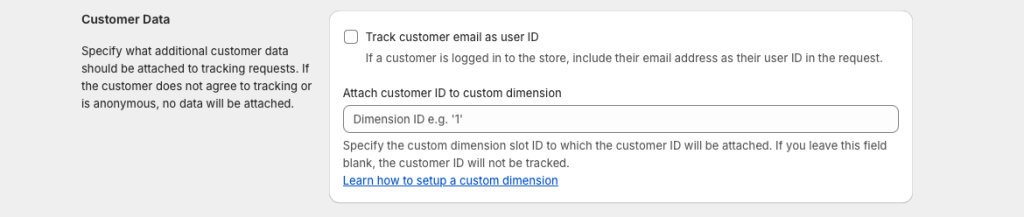
Note: If Track customer email as user ID is checked and the customer is logged in, their email address will be sent to Piwik PRO as their user ID.
Optionally, you can attach the email of a logged-in customer by specifying the Piwik PRO custom dimension ID, just make sure that it has been created beforehand.
20. Optionally, you can choose which events you want to track.
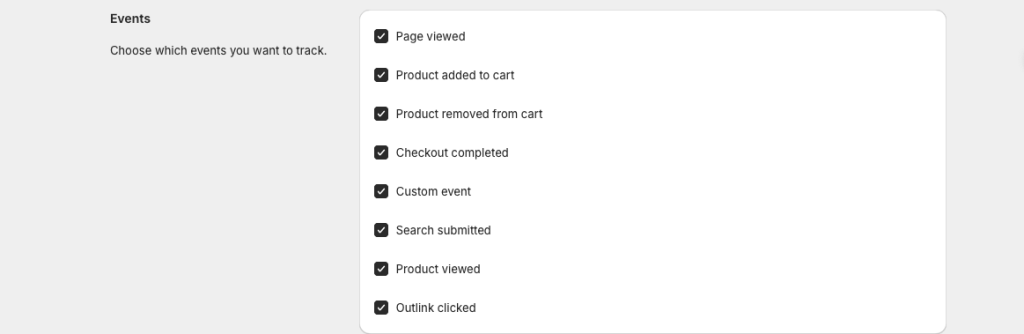
Note: The custom event feature lets you track custom analytics events set up in Shopify’s theme liquid files, theme app extensions, or checkout extensions using Shopify.analytics.publish() method.
If you want to learn how to send custom events, check Shopify’s documentation.
Each custom event must have the event_name parameter set to piwik_pro_trackEvent. You can find the event body structure below:
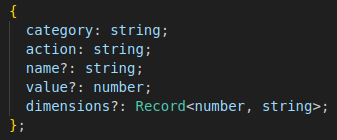
- category (string, required) – The category of the tracked event.
- action (string, required) – The action of the tracked event.
- name (string, optional) – The name of the tracked event.
- value (float, optional) – The value you want to assign to the tracked event.
- dimensions (object, optional) – A list of custom dimensions you want to pass with this event. Format for keys: X, where X is the dimension ID. Type of value: string.
Matched events are sent as Piwik PRO custom events.
Example:
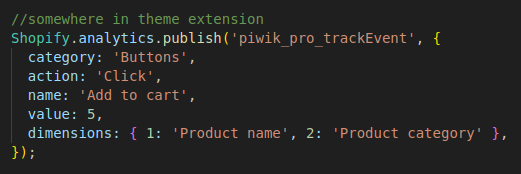
21. Click Save settings.

22. Well done! Data will appear in reports in about two hours. Data in the tracker debugger will appear instantly.
Note: You can remove the Piwik PRO app from your Shopify store without deleting your Piwik PRO account. If you want to remove your Piwik PRO account, see this article.