An ecommerce product detail view tag lets you collect data about the views of the product detail page in your online store.
To set it up, follow these steps:
1. Go to Menu > Tag Manager.
2. Navigate to Tags.
3. Click Add a tag.
4. Name your tag and select the following type: Ecommerce product detail view tag.
5. Click Next.
6. In Ecommerce product detail view setup, you need to fill in the fields based on the ecommerce setup you have on your site. The choices are:
- Data layer (Google Analytics 4)
- Data layer (Google Universal Analytics)
- Google tag (Google Analytics 4)
- Google tag (Google Universal Analytics)
- Custom data layer
Note:
- In this step, you’re selecting the structure your ecommerce events use. These events, like
add_to_cartorpurchase, are often pushed to the data layer by your developer or platform.
Select the format that best suits your setup, such as the GA4 data layer or Universal Analytics events. If you’re unsure, ask your developer or use a browser tool like the dev tool console to inspect the data layer. - Google has deprecated Universal Analytics, and it’s no longer officially supported. However, if you’re already using it, you don’t need to make any changes.
So first, check the structure you’re using.
7. If your data layer setup is based on one of Google’s standards (Google Analytics 4 or Google Universal Analytics), click Browse presets and select the appropriate option. If your setup is different, go to step 11.
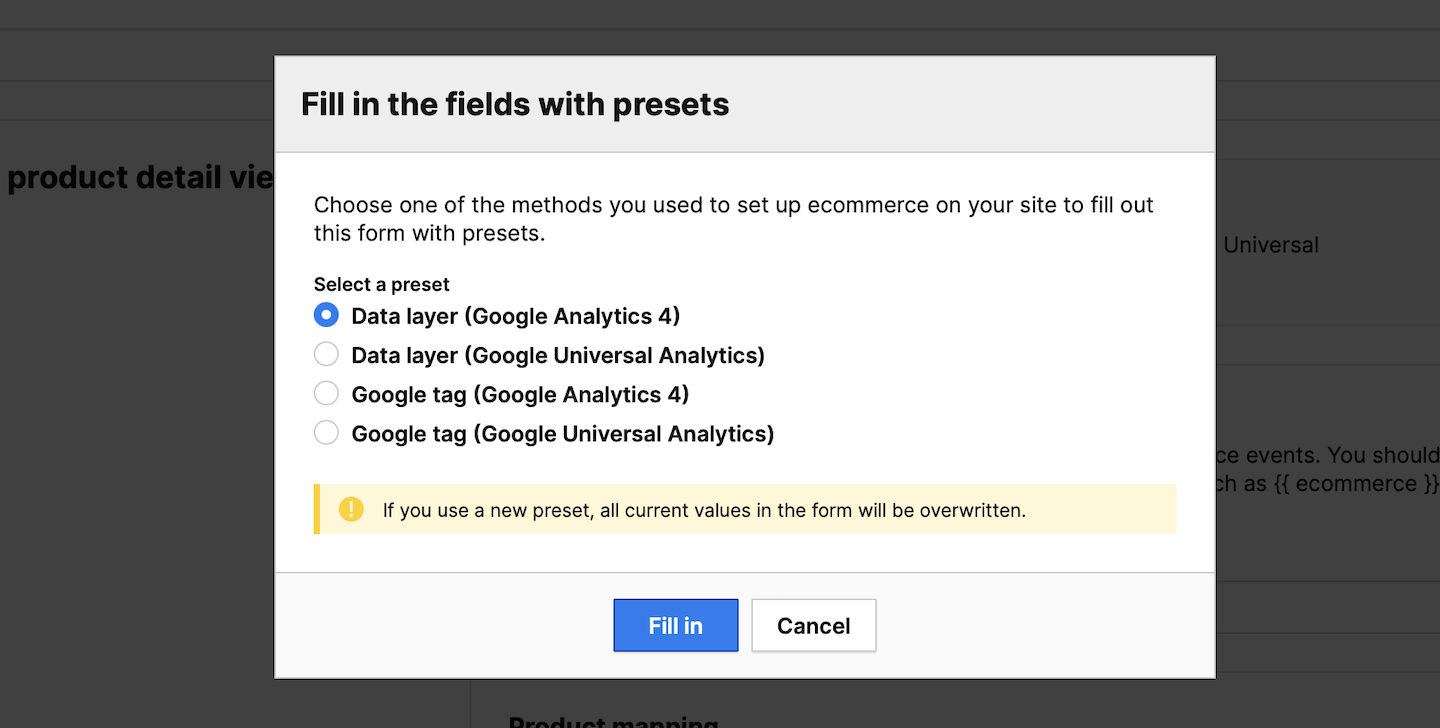
8. Click Fill in and the fields will automatically be filled with the appropriate events.
Note:
- You don’t need to create any variables. Tag Manager can directly extract values from the data layer.
- If your data structure doesn’t use some values, leave the fields blank.
- If your data structure doesn’t fully comply with Google’s standards, just adjust the values added by the preset. For example, if the standard uses ‘variant,’ but your event uses ‘size,’ fill in the field with ‘size’ accordingly.
9. Review the completed fields and if everything is correct, go to step 13.
10. If your setup involves a custom data layer, you’ll need to manually fill in the fields.
11. In Product array, enter the source of information about the products in your ecommerce events. You should use double curly braces syntax for the root key and add nested values as needed, such as {{ ecommerce }} or {{ ecommerce }}.items. (See example)
12. (Optional) In Currency, enter the source of information about the product currency to enrich your reports. You should use double curly braces syntax for the root key and add nested values as needed, such as {{ ecommerce }}.currency. (See example)

Note: For more about currency conversion, see this article.
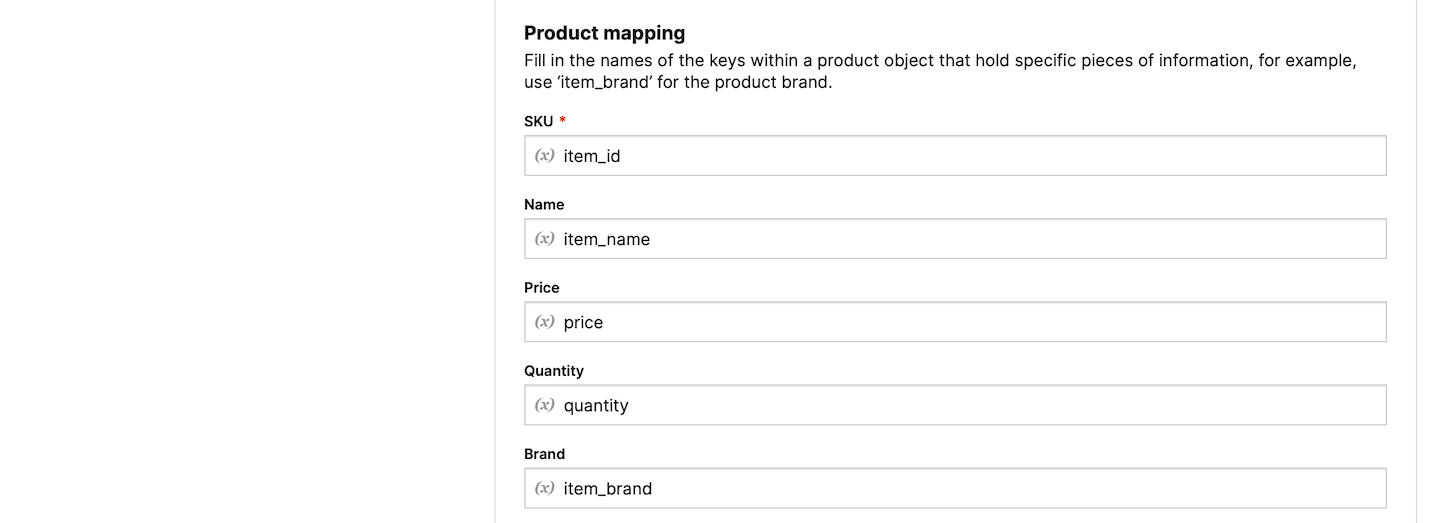
13. In Product mapping, fill in the names of the keys within a product object that hold specific pieces of information. (See example)
Note: You can map up to 5 categories. The first one is considered the main category, while the rest are treated as subcategories. If you choose to use subcategories, you can select the following options:
- Read categories from the category field: Categories must be separated by a slash (/). Example: House/Furniture/Bedside tables. Compatible with Google Universal Analytics.
- Read categories from custom fields: Enter the fields you use for the categories in the data layer or gtag.js. Compatible with Google Analytics 4.
Note: You can track a previously created custom dimension by picking the index number or name of the dimension and providing its value. Read more
14. In Advanced tag settings, select Consent type. Set it up if you use a consent form on your site. This tag will only fire for visitors who accept the selected consent type.
15. Respect opt-out and DNT is turned off by default. Turn it on, if you want to respect visitors who’ve turned on the Do-Not-Track feature in their browsers or who’ve opted out of tracking using our opt-out form.
16. In Flight dates, you can set the date and time when the tag will fire.
17. In Tag triggers, click Add a trigger to set up a trigger for your tag.
18. Name the trigger.
19. Select the following trigger type: Data layer event. It’s the most suitable trigger to use because ecommerce tracking typically relies on the data layer.
20. In Data layer event settings, set the following condition: Event name equals your-event-name.

Note: If your ecommerce setup complies with Google’s standards, you can use one of the following event names:
- view_item for Data layer (Google Analytics 4)
- arguments.view_item for Google tag (Google Analytics 4)
- arguments.view_item for Google tag (Google Universal Analytics)
The default data layer push in Google Universal Analytics doesn’t include an event field. To include one, just add an event field to the data layer’s push and give it a name, such as “viewItem.”
21. Adjust the trigger conditions if you want.
22. When you’re done, click Add.
23. Click Save to save the tag.
24. Test your tag in debug mode.
25. When you’re happy with how the tag works, click Publish.
26. Done! Your ecommerce orders are now tracked. Data will appear in reports in Analytics > Ecommerce in about two hours. Data in the tracker debugger will appear instantly.
Note: Ecommerce reports are only visible if you turn them on in Administration > Sites & apps > Reports.
Example of a custom ecommerce event and tag setup
Here’s an example of a custom ecommerce event and how the ecommerce product detail view tag should be set up to properly track all the information from that event.
Example ecommerce event
{
    "event": "product_detail_view",
    "currency": "USD",
    "items": [
        {
        "item_id": "11111",
        "item_name": "Product name",
        "price": "30.00",
        "quantity": 1,
        "item_brand": "Product name brand",
        "item_category": "Men",
        "item_category2": "Shoes",
        "item_category3": "Boots & Trainers",
        "item_category4": "Boots",
        "item_category5": "Cowboy boots",
        "item_color": "red"
        },
        {
        "item_id": "22222",
        "item_name": "Product name 2",
        "price": "45.00",
        "quantity": 1,
        "item_brand": "Product name brand",
        "item_category": "Men",
        "item_category2": "Shoes",
        "item_category3": "Boots & Trainers",
        "item_category4": "Boots",
        "item_category5": "Platform boots",
        "item_color": "black"
        }
    ]
}
Example tag setup
| Setup element | Value |
|---|---|
| Product array | {{ items }} |
| Currency | currency |
| SKU | item_id |
| Name | item_name |
| Category | item_category |
| Category 2* | item_category2 |
| Category 3* | item_category3 |
| Category 4* | item_category4 |
| Category 5* | item_category5 |
| Price | price |
| Quantity | quantity |
| Brand | item_brand |
| Variant | item_color |
This only applies if your ecommerce events have separate fields for subcategories.