When you want to collect additional data about events happening on your site or app, you need to create a custom event using a built-in tag in Tag Manager. This tag will pass information about the event’s category, name, activity and value to Analytics, and you’ll see it in your custom event report.
In this article, we’ll show you how to create a custom event.
Create a custom event
To create a custom event, follow these steps:
1. Go to Menu > Tag Manager.
2. Navigate to Tags.
3. Click Add a tag.
4. Select the following type: Custom event and click Next.
5. Name your tag.
6. Add the following elements:
- Category (string, required): The category of the event you’re tracking. The category organizes events into groups. Example:
Buttons. - Action (string, required): The action of the event you’re tracking. The action tells you what a visitor did. Example:
Click. - Name (string, optional): The name of the event you’re tracking. The name gives you more information about the event. Example:
Sign up(a CTA on your button). - Value (float, optional): The value you want to assign to the event you’re tracking. Example:
5. If an action is worth some money for your business, like a signup button click is worth 5 USD, you can assign a value for it. Every time an event happens, Piwik PRO will count the value and show the total value in an event report.

Note: You can track a previously created custom dimension along with the event by picking the index number of the dimension and providing its value. For more, read this article.
7. In Advanced tag settings, choose Consent type. Set it up if you use a consent form on your site. This tag will only fire for visitors who accept the selected consent type.
8. In Tag triggers, click Add a trigger or Choose existing trigger to set up a trigger for your tag.
9. Click Next.
10. Name the trigger.
9. Adjust trigger conditions.
10. When you’re done, click Add to save the trigger.
11. Click Add to save the tag.
12. Test your tag in debug mode.
13. When you’re happy with how the tag works, click Publish.
14. Done! Now your data is collected and you can see it Menu > Analytics > Reports > Custom events.
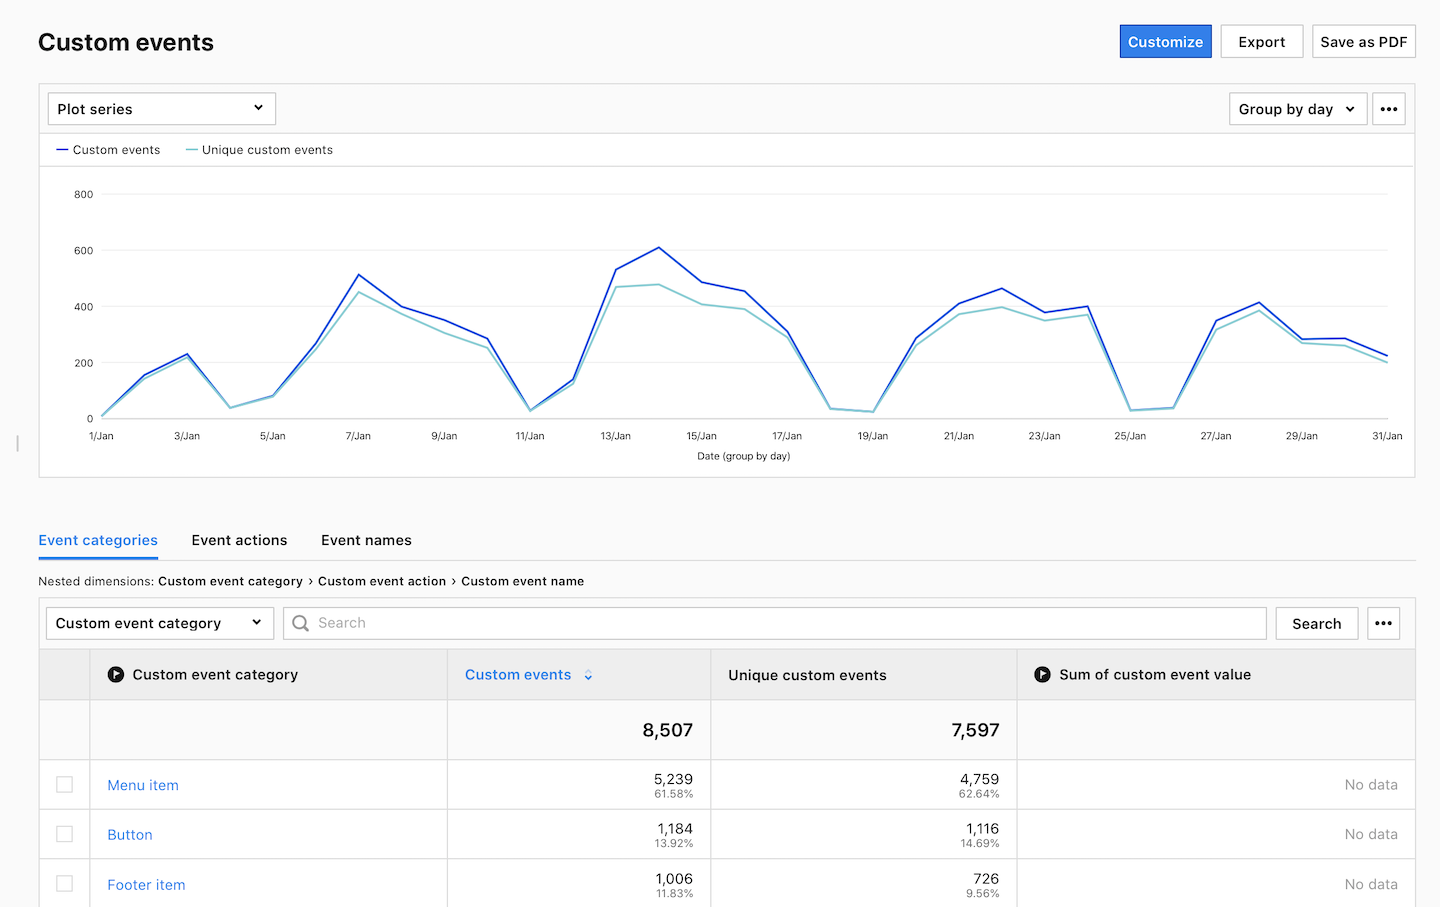
Note: Data will appear in reports in about an hour. Data in the tracker debugger will appear instantly.
15. You can also see custom events in Analytics > Reports > Session log.

Tip: See some examples of using custom events:
For developers: You can set up custom events manually by modifying the tracking code.