Data Activation (DA), formerly Customer Data Platform or CDP, is a tool that collects and organizes user data to help you understand your customers better. With custom activation, you can use this data to create personalized marketing campaigns and improve user experience. When a user joins a specific audience, selected attributes are sent in real time to a webhook’s endpoint, allowing you to send targeted messages, display personalized ads, assign salespeople, and more.
Overall, activation lets you use your site’s data to develop more effective marketing strategies and improve customer engagement across email, social media, mobile apps and sites.
In this article, we’ll guide you through the process of creating a custom activation.
Before you start
Here are a few helpful things to know before you start:
- Our activations are based on webhooks, which allow web apps to receive real-time updates from other systems or apps. When a user becomes a member of a selected audience, our activation will send their attributes to the webhook’s endpoint (a URL specified by the receiving app). This will then trigger an action in that app.
- Activation will only happen after it’s created and only for people who join the audience. It does not apply to people who were in the audience before activation.
Create a custom activation
To create a custom activation, follow these steps:
1. Go to Menu > Data Activation.
2. Navigate to Activations.
3. Click Add an activation.
4. Select Custom activation.
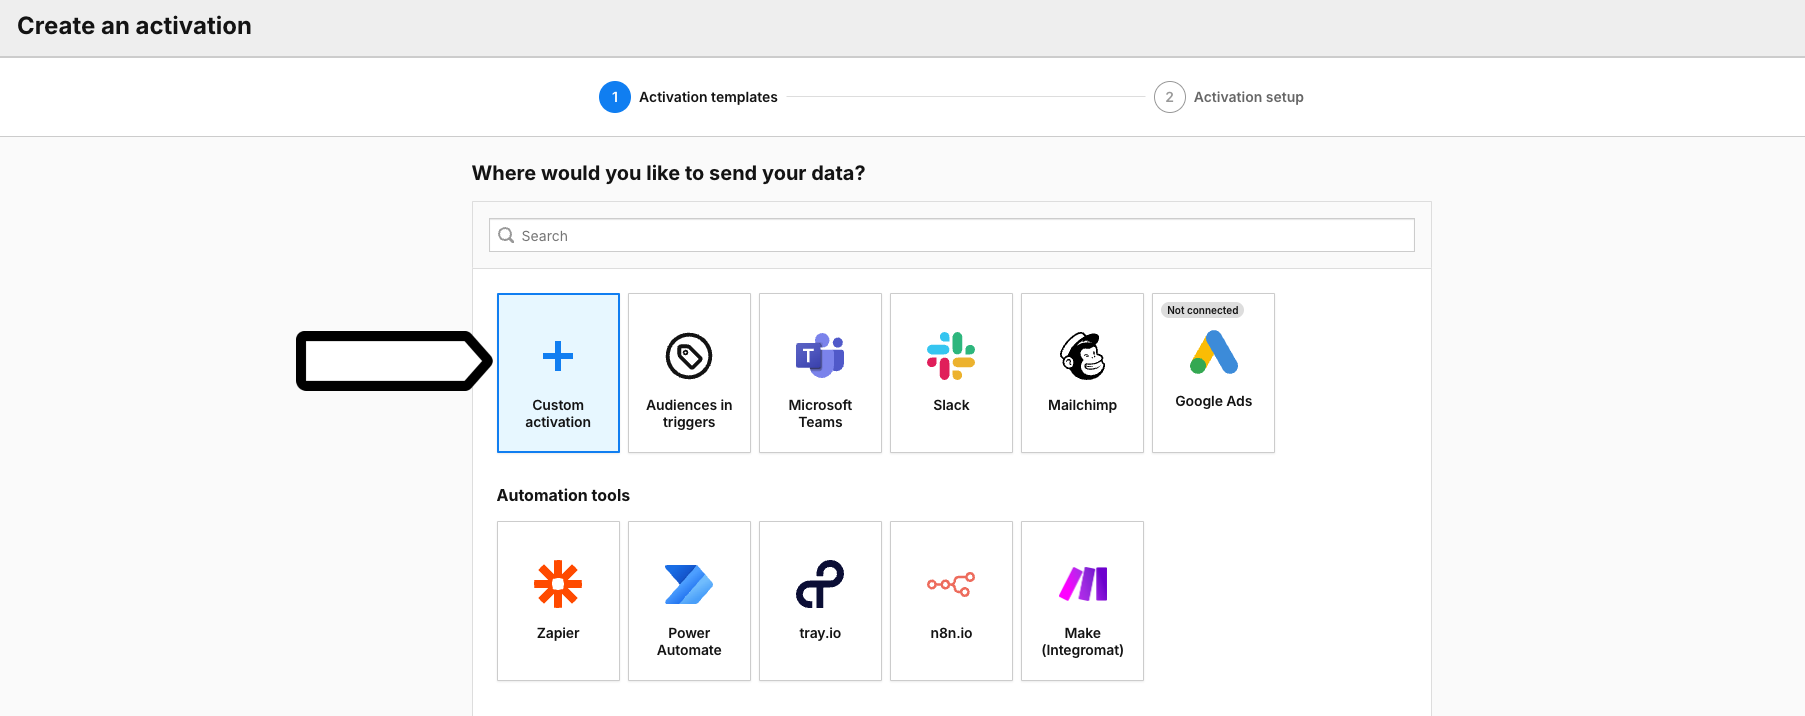
5. Click Next.
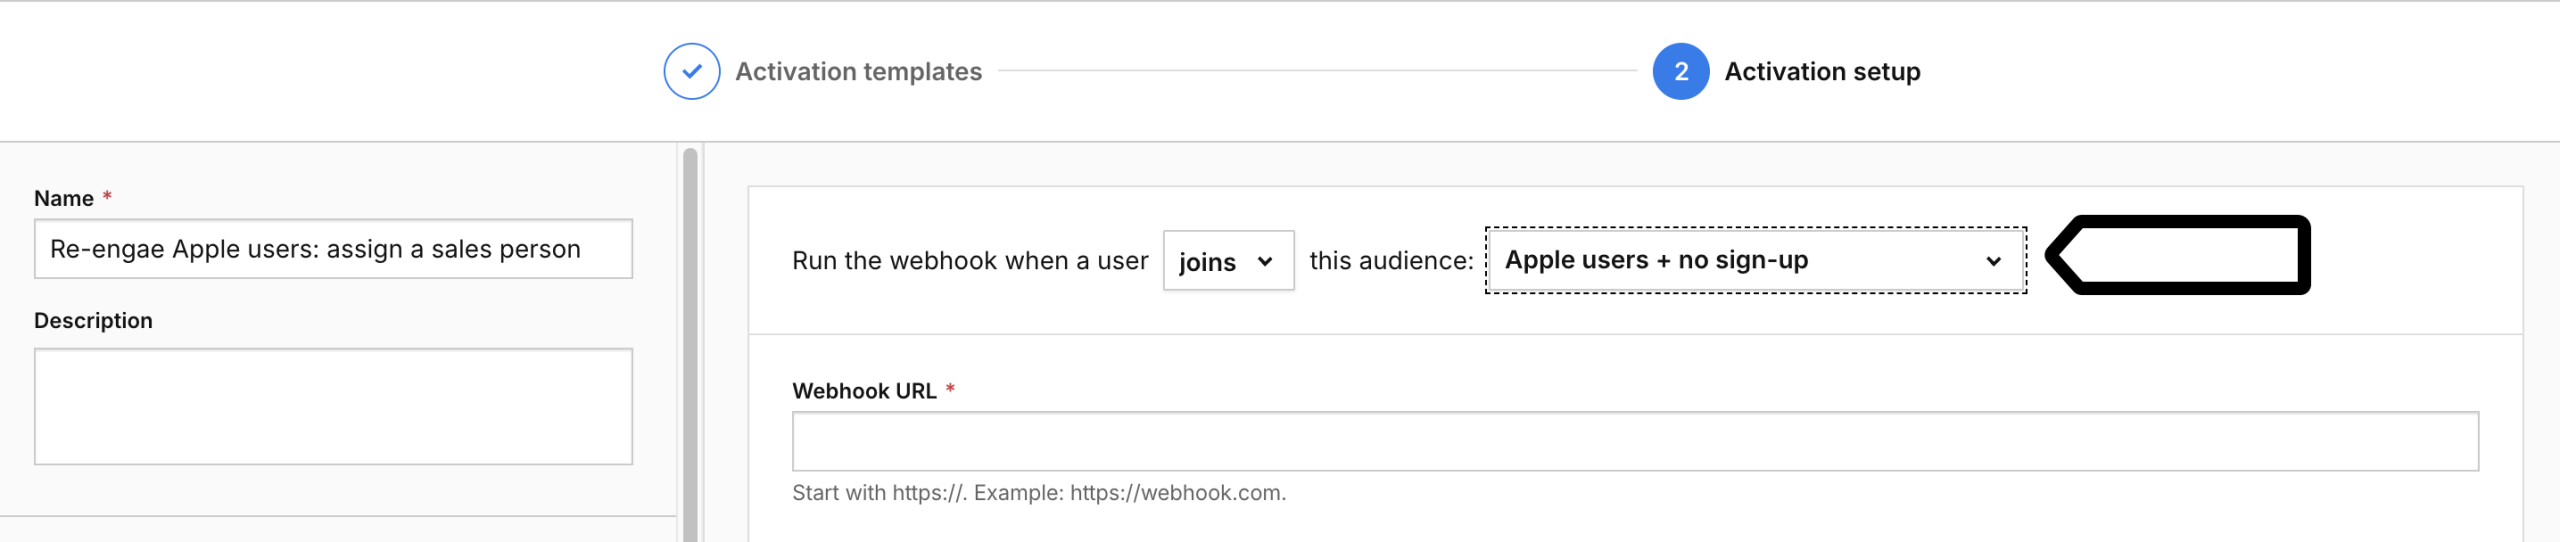
6. Name your activation and add a description.
7. Pick the audience you want to use in this activation. Example: Run the webhook when a user joins this audience: Apple users + no sign-up.
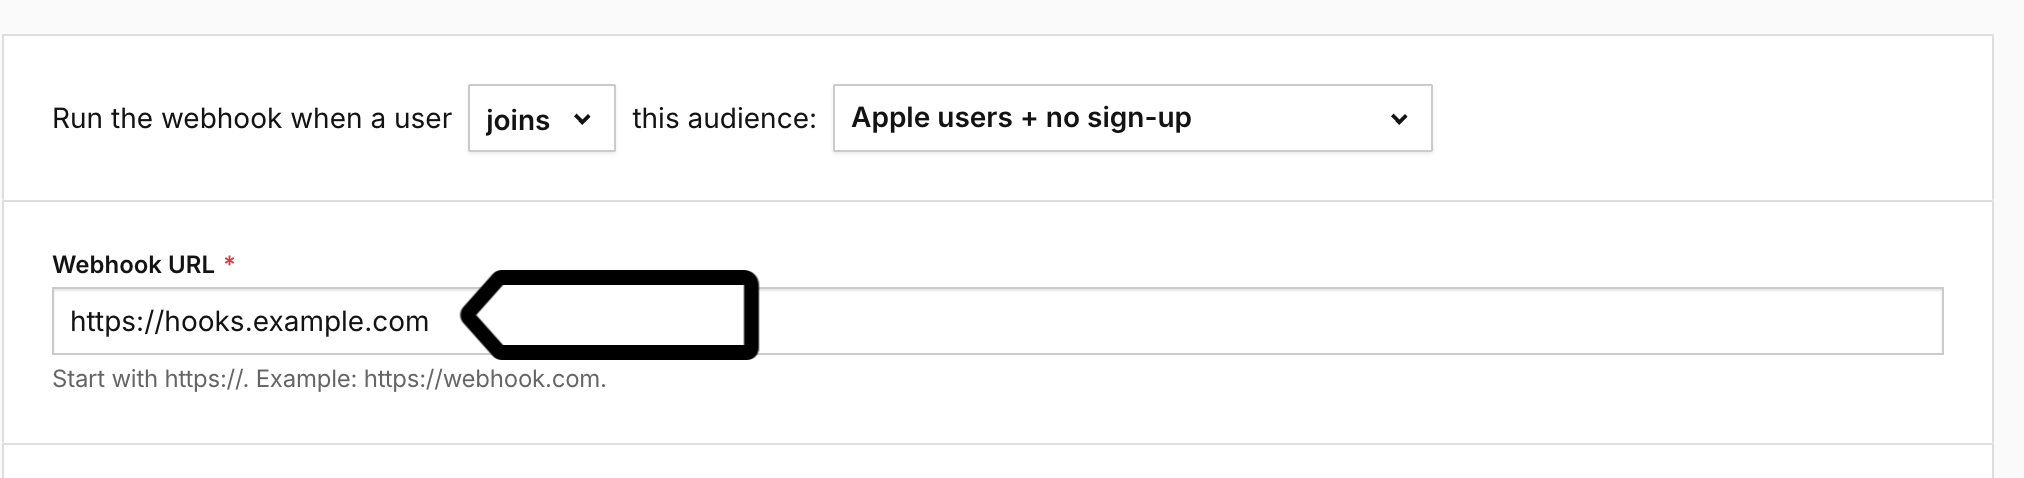
7. Enter the webhook URL.
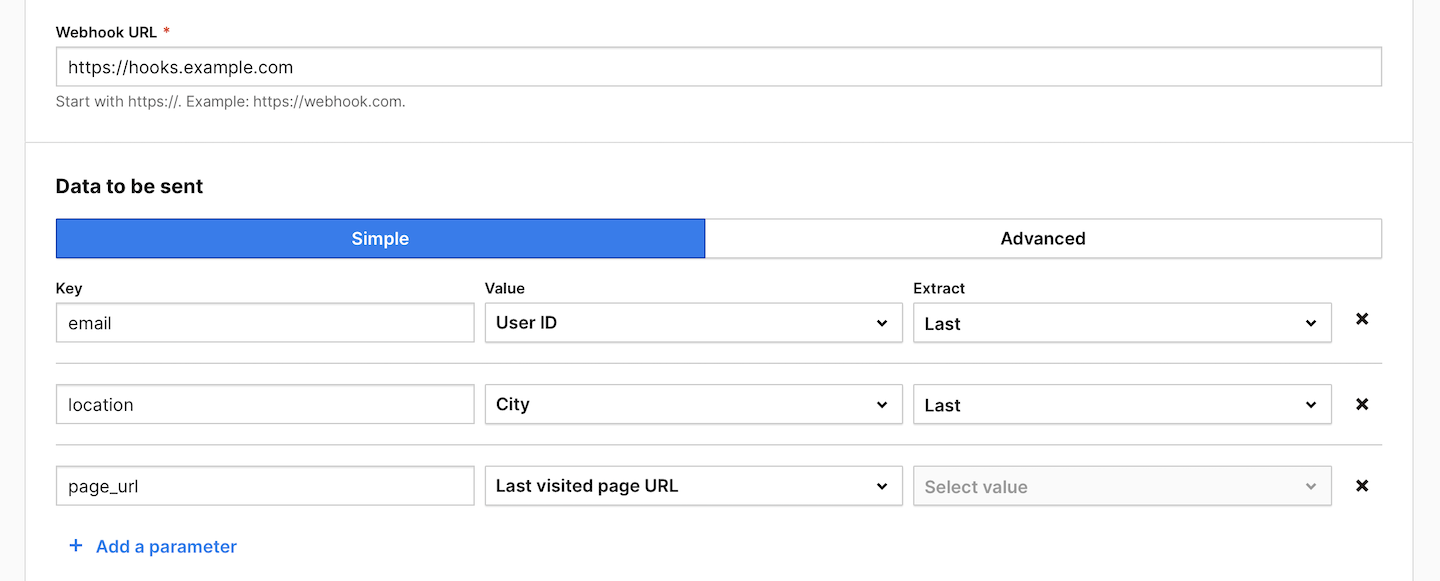
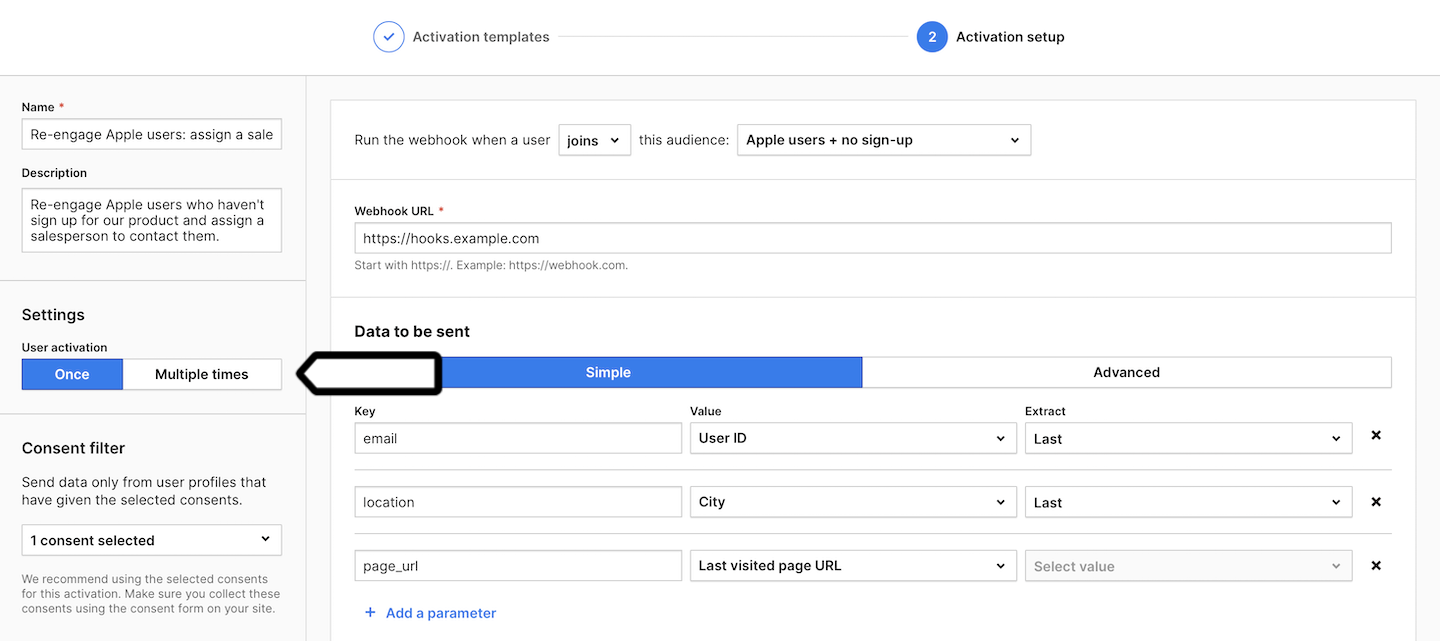
8. Select the data you want to send when a user joins the selected audience (the webhook is triggered). You can use two formats:
- Simple: Select key-value pairs. Choose whether you want to extract the first, last or all values. Note that some tools define the keys they use, so make sure that you use the right ones.
- Advanced: Use JSON formatted data to send anything that a simple option won’t do. Note that it’s better to use JSON with some tools because it gives you more flexibility in defining your dataset.
Note: For some attributes, you can extract the First, Last or All values. First means it’s the first detected value, Last means it’s the most recent detected value.
9. Click Send test data to make sure the webhook works. If it works, you’ll see a green success message.
10. Choose whether you want to activate the user:
- Once: A user is activated only the first time they join this audience.
- Multiple times: A user is activated each time they join this audience.
11. (Optional) Choose to activate users who have multiple user IDs.
12. In Consent filter, select the consents that should be given to use user profile data.
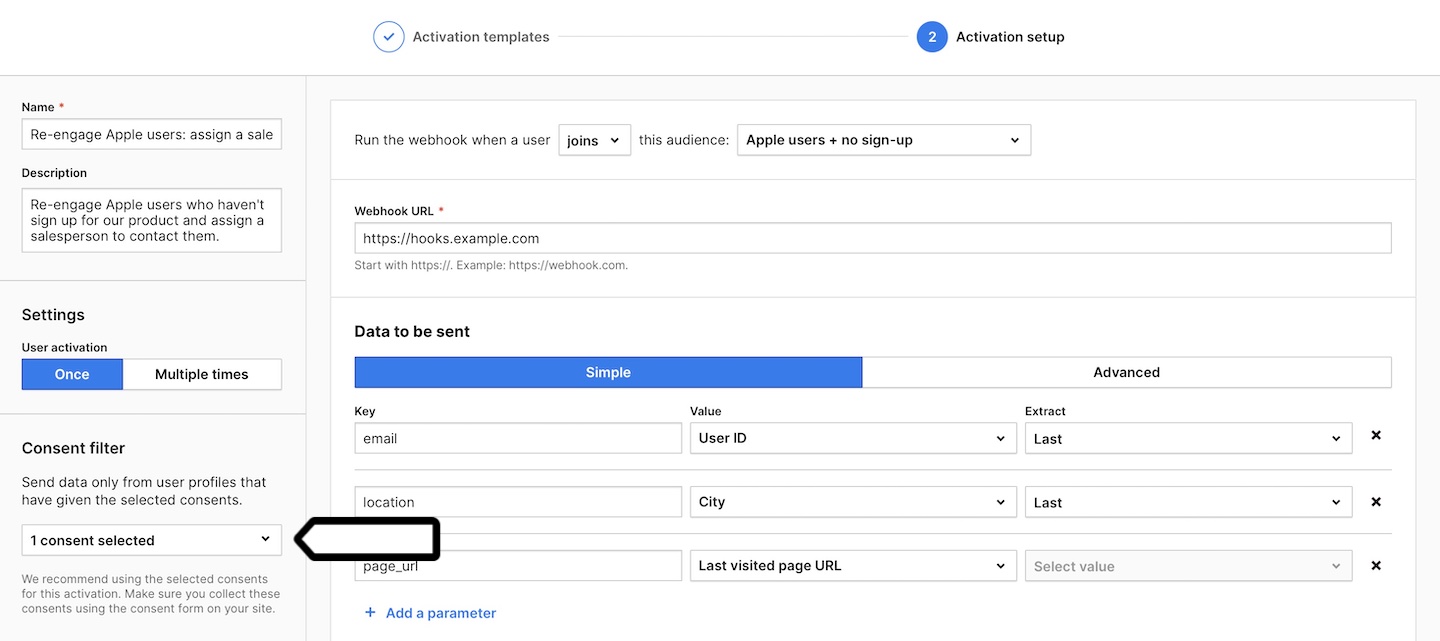
Note: Make sure you collect these consents using the consent form on your site. Read more
13. Click Save.
14. You’re all set! From now on, the selected user data will be sent to your tool every time a user joins the selected audience. Of course, only if they have given the necessary consent.
Watch more tutorials on YouTube: