n8n is a tool that helps you automate tasks and connect different apps and services. It has a visual editor that lets you create these automated workflows easily. With over 300 different nodes, you can integrate n8n with tools like email, social media, databases, and CRM systems.
You can use n8n to create workflows between Piwik PRO and the app of your choice. This means you can set it up to do things like automatically receive an email when someone signs up for your newsletter, update your CRM system when someone makes a purchase, or send a discount code to visitors who haven’t decided to buy yet. The options for automation are endless!
In this article, we’ll explain how to activate data for n8n.
Before you start
Here are a few helpful things to know before you start:
- For more information about webhooks, see the n8n documentation.
- Activation will only happen after it’s created and only for people who join the audience. It does not apply to people who were in the audience before activation.
Create an n8n activation
To create an n8n activation, follow these steps:
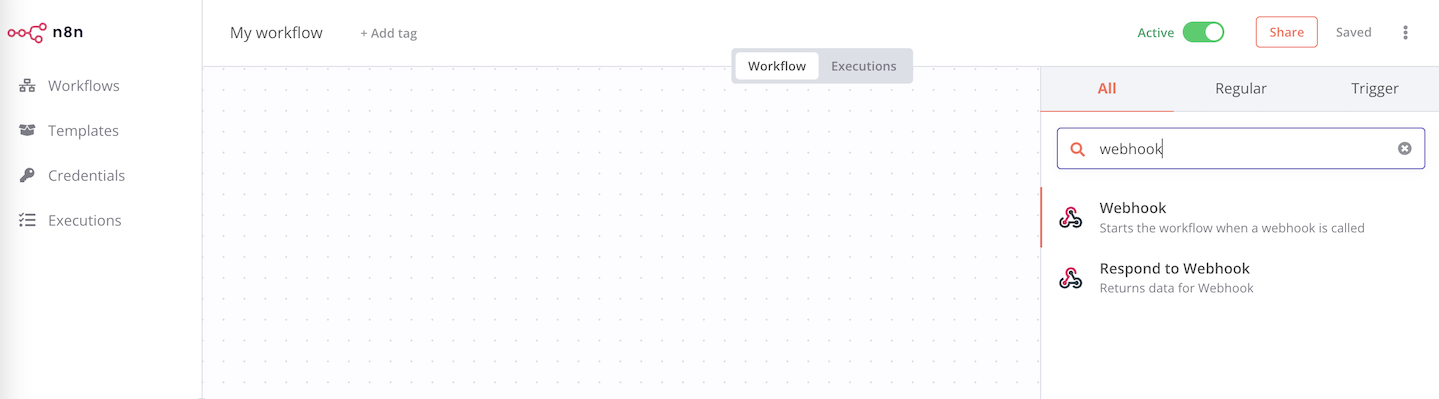
1. Log in to n8n.
2. Search for “webhook” in the search engine. This will let you start the workflow when a webhook is called.
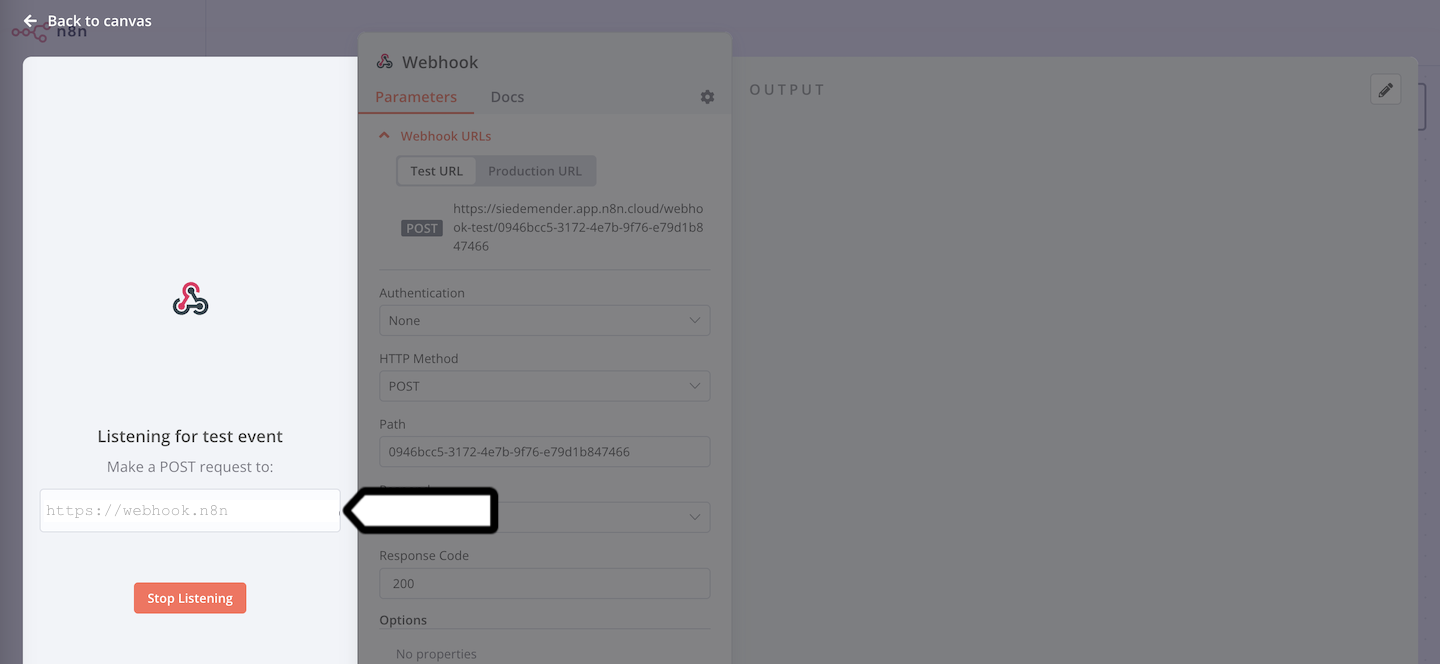
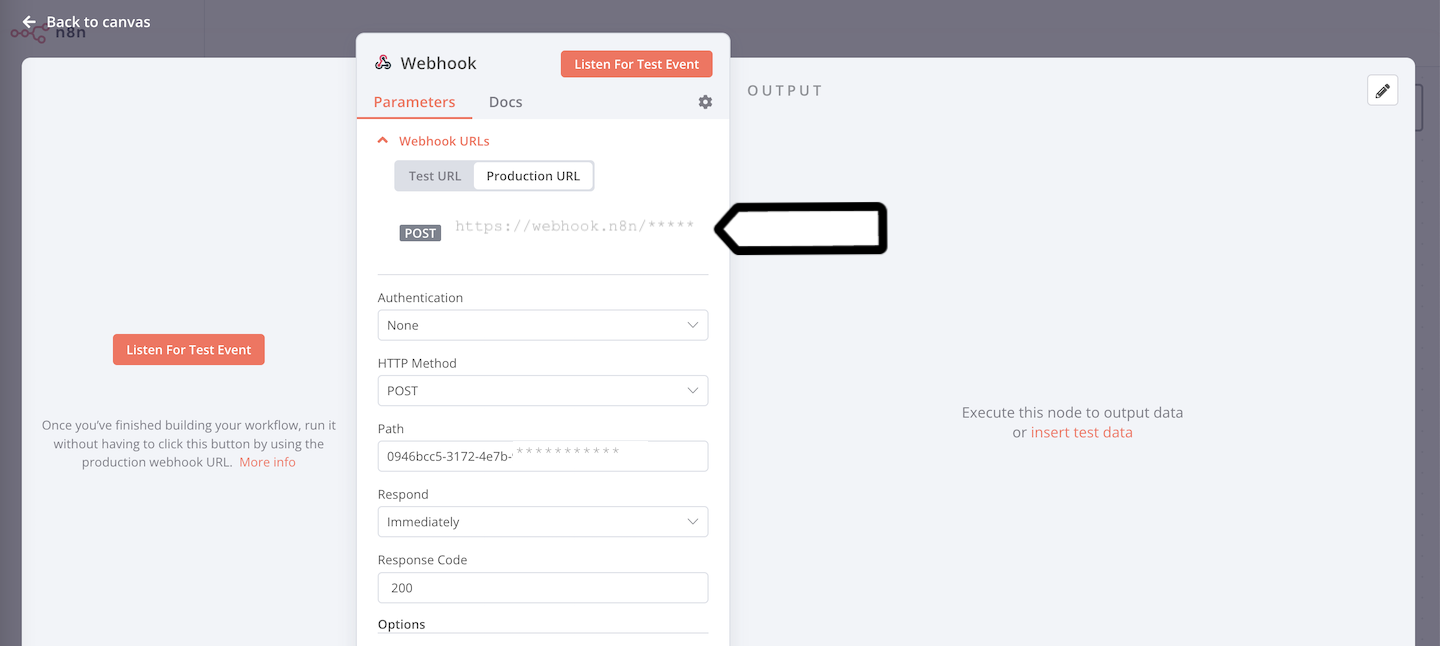
3. Click Test URL and copy the generated test URL.
4. Log in to Piwik PRO.
5. Go to Menu > Data Activation, formerly Customer Data Platform.
6. Navigate to Activations.
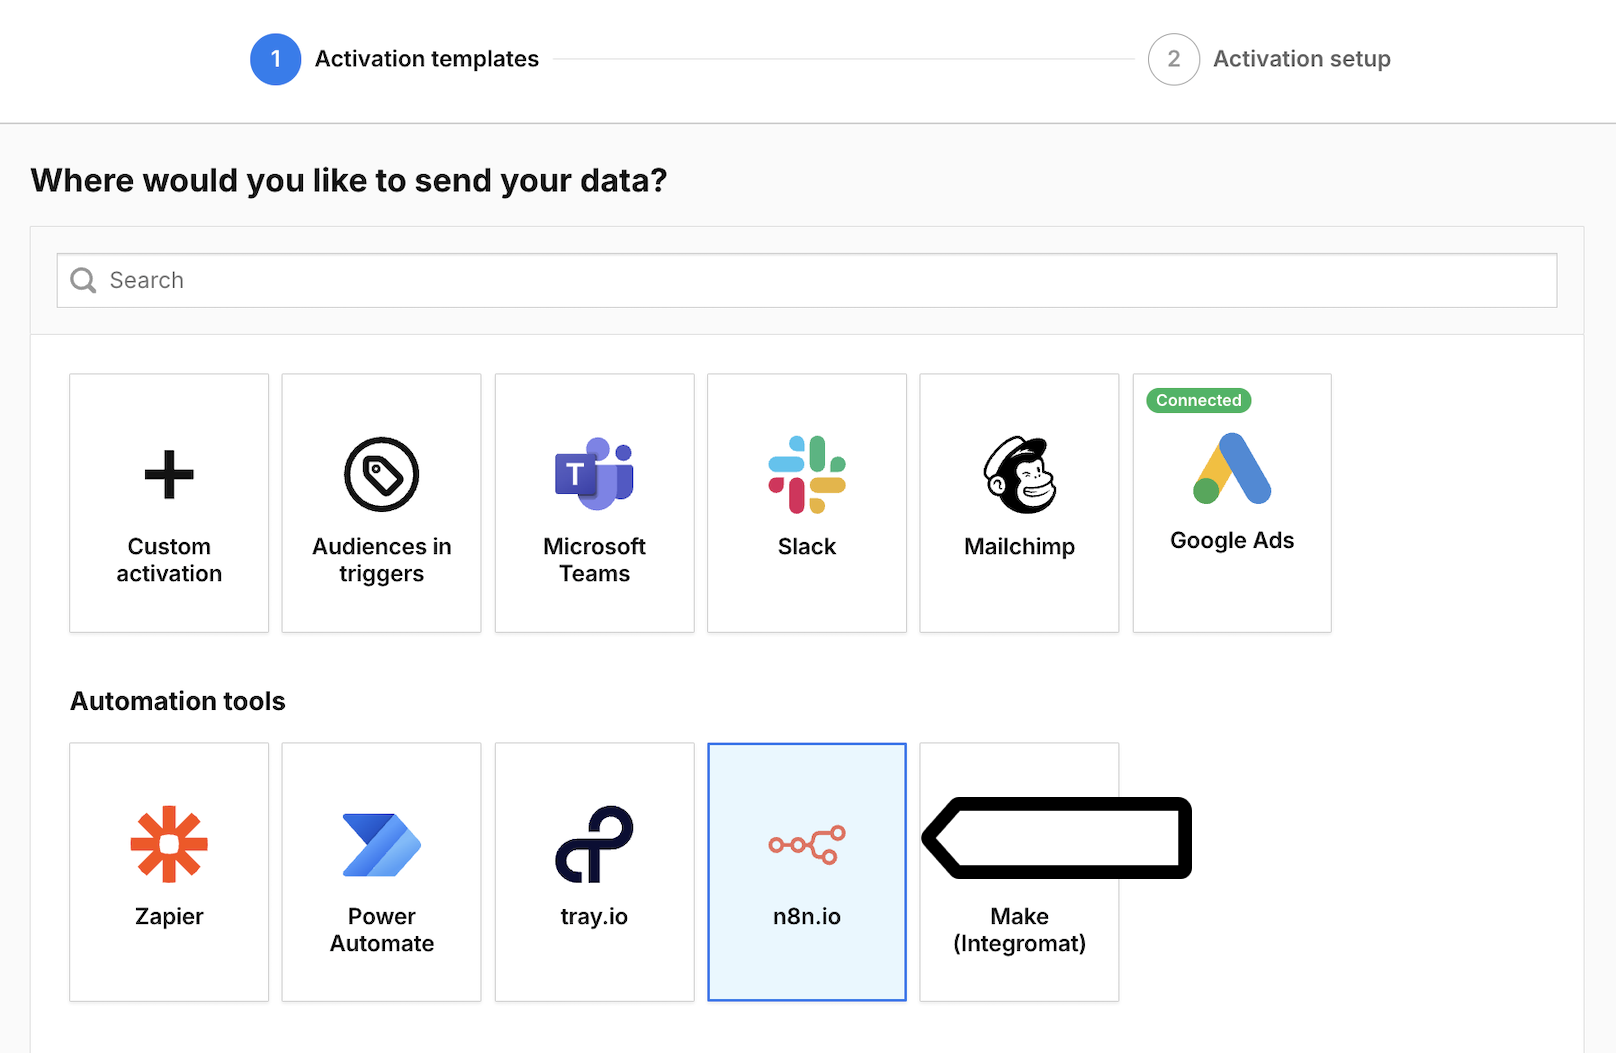
7. Click Add an activation.
8. Select n8n.
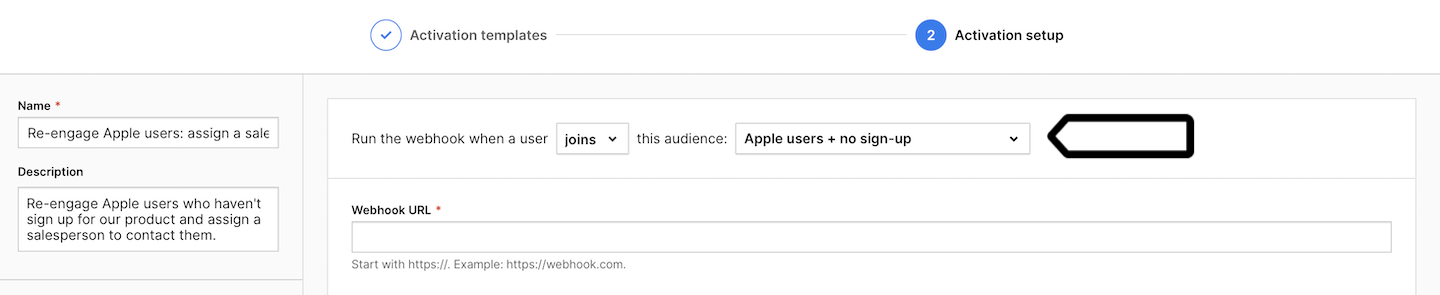
9. Name your activation and add a description.
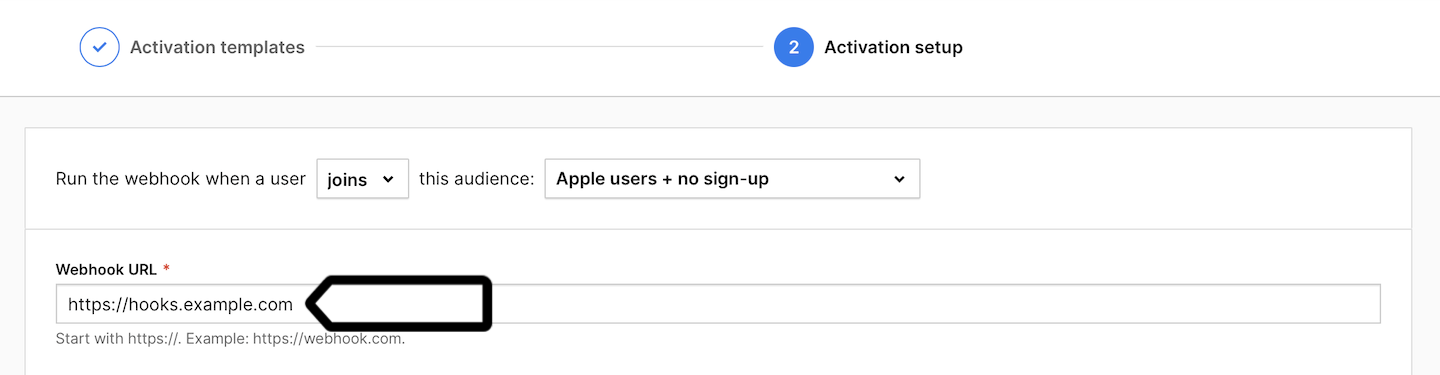
10. Pick the audience you want to use in this activation. Example: Run the webhook when a user joins this audience: Apple users + no sign-up.
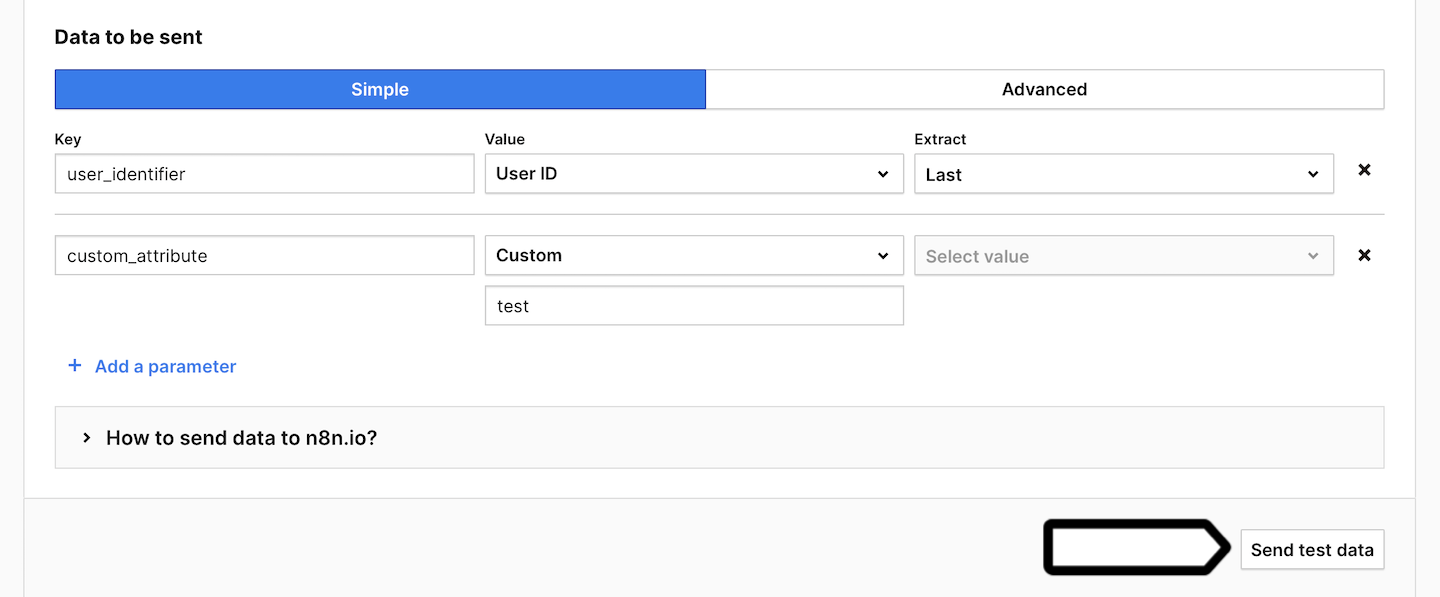
11. Enter the test URL from n8n and click Send test data.
12. Go back to n8n.
13. If the test is successful, switch to Production URL and copy the production URL. This is your final webhook URL, which you’ll need to set up the activation in Piwik PRO.
14. Go back to Piwik PRO.
15. Enter the final webhook URL from n8n (production URL).
16. Select the data you want to send when a user joins the selected audience (the webhook is triggered). We’ve included a sample dataset.
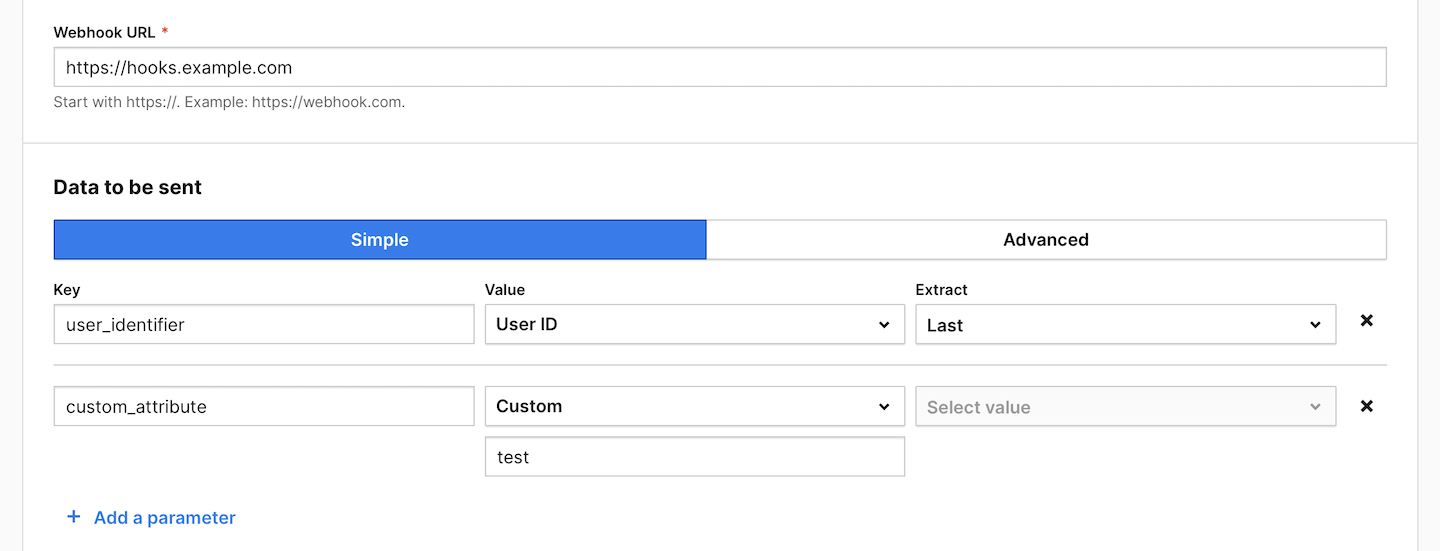
Note: To learn more about sending data to n8n via webhooks, see their documentation.
17. Choose whether you want to activate the user:
- Once: A user is activated only the first time they join this audience.
- Multiple times: A user is activated each time they join this audience.
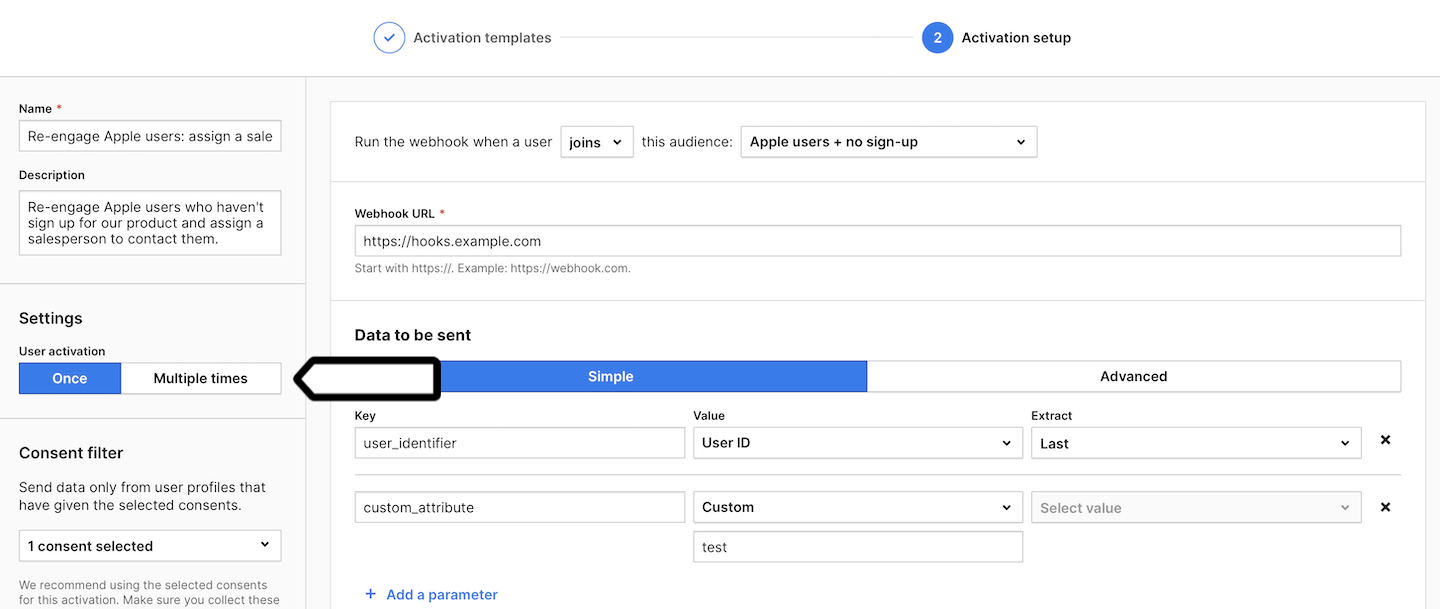
18. (Optional) Choose to activate users who have multiple user IDs.
19. In Consent filter, select the consents that should be given to use the user profile data.
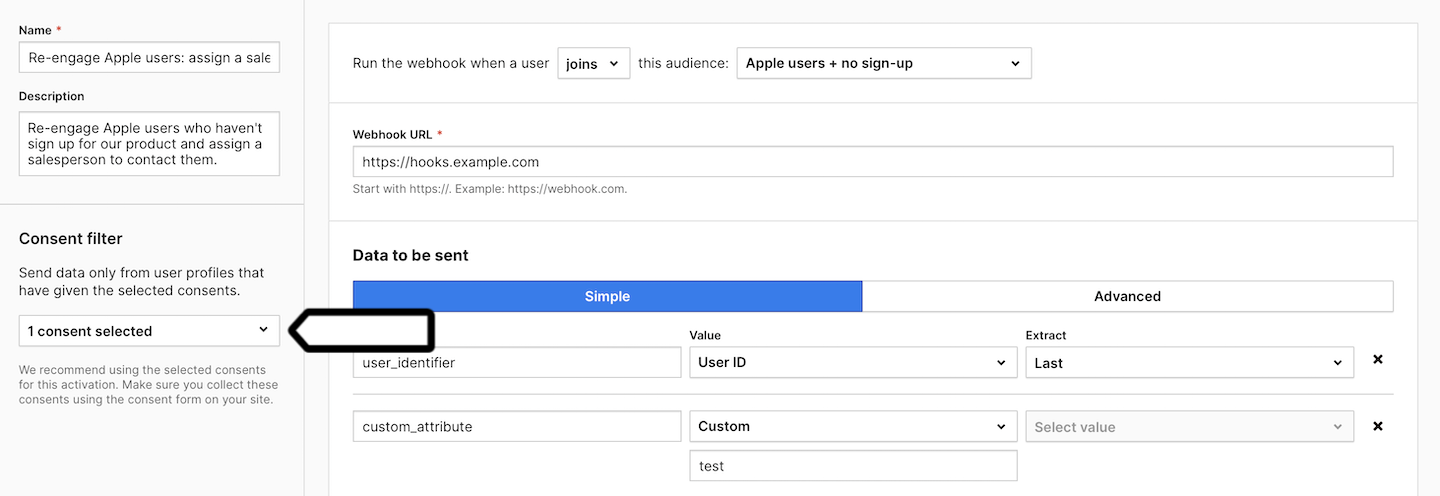
Note: Make sure you collect these consents using the consent form on your site. Read more
20. Click Create.
21. Go back to n8n.
22. Select and set up the action you want to perform when data from Piwik PRO is sent.
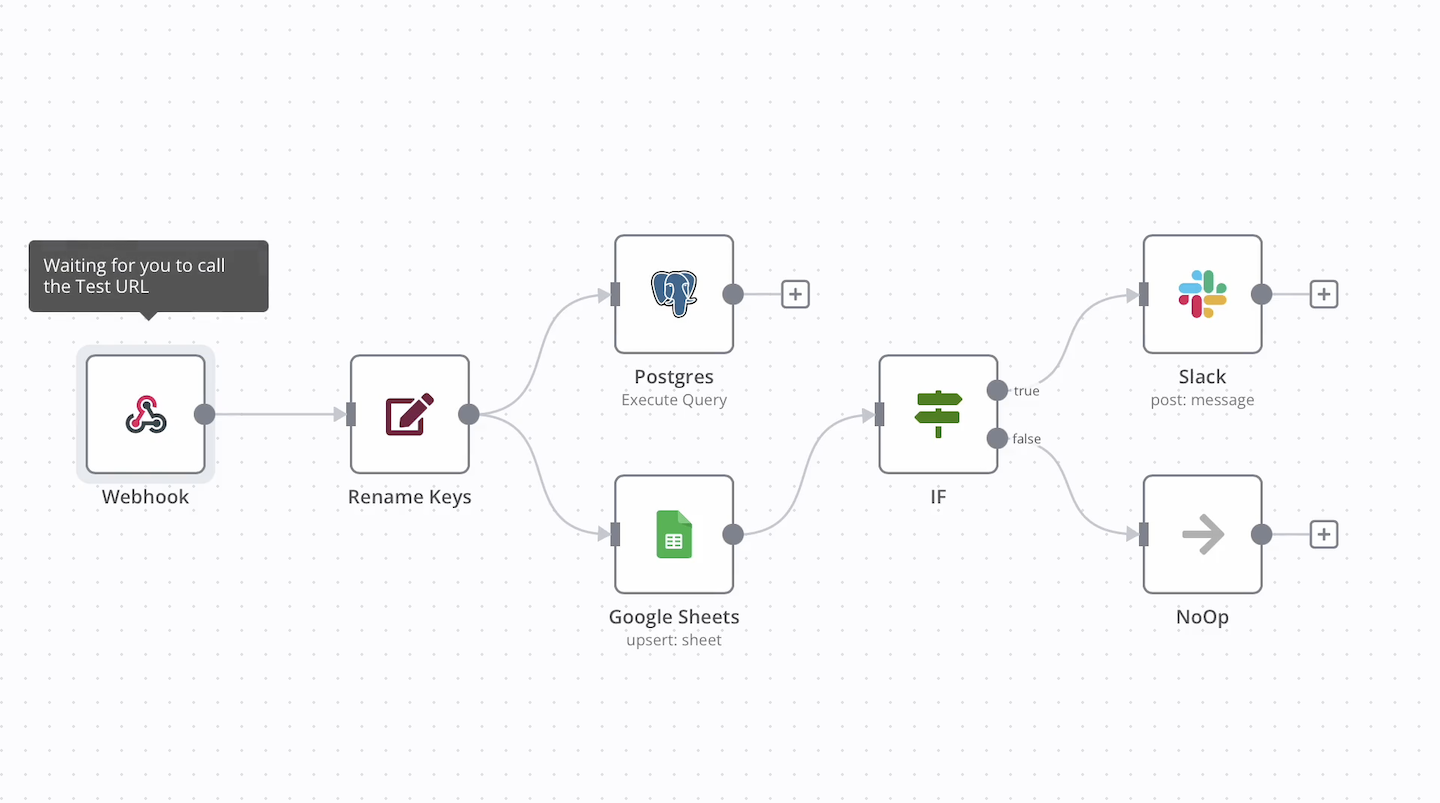
23. Well done! From now on, every time a user joins the selected audience, their data will be sent to n8n and trigger the action in the selected tool. Of course, only if the user has given the necessary consent.
Watch more tutorials on YouTube: