Slack is a tool that helps people communicate and work together. You can use it to chat, call and share information with others. Piwik PRO can feed data to Slack and help your team connect with your site visitors and ultimately boost sales. You can do things like assign a salesperson to someone who hasn’t decided to buy, give an account manager to customers who spend a lot or tell the marketing team about good reviews. There are endless ways to make use of this data!
In this article, we’ll show you how to activate data for Slack.
Before you start
Here are a few helpful things to know before you start:
- To learn more about incoming webhooks, see the Slack documentation.
- For more about creating rich message layouts in JSON, see the Slack documentation.
- Activation will only happen after it’s created and only for people who join the audience. It does not apply to people who were in the audience before activation.
Create a Slack activation
To create a Slack activation, follow these steps:
1. Log in to Slack and go to Slack API.
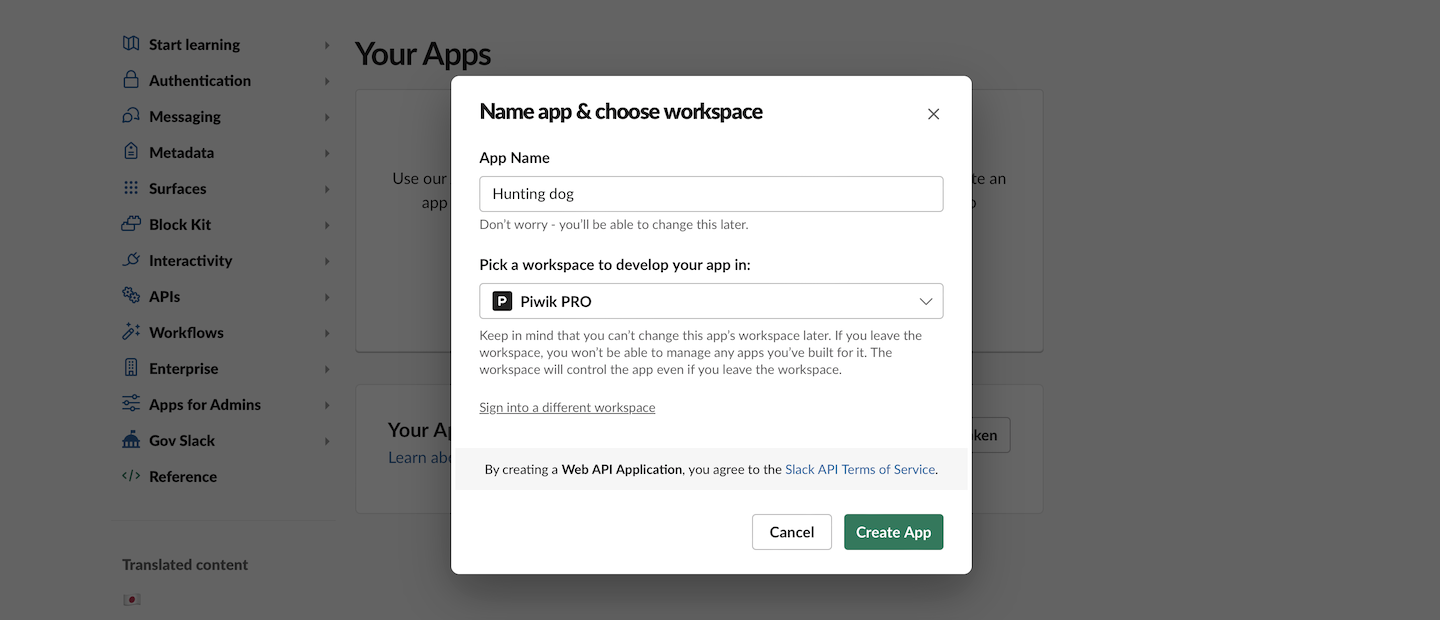
2. Create a Slack app (if you don’t have one already).
3. After creating, you’ll be redirected to the settings page for your new app. Pick Incoming Webhooks from the list on the left.
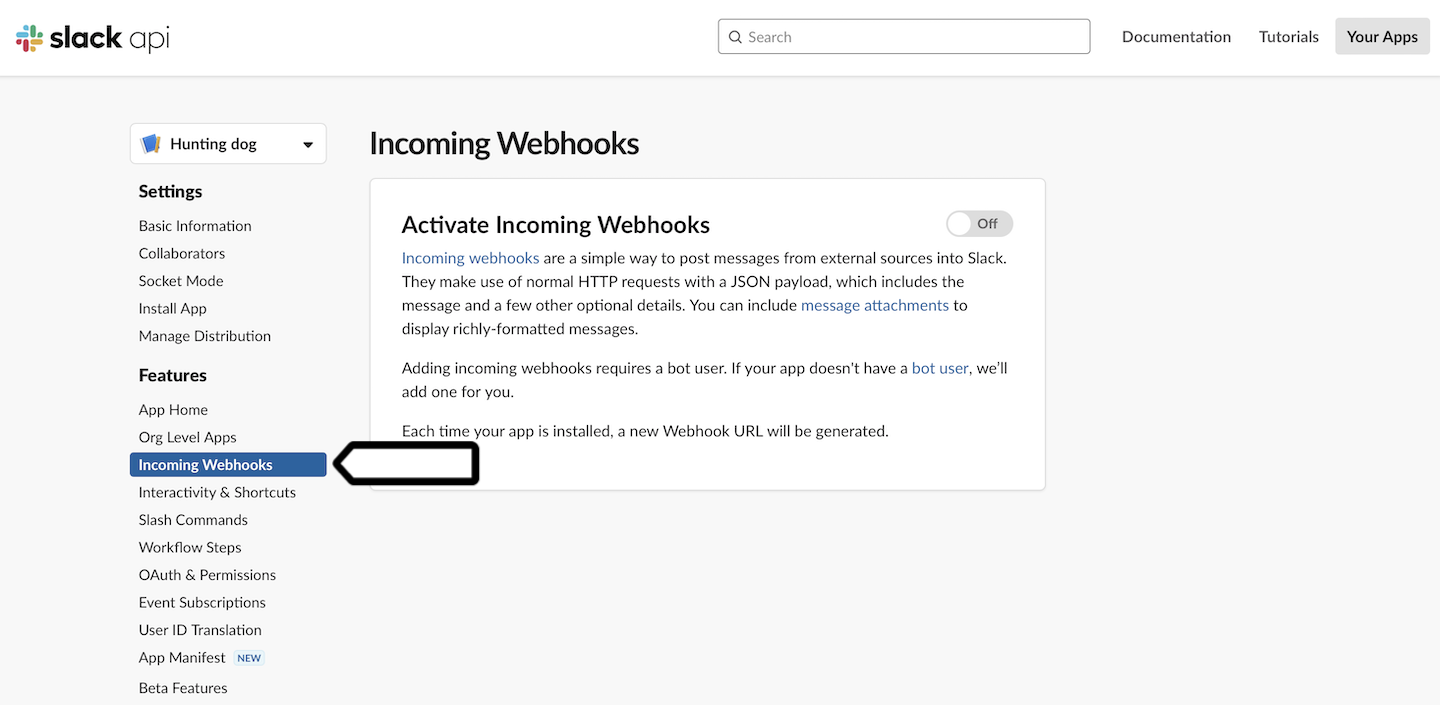
4. Turn on Activate Incoming Webhooks.
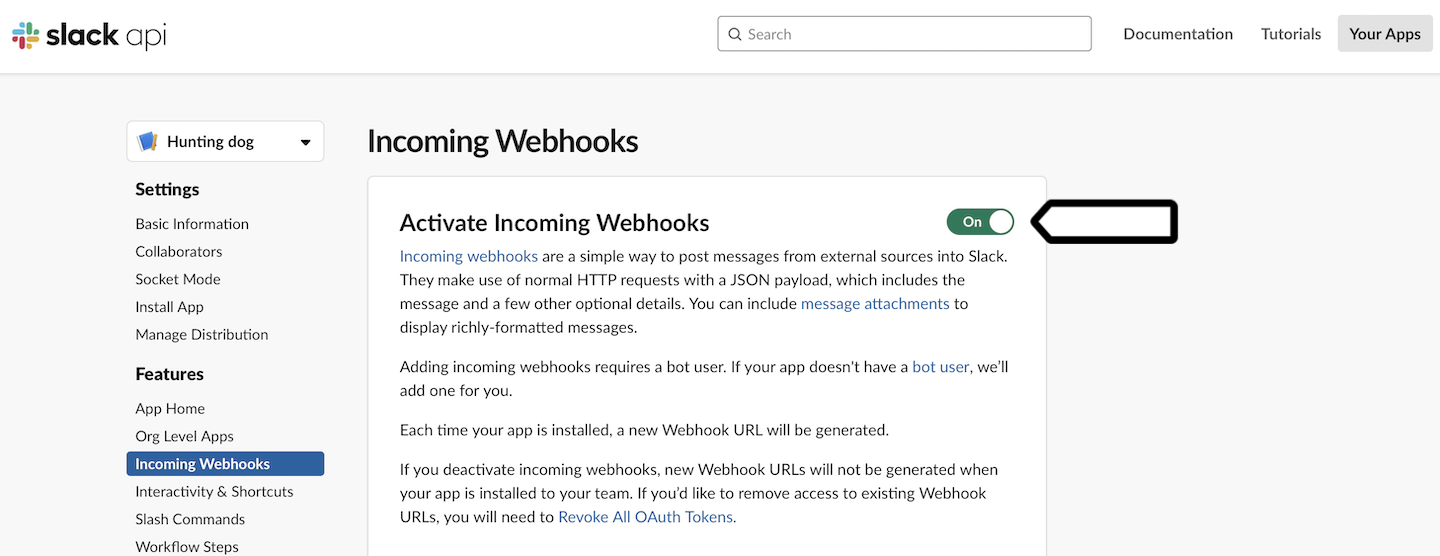
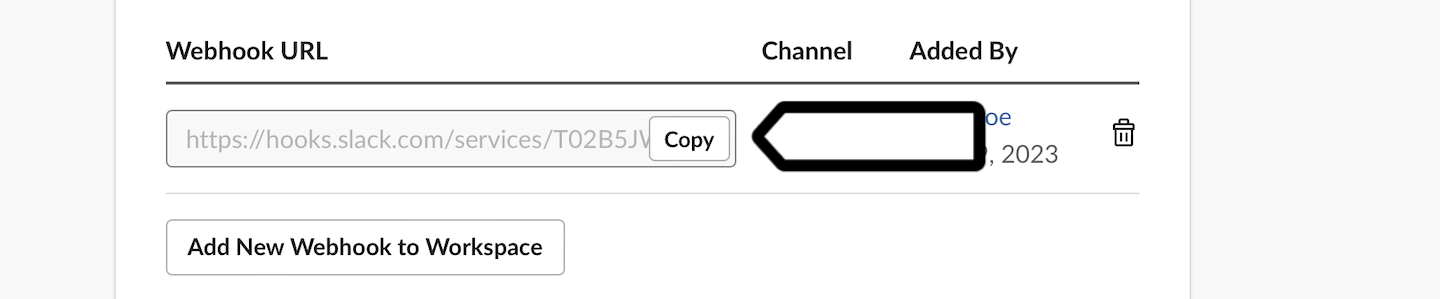
5. Click Add New Webhook to Workspace.
6. Pick the channel to which you want to post messages with data from Piwik PRO.
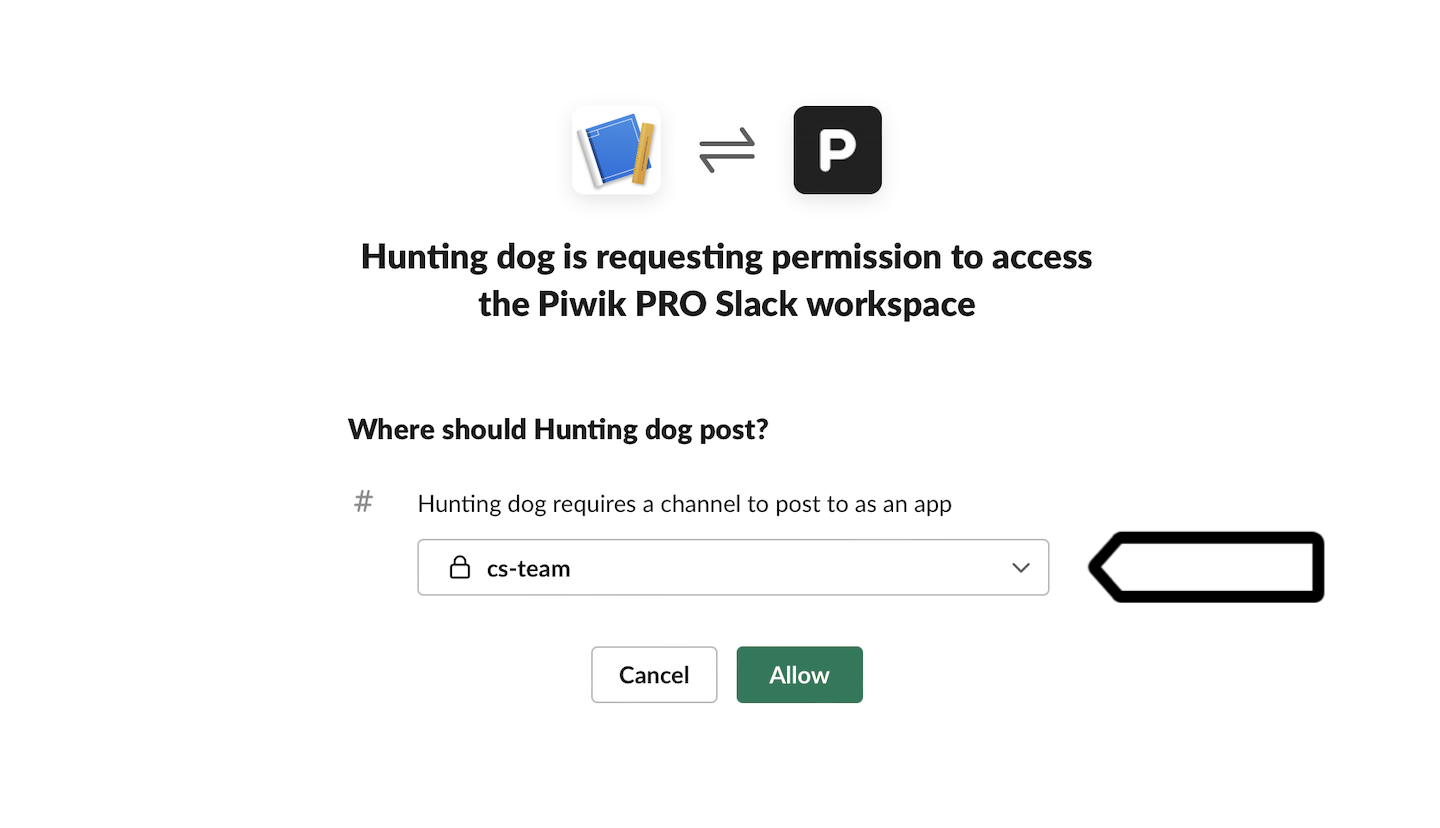
7. Copy the webhook URL. You’ll need it to set up the activation in Piwik PRO.
8. Log in to Piwik PRO.
9. Go to Menu > Data Activation, formerly Customer Data Platform, or CDP.
10. Navigate to Activations.
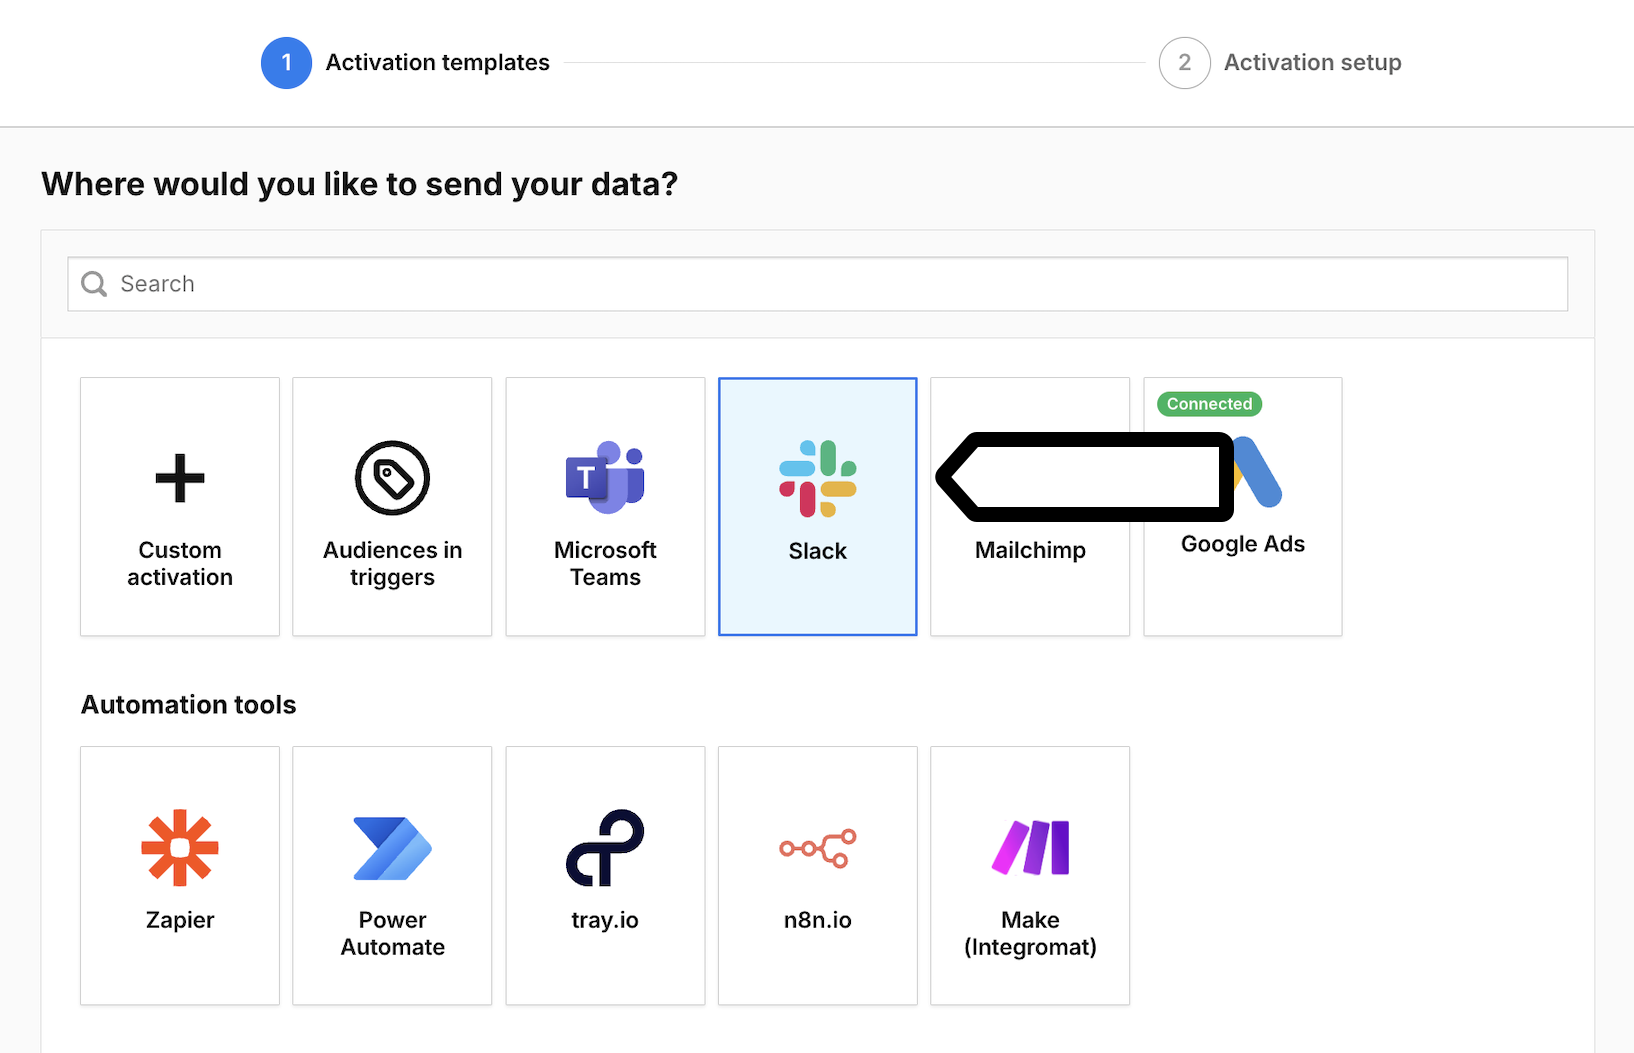
11. Click Add an activation.
12. Select Slack.
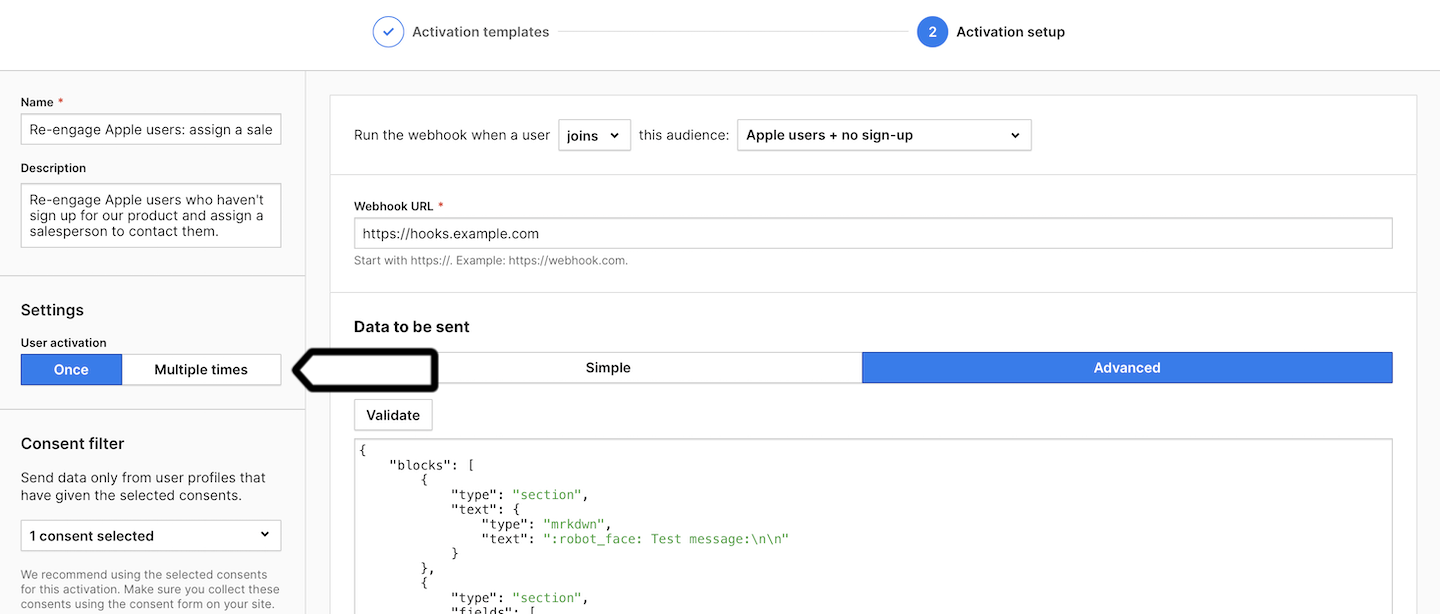
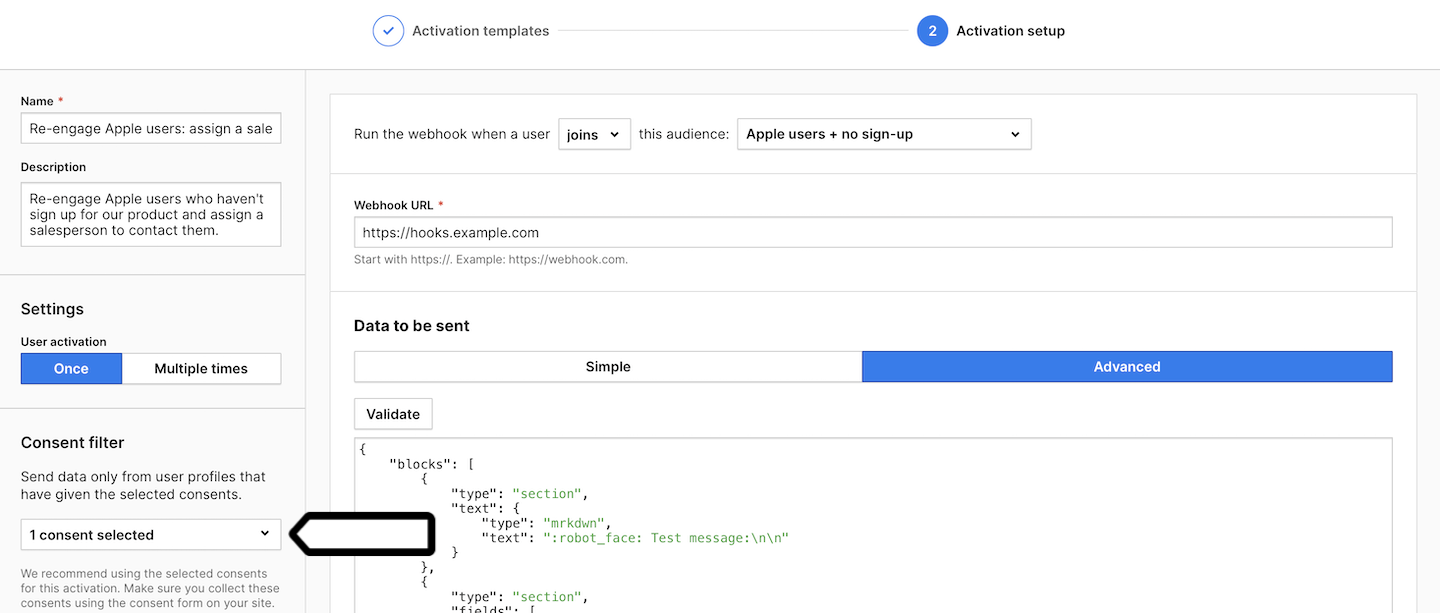
13. Name your activation and add a description.
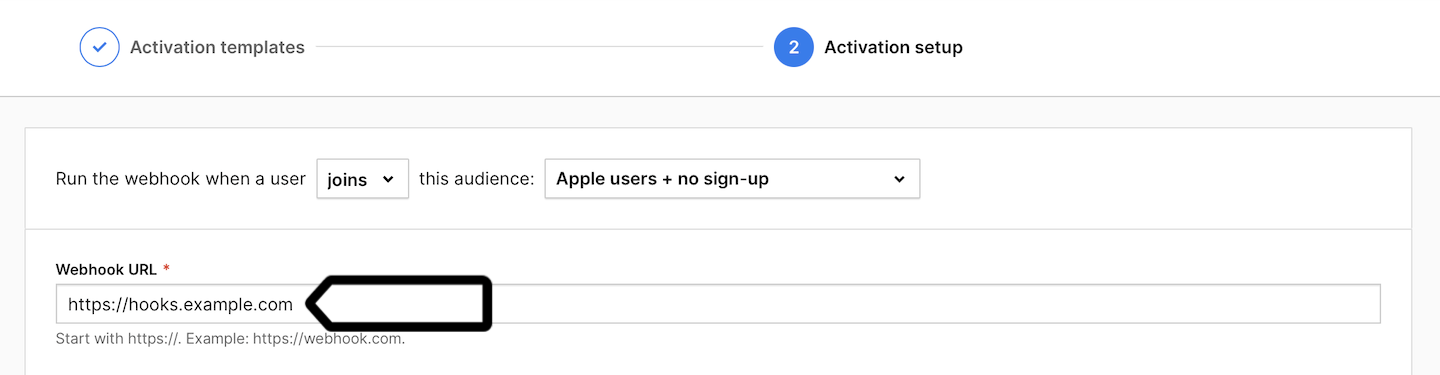
14. Pick the audience you want to use in this activation. Example: Run the webhook when a user joins this audience: Apple users + no sign-up.
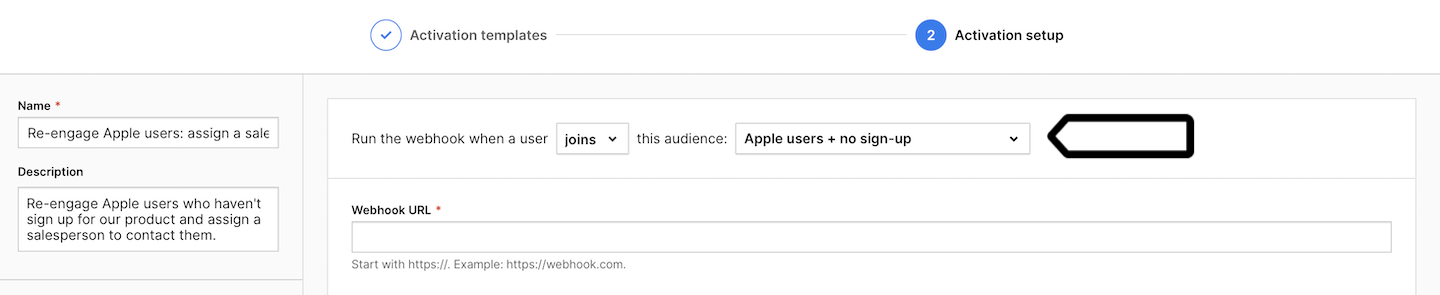
15. Enter the webhook URL from Slack.
16. Select the data you want to send when a user joins the selected audience (the webhook is triggered). We’ve included a sample message in the advanced section to help get you started.
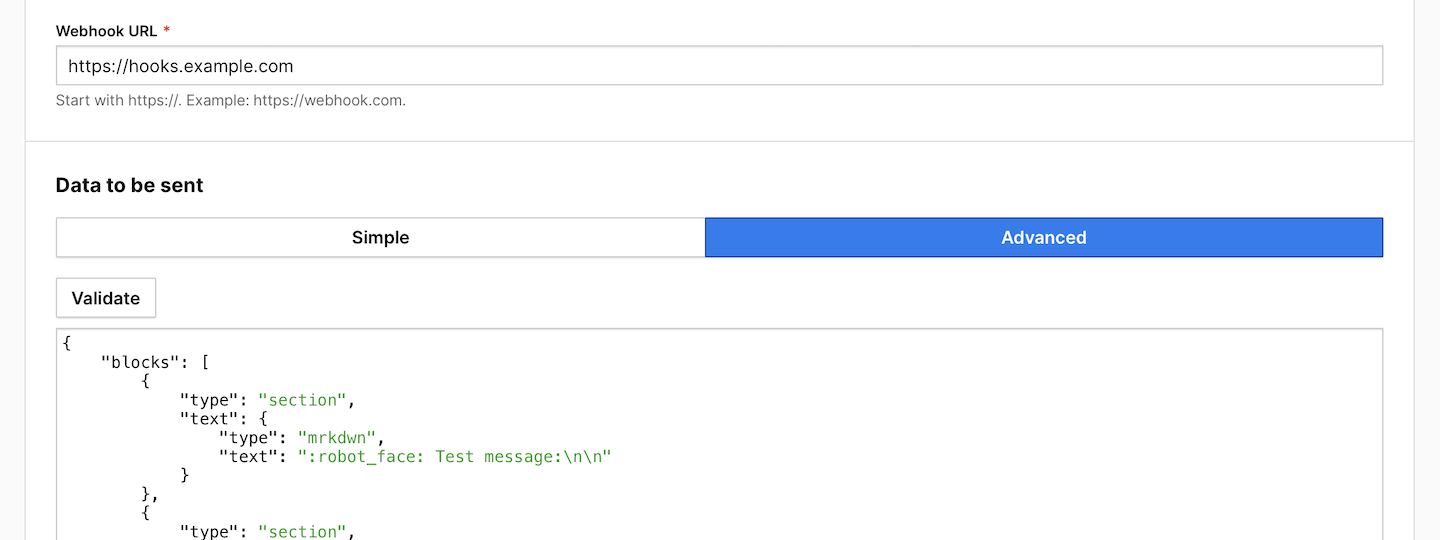
Note: Slack only listens to the “text” key, so you must always include it in your JSON. For more about creating rich message layouts in JSON, see the Slack documentation.
17. Click Send test data to make sure the webhook works. If it works, you’ll see a green success message.
18. Choose whether you want to activate the user:
- Once: A user is activated only the first time they join this audience.
- Multiple times: A user is activated each time they join this audience.
19. (Optional) Choose to activate users who have multiple user IDs.
20. In Consent filter, select the consents that should be given to use the user profile data.
Note: Make sure you collect these consents using the consent form on your site. Read more
21. Click Create.
22. Bravo! From now on, the selected user data will be sent to your channel on Slack every time a user joins the selected audience. Of course, only if they have given the necessary consent.
Watch more tutorials on YouTube: