In the previous chapter, we showed you how to pass blog author data using a CSS selector. But there’s another way to access data on your site or app – a data layer.
A data layer is a space where you can store information and use it for your tags, triggers and variables. Your developers can create the data layer by writing it into the page code. For example, information about a blog post in the data layer could look like this:
<script>
    window.dataLayer = window.dataLayer || [];
    window.dataLayer.push({
        'blogCategory': 'Home budget'
        'blogAuthor': 'John Doe'
    });
</script>
This command window.dataLayer = window.dataLayer || []; creates a data layer. This command window.dataLayer.push() adds information to the data layer using key-value pairs. In our example, the key-value pairs are:
'blogCategory': 'Home budget''blogAuthor': 'John Doe'
As you can see, the key is a category of things like a blog category or blog author. Each key can have different values. For example, a blog category key can have values like ‘Home budget’, ‘Savings’, ‘Investments’, and the like.
If you don’t want to ask developers for help with adding a data layer to the page source, you can also use a tag to push that information to the data layer and then access it. We’ll show you how it can be done in an example.
For developers: The default data layer name is dataLayer, but you can change it to a custom one. Read more
Add the data layer to a page
Let’s say we’d like to access data about a blog category on our site. We can’t access it with a CSS selector, so we need to hard-code a category to each page.
To add the data layer to a page, follow these steps:
1. Go to Menu > Tag Manager.
2. Navigate to Tags.
3. Click Add a tag.
4. Name the tag. Example: (data layer) Blog category.
5. Choose the following tag type: Custom code.
6. In Tag code, we’ll paste the following code:
<script>
    window.dataLayer = window.dataLayer || [];
    window.dataLayer.push({
        'event': 'blogEvent',
        'blogCategory': 'Home budget'
    });
</script>
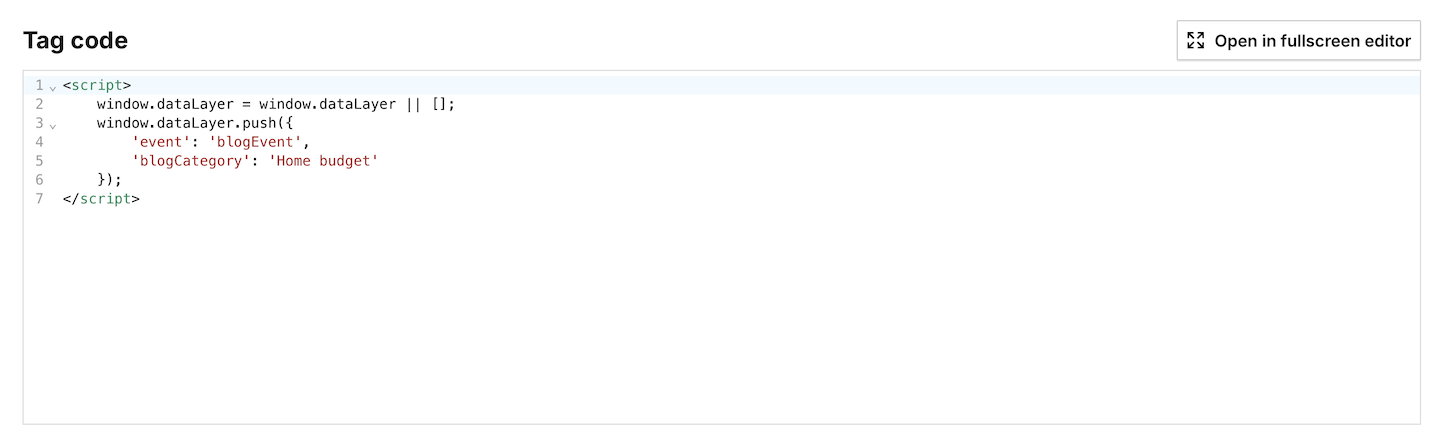
Note: Our key-value pair is: 'blogCategory': 'Home budget'. You can replace it with your data.
7. In Tag triggers, click Add a trigger.
8. We’ll create a page view trigger that will run only on a page with a 'Home budget' category.
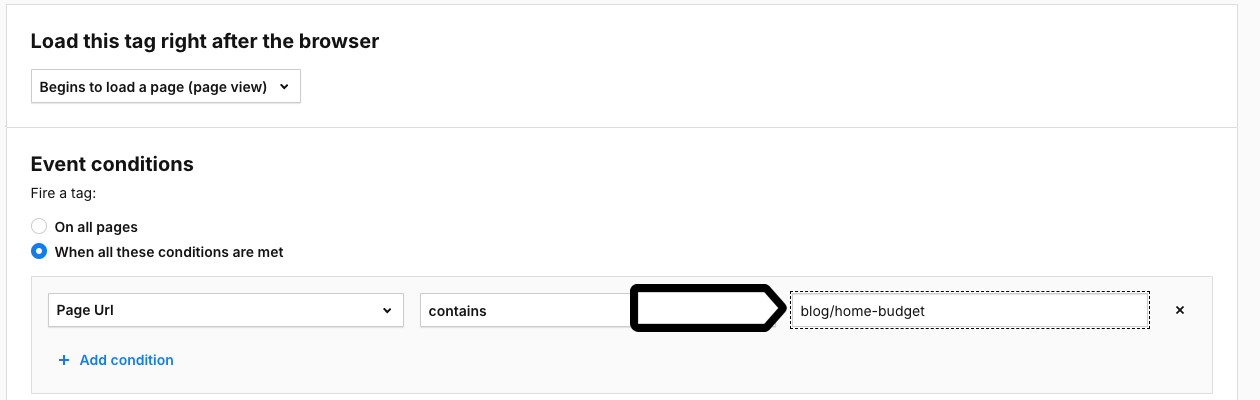
Note: If we wanted to add information about the 'Home budget' category to other blog posts, we would add more triggers with the correct page URLs. The tag fires when any of the attached triggers is present.
9. Click Save for the tag.
10. Go to Tag Manager.
11. Choose the site/app you want to work with. Use the site/app picker in the upper right corner.
12. Go to Debug mode.

13. In Your site address, type in or select your site or app address.
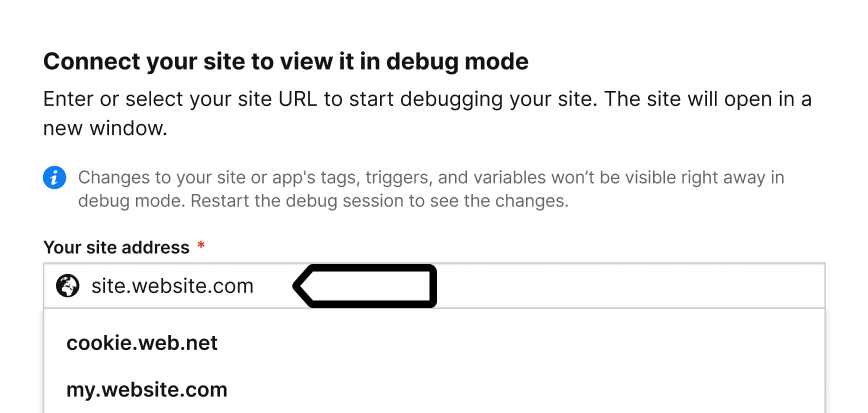
14. Click Connect.
15. Once your site is connected, it will open in a new tab.
Note: If you have any trouble connecting, check that:
- Your browser allows popups. Some browsers, such as Safari, block them by default.
- The necessary code is installed on your site.
- You entered the correct site address.
- Ad blockers are turned off.
16. (Optional) Turn on Prevent page reload. This will stop the page from refreshing when you click elements that would normally trigger a reload.
Tip: This option is useful for testing form submissions and link clicks.
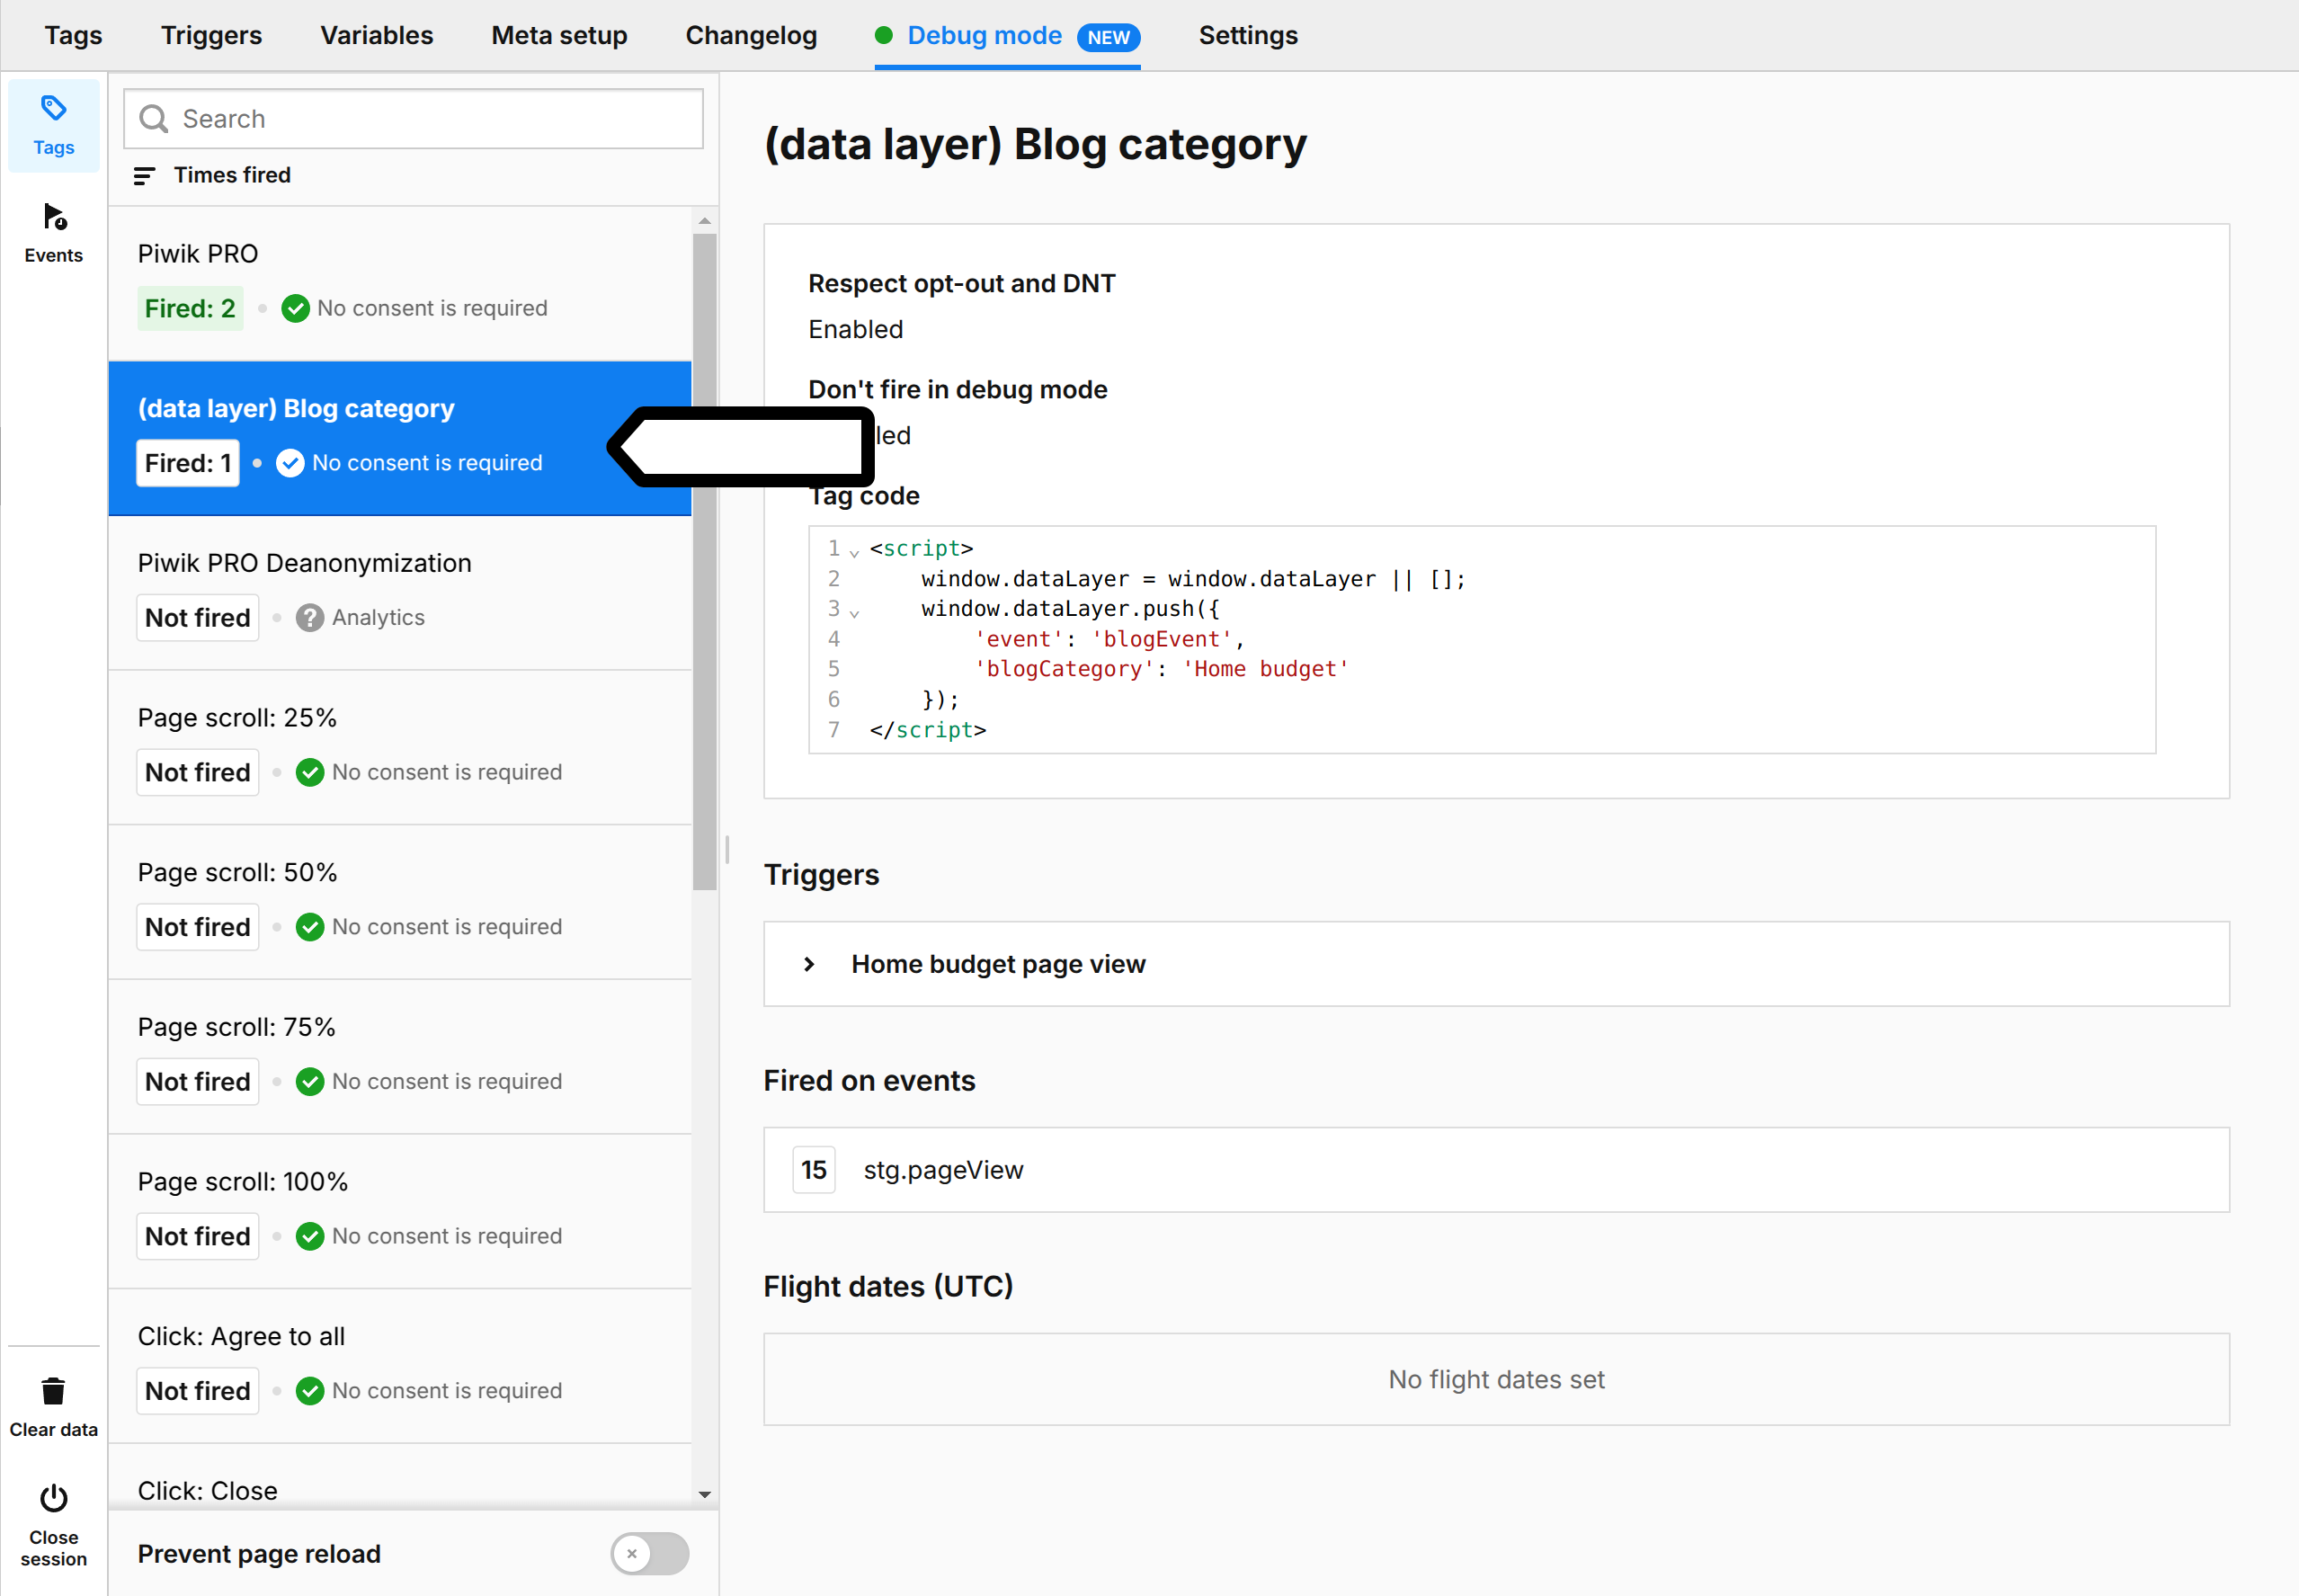
17. To check if the tag fired for this page view, return to Tag Manager > Debug mode.
18. In Tags, find the (data layer) Blog category tag.
19. When you’re happy with your tracking setup, return to Tag Manager and click Publish.

Okay, we’ve set the data layer for our blog page. Now we need to pass the information that it holds to Analytics. For that, we’ll use a variable and custom dimension. Read on.
Add a data layer variable
When you want to pull some data from your data layer, you can use a dedicated data layer variable.
To add a data layer variable, follow these steps:
1. Go to Menu > Tag Manager.
2. Navigate to Variables.
3. Click Add a variable.
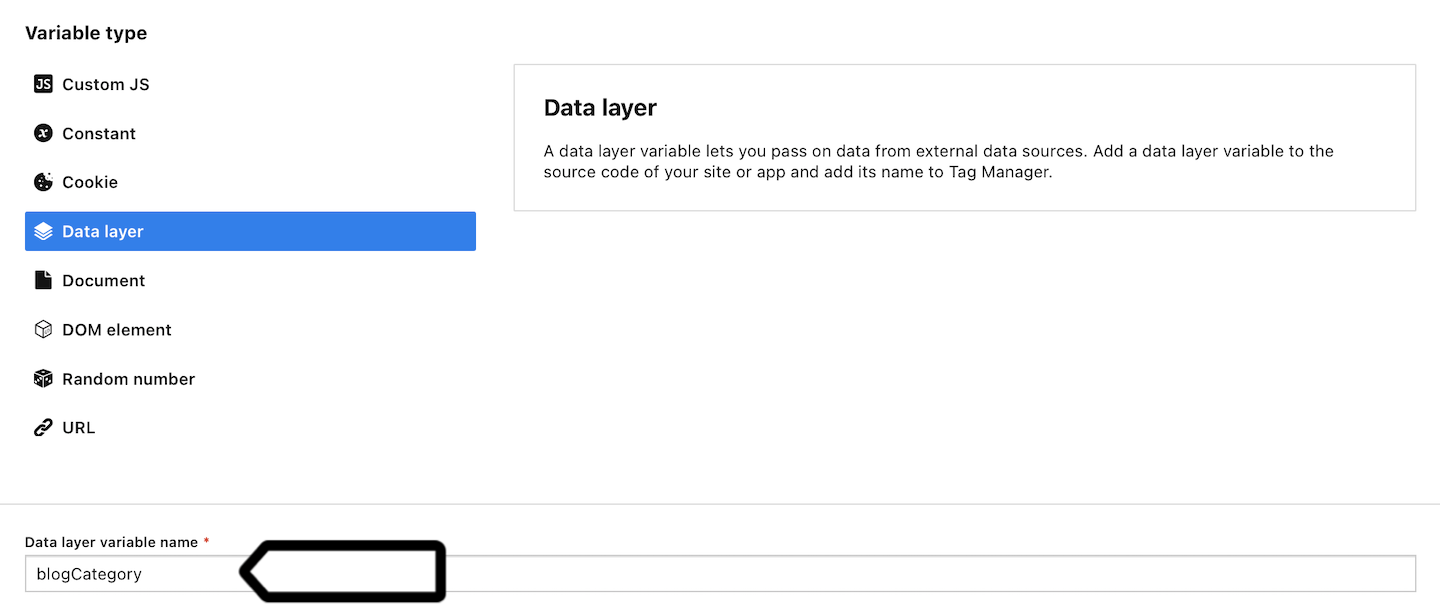
4. Name the variable. Example: Blog category.
5. Select the following variable type: Data layer.
6. In Data layer variable name, type the key exactly as it is written in the code. In our example, it’s blogCategory.
7. Click Save.
8. Go to Debug mode.
9. Choose the site/app you want to work with. Use the site/app picker in the upper right corner.
10. In Your site address, type in or select your site or app address.
11. Click Connect.
12. Once your site is connected, it will open in a new tab.
Note: If you have any trouble connecting, check that:
- Your browser allows popups. Some browsers, such as Safari, block them by default.
- The necessary code is installed on your site.
- You entered the correct site address.
- Ad blockers are turned off.
13. (Optional) Turn on Prevent page reload. This will stop the page from refreshing when you click elements that would normally trigger a reload.
Tip: This option is useful for testing form submissions and link clicks.
14. We’ll go to the page with the 'Home budget' blog category.
15. In Debug mode, navigate to Events.

16. Click stg.PageView on the event list.
17. Navigate to Variables.

18. Look for your variable on the list and see if the value is assigned correctly.

19. If everything looks okay, return to Tag Manager and click Publish.
20. Done! Your variable now holds information about the blog category. As the last step, we need to set up a custom dimension to pass that data to Analytics.
Add a custom dimension
To add and set up a custom dimension, follow these steps:
1. Go to Menu > Analytics.
2. Navigate to Settings.
3. On the left, click Custom dimensions.
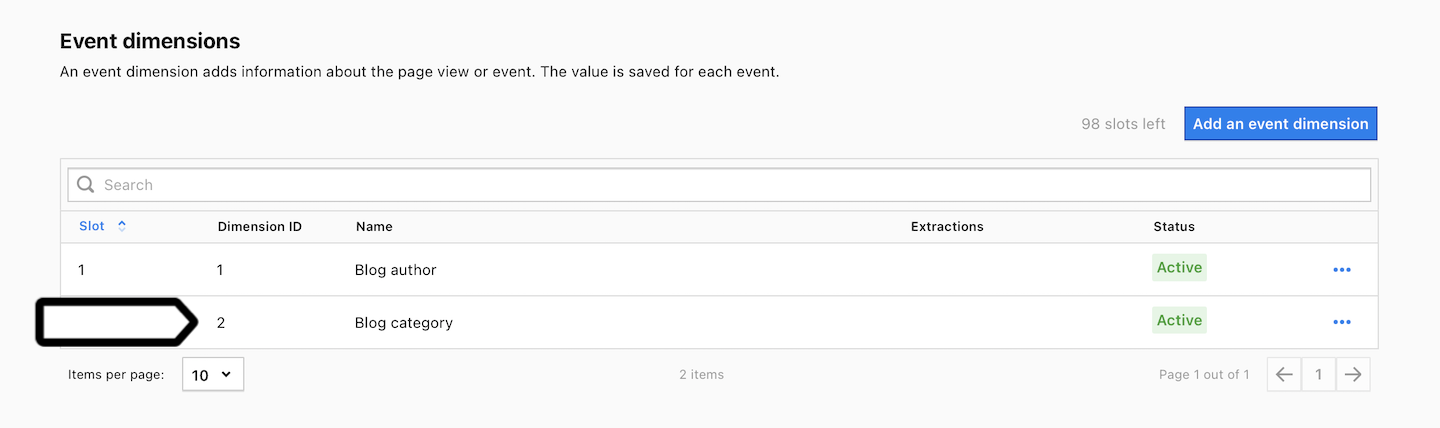
4. In Event dimensions, click Add an event dimension.

5. Name the dimension.
6. Click Save.
7. After creating the custom dimension, note Dimension ID.
8. Go to Menu > Tag Manager.
9. Navigate to Tags.
10. Click Add a tag.
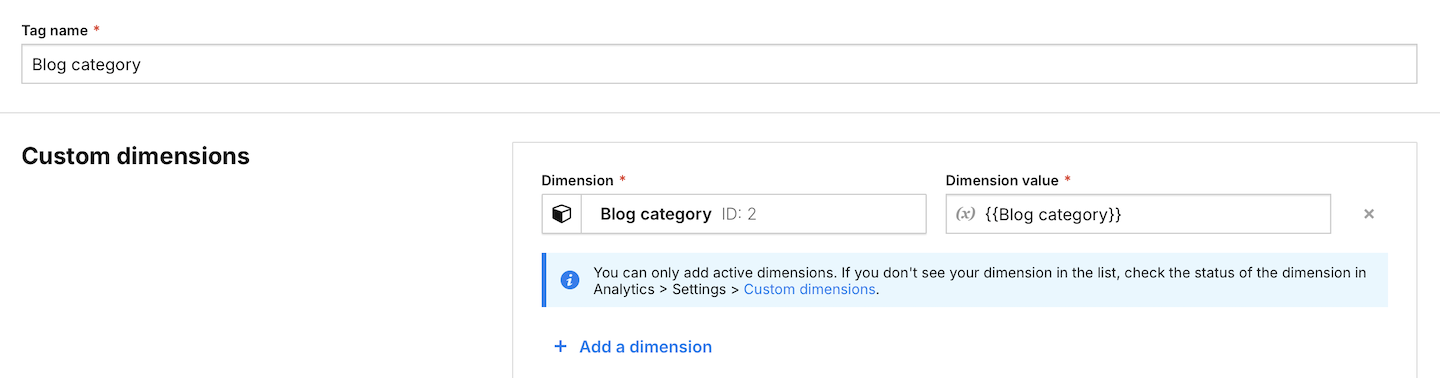
11. Name your tag and select the following type: Custom dimension.
12. Click Next.
13. Add the custom dimension set in Analytics> Settings> Custom dimensions and assign a value to it.
14. In Advanced tag settings, choose Consent type. Set it up if you use a consent form on your site. This tag will only fire for visitors who accept the selected consent type.
15. Respect opt-out and DNT is turned off by default. Turn it on, if you want to respect visitors who’ve turned on the Do-Not-Track feature in their browsers or who’ve opted out of tracking using our opt-out form.
16. In Flight dates, set the date and time when the tag will fire.
17. In Tag triggers, click Add a trigger to set up a trigger for your tag.
18. Choose the following type: Data layer event and click Next.
19. Name the trigger and enter the event name that you set in your data layer.

20. Click Add.
21. You can quickly check if data is collected correctly by going to Menu > Analytics > Settings > Tracker debugger.

Note: Data in the tracker debugger appears instantly. Data in reports appears in about 30 minutes.
22. After data is collected, you’ll see it under Menu > Analytics > Reports > Custom dimensions.
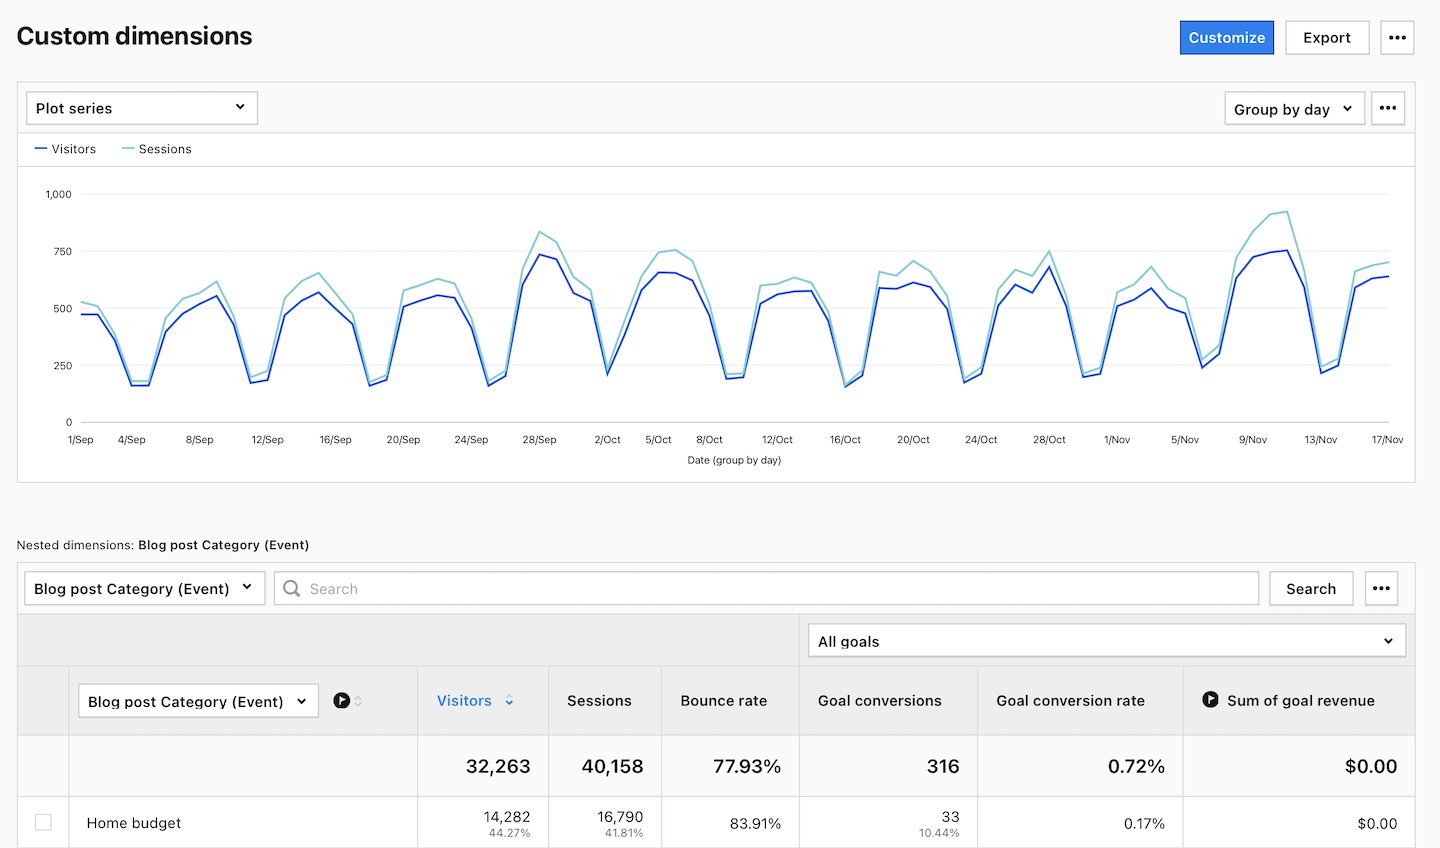
23. You can also see your custom dimension under Analytics > Reports > Session log.

Tip: You can also use your custom dimension in a custom report.
Note: In this chapter, we showed you how to use a data layer with key-value pairs. But sometimes you might want to use a data layer to add a new event. Then you can use the following functions:
dataLayer.push({event: 'event_name'});dataLayer.push({event: 'event_name', event_key: 'event_value'});
The added events can be used in a data layer event trigger and tags.