Now that you know why and how you are collecting data, it’s time to turn on Piwik PRO, install a container with the tracking code and set up a few things. Let’s get started.
Install a container (with a tracking code)
Piwik PRO uses a container to let you manage tags and consents, and run a tracking code (a JavaScript code) on your web pages. The tracking code collects data about people who visit your site or app. Every time a visitor views a page, the tracking code grabs information about that visitor and sends it to Piwik PRO. Then Piwik PRO organizes this data into reports.
To install a container, follow these steps:
1. Go to Menu > Administration.
2. Navigate to Sites & apps.
3. Click Add a site or app.
4. Type the site or app name and address.
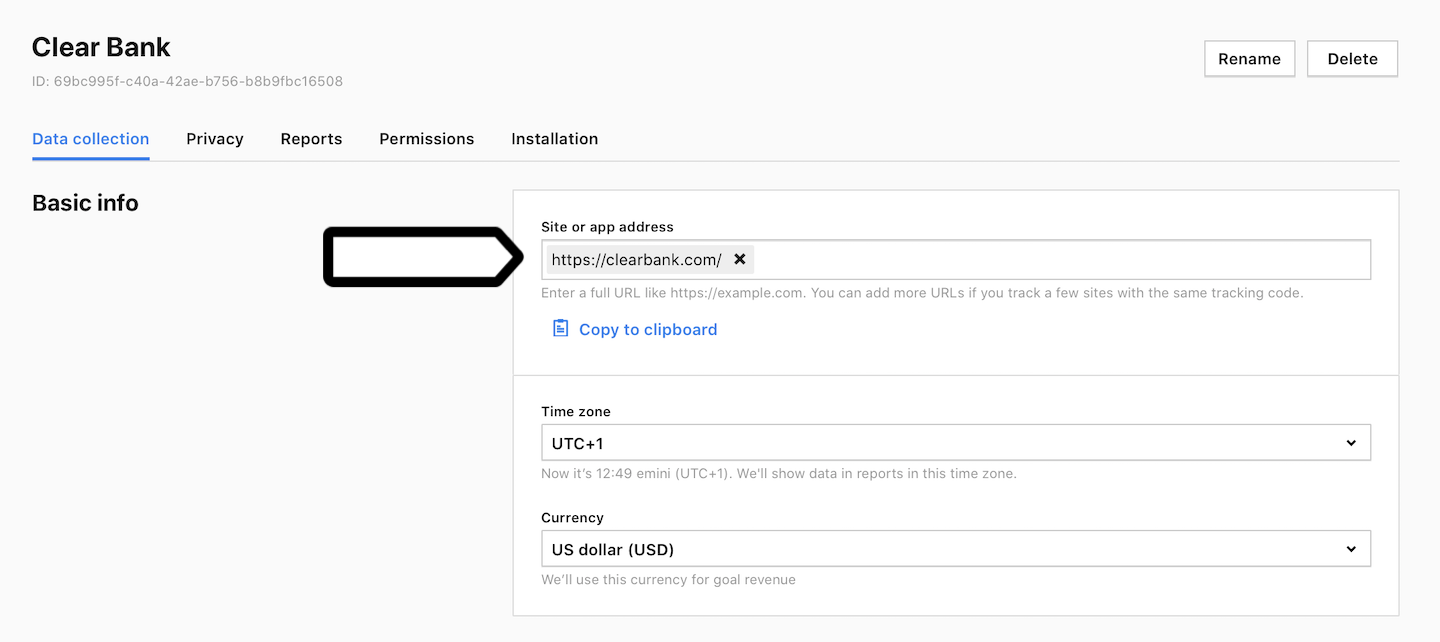
Note: If you want to track a few domains with the same tracking code, add their addresses.
5. Set the time zone and currency.
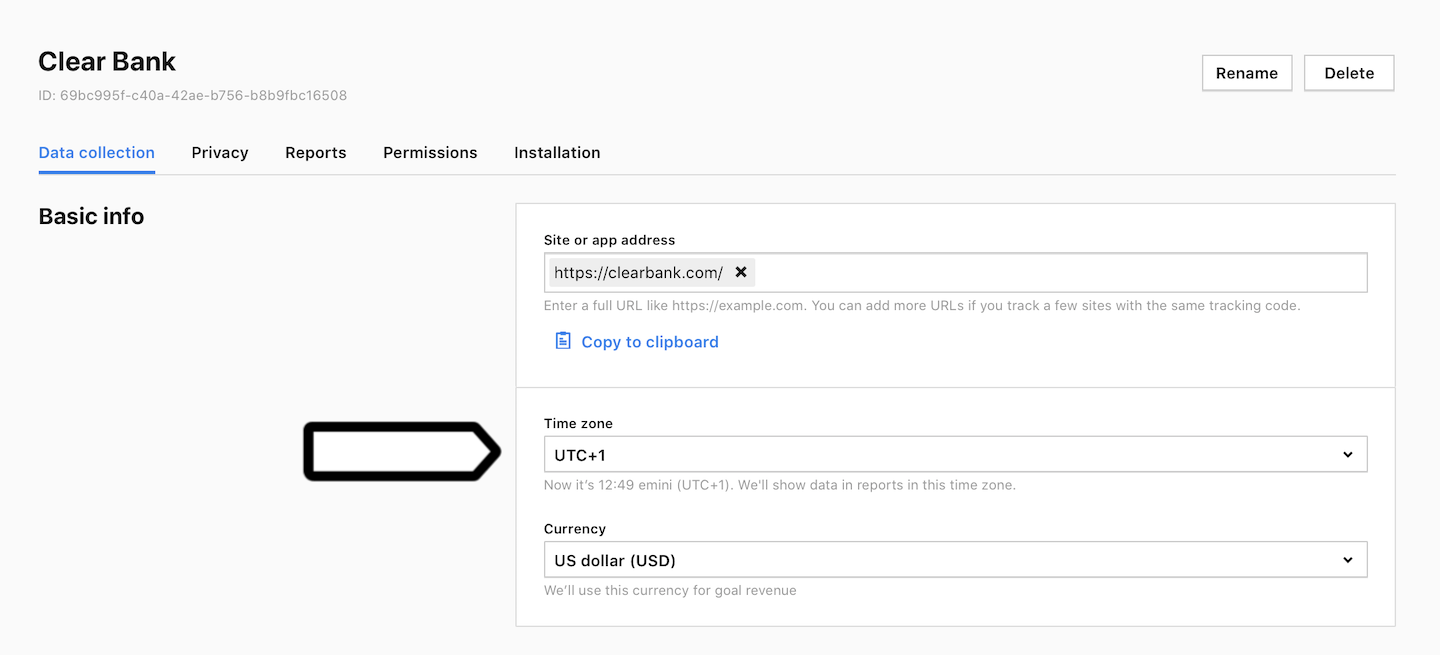
Note: We’ll show data in reports in this time zone. We’ll use this currency for goal revenue.
6. Navigate to Installation.
7. In Sites, click Install manually.
8. In Basic container (async), click Copy to clipboard.
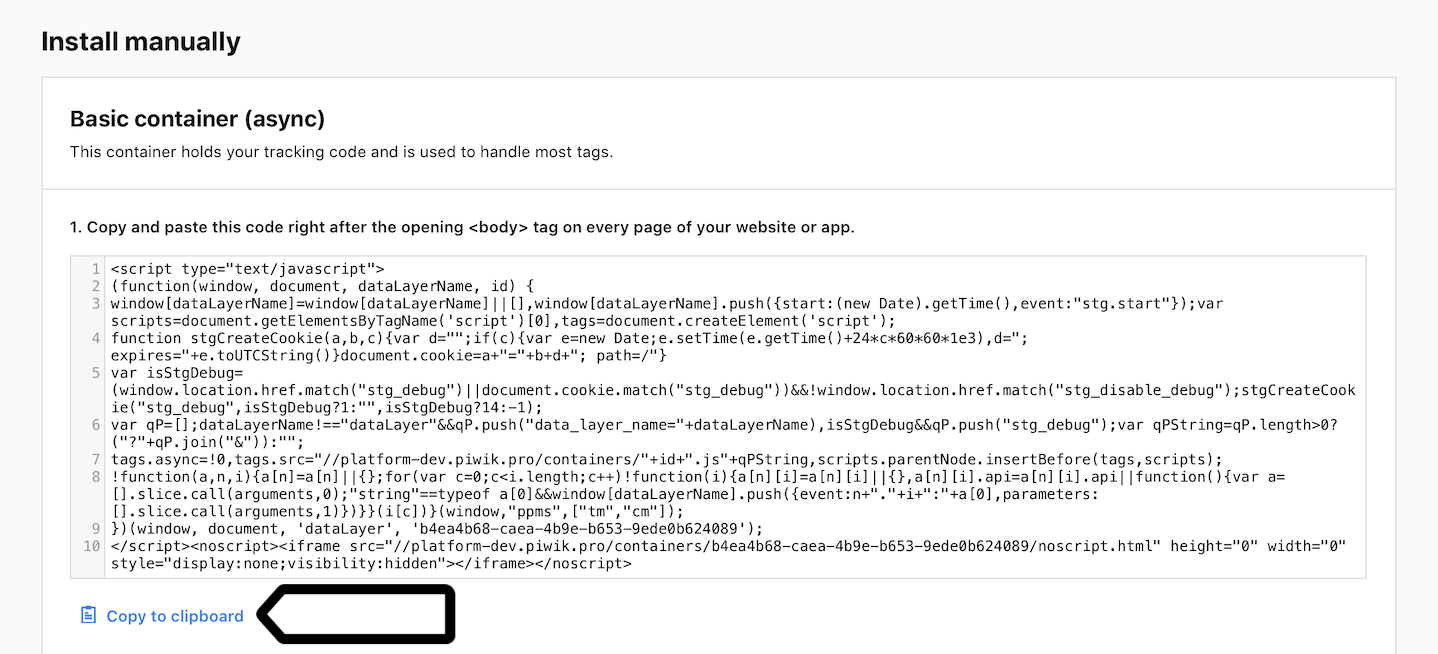
Note: This container holds your tracking code and is used to handle most tags. Always install this container.
9. Paste the code right after the opening <body> tag on every page of your website or app.
10. Data will appear in reports in about an hour. Data in the tracker debugger will appear instantly.
Tip: You can also check manually to see if your tracking works. Read more
11. We’ll start showing a consent form on your site after you’ve installed the container. Add your privacy policy address to the form or turn off the consent form.
Tip: You can use other methods to install a container:
Look into settings
After installing a container, you can look into site or app settings. This is where you can set up what data you want to collect and how to display it in reports. Let’s see what we’ll find there.
To change site or app settings, follow these steps:
1. Go to Menu > Administration.
2. Navigate to Sites & apps.
3. On the left, pick the site or app you want to set up.
4. Navigate to Data collection.
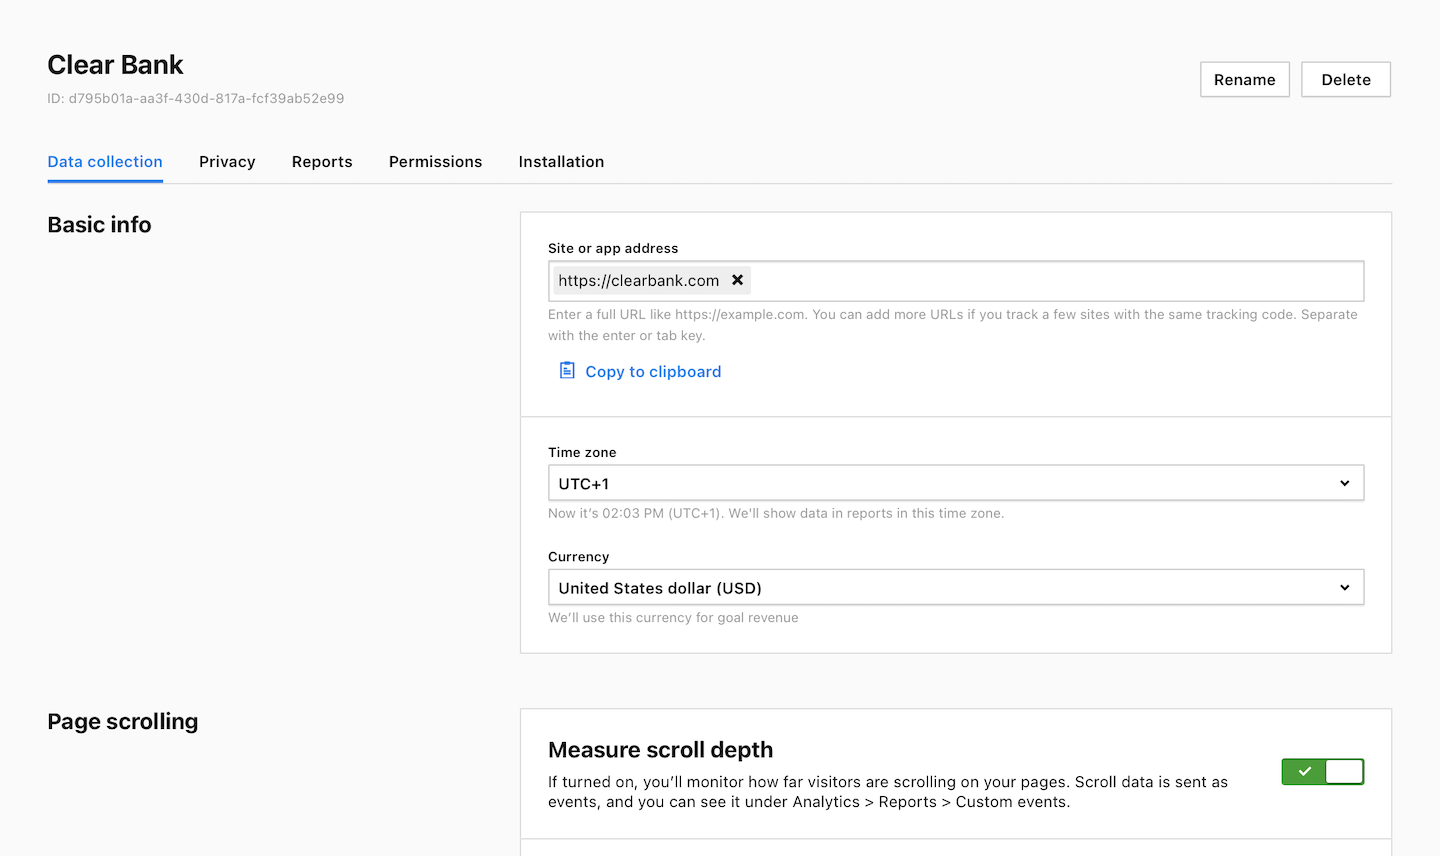
In Data collection, you can change the following settings:
Basic info
- Site or app address: Your site or app address. If you’re collecting data from a few domains with the same tracking code, add all addresses here.
- Time zone: We’ll show data in reports in this time zone.
- Currency: We’ll use this currency for goal revenue.
Page scrolling
Available from 16.17.0Measure scroll depth: If turned on, you’ll monitor how far visitors are scrolling on your pages. Scroll data is sent as custom events. For reporting, you’ll need to set up a custom report. Note: If you’re tracking page scrolls with your own custom events, we recommend removing them, otherwise scroll events will be tracked twice.
Internal search engine
- Keywords from your internal search engine: To collect search data, add the parameters used by your search engine. You’ll see keywords and categories under Analytics > Reports > Internal search. Note: Some internal search engines don’t use parameters. In such cases, we can’t collect any search data.
- Remove keyword parameters from page URLs: We’ll first collect keyword data from your internal search engine and then remove the parameters from links.
Page URLs
- Remove parameters from page URLs: Removing parameters makes the URLs in your reports cleaner. However, if the parameters carry essential details — like keywords, referrers or campaign names — it’s better to leave them in. Note: The added parameters are case-sensitive.
- Keep anchors in page URLs: Keeping full URLs along with their anchors will help you analyze how visitors use anchor links on your site. Tip: Anchors help users get to a specific point on the page without scrolling. Example: #details is an anchor in this link example.com/pricing#details
Campaigns
- Campaign parameters: Collect campaign data based on the listed parameters.
- Start a new session when the campaign changes: When the campaign changes during a visitor’s session, we’ll start a new session. This way, you’ll collect data on all campaigns — both initial and new ones.
Filters
- Don’t collect data from these IP addresses: You can stop collecting data from the added IP addresses. Use wildcards like 1.2.3.* or 1.2.*.* to deny traffic from a group of IP addresses
- Don’t collect data from known crawlers: If turned on, we won’t collect data from known crawlers. We don’t collect any data from bots by default.
- Add crawlers: We’ll block these crawlers along with known crawlers. Note: Enter a user agent name or a full user agent string to define crawlers. Separate with the enter or tab key. The crawler definition supports partial strings, but not wildcards or regular expressions.
- Collect data only from known sites: You’ll only collect data from sites whose web addresses you’ve added in the ‘Site or app address’ section. This can protect your data against spam from unknown web addresses.
SPA
Available from 16.19.0Track page views in a single-page application: If turned on, we’ll capture every change in the browser’s history as a page view. Note: If you notice that a page view is recorded twice on a page load, turn on this setting: Tag Manager > Piwik PRO tag (tracking code) > Other options > Track page views manually. Tip: For more advanced setups, we recommend using our tracking libraries.
Session limits
Available from 17.6.0Max session duration: Max value: 12h 0m 0s.Available from 17.6.0Max events in a session: Min value: 1. Max value: 65535.Available from 17.6.0If session limits are exceeded: (1) Close the session and exlude the next matching events or (2) Create a new session.
Note: The session that goes over the limit is closed. The next matching events start a new session or are excluded and don’t reach the reporting engine.
Other options
- Delay loading the next page: When a visitor clicks a button or submits a form, we’ll introduce a brief delay. This ensures that all tags have enough time to activate on the following page.
- Start a new session when the referrer changes: When the referrer changes during a visitor’s session, we’ll start a new session. This way, you’ll collect data on all referrers — both initial and changed ones.
5. Navigate to Privacy.
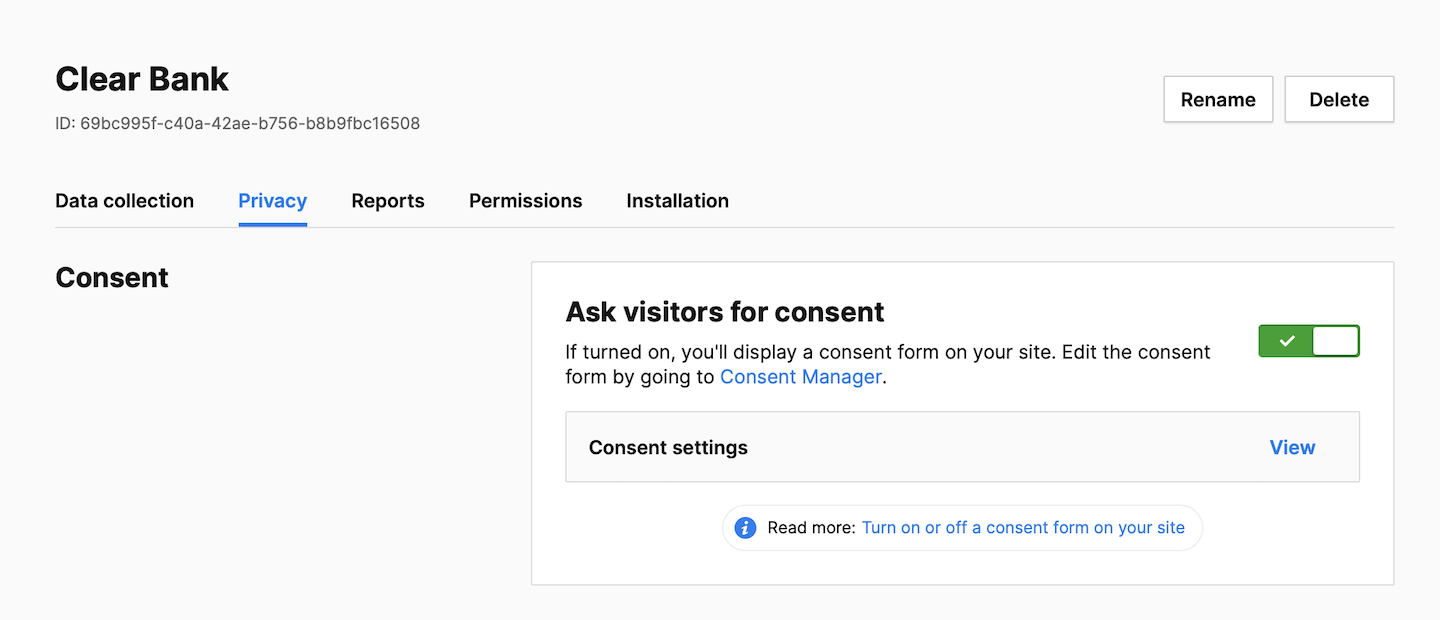
In Privacy, you can change the following settings:
Consent
- Ask visitors for consent: If turned on, you’ll display a consent form on your site.
- Collect anonymous data from non-consenting visitors: You can collect anonymous data from visitors who haven’t given their consent. Their IP addresses will be completely masked. You will not recognize new and returning visitors. And you will only know their country. It’s up to you to decide whether to use a session hash and visitor cookies for these visitors or not.
- Use a session hash: If you use a session hash, it’ll be created for each session based on the visitor’s IP address, operating system, browser name, browser version, browser language, enabled browser plugins and site/app ID. This hash will help us recognize events that belong to the same session. Note: This setting only applies to non-consenting visitors.
- Use visitor cookies: If you use visitor cookies (_pk_id and _pk_ses), we’ll use them to recognize events that belong to the same session. They will expire 30 minutes after the last event. Note: This setting only applies to non-consenting visitors.
- Consent is valid for: The cookie storing consent preferences will expire after this time, and your form will ask a visitor for consent again.
- Share consent between subdomains: You can add subdomains to share consent between them. Enter a full URL or use a wildcard like *.example.com.
- Use a custom consent form: This consent form overrides those from Consent Manager. You can add it via the JavaScript API. Read more
Compliances
- Use a session hash: If you use a session hash, it’ll be created for each session based on the visitor’s IP address, operating system, browser name, browser version, browser language, enabled browser plugins and site/app ID. This hash will help us recognize events that belong to the same session. Note: This setting applies to consenting visitors, or to all visitors if you don’t ask for consent.
- Use visitor cookies: If you use visitor cookies (_pk_id and _pk_ses), we’ll use them to recognize new and returning visitors, as well as recognize events that belong to the same session. Note: This setting applies to consenting visitors, or to all visitors if you don’t ask for consent.
Note: If you turn off both visitor cookies and session hashes, each event will be treated as a new session and you won’t recognize visitors.
- Comply with CNIL guidelines: If turned on, we’ll hide the session log report (Analytics > Reports > Session log) and the tracker debugger (Analytics > Settings > Tracker debugger). We’ll also show a warning message when a user tries to create API keys. The session log report will also be hidden on meta sites/apps that contain a site with this setting turned on. Read more
Available from 16.11.0Don’t collect visitor’s device data: If turned on, you won’t read screen resolution and browser plugins from a visitor’s device without consent. Accessing visitor’s device is not compliant with the German Data Protection Act (TTDSG) and similar privacy laws.
IP addresses
Available from 17.6.0Collect visitors’ IP addresses: When you collect visitors’ IP addresses, you can know their location, like their country or city. But if you decide to turn off this feature, you won’t have access to such data. Also, a session hash that relies on IP addresses will be less accurate.- Mask IP addresses: If turned on, we’ll remove the selected number of bytes from the address before saving it to the database. Nobody will ever see the full address. IP masking helps keep visitor data private.
- Collect from unmasked IP addresses (All location data, City, Region or Continent): We’ll take this data from unmasked IP addresses before we mask them. You’ll always see masked IP addresses in reports.
6. Navigate to Reports.
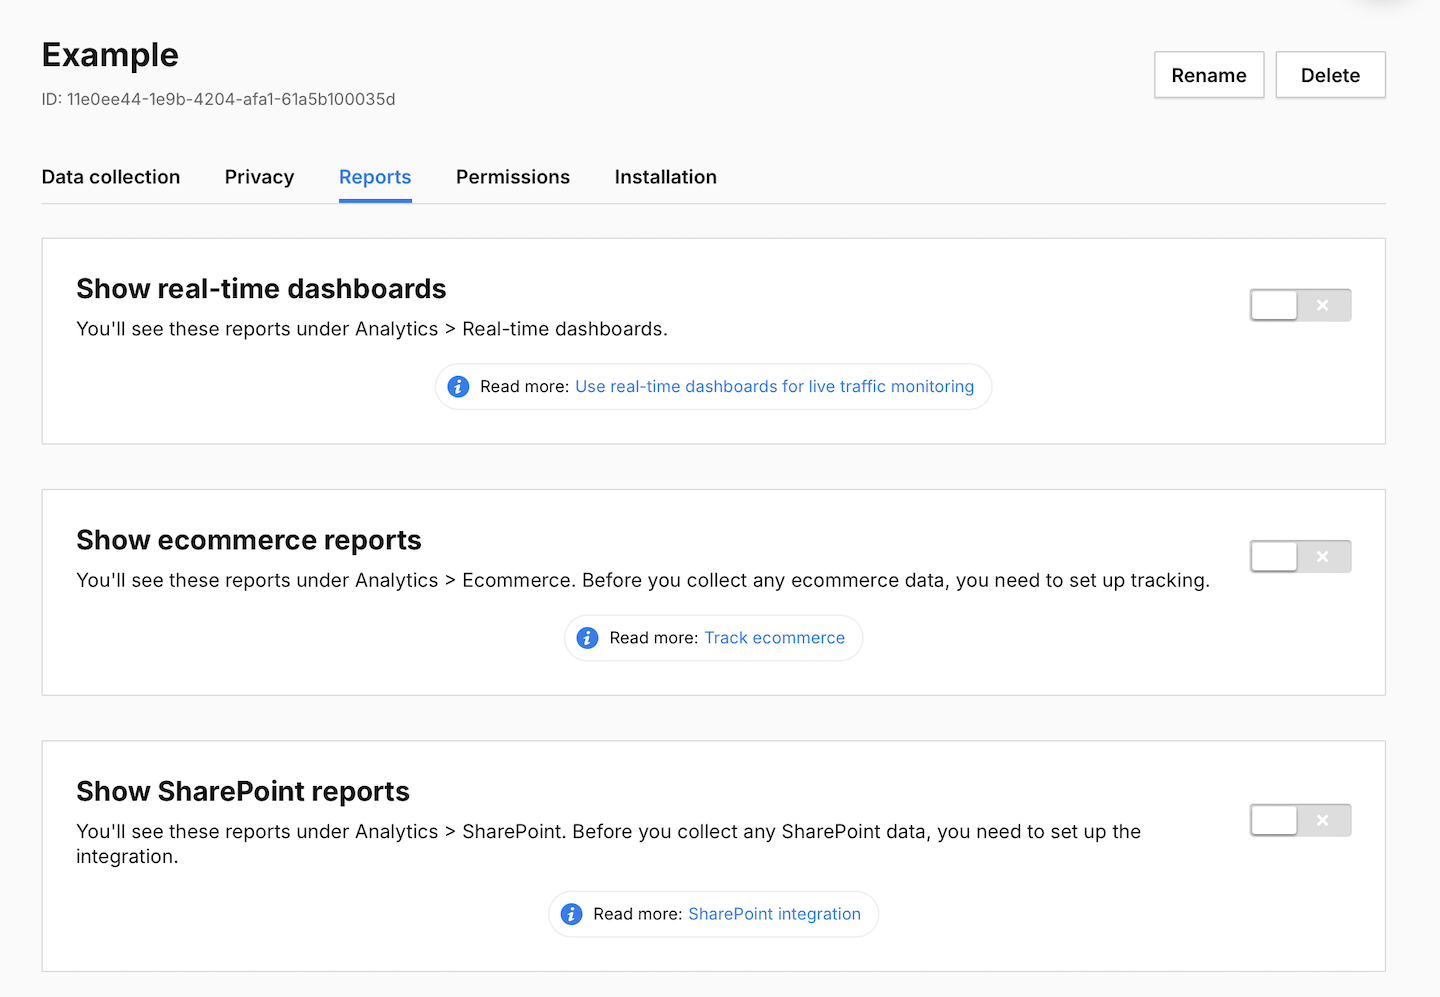
In Reports, you can change the following settings:
- Show real-time dashboards: If turned on, you’ll see these reports under Analytics > Real-time dashboards. Read more
- Show ecommerce reports: If turned on, you’ll see these reports under Analytics > Ecommerce. Before you collect any ecommerce data, you need to set up tracking. Read more
- Show SharePoint reports: If turned on, you’ll see these reports under Analytics > SharePoint. Before you collect any SharePoint data, you need to set up the integration. Read more
Tip: To change how your data is collected, you can also use the following settings:
Invite a user
If you want to use Piwik PRO in a team, you need to invite your teammates and set permissions for sites and apps, meta sites and apps, and modules. Let’s see how this can be done.
To invite a user, follow these steps:
1. Go to Menu > Administration.
2. Navigate to Users.
3. Click Invite a user.
4. Enter your teammates’s email address and click Send invitation.
Note: Invitations are sent in version 16.0.0 and higher. In versions below 16.0.0, you need to set a password for your teammate and ask them to reset that password during the first log-in.
5. Your teammate will receive an email with an activation link. They can then click on the link Join this account and set their password.
Note: Didn’t get the email? This can help:
- Check the spam folder.
- Double-check the user’s email address.
6. After sending the invitation, set permissions for your teammate. By default, new users don’t have access to any site, app or meta site/app.
7. Go to Menu > Administration > Sites & apps > Permissions to grant permissions for a site or app.
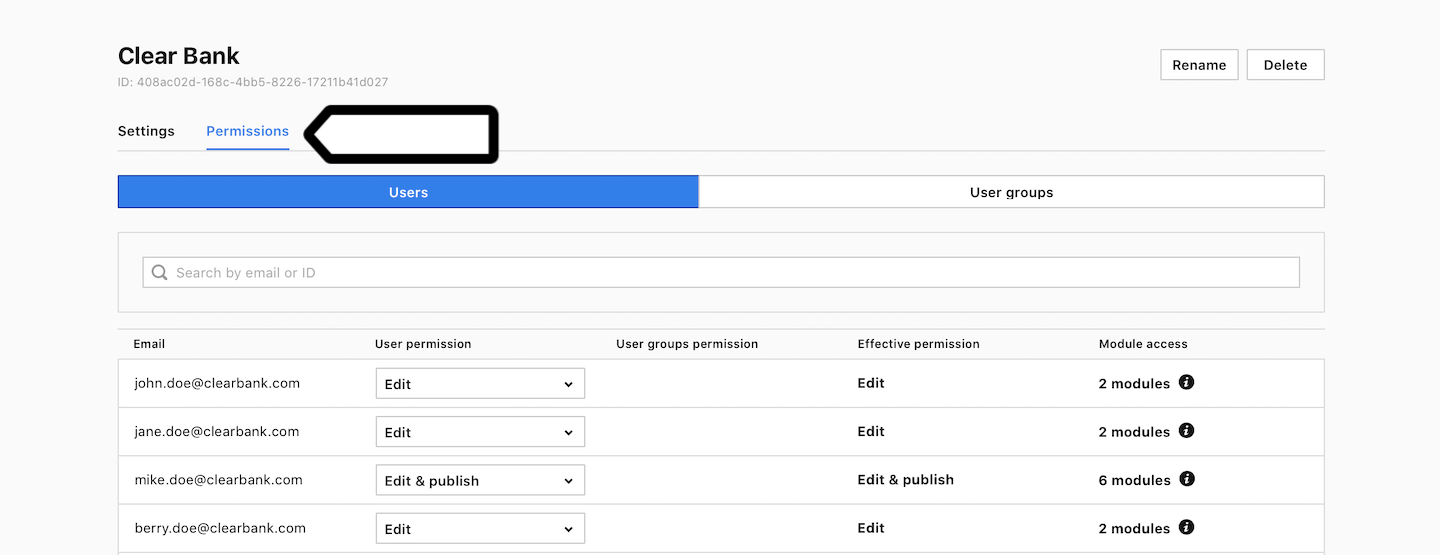
Note: Users with the owner role are not listed. They have unlimited access to all sites/apps.
Here’s a brief overview of site/app permissions:
- Manage: The user can see and edit a site/app; edit and publish tags, triggers and variables; manage permissions and use Consent Manager. But they can’t add a site/app or new user.
- Edit & publish: The user can perform the same actions as those with permission to Manage, except manage permissions.
- Edit: The user can edit a site/app and edit tags, triggers and variables. But they can’t publish changes, manage permissions or use Consent Manager.
- View: The user can see a site/app as well as tags, triggers and variables..
- No access: The user can’t see any of the above.
Tip: For more details, see this article.
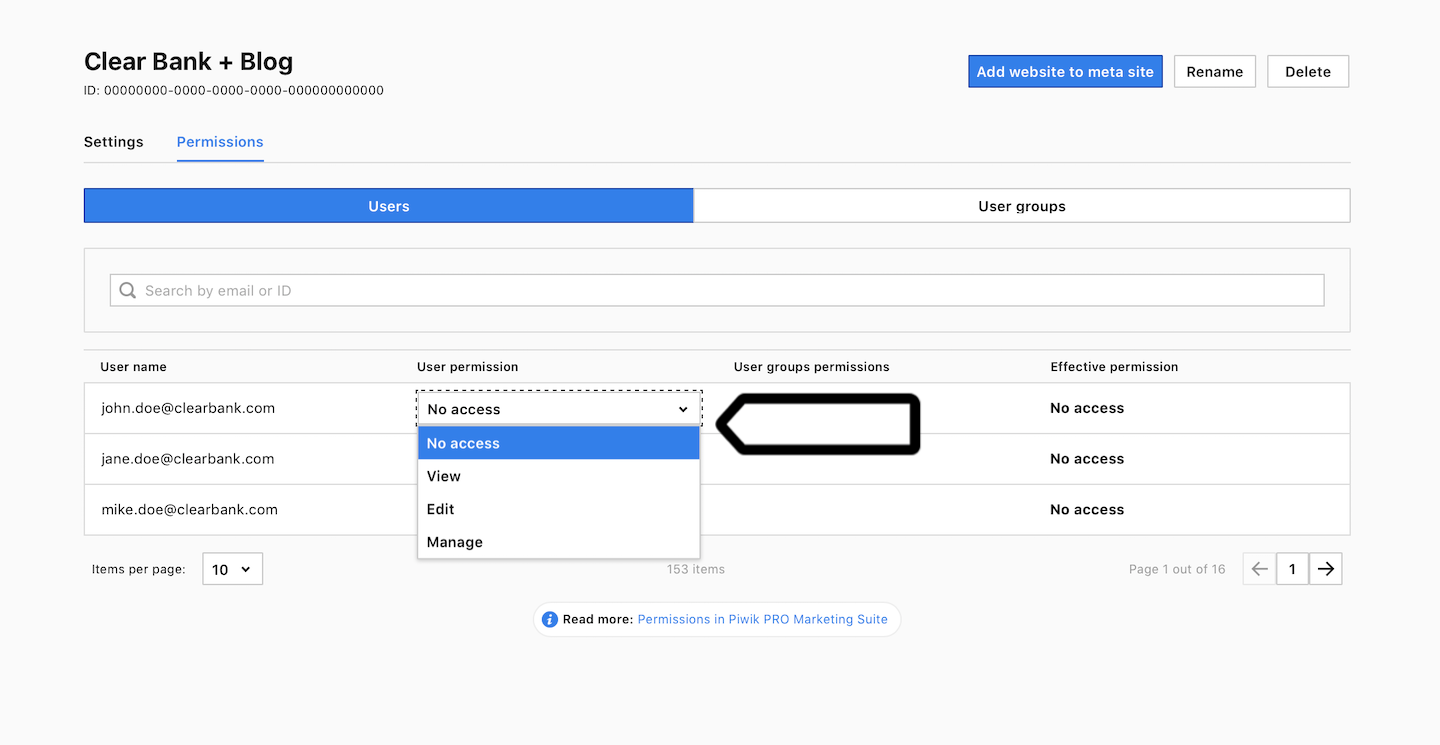
8. Go to Menu > Administration > Meta sites & apps > Permissions to grant permissions for a meta site or app.
Note: Users with the owner role are not listed. They have unlimited access to all meta sites/apps.
Here’s a brief overview of meta site/app permissions:
- Manage: The user can see meta site/app settings; assign permissions to users; edit and publish tags, triggers and variables. But they can’t add a new meta site/app.
- Edit: The user can add and edit tags, triggers and variables as well as see and manage all meta site/app reports. But they can’t publish changes.
- View: The user can see all meta site/app reports, tags, triggers and variables.
- No access: The user can’t see any of the above.
Tip: For more details, see this article.
9. (Optional) Go to Menu > Administration > Users > Profile to change access to modules.
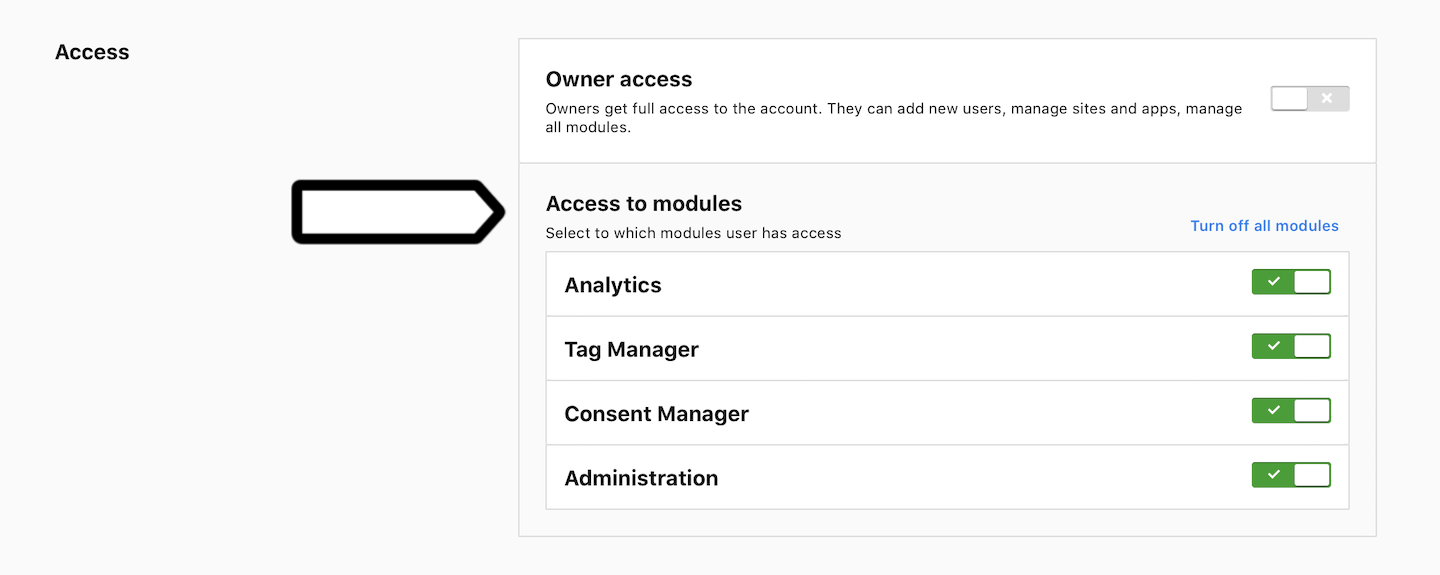
10. (Optional) Turn on Owner access to give your teammate the owner role. They will then have unlimited access to everything.

Tip: The difference between the owner and user is:
- Owner is the primary contact for the account and can perform all actions on the account, including adding a site/app, inviting others to join, assigning user/owner levels and granting permissions.
- User can only perform certain actions depending on the type of permissions they have for certain sites/apps. By default, a new user has no access to anything.
Note: If you want to track changes made by your teammates in the platform, use the audit log.